Page 48 of 68

46
TOYOTA SAFETY SENSE™
TURNING SYSTEM ON/OFF
ADJUSTING SET SPEED
Vehicle will cruise at a set speed, decelerate to maintain a selected distance from a
slower vehicle traveling in front and accelerate back up to the selected speed if the
vehicle in front changes lanes or speeds up.
(1) Push “
” to turn DRCC system ON. The “Radar Ready” and “” indicator
will come on.
(2) Use the steering wheel controls to increase speed by pushing “+RES” or
decrease the speed by pushing “-SET”. Push and hold to make a large
adjustment or push each time to make fine adjustments (1 mph [1.6 km/h] or 1
km/h [0.6 mph] increments).
(3) Push “Cancel” to cancel the speed control.(1)
(2) (3)
Cruise control
switches
Push once: On
Push twice: Off
Refer to page 48 for switching to Constant Speed (Cruise) Control Mode.
* The speed control may also be canceled by depressing the brake pedal.
DisplaySet speedDynamic Radar Cruise Control
vehicle-to-vehicle distance button
Indicators
Increase speed/Resume
Cancel*
Decrease speed
Dynamic Radar Cruise Control (DRCC) or
Full-Speed Range DRCC
Intended for highway use, Dynamic Radar Cruise Control (DRCC) lets you drive at
a preset speed. DRCC is designed to function at speeds of 25-110 mph and uses
vehicle-to-vehicle distance control, helping maintain a preset distance from the
vehicle ahead of you.*
Full-Speed Range DRCC is designed to function between 0-110 mph.*
* Not available on all models. See www.toyota.com/safety-sense for model applicability.
Refer to the Toyota Owner’s Manual for a list of additional situations in which the
system operation may be limited.
Page 50 of 68

48
SWITCHING TO CONSTANT SPEED (CRUISE) CONTROL MODE
SETTING CONSTANT SPEED (CRUISE) CONTROL
Note: When your vehicle is too close to a vehicle ahead, and sufficient automatic
deceleration via the cruise control is not possible, the display will flash and the
buzzer will sound to alert the driver. An example of this would be if another driver
cuts in front of you while you are following a vehicle. Depress the brake pedal to
ensure an appropriate vehicle-to-vehicle distance.
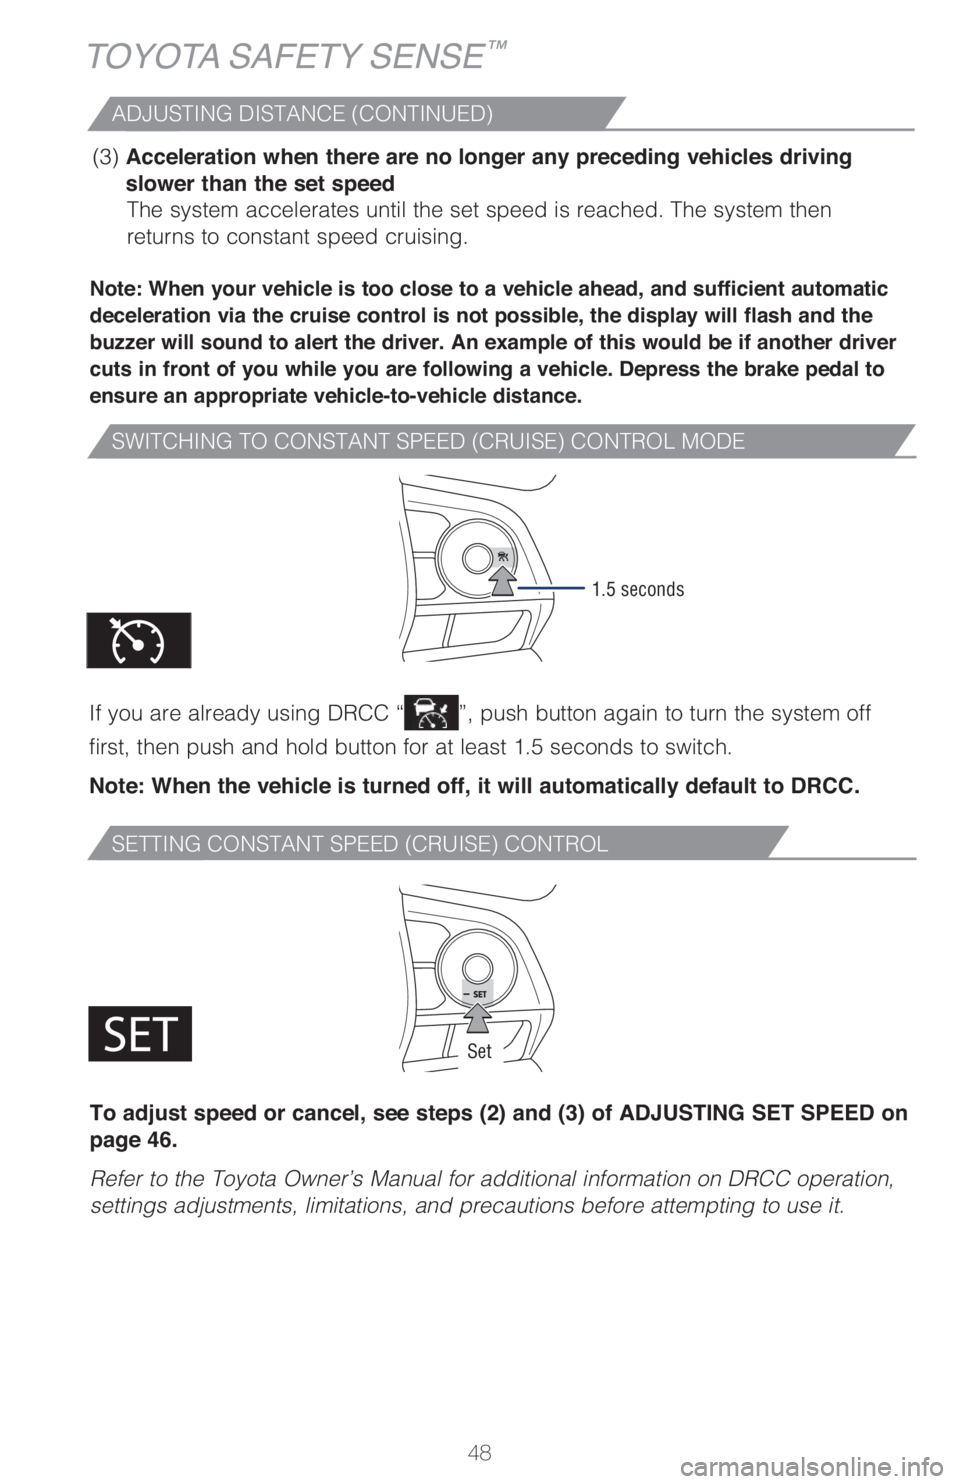
If you are already using DRCC “”, push button again to turn the system off
first, then push and hold button for at least 1.5 seconds to switch.
Note: When the vehicle is turned off, it will automatically default to DRCC.
(3) Acceleration when there are no longer any preceding vehicles driving
slower than the set speed
The system accelerates until the set speed is reached. The system then
returns to constant speed cruising.
1.5 seconds
ADJUSTING DISTANCE (CONTINUED)
To adjust speed or cancel, see steps (2) and (3) of ADJUSTING SET SPEED on
page 46.
Refer to the Toyota Owner’s Manual for additional information on DRCC operation,
settings adjustments, limitations, and precautions before attempting to use it.
Set
TOYOTA SAFETY SENSE™
Page 52 of 68

50
TOYOTA SAFETY SENSE™
TEMPORARILY SWITCHING TO THE LOW BEAMS
Pull the lever toward you and then return it to its original position to switch to the
low beams temporarily.
The high beams are on while the lever is pulled toward you, however, after the lever
is returned to its original position, the low beams remain on for a certain amount of
time. Afterwards, the Automatic High Beams will be activated again.
NOTE: It is recommended to switch to the low beams when the high beams
may cause problems or distress to other drivers or pedestrians nearby.
Refer to the Toyota Owner’s Manual for additional information on AHB operation,
settings adjustments, limitations, and precautions before attempting to use it.
Road Sign Assist (RSA)
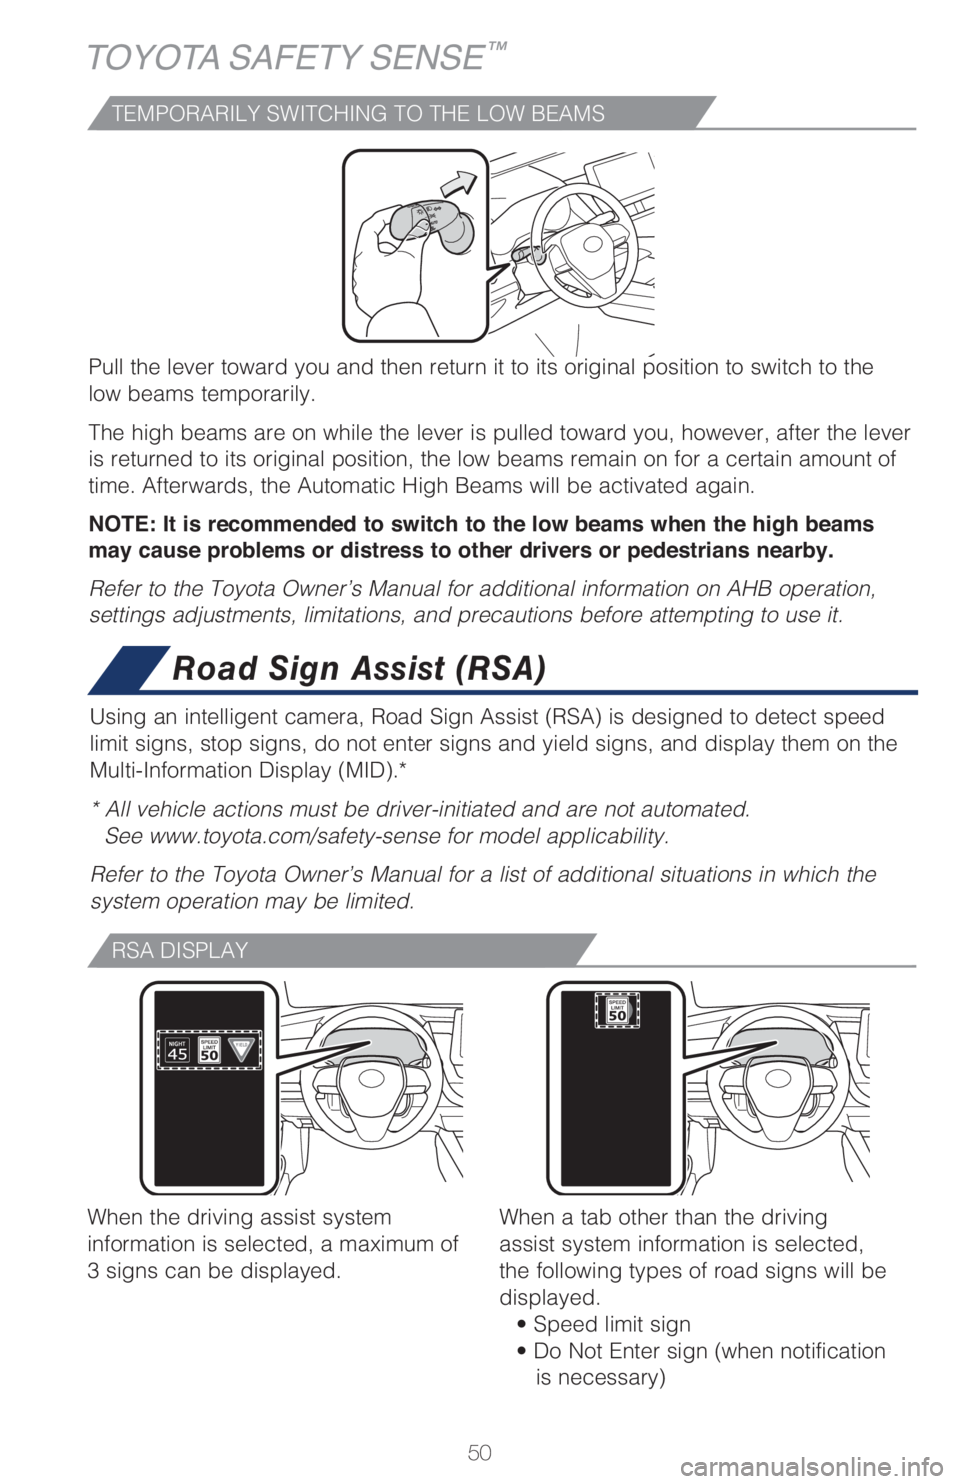
Using an intelligent camera, Road Sign Assist (RSA) is designed to detect speed
limit signs, stop signs, do not enter signs and yield signs, and display them on the
Multi-Information Display (MID).*
* All vehicle actions must be driver-initiated and are not automated.
See www.toyota.com/safety-sense for model applicability.
Refer to the Toyota Owner’s Manual for a list of additional situations in which the
system operation may be limited.
RSA DISPLAY
When the driving assist system
information is selected, a maximum of
3 signs can be displayed.When a tab other than the driving
assist system information is selected,
the following types of road signs will be
displayed.
• Speed limit sign
• Do Not Enter sign (when notification
is necessary)
Page 53 of 68
51
OVERVIEW FEATURES & OPERATIONS TOYOTA SAFETY SENSE SAFETY & EMERGENCY FEATURES
SUPPORTED TYPES OF ROAD SIGNS
SETTING RSA
Speed limit Stop
Do Not Enter Yield
(1) Press “
” or “” switches and select “ (4.2-in display)” or “ (7-in
display)” from the Multi-Information Display (MID).
(2) Press “
” or “” switches and select “ RSA” and then press “.” The
setting screen is displayed.
(3) Press “
” or “” switches and select “RSA” and then press “” to select
the desired setting.
(4) Press “
” to go back to the menu.
Note: If the vehicle was last turned off while a speed limit sign was displayed
on the Multi-Information Display, the same sign displays again when the
vehicle is turned back ON.
Refer to the Toyota Owner’s Manual for additional information on RSA operation,
settings adjustments, limitations, and precautions before attempting to use it.
Page 58 of 68

56
SAFETY & EMERGENCY FEATURES
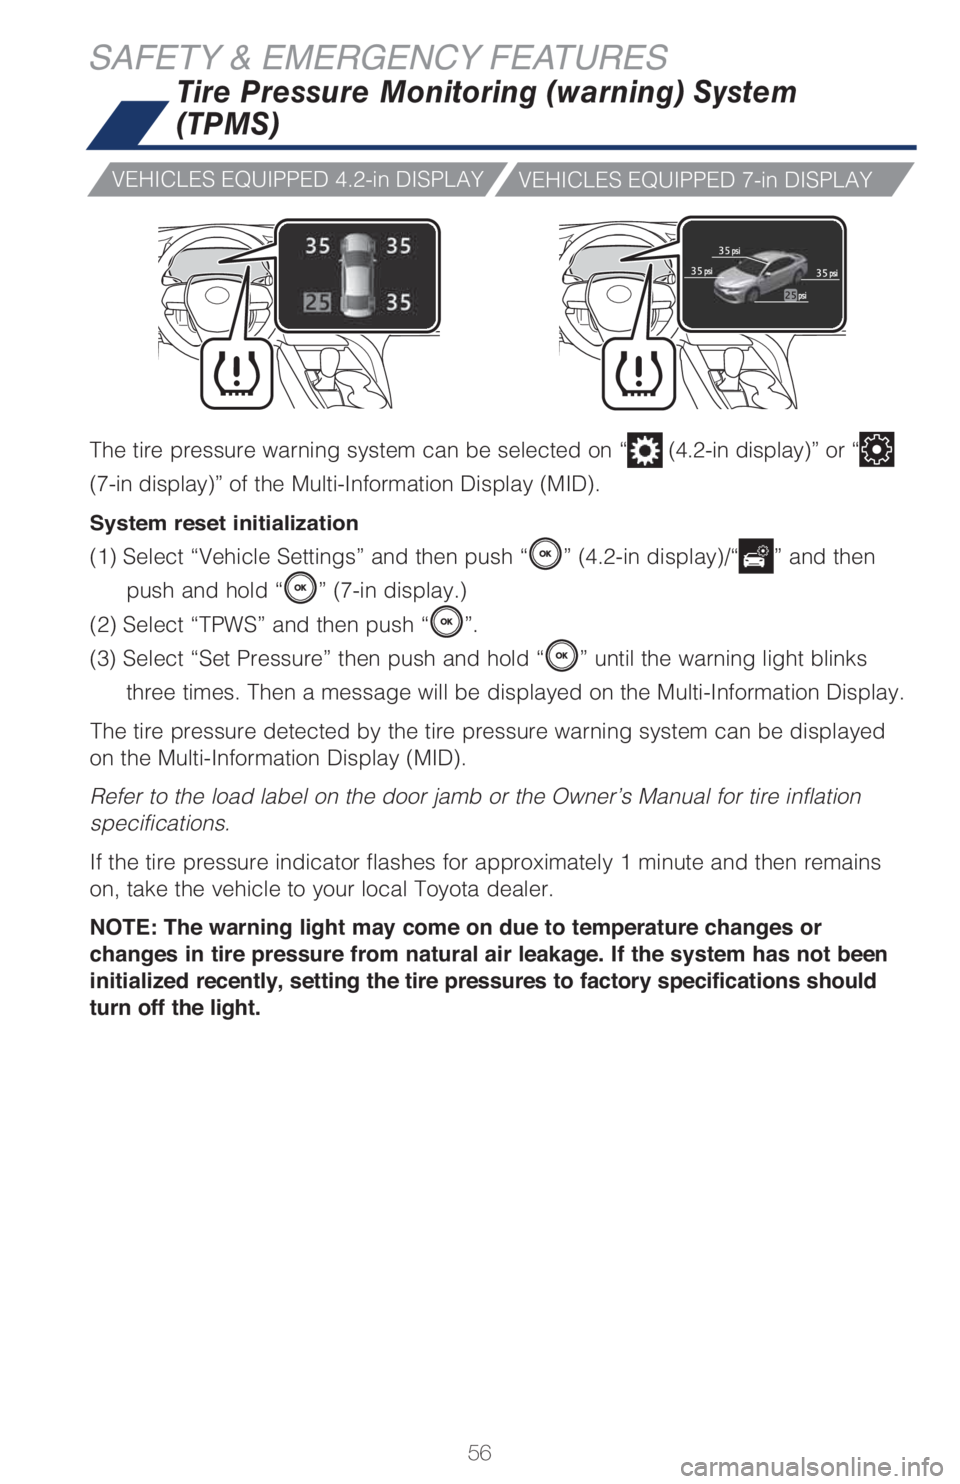
The tire pressure warning system can be selected on “ (4.2-in display)” or “
(7-in display)” of the Multi-Information Display (MID).
System reset initialization
(1) Select “Vehicle Settings” and then push “” (4.2-in display)/“” and then
push and hold “
” (7-in display.)
(2) Select “TPWS” and then push “
”.
(3) Select “Set Pressure” then push and hold “
” until the warning light blinks
three times. Then a message will be displayed on the Multi-Information Display.
The tire pressure detected by the tire pressure warning system can be displayed
on the Multi-Information Display (MID).
Refer to the load label on the door jamb or the Owner’s Manual for tire inflation
specifications.
If the tire pressure indicator flashes for approximately 1 minute and then remains
on, take the vehicle to your local Toyota dealer.
NOTE: The warning light may come on due to temperature changes or
changes in tire pressure from natural air leakage. If the system has not been
initialized recently, setting the tire pressures to factory specifications should
turn off the light.
Tire Pressure Monitoring (warning) System
(TPMS)
VEHICLES EQUIPPED 4.2-in DISPLAY
VEHICLES EQUIPPED 7-in DISPLAY
Page 63 of 68
61
To begin the Bluetooth® Pairing process, press the HOME button on the faceplate of
the multimedia system.
Bluetooth® Pairing for your phone
Pairing your phone is the first step in connecting with your Toyota. This pairing
process is quick and easy. All you have to do is setup the phone and multimedia
system to form a connection.
1
Select "Bluetooth," then select
"Add New Device" on display
screen. Ensure Bluetooth is turned on for
your phone.
Select "Phone Name."
iPhone bluetooth MenuAndroid bluetooth Menu
1
Some Android devices may have slightly different SETTINGS screen layout depending on manufacturer of device and Android OS version.
Check the display on your
phone. Does the PIN XXXX
match the PIN displayed?
If it does, select "Pair."
Press [MENU] on the audio system faceplate, then select "Setup" on display
screen.STEP 1
STEP 2
STEP 4
STEP 3
STEP 5
Audio / Audio Plus / Premium Audio
Page 64 of 68
62
BLUETOOTH® DEVICE PAIRING
Bluetooth® Pairing for your phone (cont.)
"Connecting" displays while
phone is forming the connection
to the multimedia system.Enable Notifications (text
message). While pairing your
phone, a message will be
displayed:
"You may need to allow
message access on your
phone."
Note: You may also select
"Skip" on display screen to skip
enabling notifications. If skipped,
proceed to
Step 8.
Turn on "Show Notifications" for
iPhone or "ON" for Android.A confirmation will appear once
your phone has been paired and
connected.
iPhoneAndroid
STEP 6
STEP 8
STEP 7
STEP 9