Page 294 of 548
2944-5. Using the driving support systems
C-HR_OM_USA_OM10684U
The RCTA functions when your vehicle is in reverse. It can dete ct
other vehicles approaching from the right or left rear of the v ehicle. It
uses radar sensors to alert the driver of the other vehicle’s existence
through flashing the outside rear view mirror indicators and so unding
a buzzer.
RCTA function
Approaching vehicles Detection areas
WARNING
■Cautions regarding the use of the function
The driver is solely responsible for safe driving. Always drive safely, taking
care to observe your surroundings.
The RCTA function is only a supplementary function which alerts the driver
that a vehicle is approaching from the right or left at the rea r of the vehicle.
As the RCTA function may not function correctly under certain c onditions,
the driver’s own visual confirmation of safety is necessary. Ov er reliance on
this function may lead to an accident resulting death or seriou s injury.
Page 311 of 548
311
5Interior features
C-HR_OM_USA_OM10684U5-1. Using the air conditioning
system and defogger
Air conditioning system ..... 312
Heated steering wheel/ seat heaters .................... 321
5-2. Using the interior lights Interior lights list ................ 323• Interior lights ................. 324
• Personal lights .............. 325
5-3. Using the storage features
List of storage features ..... 326 • Glove box...................... 327
• Console box .................. 327
• Bottle holders ................ 328
• Cup holders .................. 329
Luggage compartment features ........................... 330
5-4. Using the other interior features
Other interior features ....... 336 • Sun visors ..................... 336
• Vanity mirrors................ 336
• Power outlet .................. 337
• Assist grips ................... 338
Page 315 of 548

3155-1. Using the air conditioning system and defogger
5
Interior features
C-HR_OM_USA_OM10684U■
Switching between outside air
and recirculated air modes
Press .
The mode switches between outside air mode (indicator off) and recir-
culated air mode (indicator on) each time is pressed.
■
Defogging the windshield
Defoggers are used to defog the windshield and front side win-
dows.
Press .
The dehumidification function operates and fan speed increases.
Set the outside/recirculated air mode button to the outside air mode if
the recirculated air mode is used. (It may switch automatically .)
To defog the windshield and the front side windows early, turn the air
flow and temperature up.
To return to the previous mode, press again when the windshiel d
is defogged.
■
Defogging the rear window and outside rear view mirrors
Defoggers are used to defog the rear window, and to remove rain -
drops, dew and frost from the outside rear view mirrors.
Press .
The defoggers will automatically turn off after a period of tim e.
■
Windshield wiper de -icer (if equipped)
This feature is used to prevent ice from building up on the win d-
shield and wiper blades.
Press .
The windshield wiper de-icer will automatically turn off after a period of
time.
Other functions
Page 320 of 548

3205-1. Using the air conditioning system and defogger
C-HR_OM_USA_OM10684U
WARNING
■To prevent the windshield from fogging up
● Do not use during cool air operation in extremely humid weathe r.
The difference between the temperature of the outside air and t hat of the
windshield can cause the outer surface of the windshield to fog up, block-
ing your vision.
■ To prevent burns
● Do not touch the rear view mirror surfaces when the outside rear view mir-
ror defoggers are on.
● Do not touch the glass at the lower part of the windshield or t o the side of
the front pillars when the windshield wiper de-icer is on.
NOTICE
■ To prevent battery discharge
Do not leave the air conditioning system on longer than necessa ry when the
engine is stopped.
■ When repairing/replacing parts of the air conditioning system
Have repair/replacement performed by your Toyota dealer. When a part of
the air conditioning system, such as the evaporator, is to be r eplaced, it
must be replaced with a new one.
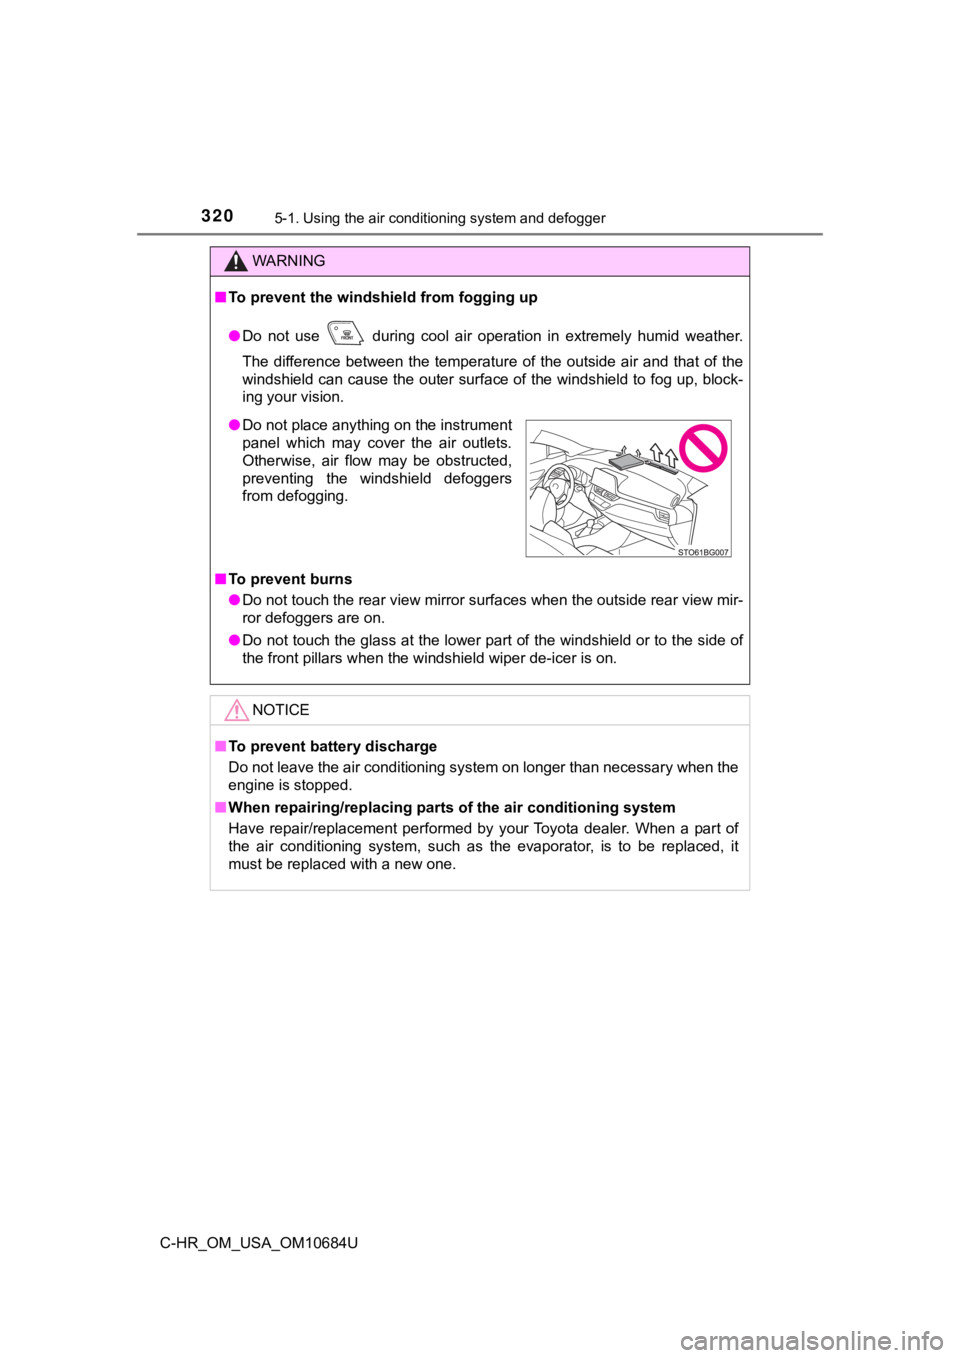
● Do not place anything on the instrument
panel which may cover the air outlets.
Otherwise, air flow may be obstructed,
preventing the windshield defoggers
from defogging.
Page 325 of 548

3255-2. Using the interior lights
5
Interior features
C-HR_OM_USA_OM10684U
Turns the lights on/off
When the lights are on due to the
door link switch, a light will not turn
off even if its switch is pressed.
■Illuminated entry system
Vehicles without a smart key system
When the interior light switch is in the door position, the int erior lights auto-
matically turn on/off according to the engine switch position, whether the
doors are locked/unlocked and whether the doors are open/closed .
Vehicles with a smart key system
When the interior light switch is in the door position, the int erior lights and
engine switch light automatically turn on/off according to engine switch mode,
the presence of the electronic key, whether the doors are locke d/unlocked
and whether the doors are open/closed.
■ Outer mirror illumination (if equipped)
The illumination automatically turns on according to the presen ce of the elec-
tronic key (vehicles with a smart key system), or the doors are unlocked.
■ To prevent battery discharge
The following lights will turn off automatically after 20 minut es:
● Front interior light/front personal lights
● Rear interior light
● Luggage compartment light
● Vanity lights (if equipped)
■ Customization
Settings (e.g. the time elapsed before lights turn off) can be changed.
(Customizable features: P. 510)
Personal lights
Page 336 of 548
3365-4. Using the other interior features
C-HR_OM_USA_OM10684U
Other interior features
To set the visor in the forward
position, flip it down.
To set the visor in the side posi-
tion, flip down, unhook, and
swing it to the side.
To use the side extender, place
the visor in the side position,
then slide it backward. (if
equipped)
Slide the cover to open.
The light turns on when the cover
is opened. (if equipped)
Sun visors
Vanity mirrors
Page 341 of 548

3416-1. Maintenance and care
6
Maintenance and care
C-HR_OM_USA_OM10684U■
Automatic car washes
●Fold the mirrors before washing the vehicle. Start washing from the front of
the vehicle. Make sure to extend the mirrors before driving.
● Brushes used in automatic car washes may scratch the vehicle su rface,
parts (wheel, etc.) and harm your vehicle’s paint.
● Rear spoiler may not be washable in some automatic car washes. There
may also be an increased risk of damage to vehicle.
■ High pressure car washes
As water may enter the cabin, do not bring the nozzle tip near the gaps
around the doors or perimeter of the windows, or spray these ar eas continu-
ously.
■ Note for a smart key system (if equipped)
If the door handle becomes wet while the electronic key is within the effective
range, the door may lock and unlock repeatedly. In that case, f ollow the fol-
lowing correction procedures to wash the vehicle:
● Place the key in a position 6 ft. (2 m) or more separate from t he vehicle
while the vehicle is being washed. (Take care to ensure that th e key is not
stolen.)
● Set the electronic key to battery-saving mode to disable the sm art key sys-
tem. ( P. 135)
■ Wheels and wheel ornaments (if equipped)
●Remove any dirt immediately by using a neutral detergent.
● Wash detergent off with water immediately after use.
● To protect the paint from damage, make sure to observe the following pre-
cautions.
• Do not use acidic, alkaline or abrasive detergent
• Do not use hard brushes
• Do not use detergent on the wheels when they are hot, such as after driv-
ing or parking in hot weather
■ Bumpers and side moldings
Do not scrub with abrasive cleaners.
■ Plated portions (if equipped)
If dirt cannot be removed, clean the parts as follows:
●Use a soft cloth dampened with an approximately 5% solution of neutral
detergent and water to clean the dirt off.
● Wipe the surface with a dry, soft cloth to remove any remaining moisture.
● To remove oily deposits, use alcohol wet wipes or a similar pro duct.
Page 414 of 548
4146-3. Do-it-yourself maintenance
C-HR_OM_USA_OM10684U■
Side turn signal lights
Insert a flathead screwdriver
and release the claw for the
outside rear view mirror
cover.
To prevent damaging the vehi-
cle, wrap the flathead screw-
driver with a tape.
Release the cover claws
spanning over the entire
perimeter.
Release the claw of the bot-
tom part of the cover and
then remove the cover.
1
Claw
O
P