Page 113 of 139
114
76G-74E
9-31INSPECTION AND MAINTENANCE1. HEATER 10A
2 . WIPER/WASHER 15A
3 . DOOR LOCK 20A
4 . STOP 10A
5 . TAIL 10A
6 . RADIO/DOME 15A
7 . HORN HAZARD 15A
8 . POWER STEERING 30A
9 . IG 15A
0 . TURN/BACK 10A
c . METER 10A
d . ACC 15A
e . CIGAR 15A
f . STARTER FUSE 30A
g . FUSE PULLER
h . POWER WINDOW 30A
76G-09-041A
ALTO K10
Fuse Box
The fuse boxes are located in the engine
compartment and under the driver’s side of
the dashboard.
To remove the fuse box cover under the
dashboard pull off the cover.
NOTE:AltoTo remove the fuse from the fuse box usethe fuse puller given in the fuse box (under
dashboard) as shown in the illustration.
76G-09-042
ALTO
Fuse Box (under dashboard)
76G-09-042A
ALTO K10
Fuse Box (under dashboard)
NOTE:Alto K10Replace the fuse as described on the fusebox cover. Use the fuse puller given in thefuse box and keeping cover rib (1) in
downward direction as shown.
Page 114 of 139

11576G-74E
INSPECTION AND MAINTENANCE
9-32
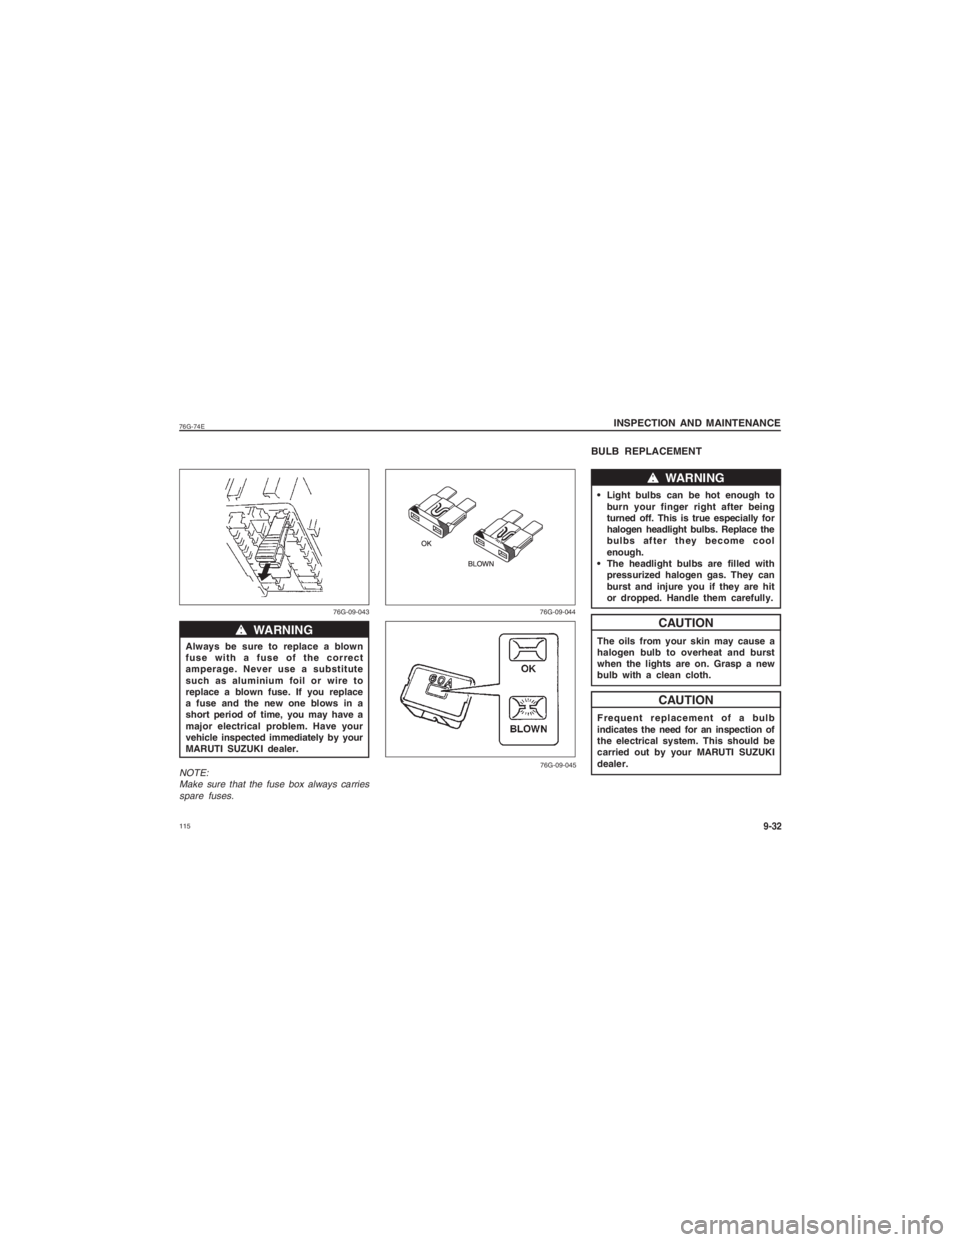
Always be sure to replace a blown
fuse with a fuse of the correct
amperage. Never use a substitute
such as aluminium foil or wire to
replace a blown fuse. If you replace
a fuse and the new one blows in a
short period of time, you may have a
major electrical problem. Have your
vehicle inspected immediately by your
MARUTI SUZUKI dealer.NOTE:Make sure that the fuse box always carriesspare fuses.
ww ww
w WARNING
76G-09-043
BULB REPLACEMENT Light bulbs can be hot enough to
burn your finger right after being
turned off. This is true especially for
halogen headlight bulbs. Replace the
bulbs after they become cool
enough.
The headlight bulbs are filled with pressurized halogen gas. They can
burst and injure you if they are hit
or dropped. Handle them carefully.
The oils from your skin may cause a
halogen bulb to overheat and burst
when the lights are on. Grasp a new
bulb with a clean cloth.
Frequent replacement of a bulb
indicates the need for an inspection of
the electrical system. This should be
carried out by your MARUTI SUZUKI
dealer.
CAUTIONCAUTIONww ww
w WARNING
76G-09-044
76G-09-045
Page 115 of 139

116
76G-74E
INSPECTION AND MAINTENANCE9-33Front Interior Light
Press the front part of the lens toward you
and pull down the lens. To install it, simply
push it back in.
The bulb can be removed by simply pulling
it out. When replacing the bulb, make sure
that the contact springs are holding the bulb
securely.
76G-09-046
Front Clearance/Turn Signal Light, Side
Turn Signal Light, rear Combination
Light, Registration Plate Light.
To remove a bulb holder from a light
housing, turn the holder counterclockwise
and pull it out. To install the holder, push
the holder in and turn it clockwise.
Two types (small oval and round) of bulb
are used for these lights. To remove and
install a small oval bulb, simply pull out or
push in the bulb.
76G-09-048
Headlights
Open the bonnet. Disconnect the coupler.
Remove the sealing rubber.
Push the retaining spring forward and
unhook it. Then remove the bulb. Install a
new bulb in the reverse order of removal.Note:Your vehicle is provided with two spareheadlight bulbs for replacement in
emegency.
76G-09-047
Page 116 of 139
11776G-74E
INSPECTION AND MAINTENANCE
9-34
To remove a round bulb from a bulb holder,
push in the bulb and turn it
counterclockwise. To install a new bulb,
push it in and turn it clockwise. You can
access the individual bulb holders as
described below:
76G-09-049
Side turn signal light
Remove the lens by using a plain screw
driver covered with a soft cloth.
76G-09-051
Front clearance light / Turn Light
Trust this replacement job to your MARUTI
SUZUKI authorised workshop.
76G-09-050
Page 117 of 139
118
76G-74E
INSPECTION AND MAINTENANCE9-35Rear combination light (tail, stop, turn
signal, etc.)
Undo the screws that secure the housing
and remove the housing by sliding in the
direction of the white arrow in the
illustration.
76G-09-052
WIPER BLADESIf the wiper blades become brittle or
damaged, or make streaks when wiping,
replace the wiper blades.
To install new wiper blades, follow the
procedure below.To avoid scratching or breaking the
window, do not let the wiper arm
strike the windshield while replacing
the wiper blade.
CAUTION
76G-09-054
Registration plate light
Turn the lens counterclockwise and pull it
off
76G-09-053
Page 118 of 139
11976G-74E
INSPECTION AND MAINTENANCE
9-36
ww ww
w WARNING
NOTE:
Some wiper blades may be different from the
ones described here depending on vehiclespecifications. If so consult your MARUTISUZUKI dealer for proper replacement method.The left and the right wiper arm
assemblies are different from each
other. In case you have to remove the
wiper arm assemblies for any reason,
remember not to interchange the two
while fitting them back. Wrong fitment
may lead to windshield breakage. 2. Squeeze lock lever (A) towards wiper
arms (B) and remove the wiper frame
from the arm as shown.
76G-09-056
For windshield wipers:
1. Hold the wiper arm away from the
window.
76G-09-055
Page 119 of 139
Page 120 of 139
12176G-74E
EMERGENCY SERVICE
10
EMERGENCY SERVICE
Jacking Instructions
........................................................................\
................ 10-1
Jump Starting Instructions ........................................................................\
.... 10-2
Towing ........................................................................\
........................................ 10-4
Towing Hook (if equipped) ........................................................................\
.... 10-4
Emergency Remedies ........................................................................\
.............. 10-4
Warning Triangle .. ........................................................................\
.................... 10-5