2021 PEUGEOT PARTNER change wheel
[x] Cancel search: change wheelPage 155 of 260

153
In the event of a breakdown
8With a tyre repaired using this type of kit,
do not exceed a speed of 50 mph
(80
km/h) and do not drive more than
125
miles (200 km).
Contact a PEUGEOT dealer or a qualified
workshop to have the tyre changed.
Checking / adjusting tyre
pressures
The compressor can be used, without injecting
sealant, to check and, if necessary, adjust the
tyre pressures.
►
Remove the valve cap from the tyre and keep
it in a clean place.
►
Uncoil
the pipe stowed under the compressor.
►
Screw the pipe onto the valve and tighten
firmly
.
►
Check that the compressor switch is in
position " O
".
►
Fully uncoil the electric cable stowed under
the compressor
.
►
Connect the compressor's electric plug to the
vehicle's 12
V socket.
►
Switch on the ignition.
Only the 12 V socket located at the front
of the vehicle can be used to power the
compressor .
The tyre inflation pressures are given on
this label.
► Start the compressor by placing the switch at
position " I
" and adjust the pressure to the value
shown on the vehicle's tyre pressure label. To
deflate: press the black button located on the
compressor pipe, near the valve connection.
If after 7 minutes the pressure of 2 bars
is not reached, this indicates that the tyre
is damaged; contact a PEUGEOT
dealer or a
qualified workshop for assistance.
►
Once the correct pressure is reached, put the
switch in position " O
".
►
Remove the kit and stow it.
Should the pressure of one or more tyres
be adjusted, it is necessary to reinitialise
the under-inflation detection system.
For more information on Tyre under-inflation
detection, refer to the corresponding section.
Spare wheel
Scan the QR code on page 3 to view
explanatory videos.
Procedure for changing a damaged wheel with
the spare wheel using the tools provided with the
vehicle.
For more information on the Tool kit,
refer to the corresponding section.
►
Park the vehicle, taking care to avoid
obstructing traffic, and apply the parking brake.
►
Follow the safety instructions (hazard
warning lamps, warning triangle, wearing high
visibility vest, etc.) according to the legislation in
force in the country where you are driving.
►
Switch off the ignition.
Access to the spare wheel
► Access to the spare wheel is from the rear .
► If your vehicle is fitted with a towbar, raise
the rear of the vehicle using the jack (must be
at jacking point B) to allow sufficient space to
remove the spare wheel.
Removing the spare wheel from the
carrier
► Depending on version, open the tailgate or
side-hinged doors.
Page 156 of 260

154
In the event of a breakdown
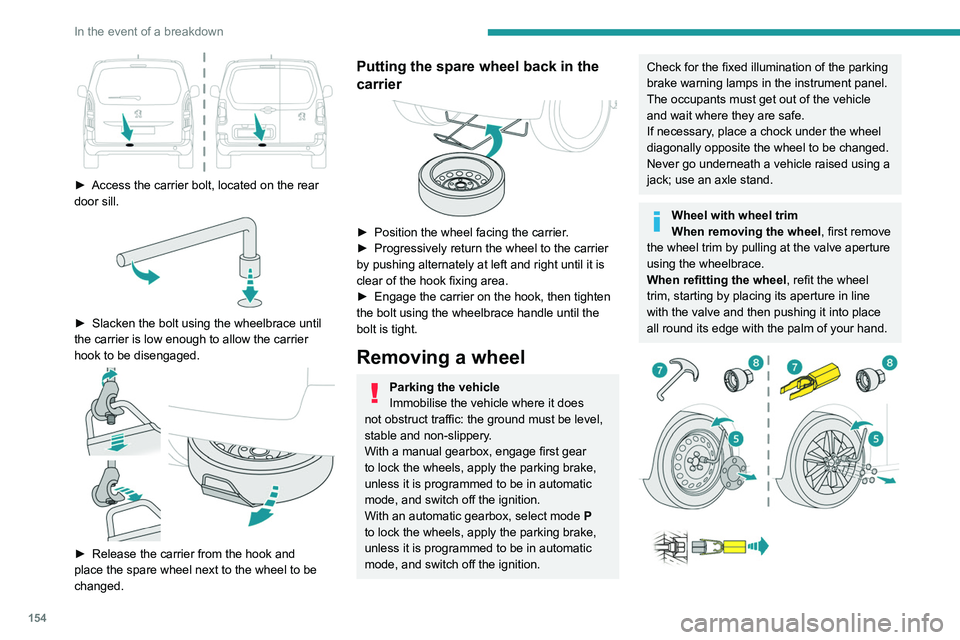
► Access the carrier bolt, located on the rear
door sill.
► Slacken the bolt using the wheelbrace until
the carrier is low enough to allow the carrier
hook to be disengaged.
► Release the carrier from the hook and
place the spare wheel next to the wheel to be
changed.
Putting the spare wheel back in the
carrier
► Position the wheel facing the carrier .
► Progressively return the wheel to the carrier
by pushing alternately at left and right until it is
clear of the hook fixing area.
►
Engage the carrier on the hook, then tighten
the bolt using the wheelbrace handle until the
bolt is tight.
Removing a wheel
Parking the vehicle
Immobilise the vehicle where it does
not obstruct traffic: the ground must be level,
stable and non-slippery.
With a manual gearbox, engage first gear
to lock the wheels, apply the parking brake,
unless it is programmed to be in automatic
mode, and switch off the ignition.
With an automatic gearbox, select mode
P
to lock the wheels, apply the parking brake,
unless it is programmed to be in automatic
mode, and switch off the ignition.
Check for the fixed illumination of the parking
brake warning lamps in the instrument panel.
The occupants must get out of the vehicle
and wait where they are safe.
If necessary, place a chock under the wheel
diagonally opposite the wheel to be changed.
Never go underneath a vehicle raised using a
jack; use an axle stand.
Wheel with wheel trim
When removing the wheel , first remove
the wheel trim by pulling at the valve aperture
using the wheelbrace.
When refitting the wheel , refit the wheel
trim, starting by placing its aperture in line
with the valve and then pushing it into place
all round its edge with the palm of your hand.
Page 157 of 260

155
In the event of a breakdown
8► With a steel wheel, remove the wheel trim
using tool 7
.
►
With an alloy wheel, remove the cap from
each of the bolts using tool 7
.
►
If the vehicle is so equipped, fit security bolt
socket
8 to wheelbrace 5 to slacken the security
bolt.
►
Slacken
(without removing) the other wheel
bolts using just wheelbrace 5.
Wheel with wheel trim
When removing the wheel, first remove
the wheel trim by pulling at the valve aperture
using the wheelbrace.
► Place the foot of the jack on the ground and
ensure that it is directly below the A
or B jacking
point provided on the underbody, whichever is
closest to the wheel to be changed.
► Extend jack 6 until its head comes into
contact with jacking point A or B, whichever is
used; the contact surface A or B of the vehicle
must be correctly engaged with the central part
of the head of the jack.
►
Raise the vehicle until there is sufficient
space between the wheel and the ground to
admit the spare (not punctured) wheel easily
.
Risk of injury!
Ensure that the jack is stable. If the
ground is slippery or loose, the jack may slip
or collapse.
Ensure that the jack is positioned strictly at
one of the jacking points A or B under the
vehicle, making sure that the vehicle's contact
surface is correctly centred on the head of the
jack. Otherwise, there is a risk of damage to
the vehicle and/or of the jack collapsing.
► Remove the bolts and store them in a clean
place.
►
Remove the wheel.
Page 192 of 260

190
PEUGEOT Connect Radio
Short press: confirm a selection; if nothing
selected, access to presets.
Radio: display the list of stations.
Media: display the list of tracks.
Radio (press and hold): update the list of
stations received.
Menus
Applications
Access configurable equipment.
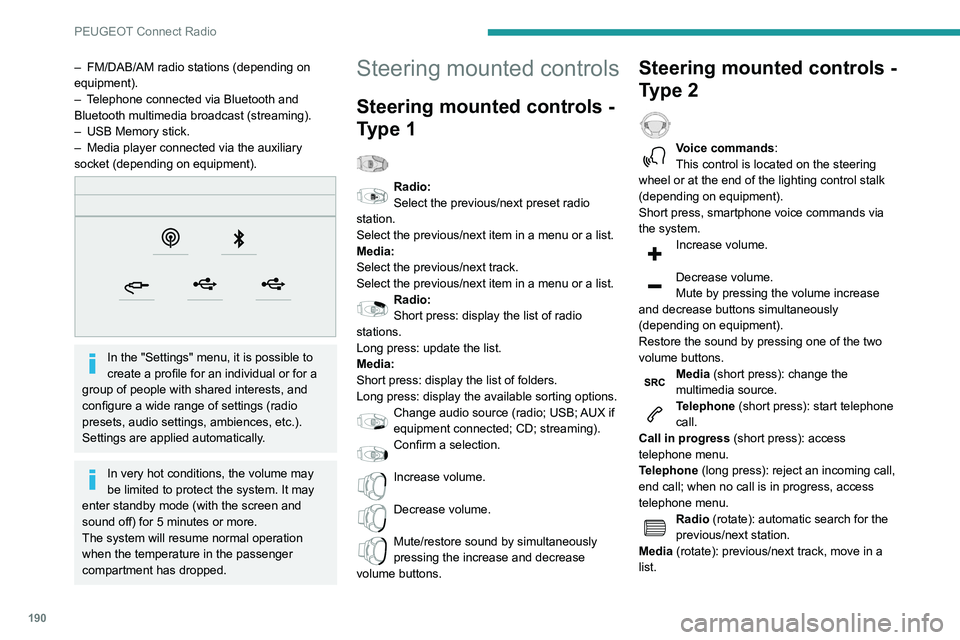
– FM/DAB/AM radio stations (depending on
equipment).
–
T
elephone connected via Bluetooth and
Bluetooth multimedia broadcast (streaming).
–
USB Memory stick.
–
Media player connected via the auxiliary
socket (depending on equipment).
In the "Settings" menu, it is possible to
create a profile for an individual or for a
group of people with shared interests, and
configure a wide range of settings (radio
presets, audio settings, ambiences, etc.).
Settings are applied automatically.
In very hot conditions, the volume may
be limited to protect the system. It may
enter standby mode (with the screen and
sound off) for 5 minutes or more.
The system will resume normal operation
when the temperature in the passenger
compartment has dropped.
Steering mounted controls
Steering mounted controls -
Type 1
Radio:
Select the previous/next preset radio
station.
Select the previous/next item in a menu or a list.
Media:
Select the previous/next track.
Select the previous/next item in a menu or a list.
Radio:
Short press: display the list of radio
stations.
Long press: update the list.
Media:
Short press: display the list of folders.
Long press: display the available sorting options.
Change audio source (radio; USB; AUX if
equipment connected; CD; streaming).
Confirm a selection.
Increase volume.
Decrease volume.
Mute/restore sound by simultaneously
pressing the increase and decrease
volume buttons.
Steering mounted controls -
Type 2
Voice commands:
This control is located on the steering
wheel or at the end of the lighting control stalk
(depending on equipment).
Short press, smartphone voice commands via
the system.
Increase volume.
Decrease volume.
Mute by pressing the volume increase
and decrease buttons simultaneously
(depending on equipment).
Restore the sound by pressing one of the two
volume buttons.
Media (short press): change the
multimedia source.
Telephone (short press): start telephone
call.
Call in progress (short press): access
telephone menu.
Telephone (long press): reject an incoming call,
end call; when no call is in progress, access
telephone menu.
Radio (rotate): automatic search for the
previous/next station.
Media (rotate): previous/next track, move in a
list.
Page 206 of 260

204
PEUGEOT Connect Nav
Applications
Run certain applications on a smartphone
connected via CarPlay®, MirrorLinkTM
(available in some countries) or Android Auto.
Check the status of Bluetooth
® and Wi-Fi
connections.
Radio Media
FM 87.5 MHz
Select an audio source or radio station, or
display photographs.
Audio source selection (depending on
equipment):
–
FM/DAB/AM radio stations (depending on
equipment).
–
T
elephone connected via Bluetooth and
Bluetooth multimedia broadcast (streaming).
–
USB memory stick.
–
Media player connected via the auxiliary
socket (depending on equipment).
–
V
ideo (depending on equipment).
In the "Settings" menu, it is possible to
create a profile for an individual or for a
group of people with shared interests, and
configure a wide range of settings (radio
presets, audio settings, navigation history,
favourite contacts, etc.). Settings are applied
automatically.
In very hot conditions, the volume may
be limited to protect the system. It may
enter standby mode (with the screen and
sound off) for 5 minutes or more.
The system will resume normal operation
when the temperature in the passenger
compartment has dropped.
Steering mounted controls
Voice control :
This control is located on the steering
wheel or at the end of the lighting control stalk
(depending on equipment).
Short press, system voice control.
Long press, voice control for smartphone or
CarPlay
®, MirrorLinkTM (availability depending on
country), Android Auto via the system.
Increase volume.
Decrease volume.
Mute by pressing the volume increase
and decrease buttons simultaneously
(depending on equipment).
Restore the sound by pressing one of the two
volume buttons.
Media (short press): change the
multimedia source.
Telephone (short press): start telephone
call.
Call in progress (short press): access
telephone menu. Telephone (long press): reject an incoming call,
end call; when no call is in progress, access
telephone menu.
Radio (rotate): automatic search for the
previous / next station.
Media (rotate): previous / next track, move in a
list.
Short press: confirm a selection; if nothing
selected, access to presets.
Radio: display the list of stations.
Media: display the list of tracks.
Radio (press and hold): update the list of
stations received.
Menus
Connected navigation
Enter navigation settings and choose a
destination.
Use real-time services, depending on equipment.