2021 Peugeot Landtrek Start
[x] Cancel search: StartPage 133 of 176

131
Peugeot Connect 10" Touchscreen
11Peugeot Connect 10"
Touchscreen
GPS navigation -
Applications - Multimedia
audio system - Bluetooth
®
telephone
The functions and settings described
vary according to the vehicle version and
configuration, as well as the country of sale.
For safety reasons and because they
require sustained attention by the driver,
the following operations must be carried out
with the vehicle stationary and the ignition
on:
–
Pairing the smartphone with the system via
Bluetooth.
–
Using the smartphone.
– Connection to the CarPlay®, MirrorLinkTM
or Android Auto applications (certain
applications interrupt their display while the
vehicle is moving).
–
W
atching a video (the video stops when the
vehicle starts to move again).
–
Changing the system settings and
configuration.
To perform system and map updates, visit a Peugeot dealer.
First steps
With the engine running, a short press
mutes the sound. A long press (3 sec)
puts the system on standby. A very long press
(10 sec) restarts the system.
With the ignition off, a short press turns the
system on.
Increase or decrease the volume using the
thumbwheel.
Use the main menu buttons on the touch screen
to access the sub-menus.
Press this button to return to the menu
carousel.
Slide your finger on the touch screen from
top to bottom to display a set of quick
settings (Bluetooth
® connection, volume,
brightness) and notifications.
Press this button to directly access the
quick settings (depending on equipment).
Press the back arrow to go back a level.
The touch screen is of the "capacitive" type.
To clean the screen, use a soft, non-abrasive
cloth (e.g. spectacles cloth) with no additional
product.
Do not use sharp objects on the screen.
Do not touch the screen with wet hands.
Steering mounted controls
Short press: change of multimedia
source.
Long press: access to smartphone voice
commands via the system (available only via the
CarPlay
® or Android Auto).Decrease volume.
Increase volume.
Telephone: refuse an incoming call, hang
up a call in progress.
Radio: short press, access to the previous
memorised station; long press, automatic search
for the previous station.
Media: short press, access to the previous track/
video; long press, fast-rewind in the track/video.
Telephone: answering an incoming call.
Radio: access to the next memorised
station; long press, automatic search for the next
station.
Page 136 of 176

134
Peugeot Connect 10" Touchscreen
Accepting the call
Press this button on the steering-mounted
controls to answer the call.
Or
Select "Answer" on the touch screen.
Refusing the call
Press this button on the steering-mounted
controls to refuse the call.
Or
Select "End call" on the touch screen.
Making a call
Using the telephone is strongly
discouraged while driving.
Park the vehicle.
Make the call using the steering-mounted
controls.
Calling a new number
Press Telephone to display the main
page.
Press Call then enter the number using
the numeric keypad.
Press this button to make the call.
Calling a contact
Press Telephone to display the main
page.
Select a source:"USB" to play files from a USB stick.
"Local" to play locally stored files.
"BT" to play audio streaming files.
Streaming allows you to listen to the
audio feed from your smartphone.
The Bluetooth profile must be activated.
If play does not start automatically, it may be
necessary to start the audio playback from
the smartphone.
Control is from the portable device or by using
the system's touch buttons.
Once connected in streaming mode, the
smartphone is considered to be a media
source.
USB port
Insert the USB memory stick into the USB
port or connect the USB device to the
USB port using a suitable cable (not supplied).
To protect the system, do not use a USB hub.
The system builds playlists (in temporary
memory); this operation can take from a
few seconds to several minutes at the first
connection.
Reduce the number of non-music files and the
number of folders to reduce the waiting time.
Playlists are updated whenever the ignition
is switched off or a USB memory stick is
connected. The audio system memorises these
lists, which will subsequently load faster if they
have not been changed.
Telephone
Pairing a Bluetooth®
telephone
The services available depend on the
network, the SIM card and the
compatibility of the Bluetooth
® devices used.
Consult the telephone user guide and the
service provider to check which services are
available.
The Bluetooth® function must be
activated and the telephone configured
as "Visible to all” (in the telephone settings).
To complete the pairing, whichever procedure is
used (from the telephone or from the system),
ensure that the code is the same in the system
and in the telephone.
If the pairing procedure fails, we
recommend deactivating and then
reactivating the Bluetooth
® function on the
telephone.
Procedure from the telephone
Select the system name in the list of
detected devices.
In the system, accept the connection request
from the telephone.
Procedure from the system
Press Telephone to display the primary
page.
Press "BT settings" .
Activate the Bluetooth connection.
Press “Available devices”.
The list of telephones detected is
displayed.
Select the name of the telephone in the list.
Automatic reconnection
On return to the vehicle, if the last telephone
connected is present again, it is automatically
recognised and within about 30 seconds
of switching on the ignition, the pairing is
established automatically (with Bluetooth
activated).
Deleting a telephone
In the list of paired telephones, press the
bin next to the telephone to be deleted.
Receiving a call
An incoming call is announced by a ring and a
display overlaid on the screen.
Page 138 of 176

136
Peugeot Connect 10" Touchscreen
– To configure the display when the screen is
off, choose Digital, Analogue or Black.
Audio settings
Press Settings to display the main page.
Select “Audio settings” then “Treble” or
“Medium” or “Bass”.
Press Reset to restore the default settings.
BT settings
Press Settings to display the main page.
Select “BT settings”.
Activate or deactivate the Bluetooth®
search.
Activate or deactivate the synchronisation of the contacts on the paired telephone.
– Press "Local name" to change the name of
the system.
– Manage paired telephones in " Suitable
devices”.
– Press "Add device" to update the list of
detected telephones.
Customising the theme
Press Settings to display the main page.
Select "Customise".
Choose one of the themes from those offered.
Connect the USB cable. The smartphone
charges when connected by the USB
cable.
A message appears on the smartphone.
Read it and then confirm with the " Authorise"
button.
Press "CarPlay" to display the CarPlay®
interface.
MirrorLinkTM smartphone
connection
Depending on country.
The "MirrorLinkTM" function requires the
use of a compatible smartphone and
compatible
applications.
Check the compatibility of the telephone on
the Brand's website (services).
When connecting a smartphone to the
system, we recommend enabling
Bluetooth
® on the smartphone.Connect the USB cable. The smartphone
charges when connected by the USB
cable.
Press "MirrorLinkTM" to start the
application in the system.
Depending on the smartphone, it may be
necessary to activate the "MirrorLink
TM"
function.
During the procedure, several screen
pages relating to certain features are
displayed.
Accept to start and complete the connection.
Once the connection is established, a page is
displayed, showing the applications already
downloaded to the smartphone that are
compatible with MirrorLink
TM technology.
Access to the menus for the system is possible
at any time using the dedicated buttons.
There may be a pause before applications become available,
depending on the quality of the network.
Android Auto smartphone connection
Depending on country.
Install the "Android Auto" application on
the smartphone via "Google Play".
The "Android Auto" function requires the use
of a compatible smartphone and compatible
applications.
Connect the USB cable. The smartphone
charges when connected by the USB
cable.
Press "Android Auto" to start the
application in the system.
During the procedure, several screen
pages relating to certain features are
displayed.
Accept to start and complete the connection.
Access to the menus for the system is possible
at any time using the dedicated buttons.
There may be a pause before applications become available,
depending on the quality of the network.
Settings
System settings
Press Settings to display the main page.
Select "System".
–
T
o change the language, select “ Languages”.
–
T
o set the date and time automatically, choose
the time zone corresponding to the country in
which the vehicle is being driven in " Time zone".
Then choose the time display format ( 12h/24h).
–
T
o adjust the tone when touching the screen,
select "Key tone".
–
T
o adjust the volume of the touch screen and
telephone calls, move the " Automatic volume
control" and "Mobile " sliders.
Display
Press Settings to display the main page.
Select "Display".
–
T
o adjust the screen brightness, move the
"Brightness" slider.
–
Activate or deactivate video playback while
driving.
Page 142 of 176

140
Alphabetical index
H
Hazard warning lamps 48, 104
headlamp adjustment
44
Headlamp adjustment
44
Headlamp beam height
44
Headlamps, automatic illumination
44
Headlamps, dipped beam
11 0 – 111
Headlamps, halogen
11 0 – 111
Headlamps, main beam
11 0 – 111
Head restraints, front
25
Head restraints, rear
27, 29–30
Heating
31–33, 35
Hill Assist Descent Control (HADC)
51
Hill start assist
72–73
Hooks
38
Horn
49
I
Ignition 66
Ignition on
66
Ignition switch
63–64
Immobiliser, electronic
63
Indicator, coolant temperature
11
Indicators, direction
43, 111
Inflating tyres
95, 126
Infrared camera
75
Instrument panel
7, 12, 75
ISOFIX mountings
59
J
Jack 106–107
Jump starting
11 7
K
Key 16–17, 20
Key, electronic
18–19
Keyless Entry and Starting
18, 65
Key not recognised
66
Key with remote control
16–17, 63
Kit, hands-free
129–130, 134
L
Labels, identification 125
Lamps, parking
44
Lamps, rear
11 2
Lams with Full LED technology
43
Lane Departure Warning System
(LDWS)
78, 80
Leather (care)
103
LEDs - Light-emitting diodes
43, 110, 112
Level, brake fluid
93
Level, Diesel additive
95
Level, engine coolant
11, 93
Level, engine oil
92
Level, power steering fluid
93
Levels and checks
91–94
Level, screenwash fluid 46, 94
Light-emitting diodes - LEDs
43, 110, 112
Lighting
40
Lighting, cornering
43
Lighting dimmer
12
Lighting, exterior
42
Lighting, guide-me home
45
Lighting, interior
38
Lighting, mood
12
Lighting, welcome
45
Loading
40, 90
Load restraint
40
Locating your vehicle
17
Locking
17–18
Locking from the inside
19
Locking the doors
19
Low fuel level
88
M
Maintenance 96
Maintenance (advice)
102
Maintenance, routine
75, 94, 96
Manoeuvring aids (recommendations)
74
Map reading lamps
38
Markings, identification
125
Mat
37, 75
Mirror, rear view
28
Mirrors, door
28, 35
Mirror, vanity
36
Mode, driving
71
Page 144 of 176

142
Alphabetical index
Serial number, vehicle 125
Servicing
94, 96
Settings, equipment
13–15
Sidelamps
43–44, 110, 112
Snow chains
89
Socket, 12 V accessory
36
Speed limiter
75–76
Speedometer
7, 75
Sport mode
71
Stability control (ESC)
49–50
Starting a Diesel engine
88
Starting the engine
63
Starting the vehicle
63–65
Starting using another battery
66, 117
Station, radio
128, 133
Stay, bonnet
91
Steering mounted controls, audio
128, 131
Steering wheel
95
Steering wheel, adjustment
27
Stickers, customising ~ Stickers,
expressive
103
Stopping the vehicle
63–65
Storage
36–40
Storage boxes
39
Storage compartments
36
Stowing rings
39
Sunshine sensor
31
Sun visor
36
Suspension
96
Switching off the engine
63
Synchronising the remote control
21T
Tables of engines 123–124
Tables of fuses
113, 115
Tailgate
22
Tank, fuel
88
Technical data
123–124
Telephone
129–130, 134–135
Temperature, coolant
11
Ticket holder
36
Time (setting)
13, 136
Tipper truck fittings
39
Tipper truck lighting
40
Tools
105–106, 106–107
Top Tether (fixing)
59
Total distance recorder
12
Touch screen
14
Towbar
50, 89
Towed loads
122
Towing another vehicle
119, 121
Traction control (ASR)
49–50
Trailer
50, 89
Trailer stability assist (TSA)
50
Trajectory control systems
49
Triangle, warning
104
Trip computer
12–13
Trip distance recorder
12
Tyres
95, 126
Tyre under-inflation detection
73
U
Under-inflation (detection) 73
Unlocking
16–18
Unlocking from the inside
19
Unlocking the doors
19
Updating the time
136
USB
129, 133–135
V
Ventilation 31–33
Visibility
35
W
Warning and indicator lamps 8
Warning lamp, driver''s seat belt
not fastened
53
Warning lamps
8
Warning lamp, seat belts
53
Warnings and indicators
8
Washing
75
Washing (advice)
102–103
Weights
122
Wheel, spare
95, 105–107
Windscreen wipers
45, 47
Wiper blades (changing)
46
Wipers
45, 47
Wipers, automatic rain sensitive
47
Page 167 of 176

1
Overview
Instruments and controls
These illustrations and descriptions are intended
as a guide. The presence and location of some
elements vary depending on the version or trim
level.
1.Electric windows
Central locking/unlocking
2. Side switch panel
3. Horn
Driver front airbag
4. Instrument panel
5. Front courtesy/map reading lamps
6. Glasses holder
7. Interior rear view mirror
8. Monochrome screen or touch screen
9. Heating/air conditioning controls
10. Central switch panel (lower and upper)
11 . Audio USB socket/Charger USB socket
12. Key ignition switch or button START/STOP 13.
2H, 4H and 4L transmission mode selector
14. Gearbox
15. Sport/Eco button
16. Parking brake
Cigarette lighter/12 V (120 W) accessory socket
17. Front passenger airbag
18. Glove box
19. Deactivate front passenger airbag (on the
side of the dashboard)
Page 168 of 176

2
Access
Alarm
(Depending on version)
System which protects and provides a deterrent
against theft and break-ins.
Exterior perimeter monitoring
The system checks for opening of the vehicle.
The alarm goes off if anyone tries to open a door
or the bonnet, for example.
For all work on the alarm system, contact
a PEUGEOT dealer or a qualified
workshop.
Locking the vehicle with
alarm system
Activation
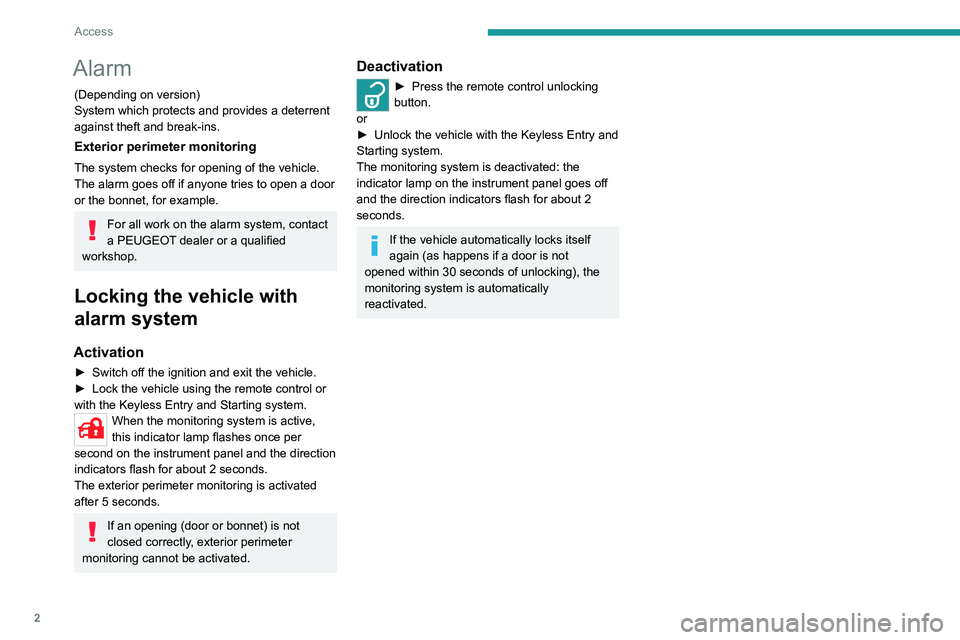
► Switch off the ignition and exit the vehicle.► Lock the vehicle using the remote control or with the Keyless Entry and Starting system.When the monitoring system is active,
this indicator lamp flashes once per
second on the instrument panel and the direction
indicators flash for about 2 seconds.
The exterior perimeter monitoring is activated
after 5 seconds.
If an opening (door or bonnet) is not
closed correctly, exterior perimeter
monitoring cannot be activated.
Deactivation
► Press the remote control unlocking button.
or
► Unlock the vehicle with the Keyless Entry and Starting system.
The monitoring system is deactivated: the
indicator lamp on the instrument panel goes off
and the direction indicators flash for about 2
seconds.
If the vehicle automatically locks itself
again (as happens if a door is not
opened within 30 seconds of unlocking), the
monitoring system is automatically
reactivated.
Page 169 of 176

3
Driving
6Driving recommendations
► Observe the driving regulations and remain vigilant whatever the traffic conditions.► Monitor your surroundings and keep your hands on the wheel to be able to react to
anything that may happen any time.
► Drive smoothly, anticipate the need for braking and maintain a longer safety distance,
especially in bad weather.
► Stop the vehicle to carry out operations that require close attention (such as adjustments).► During long trips, take a break every 2 hours.
On flooded roads
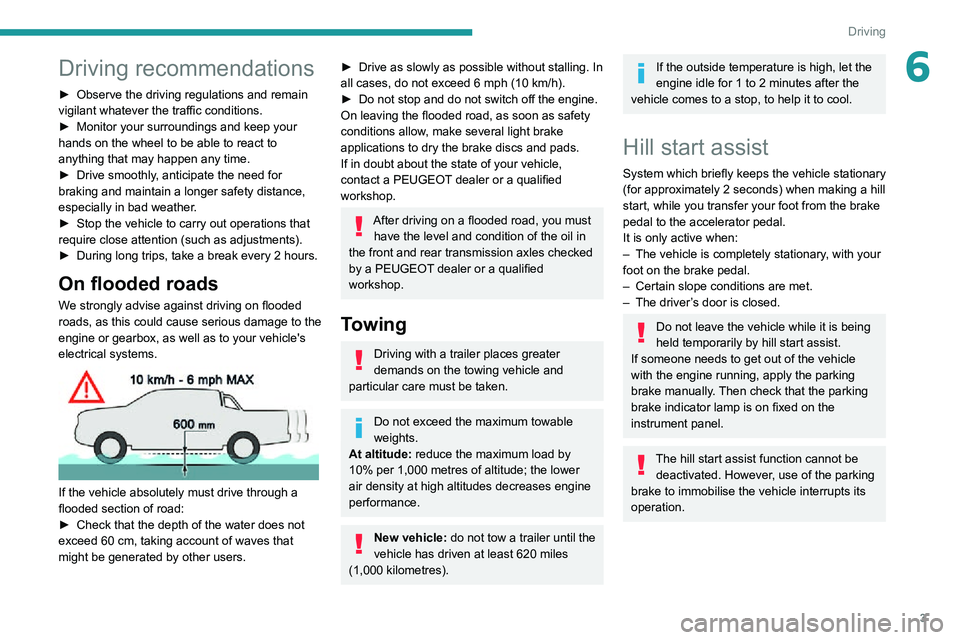
We strongly advise against driving on flooded
roads, as this could cause serious damage to the
engine or gearbox, as well as to your vehicle's
electrical systems.
If the vehicle absolutely must drive through a
flooded section of road:
► Check that the depth of the water does not exceed 60 cm, taking account of waves that might be generated by other users.
► Drive as slowly as possible without stalling. In all cases, do not exceed 6 mph (10 km/h).► Do not stop and do not switch off the engine.On leaving the flooded road, as soon as safety
conditions allow, make several light brake
applications to dry the brake discs and pads.
If in doubt about the state of your vehicle,
contact a PEUGEOT dealer or a qualified
workshop.
After driving on a flooded road, you must
have the level and condition of the oil in
the front and rear transmission axles checked
by a PEUGEOT dealer or a qualified
workshop.
Towing
Driving with a trailer places greater
demands on the towing vehicle and
particular care must be taken.
Do not exceed the maximum towable
weights.
At altitude: reduce the maximum load by
10% per 1,000 metres of altitude; the lower
air density at high altitudes decreases engine
performance.
New vehicle: do not tow a trailer until the
vehicle has driven at least 620 miles
(1,000 kilometres).
If the outside temperature is high, let the
engine idle for 1 to 2 minutes after the
vehicle comes to a stop, to help it to cool.
Hill start assist
System which briefly keeps the vehicle stationary (for approximately 2 seconds) when making a hill start, while you transfer your foot from the brake
pedal to the accelerator pedal.
It is only active when:
– The vehicle is completely stationary , with your foot on the brake pedal.– Certain slope conditions are met.– The driver’s door is closed.
Do not leave the vehicle while it is being
held temporarily by hill start assist.
If someone needs to get out of the vehicle
with the engine running, apply the parking
brake manually. Then check that the parking
brake indicator lamp is on fixed on the
instrument panel.
The hill start assist function cannot be deactivated. However, use of the parking
brake to immobilise the vehicle interrupts its
operation.