2021 PEUGEOT BOXER dashboard
[x] Cancel search: dashboardPage 23 of 212

21
Instruments
1Touch screen audio and telematics system
This audio system control panel, located in the
centre of the dashboard, gives access to menus
in order to customise some equipment.
The corresponding information is displayed in
the touch screen.
It is available in 9 languages: German, English,
Spanish, French, Italian, Dutch, Polish,
Portuguese and Turkish.
For safety reasons, some menus are only
accessible with the ignition off.
Provides access to the “Settings” menu.
Allows you to scroll up in a menu or
increase a value.
Allows you to scroll down in a menu or decrease a value.
"Settings" menu
1. "Display"
2. "Voice commands"
3. “Clock and Date”
4. "Safety/Assistance"
5. “Lights”
6. “Doors & locking”
7. "Audio"
8. "Telephone/Bluetooth"
9. “Radio setting”
10. "Restore Settings" to return to the
manufacturer’s default settings.
11 . “Delete pers. data“ to delete all your
personal data, related to the Bluetooth
equipment, in the audio system.
For more information on audio,
telephone, radio and navigation, refer to
the corresponding sections.
The settings in sub-menus 4, 5 and 6
vary depending on the equipment
installed on the vehicle.
From the "Display" sub-menu, it is possible to:
–
select "Languages" and choose one of the
languages mentioned above,
–
select "Unit of measurement" and set the
consumption (mpg, l/100 km), distances (miles,
km) and temperature (°F
, °C), –
select "T
rip B display" to activate or deactivate
trip B of the trip computer (On, Off).
From the "Safety/Assistance" sub-menu, it is
possible to:
–
select "Parkview Camera", then "Reversing
camera" to activate or deactivate its use (On,
Off),
–
select “Parkview Camera", then "Camera
delay" to activate or deactivate the maintaining
of the display for 10 seconds or up to 1
1 mph (18
km/h) (On, Off),
–
select "T
raffic Sign" to activate or deactivate
its use (On, Off),
–
select "Passenger airbag" to activate or
deactivate its use (On, Off).
From the "Lights" sub-menu, it is possible to:
–
select "Daytime running lamps" to activate or
deactivate their use (On, Off),
–
select "Auto. main beam headlamps" to
activate or deactivate its use (On, Off),
–
select "Headlamp sensor" to adjust its
sensitivity (1, 2, 3).
From the "Doors & locking" sub-menu, it is
possible to:
–
select "Autoclose" to activate or deactivate its
use (On, Off).
Setting the date and time
Using the MODE control panel
► Press the “MODE” button.
Page 25 of 212
23
Access
2Key
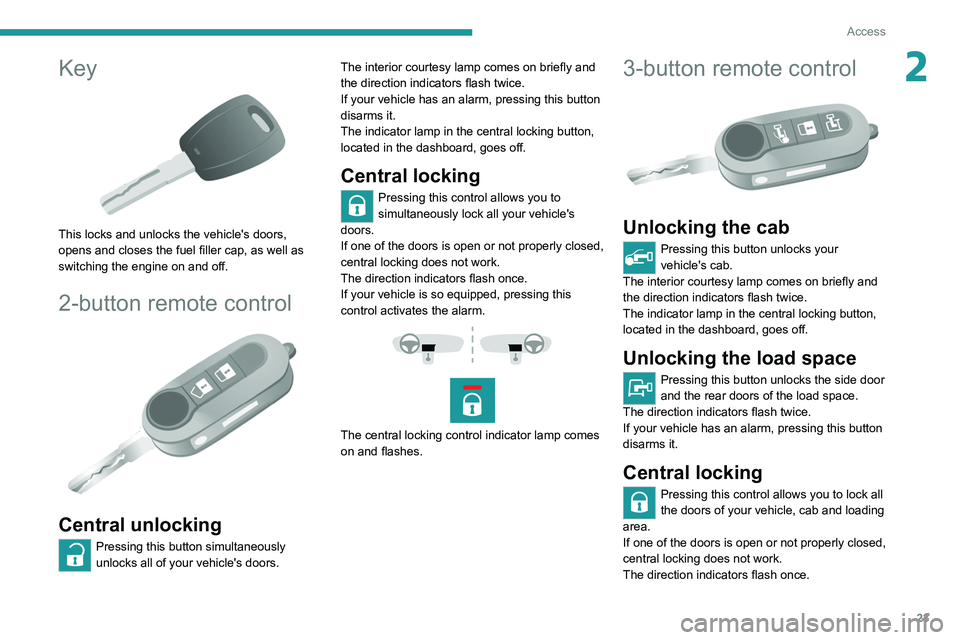
This locks and unlocks the vehicle's doors,
opens and closes the fuel filler cap, as well as
switching the engine on and off.
2-button remote control
Central unlocking
Pressing this button simultaneously
unlocks all of your vehicle's doors. The interior courtesy lamp comes on briefly and
the direction indicators flash twice.
If your vehicle has an alarm, pressing this button
disarms it.
The indicator lamp in the central locking button,
located in the dashboard, goes off.
Central locking
Pressing this control allows you to
simultaneously lock all your vehicle's
doors.
If one of the doors is open or not properly closed,
central locking does not work.
The direction indicators flash once.
If your vehicle is so equipped, pressing this
control activates the alarm.
The central locking control indicator lamp comes
on and flashes.
3-button remote control
Unlocking the cab
Pressing this button unlocks your
vehicle's cab.
The interior courtesy lamp comes on briefly and
the direction indicators flash twice.
The indicator lamp in the central locking button,
located in the dashboard, goes off.
Unlocking the load space
Pressing this button unlocks the side door
and the rear doors of the load space.
The direction indicators flash twice.
If your vehicle has an alarm, pressing this button
disarms it.
Central locking
Pressing this control allows you to lock all
the doors of your vehicle, cab and loading
area.
If one of the doors is open or not properly closed,
central locking does not work.
The direction indicators flash once.
Page 27 of 212
25
Access
2Summary of the main functions of the key
Type of keyUnlocking the cabLocking the doorsUnlocking the rear doors
Basic key Turn anti-clockwise (driver’s side). Turn clockwise (driver’s side). -
Remote control key
Signalling
Direction indicators 2 flashes.1 flash.2 flashes.
Central locking control indicator
lamp on the dashboard Off.
Fixed for approximately 3
seconds, then flashing.Flashing.
Using the key in the driver's door lock does not activate/deactivate the alarm.
Locking/Unlocking from
the inside
Cab and loading area
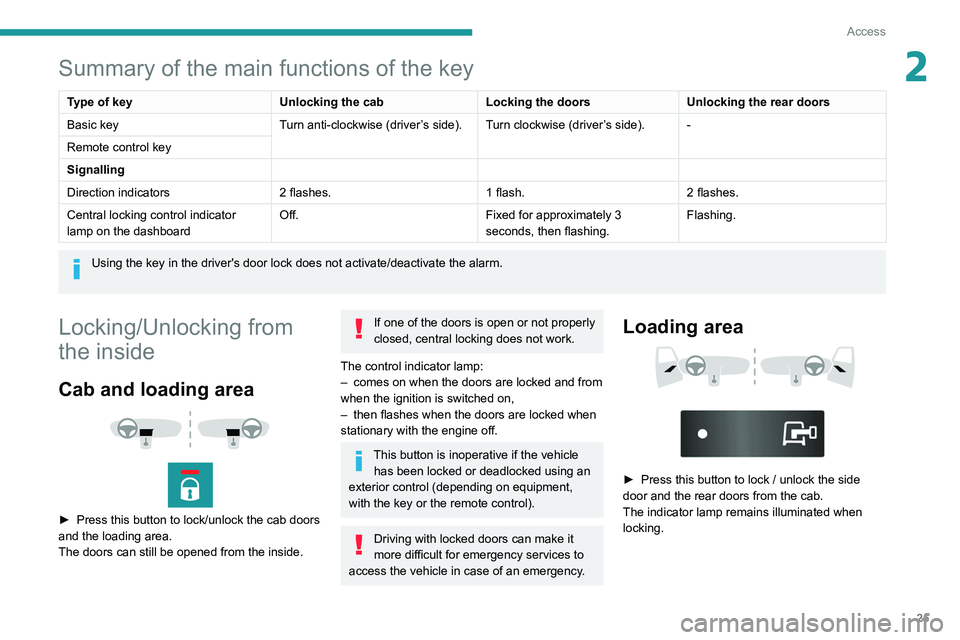
► Press this button to lock/unlock the cab doors
and the loading area.
The doors can still be opened from the inside.
If one of the doors is open or not properly
closed, central locking does not work.
The control indicator lamp:
–
comes on when the doors are locked and from
when the ignition is switched on,
–
then flashes when the doors are locked when
stationary with the engine off.
This button is inoperative if the vehicle has been locked or deadlocked using an
exterior control (depending on equipment,
with the key or the remote control).
Driving with locked doors can make it
more difficult for emergency services to
access the vehicle in case of an emergency.
Loading area
► Press this button to lock / unlock the side
door and the rear doors from the cab.
The indicator lamp remains illuminated when
locking.
Page 37 of 212
35
Ease of use and comfort
3The display is reactivated automatically every
time the ignition is switched on.
For more information on the Display integrated
into the rear view mirror, refer to the
corresponding section.
Heating and Ventilation
Advice
Using the ventilation and air
conditioning system
►
T
o ensure that air is distributed evenly,
keep the external air intake grilles at the base
of the windscreen, the nozzles, the vents, the
air outlets and the air extractor in the boot
free from obstructions.
►
Do not cover the sunshine sensor located
on the dashboard; this sensor is used to
regulate the automatic air conditioning
system.
►
Operate the air conditioning system for at
least 5 to 10 minutes once or twice a month to
keep it in good working order
.
►
If the system does not produce cold air
,
switch it off and contact a PEUGEOT dealer
or a qualified workshop.
When towing a large load on a steep gradient
in high temperatures, switching off the air
conditioning increases the available engine
power, enhancing the towing capacity.
Avoid driving for too long with the ventilation off or with prolonged operation
of interior air recirculation. Risk of misting and
deterioration of the air quality!
If the interior temperature is very high
after the vehicle has stood for a long
time in the sunshine, air the passenger
compartment for a few moments.
Put the air flow control at a setting high
enough to quickly change the air in the
passenger compartment.
Condensation created by the air
conditioning results in a discharge of
water underneath the vehicle. This is perfectly
normal.
Servicing the ventilation and air
conditioning system
►
Ensure that the passenger compartment
filter is in good condition and have the filter
elements replaced regularly
.
We recommend using a composite passenger
compartment filter. Its specific active additive
helps protect against polluting gases and bad
smells.
►
T
o ensure correct operation of the
air conditioning system, have it checked
according to the recommendations in the
Manufacturer’s service schedule.
Contains the fluorinated greenhouse
gas R134A
Depending on version and country of sale,
the air conditioning system may contain
fluorinated greenhouse gas R134A.
Stop & Start
The heating and air conditioning systems
only operate when the engine is running.
Temporarily deactivate the Stop & Start
system to maintain a comfortable temperature
in the passenger compartment.
For more information on the Stop & Start,
refer to the corresponding section.
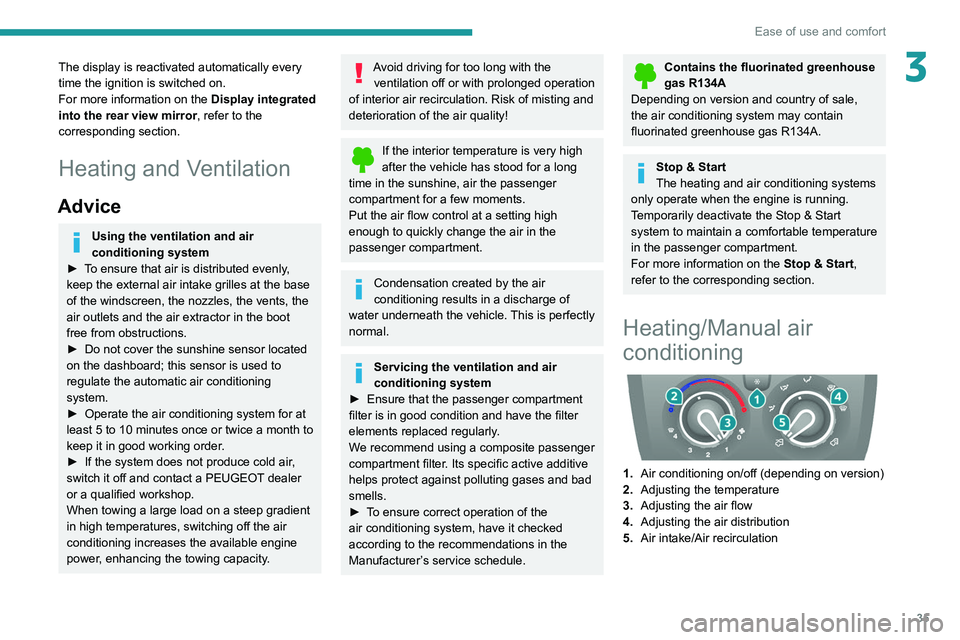
Heating/Manual air
conditioning
1. Air conditioning on/off (depending on version)
2. Adjusting the temperature
3. Adjusting the air flow
4. Adjusting the air distribution
5. Air intake/Air recirculation
Page 47 of 212
45
Ease of use and comfort
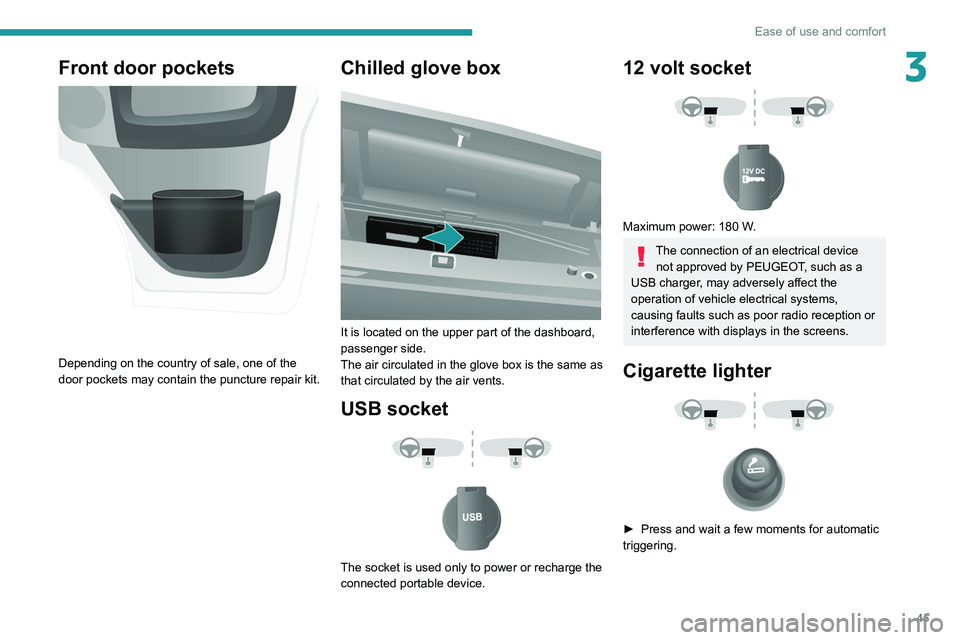
3Front door pockets
Depending on the country of sale, one of the
door pockets may contain the puncture repair kit.
Chilled glove box
It is located on the upper part of the dashboard,
passenger side.
The air circulated in the glove box is the same as
that circulated by the air vents.
USB socket
The socket is used only to power or recharge the
connected portable device.
12 volt socket
Maximum power: 180 W.
The connection of an electrical device not approved by PEUGEOT, such as a
USB charger, may adversely affect the
operation of vehicle electrical systems,
causing faults such as poor radio reception or
interference with displays in the screens.
Cigarette lighter
► Press and wait a few moments for automatic
triggering.
Page 48 of 212
46
Ease of use and comfort
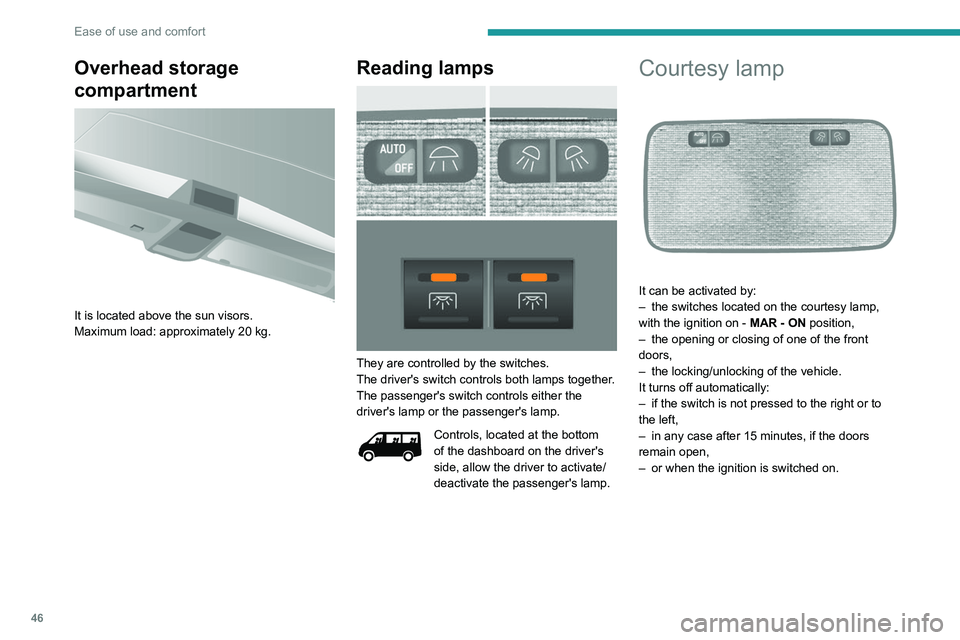
Overhead storage
compartment
It is located above the sun visors.
Maximum load: approximately 20 kg.
Reading lamps
They are controlled by the switches.
The driver's switch controls both lamps together.
The passenger's switch controls either the
driver's lamp or the passenger's lamp.
Controls, located at the bottom
of the dashboard on the driver's
side, allow the driver to activate/
deactivate the passenger's lamp.
Courtesy lamp
It can be activated by:
– the switches located on the courtesy lamp,
with the ignition on - MAR - ON
position,
–
the opening or closing of one of the front
doors,
–
the locking/unlocking of the vehicle.
It turns off automatically:
–
if the switch is not pressed to the right or to
the left,
–
in any case after 15 minutes, if the doors
remain open,
–
or when the ignition is switched on.
Page 54 of 212
52
Lighting and visibility
Automatic illumination of headlamps
If your vehicle is fitted with this function, the
dipped beam headlamps are switched on
automatically if the light is poor.
In fog or snow, the sunshine sensor may
detect sufficient light. In this case, the
lighting will not come on automatically. If
necessary, you must switch on the dipped
beam headlamps manually.
They are switched off when the light returns
to a sufficient level.
Do not cover the sunshine sensor at the top
centre of the windscreen.
You can adjust the sensitivity of the sunshine sensor.
For more information on Vehicle
configuration , refer to the corresponding
section.
Activation
► Turn the ring to this position.
The lamps go out automatically when the ignition
is switched off.
Guide-me-home lighting
If your vehicle is equipped: when you leave your
vehicle, the dipped beam headlamps remain on
for the selected period of time (e.g. leaving a car
park).
With the ignition off or the
key in the STOP position
► Within 2 minutes of switching off the engine,
turn the ignition key to the ST OP position or
remove the key.
►
Pull the lighting control stalk towards the
steering wheel.
This indicator lamp lights up on the
dashboard.
Each action on the lighting control stalk, pulled
towards the steering wheel, extends the
guide-me-home lighting by 30 seconds up to
approximately 3 minutes. Once this time has
elapsed, the lamps go out automatically.
Deactivate this control by holding the control
stalk pulled towards the steering wheel for more
than 2 seconds.
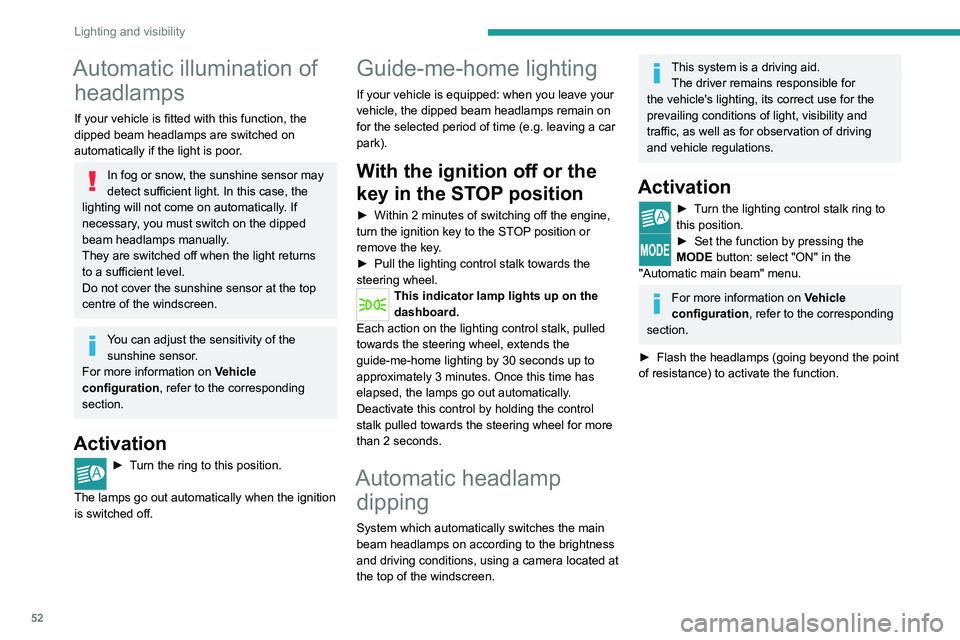
Automatic headlamp dipping
System which automatically switches the main
beam headlamps on according to the brightness
and driving conditions, using a camera located at
the top of the windscreen.
This system is a driving aid.
The driver remains responsible for
the vehicle's lighting, its correct use for the
prevailing conditions of light, visibility and
traffic, as well as for observation of driving
and vehicle regulations.
Activation
► Turn the lighting control stalk ring to
this position.
► Set the function by pressing the
MODE button: select "ON" in the
"Automatic main beam" menu.
For more information on Vehicle
configuration , refer to the corresponding
section.
►
Flash the headlamps (going beyond the point
of resistance) to activate the function.
Page 55 of 212
53
Lighting and visibility
4Operation
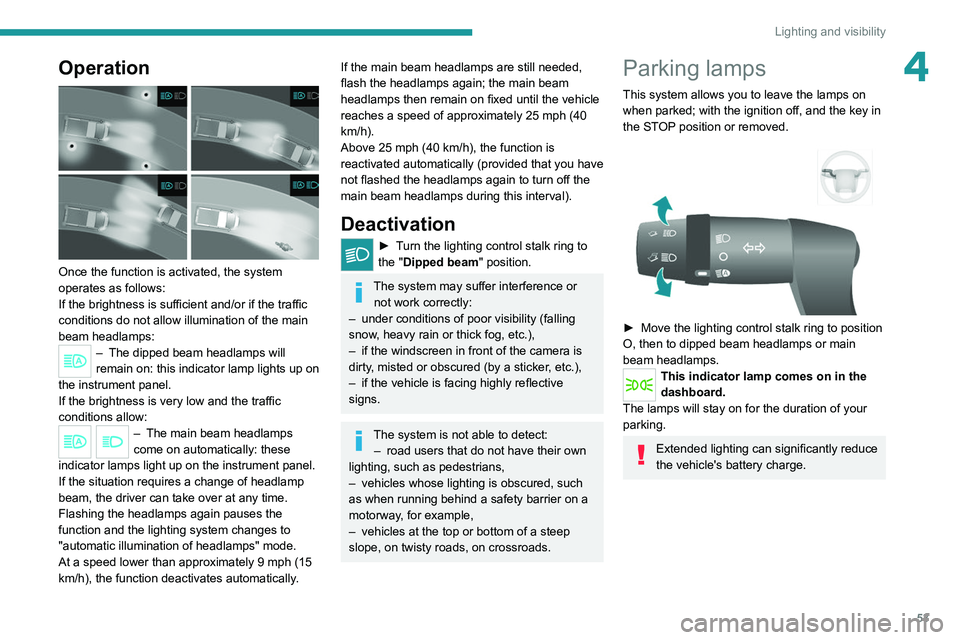
Once the function is activated, the system
operates as follows:
If the brightness is sufficient and/or if the traffic
conditions do not allow illumination of the main
beam headlamps:
– The dipped beam headlamps will
remain on: this indicator lamp lights up on
the instrument panel.
If the brightness
is very low and the traffic
conditions allow:
– The main beam headla mps
come on automatically: these
indicator lamps light up on the instrument panel.
If the situation requires a change of headlamp
beam, the driver can take over at any time.
Flashing the headlamps again pauses the
function and the lighting system changes to
"automatic illumination of headlamps" mode.
At a speed lower than approximately 9 mph (15
km/h), the function deactivates automatically.
If the main beam headlamps are still needed,
flash the headlamps again; the main beam
headlamps then remain on fixed until the vehicle
reaches a speed of approximately 25 mph (40
km/h).
Above 25 mph (40 km/h), the function is
reactivated automatically (provided that you have
not flashed the headlamps again to turn off the
main beam headlamps during this interval).
Deactivation
► Turn the lighting control stalk ring to
the "Dipped beam" position.
The system may suffer interference or not work correctly:
–
under conditions of poor visibility (falling
snow
, heavy rain or thick fog, etc.),
–
if the windscreen in front of the camera is
dirty
, misted or obscured (by a sticker, etc.),
–
if the vehicle is facing highly reflective
signs.
The system is not able to detect: – road users that do not have their own
lighting, such as pedestrians,
–
vehicles whose lighting is obscured, such
as when running behind a safety barrier on a
motorway
, for example,
–
vehicles at the top or bottom of a steep
slope, on twisty roads, on crossroads.
Parking lamps
This system allows you to leave the lamps on
when parked; with the ignition off, and the key in
the STOP position or removed.
► Move the lighting control stalk ring to position
O, then to dipped beam headlamps or main
beam headlamps.
This indicator lamp comes on in the
dashboard.
The lamps will stay on for the duration of your
parking.
Extended lighting can significantly reduce
the vehicle's battery charge.