2021 PEUGEOT BOXER steering
[x] Cancel search: steeringPage 39 of 212

37
Ease of use and comfort
3This is the normal operating mode for the
automatic air conditioning system.
–
Using the moving ring surrounding the
AUTO
control, adjust the comfort temperature to be
reached according to a scale between: •
HI (High up to ≈32) and
•
LO (Low until ≈16).
The system manages the air distribution, flow
and intake to ensure the comfort equivalent
to the graduation displayed and sufficient air
recirculation in the passenger compartment.
Customisable AUTO mode
In AUTO mode, some settings can be changed:
distribution, air flow, air conditioning and air
intake/recirculation.
The display changes from FULL AUTO to
AUTO.
►
T
o return to fully automatic operation, press
button 1 again. The control panel display
changes from AUTO to
FULL AUTO.
If after manual adjustments, the system cannot
maintain the selected graduation, this will flash
and AUTO will then go out. Press control 1 to
return to the automatic settings.
Air conditioning off
► Press button 2 to switch off the air
conditioning functions. The snowflake goes out
on the display.
Complete switch-off
► Press button 3 to switch off the system. The
LED and the display go out.
Temperature
The scale is between:
– a rise in interior air temperature HI (High),
which heats up to a maximum graduation of 32,
–
a cooling of interior air temperature LO (Low),
which decreases to a graduation
of 16.
Air distribution
► Press one of the buttons 4 to direct the air
flow towards:
the windscreen and front side window
vents (demisting - defrosting windows),
the central and side vents (chest and
face),
the diffusers of the front and rear zones
(footwells).
Combining buttons makes it possible to refine
the air distribution.
Air flow
► Press one of the buttons 5 to increase or
decrease the air flow.
Air intake/Air recirculation
The intake of exterior air prevents the formation
of mist on the windscreen and side windows.
Recirculating the interior air isolates the
passenger compartment from exterior odours
and fumes.
This function allows hot or cold air to be delivered selectively and more quickly.
Return to exterior air intake as soon as possible
to avoid deterioration of the air quality and the
formation of mist.
►
Press button
6 to activate interior air
recirculation. The indicator lamp comes on.
Pressing this button again restores exterior air
intake. The indicator lamp goes off.
Pressing button 1 also restores exterior
air intake. Returning to this position
allows the air in the passenger compartment
to be renewed and demisting. Pressing button
1
again restores the FULL AUTO function.
Heating (Electric)
A thermostatic control panel is used to heat
the passenger compartment, in addition to the
standard controls located on the central console.
The control panel is located next to the steering
wheel, below the MODE control panel.
Page 42 of 212
40
Ease of use and comfort
If the vehicle is equipped with an additional
air conditioning unit, located at the rear of the
vehicle: the distribution rail located in the roof
and the individualised air vents ensure a perfect
diffusion of cold air.
The hot air diffused from the front air conditioning
unit to the floor is distributed at the height of the
rear passengers' feet in rows 2 and 3.
A hot air vent, located on the left-hand rear
wheel arch, may complement the system for the
rear passengers’ feet in row 3.
Activation/Deactivation
► From the driver's seat, press this
button located on the MODE
control panel
to activate the operation of the rear controls. The
indicator lamp comes on.
Pressing again on this button deactivates the
operation of the rear controls. The indicator lamp
goes off.
Setting the comfort
temperature
► Turn control 1 to select a position between
blue (cold) and red (hot) so as to adjust the
temperature to your requirements.
The OFF control on the "Mono-zone" central control panel switches the
function off.
However, a back-up system will automatically
ventilate the rear circuit, even if the control is
in position 0, to avoid the formation of mist.
Air flow
► Set control 2 to the desired position to
increase or decrease the air flow.
Additional programmable heating
The additional programmable heating gradually
brings the engine to a good temperature to
facilitate its starting.
An built-in clock allows the time of its triggering
to be programmed. The passenger compartment
will warm up faster.
The warming-up of the passenger
compartment, de-icing and demisting are
facilitated. The control panel for the programmable
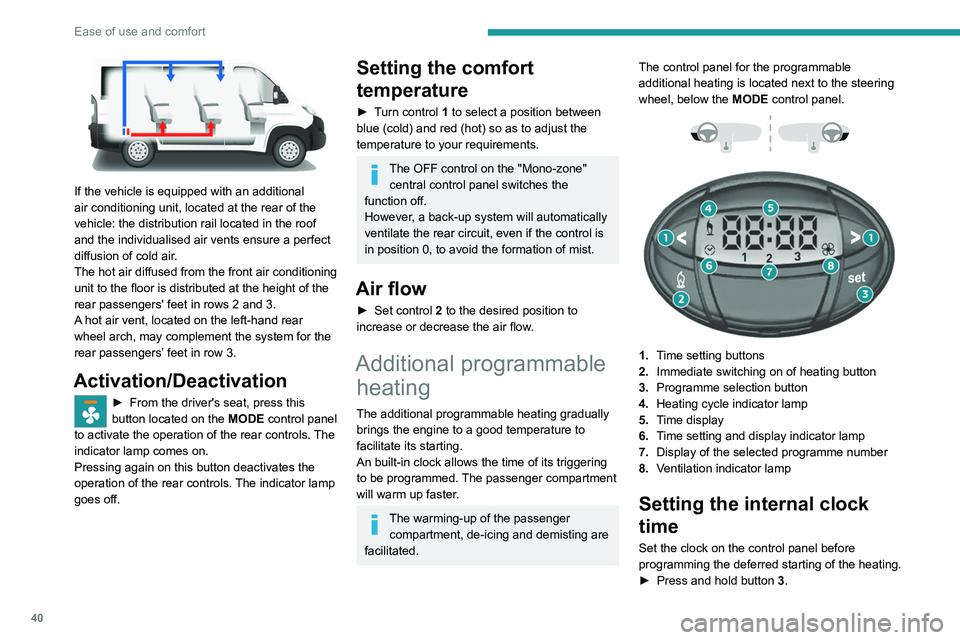
additional heating is located next to the steering
wheel, below the
MODE control panel.
1. Time setting buttons
2. Immediate switching on of heating button
3. Programme selection button
4. Heating cycle indicator lamp
5. Time display
6. Time setting and display indicator lamp
7. Display of the selected programme number
8. Ventilation indicator lamp
Setting the internal clock
time
Set the clock on the control panel before
programming the deferred starting of the heating.
►
Press and hold button 3
.
Page 54 of 212
52
Lighting and visibility
Automatic illumination of headlamps
If your vehicle is fitted with this function, the
dipped beam headlamps are switched on
automatically if the light is poor.
In fog or snow, the sunshine sensor may
detect sufficient light. In this case, the
lighting will not come on automatically. If
necessary, you must switch on the dipped
beam headlamps manually.
They are switched off when the light returns
to a sufficient level.
Do not cover the sunshine sensor at the top
centre of the windscreen.
You can adjust the sensitivity of the sunshine sensor.
For more information on Vehicle
configuration , refer to the corresponding
section.
Activation
► Turn the ring to this position.
The lamps go out automatically when the ignition
is switched off.
Guide-me-home lighting
If your vehicle is equipped: when you leave your
vehicle, the dipped beam headlamps remain on
for the selected period of time (e.g. leaving a car
park).
With the ignition off or the
key in the STOP position
► Within 2 minutes of switching off the engine,
turn the ignition key to the ST OP position or
remove the key.
►
Pull the lighting control stalk towards the
steering wheel.
This indicator lamp lights up on the
dashboard.
Each action on the lighting control stalk, pulled
towards the steering wheel, extends the
guide-me-home lighting by 30 seconds up to
approximately 3 minutes. Once this time has
elapsed, the lamps go out automatically.
Deactivate this control by holding the control
stalk pulled towards the steering wheel for more
than 2 seconds.
Automatic headlamp dipping
System which automatically switches the main
beam headlamps on according to the brightness
and driving conditions, using a camera located at
the top of the windscreen.
This system is a driving aid.
The driver remains responsible for
the vehicle's lighting, its correct use for the
prevailing conditions of light, visibility and
traffic, as well as for observation of driving
and vehicle regulations.
Activation
► Turn the lighting control stalk ring to
this position.
► Set the function by pressing the
MODE button: select "ON" in the
"Automatic main beam" menu.
For more information on Vehicle
configuration , refer to the corresponding
section.
►
Flash the headlamps (going beyond the point
of resistance) to activate the function.
Page 56 of 212
54
Lighting and visibility
Headlamp beam height
adjustment
To avoid inconvenience to other road users,
the height of the halogen headlamps should be
adjusted according to the load in the vehicle.
This function can be accessed in dipped beam
and main beam headlamp positions.
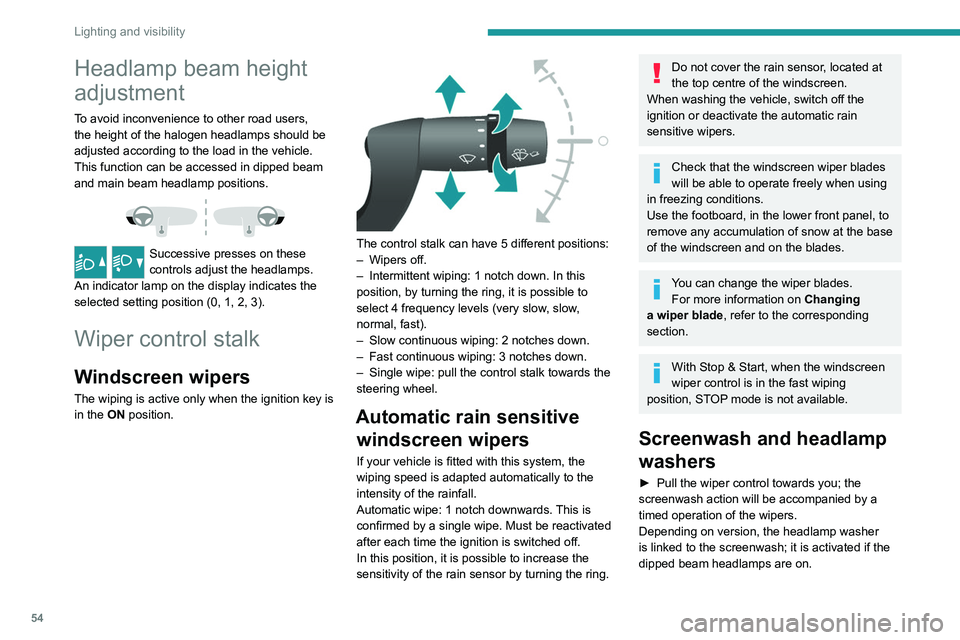
Successive presses on these
controls adjust the headlamps.
An indicator lamp on the display indicates the
selected setting position (0, 1, 2, 3).
Wiper control stalk
Windscreen wipers
The wiping is active only when the ignition key is
in the ON position.
The control stalk can have 5 different positions:
– Wipers off.
–
Intermittent wiping: 1 notch down. In this
position, by turning the ring, it is possible to
select 4 frequency levels (very slow
, slow,
normal, fast).
–
Slow continuous wiping: 2 notches down.
–
Fast continuous wiping: 3 notches down.
–
Single wipe: pull the control stalk towards the
steering wheel.
Automatic rain sensitive windscreen wipers
If your vehicle is fitted with this system, the
wiping speed is adapted automatically to the
intensity of the rainfall.
Automatic wipe: 1 notch downwards. This is
confirmed by a single wipe. Must be reactivated
after each time the ignition is switched off.
In this position, it is possible to increase the
sensitivity of the rain sensor by turning the ring.
Do not cover the rain sensor, located at
the top centre of the windscreen.
When washing the vehicle, switch off the
ignition or deactivate the automatic rain
sensitive wipers.
Check that the windscreen wiper blades
will be able to operate freely when using
in freezing conditions.
Use the footboard, in the lower front panel, to
remove any accumulation of snow
at the base
of the windscreen and on the blades.
You can change the wiper blades. For more information on Changing
a wiper blade , refer to the corresponding
section.
With Stop & Start, when the windscreen
wiper control is in the fast wiping
position, STOP mode is not available.
Screenwash and headlamp
washers
► Pull the wiper control towards you; the
screenwash action will be accompanied by a
timed operation of the wipers.
Depending on version, the headlamp washer
is linked to the screenwash; it is activated if the
dipped beam headlamps are on.
Page 58 of 212

56
Safety
General safety
recommendations
Do not remove the labels attached in
different places on your vehicle. They
include safety warnings as well as
identification information for the vehicle.
For all work on your vehicle, use a
qualified workshop that has the technical
information, skills and equipment required, all
of which a PEUGEOT dealer is able to
provide.
Depending on country regulations,
certain safety equipment may be
mandatory: high visibility safety vests,
warning triangles, breathalysers, spare bulbs,
spare fuses, fire extinguisher, first aid kit, mud
flaps at the rear of the vehicle, etc.
Installing electrical accessories:
– The fitting of electrical equipment or
accessories not approved by PEUGEOT
may
cause excessive current consumption and
faults and failures with the electrical system
of your vehicle. Contact a PEUGEOT dealer
for information on the range of approved
accessories.
–
As a safety measure, access to the
diagnostic socket, used for the vehicle's
electronic systems, is reserved strictly for
PEUGEOT dealers or qualified workshops,
equipped with the special tools required (risk
of malfunctions of the vehicle's electronic
systems that could cause breakdowns or
serious accidents). The Manufacturer cannot
be held responsible if this advice is not
followed.
–
Any modification or adaptation not intended
or authorised by PEUGEOT
or carried out
without meeting the technical requirements
defined by the Manufacturer will result in the
suspension of the commercial warranty.
Installation of accessory radio
communication transmitters
Before installing a radio communication
transmitter with an external aerial, you must
without fail contact a PEUGEOT dealer for
the specification of transmitters which can
be fitted (frequency, maximum power, aerial
position, specific installation requirements),
in line with the Vehicle Electromagnetic
Compatibility Directive (2004/104/EC).
Declarations of conformity for radio
equipment
The relevant certificates are available on the
http://public.servicebox.peugeot.com/APddb/
website.
Hazard warning lamps
► Pressing this red button causes all the
direction indicators to flash.
They can work with the ignition switched off.
Horn
► Press the central part of the steering wheel.
Page 64 of 212
62
Safety
The upper part must be positioned in the
hollow of the shoulder.
At the front, adjusting the position of the
seat belt may require the seat height to be
adjusted.
In order to be effective, a seat belt must:
–
be tightened as close to the body as
possible.
–
be pulled in front of you with a smooth
movement, checking that it is not twisted.
–
must only be used to secure one person.
–
not show signs of tearing or fraying.
–
not be changed or modified, in order to
avoid affecting its performance.
Recommendations for children
Use a suitable child seat if the passenger
is less than 12 years old or shorter than 1.5
metres.
Never use the same seat belt to secure more
than one child.
Never carry a child on your lap.
For more information on Child seats, refer to
the corresponding section.
Maintenance
In accordance with current safety
regulations, for all work on your vehicle's
seat belts, contact a qualified workshop with
the skills and equipment needed, which a
PEUGEOT
dealer is able to provide.
Have the seat belts checked regularly by a
PEUGEOT dealer or a qualified workshop,
particularly if the straps show signs of
damage.
Clean the seat belt straps with soapy water or
a textile cleaning product, sold by PEUGEOT
dealers.
Airbags
The airbags have been designed to optimise the
safety of the occupants in the event of a serious
collision; they work in conjunction with the force
limiting seat belts.
In the event of a serious collision, electronic
detectors record and analyse any abrupt
deceleration of the vehicle:
–
if there is a violent impact, the airbags deploy
instantly and help better protect occupants of the
vehicle; immediately after the impact, the airbags
deflate rapidly in order not to hinder the visibility
or the possible exit of the occupants.
–
in the case of a minor or rear impact or in
certain rollover conditions, the airbags are not
deployed; the seat belt alone contributes towards
ensuring your protection in these situations.
The airbags do not operate when the
engine is not running.
This equipment will only deploy once. If a
second impact occurs (during the same or a
subsequent accident), the airbag will not be
deployed again.
Deployment of the airbags is
accompanied by a slight discharge of
smoke and a noise, resulting from activation
of the pyrotechnic charge incorporated in the
system.
Although this smoke is not harmful, sensitive
individuals may experience slight irritation.
The noise of the detonation may result in a
slight loss of hearing for a short time.
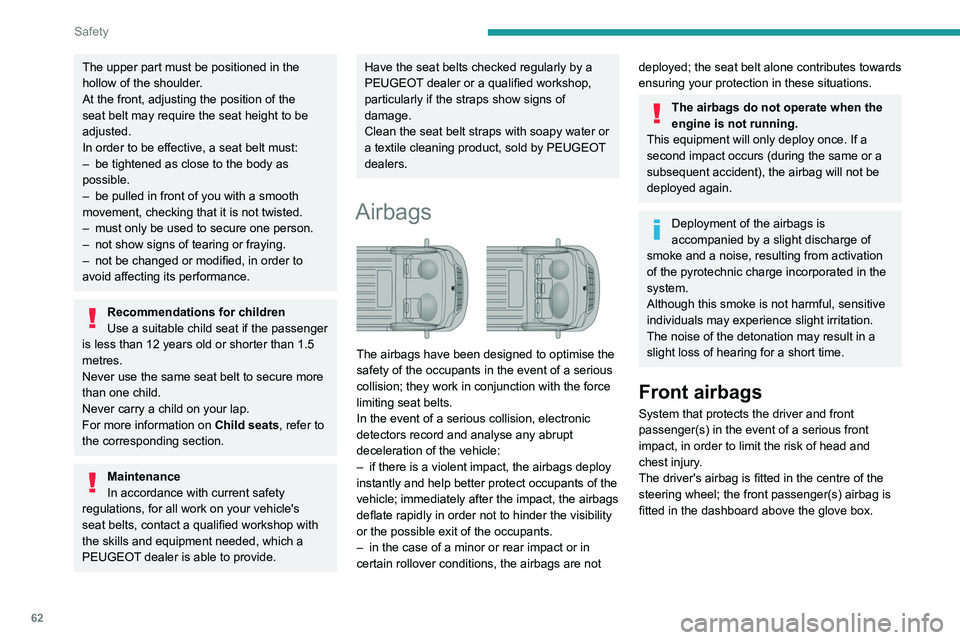
Front airbags
System that protects the driver and front
passenger(s) in the event of a serious front
impact, in order to limit the risk of head and
chest injury.
The driver's airbag is fitted in the centre of the
steering wheel; the front passenger(s) airbag is
fitted in the dashboard above the glove box.
Page 65 of 212
63
Safety
5Lateral airbags and curtain
airbags
If fitted to your vehicle, the lateral airbags are
built into the backrests of the front seats, on the
side by the door.
The curtain airbags are built into the pillars and
the upper passenger compartment area, in the
roof above the front seats.
They inflate between the occupant and the
window.
They deploy on one side only (the side where
the collision occurs).
Malfunction
If this warning lamp comes on, contact a
PEUGEOT dealer to have the system
checked.
Advice
For the airbags to be fully effective,
observe the safety recommendations
below.
Adopt a normal upright sitting position.
Fasten the seat belt ensuring it is correctly
positioned and adjusted.
Do not leave anything between the occupants
and the airbags (a child, pet, object, etc.), nor
fix or attach anything close to or in the way of
the airbag release trajectory; this could cause
injuries during their deployment.
Never modify the original definition of your
vehicle, particularly in the area directly around
the airbags.
After an accident or if the vehicle has been
stolen, have the airbag systems checked.
All work on the airbag systems must only
be performed by a PEUGEOT dealer or a
qualified workshop.
Even if all of the precautions mentioned
are observed, a risk of injury or of minor
burns to the head, chest or arms cannot be
ruled out when an airbag is deployed. The
airbag inflates almost instantly (within a few
milliseconds) then deflates within the same
time discharging the hot gas via openings
provided for this purpose.
Front airbags
Do not drive holding the steering wheel
by its spokes or resting your hands on the
centre part of the wheel.
Passengers must not place their feet on the
dashboard.
Do not smoke as deployment of the airbags
can cause burns or the risk of injury from a
cigarette or pipe.
Never remove or pierce the steering wheel or
hit it violently.
Do not fix or attach anything to the steering
wheel or dashboard, as this could cause
injuries when the airbags are deployed.
Lateral airbags
Use only approved covers on the seats,
compatible with the deployment of the lateral
airbags. For information on the range of seat
covers suitable for your vehicle, contact a
PEUGEOT dealer.
Do not fix or attach anything to the seat
backrests (clothes, etc.), as this could cause
injuries to the thorax or arm when the lateral
airbag is deployed.
Do not sit with the upper part of the body any
nearer to the door than necessary.
Curtain airbags
Do not fix or attach anything to the roof,
as this could cause head injuries when the
curtain airbag is deployed.
Do not remove the grab handles installed on
the roof, as they play a part in securing the
curtain airbags.
Child seats
The regulations on carrying children are specific to each country. Refer to the
legislation in force in your country.
For maximum safety, please observe the
following recommendations:
–
In accordance with European regulations,
all children under the age of 12 or less than
1.5 metres tall must travel in approved child
Page 81 of 212

79
Driving
6Under-inflation alert
This is signalled by the fixed illumination of this warning lamp, accompanied by an
audible signal and, depending on equipment, the
display of a message.
If a fault is detected in just one of the tyres, the
symbol or message displayed, depending on
equipment, will identify it.
►
Reduce speed immediately
, avoid excessive
steering movements and avoid sudden braking.
►
Stop the vehicle as soon as it is safe to do
so.
The loss of pressure detected may not always cause visible deformation of the
tyre.
Do not rely on just a visual check.
►
Using a compressor
, such as the one in
the temporary puncture repair kit, check the
pressures of all four tyres when cold.
►
If it is not possible to carry out this check
immediately
, drive carefully at reduced speed.
►
In the event of a puncture, use the
temporary puncture repair kit or the spare wheel
(depending on equipment).
Driving too slowly may not ensure
optimum monitoring.
The alert is not immediately triggered in the
event of a sudden loss of pressure or tyre
blow-out. This is because analysis of the
values read by the wheel's speed sensors
can take several minutes.
The alert may be delayed at speeds below
25 mph (40 km/h), or when adopting a sporty
driving mode.
The alert is kept active until the tyre/tyres
concerned is/are reinflated, repaired or
replaced.
Malfunction
The flashing and then fixed illumination of this warning lamp, accompanied by the
illumination of the service warning lamp, and
depending on equipment, the display of a
message, indicates a fault with the system.
In this case, the tyre pressures are no longer
monitored.
This alert is also displayed if at least one wheel is not equipped with a sensor.
Contact a PEUGEOT dealer or a qualified
workshop to have the system checked or,
following a puncture, to have a tyre refitted to the
original rim, equipped with a sensor.
Pneumatic suspension
If the vehicle is equipped with pneumatic
suspension, it is possible to change the height
of the rear sill, in order to facilitate loading or
unloading.
There is a normal sill level, as well as 3 higher
levels (from +1 to +3) and 3 lower levels (from
-1 to -3). Each level reached is displayed on the
instrument panel display screen.