2021 PEUGEOT BOXER rear view mirror
[x] Cancel search: rear view mirrorPage 77 of 212
75
Driving
6Drive selector (Electric)
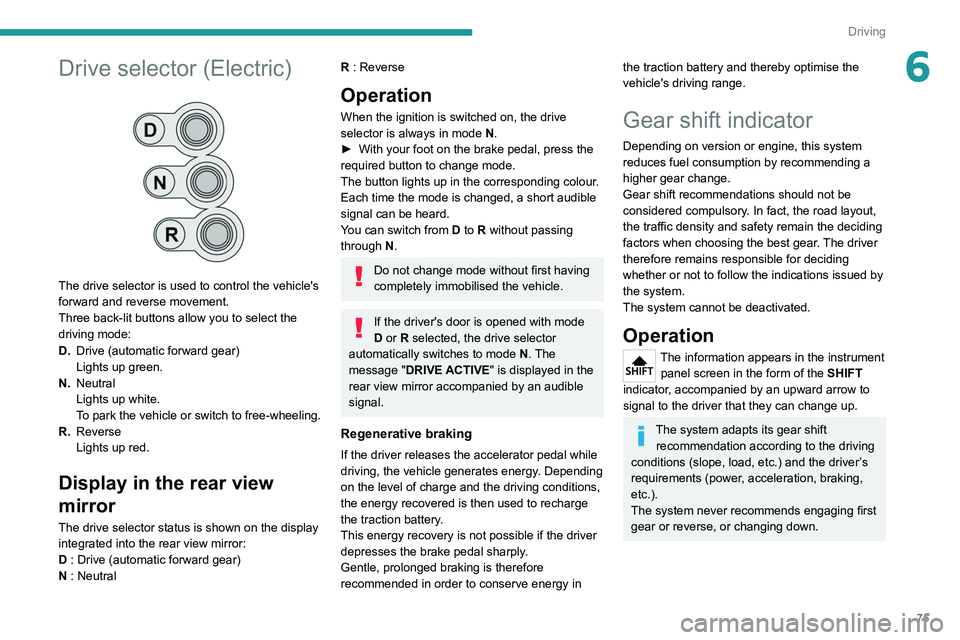
The drive selector is used to control the vehicle's
forward and reverse movement.
Three back-lit buttons allow you to select the
driving mode:
D.Drive (automatic forward gear)
Lights up green.
N. Neutral
Lights up white.
To park the vehicle or switch to free-wheeling.
R. Reverse
Lights up red.
Display in the rear view
mirror
The drive selector status is shown on the display
integrated into the rear view mirror:
D : Drive (automatic forward gear)
N : Neutral
R : Reverse
Operation
When the ignition is switched on, the drive
selector is always in mode N.
►
With your foot on the brake pedal, press the
required button to change mode.
The button lights up in the corresponding colour
.
Each time the mode is changed, a short audible
signal can be heard.
You can switch from D to R without passing
through N.
Do not change mode without first having
completely immobilised the vehicle.
If the driver's door is opened with mode
D or R selected, the drive selector
automatically switches to mode N. The
message "DRIVE ACTIVE" is displayed in the
rear view mirror accompanied by an audible
signal.
Regenerative braking
If the driver releases the accelerator pedal while
driving, the vehicle generates energy. Depending
on the level of charge and the driving conditions,
the energy recovered is then used to recharge
the traction battery.
This energy recovery is not possible if the driver
depresses the brake pedal sharply.
Gentle, prolonged braking is therefore
recommended in order to conserve energy in
the traction battery and thereby optimise the
vehicle's driving range.
Gear shift indicator
Depending on version or engine, this system
reduces fuel consumption by recommending a
higher gear change.
Gear shift recommendations should not be
considered compulsory. In fact, the road layout,
the traffic density and safety remain the deciding
factors when choosing the best gear. The driver
therefore remains responsible for deciding
whether or not to follow the indications issued by
the system.
The system cannot be deactivated.
Operation
The information appears in the instrument panel screen in the form of the SHIFT
indicator, accompanied by an upward arrow to
signal to the driver that they can change up.
The system adapts its gear shift recommendation according to the driving
conditions (slope, load, etc.) and the driver’s
requirements (power, acceleration, braking,
etc.).
The system never recommends engaging first
gear or reverse, or changing down.
Page 103 of 212
101
Practical information
7Charging the traction
battery (Electric)
To charge, connect the vehicle to a domestic
charging unit or a fast public charger (superfast
charging).
For a full charge, follow the desired charging
procedure without interrupting it, until it ends
automatically.
To stop charging at any time, press the locking
button on the remote control for 5 seconds
and remove the charging nozzle. For superfast
charging, also refer to the fast public charger.
The display of information linked to the charging
is integrated into the rear view mirror. For more
information on the Display integrated into the
rear view mirror , refer to the corresponding
section.
As a safety measure, the engine will not start if the charging cable is plugged into
the vehicle's charging connector.
Cooling the traction battery
The cooling fan in the engine
compartment comes on during charging to
cool the on-board charger and the traction
battery.
Balancing the traction battery voltage
After carrying out a full charge (100%)
at least once per week, we recommend not
using the vehicle for about 4 hours.
This time allows the voltage to balance across
all of the traction battery's cells (ensuring a
level voltage across all of its cells).
This process helps keep the traction battery in
good condition and aids in the calculation of
its charging level.
Completely discharged traction
battery
T
o preserve the lifespan of the traction battery
and avoid damaging it, make sure that it is
never completely discharged (0%).
When the charge level drops to 15%, the
message "LOW POWER MODE" appears
on the display integrated into the rear view
mirror. If this message appears while driving,
avoid heavy acceleration and charge the
vehicle as soon as possible.
Long-term parking
Before parking the vehicle for an
extended period, carry out a full charge of the
traction battery.
Park the vehicle in a place where the
temperature will be between 0°C and 45°C
(parking in a place which will experience
extreme temperatures can damage the
traction battery).
Disconnect the cable from the (-) terminal of
the 12
V accessory battery.
Check the level of charge in the traction
battery periodically and charge it if necessary.
When parking the vehicle for more than one
month, keep the level of charge above 50%.
When parking the vehicle for a very long
period, charge the vehicle every 2 months.
Do not leave the charging cable connected.
Lack of use of the traction battery temporarily
affects its performance. At the end of the
parking period, carry out several charge/
discharge cycles to restore the normal
operation of the traction battery.
Precautions
Our electric vehicles have been developed in
accordance with the recommendations on the
maximum limits for electromagnetic fields, as
issued by the International Commission on Non-
Ionizing Radiation Protection
(ICNIRP - 1998
Guidelines).
Wearers of pacemakers or equivalent
devices
Ask your doctor about what precautions you should take, or ask the manufacturer
of your implanted electro-medical device about
whether its operation is guaranteed in an
environment which complies with the ICNIRP
recommendations.
If in doubt
Accelerated charging: do not remain
inside or near the vehicle, or near the
charging cable or charging unit, even for a
short time.
Page 104 of 212
102
Practical information
Superfast charging: do not use the system
yourself and avoid approaching public fast
charging points. Leave the area and ask a
third party to recharge the vehicle.
Before charging
Accelerated charging
Depending on the context:
►
Have a professional check that the
electrical system to be used complies with
applicable standards and is compatible with
the vehicle.
►
Have an accelerated charging unit which
is compatible with the vehicle installed by a
professional.
Favour the use of the cable supplied with the
vehicle or as an accessory
.
For more information, contact a PEUGEOT
dealer or a qualified workshop.
Superfast charging
Check that the fast public charging
station and its charging cable are compatible
with the vehicle.
During charging
Never work under the bonnet:
– Some areas remain very hot, even an
hour after charging ends - risk of burns!
–
The fan may start at any time - risk of cuts
or strangulation!
The performance of the traction battery varies depending on the outside
temperature and the temperature inside the
traction battery itself.
During charging, the outside temperature
must ideally be between 0°C and 45°C.
Charging is not possible when the
temperature inside the traction battery is
below -5°C or above 55°C. Charging time
may be longer if the temperature is below
0°C.
In cold weather, immediately connect the
vehicle after switching off the ignition.
Significant variations in the level of
incoming electric current may stop the
charging process.
►
Disconnect the charging cable and wait for
the level of electric current to return to normal.
After charging
Check that the charging flap is closed.
Connection
► Switch the ignition off.
► Open the charging flap, remove the
protective covers and check that there are no
foreign bodies on the charging connector
.
Accelerated charging, mode 3
► Connect the charging cable to the charging
unit (if applicable).
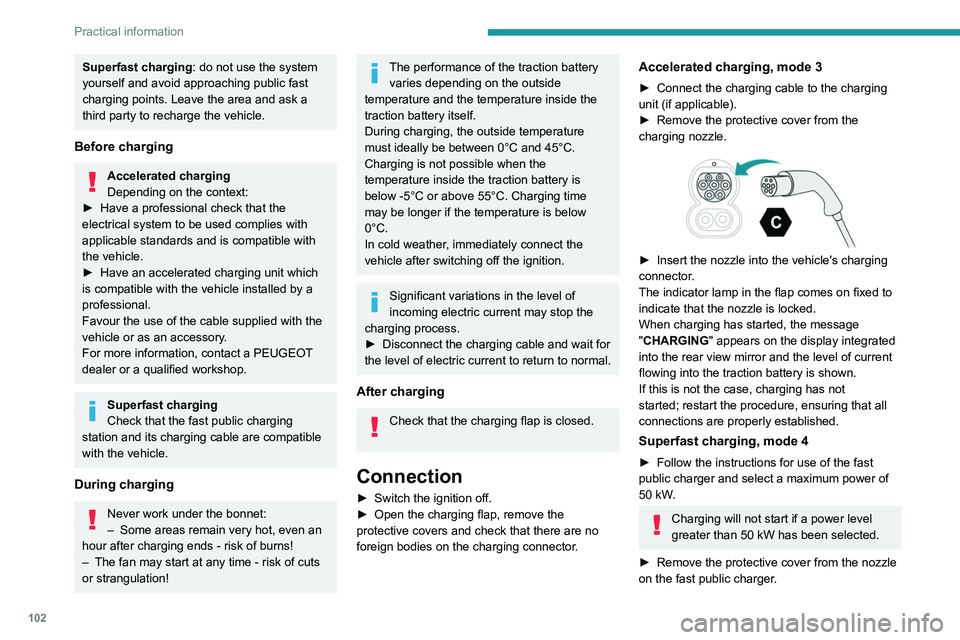
►
Remove the protective cover from the
charging nozzle.
► Insert the nozzle into the vehicle's charging
connector .
The indicator lamp in the flap comes on fixed to
indicate that the nozzle is locked.
When charging has started, the message
"CHARGING" appears on the display integrated
into the rear view mirror and the level of current
flowing into the traction battery is shown.
If this is not the case, charging has not
started; restart the procedure, ensuring that all
connections are properly established.
Superfast charging, mode 4
► Follow the instructions for use of the fast
public charger and select a maximum power of
50 kW
.
Charging will not start if a power level
greater than 50 kW has been selected.
►
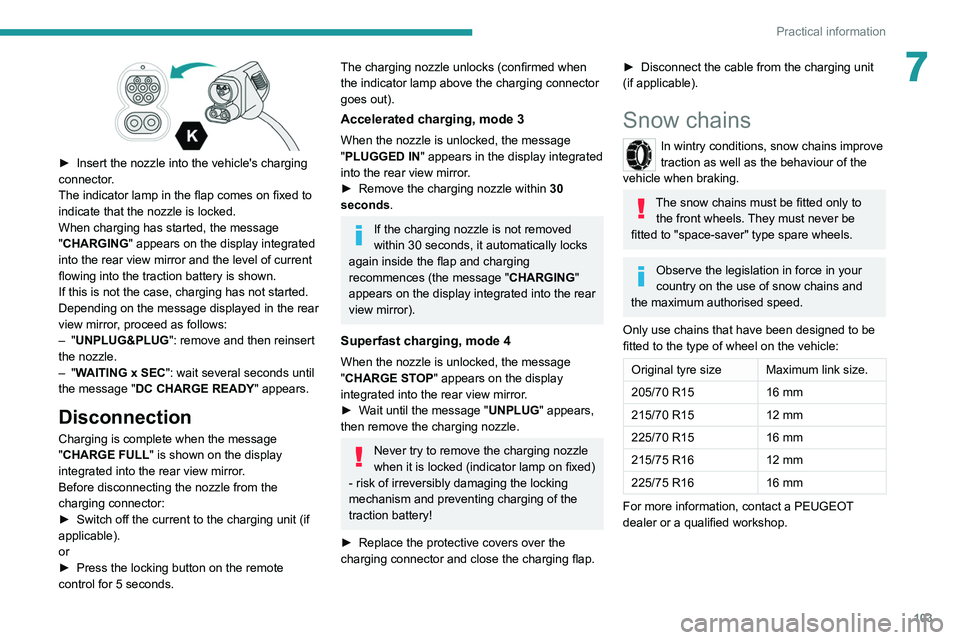
Remove the protective cover from the nozzle
on the fast public charger
.
Page 105 of 212
103
Practical information
7
► Insert the nozzle into the vehicle's charging
connector .
The indicator lamp in the flap comes on fixed to
indicate that the nozzle is locked.
When charging has started, the message
"CHARGING" appears on the display integrated
into the rear view mirror and the level of current
flowing into the traction battery is shown.
If this is not the case, charging has not started.
Depending on the message displayed in the rear
view mirror, proceed as follows:
–
"UNPLUG&PLUG": remove and then reinsert
the nozzle.
–
"WAITING x SEC": wait several seconds until
the message "DC CHARGE READY " appears.
Disconnection
Charging is complete when the message
"CHARGE FULL" is shown on the display
integrated into the rear view mirror.
Before disconnecting the nozzle from the
charging connector:
►
Switch off the current to the charging unit (if
applicable).
or
►
Press the locking button on the remote
control for 5 seconds.
The charging nozzle unlocks (confirmed when
the indicator lamp above the charging connector
goes out).
Accelerated charging, mode 3
When the nozzle is unlocked, the message
"PLUGGED IN" appears in the display integrated
into the rear view mirror.
►
Remove the charging nozzle within 30
seconds
.
If the charging nozzle is not removed
within 30 seconds, it automatically locks
again inside the flap and charging
recommences (the message " CHARGING"
appears on the display integrated into the rear
view mirror).
Superfast charging, mode 4
When the nozzle is unlocked, the message
"CHARGE STOP" appears on the display
integrated into the rear view mirror.
►
W
ait until the message "UNPLUG" appears,
then remove the charging nozzle.
Never try to remove the charging nozzle
when it is locked (indicator lamp on fixed)
- risk of irreversibly damaging the locking
mechanism and preventing charging of the
traction battery!
►
Replace the protective covers over the
charging connector and close the charging flap.
► Disconnect the cable from the charging unit
(if applicable).
Snow chains
In wintry conditions, snow chains improve
traction as well as the behaviour of the
vehicle when braking.
The snow chains must be fitted only to the front wheels. They must never be
fitted to "space-saver" type spare wheels.
Observe the legislation in force in your
country on the use of snow chains and
the maximum authorised speed.
Only use chains that have been designed to be
fitted to the type of wheel on the vehicle:
Original tyre size Maximum link size.
205/70 R15 16 mm
215/70 R15 12 mm
225/70 R15 16 mm
215/75 R16 12 mm
225/75 R16 16 mm
For more information, contact a PEUGEOT
dealer or a qualified workshop.
Page 194 of 212
192
Alphabetical index
K
Key with remote control 43
Kit, hands-free
137, 177–178
L
Lane Departure Warning System
(LDWS)
87–88
Level, AdBlue®
83
Level, brake fluid
82
Level, engine coolant
14, 82
Level, engine oil
81
Level, heating system fluid
83
Level, power steering fluid
82
Levels
110–111
Levels and checks
109–111
Lighting dimmer
8
Low fuel level
68
Lumbar
18
M
Mains socket (domestic network) 71
Maintenance (advice)
70, 88
Maintenance, routine
53, 83
Manoeuvring aids (recommendations)
52
Mat
53
Menu
15, 171–172, 146, 149, 151
Menus (audio)
171–172
Mirror, rear view 8
Mirrors, door
22, 61
Motor, electric
81, 109
O
Oil change 81
Oil consumption
81
OIl, engine
109–111
On-board tools
119–124
Opening the bonnet
79
Overhead storage
43–46
P
Pads, brake 85
Paint
89
Parking brake
46, 85
Pedestrian horn (Electric)
29, 42
Player, USB
163–164, 172–173
Port, USB
163–164, 172–173
Power indicator (Electric)
6
Pressures, tyres
85
Pre-tensioning seat belts
33
Protecting children
62–65
Public fast charging station
71
R
Radar (warnings) 53
Radio
135, 143, 145
Radio, digital (Digital Audio
Broadcasting - DAB)
144
Range, AdBlue®
14–15, 83
Recharging the traction battery
(Electric)
69, 101–103
Recovery
104
Regeneration of the particle filter
84
Remote control
13
Replacing bulbs
97
Replacing fuses
101
Replacing the air filter
84
Replacing the oil filter
84
Replacing the passenger compartment filter
84
Resetting the service indicator
13
Reversing camera
53
S
Safety, children 62–65
Screen, colour
143
Screen menu map
171–172, 146, 149, 151
Screenwash fluid
110–111
SCR (Selective Catalytic Reduction)
86
Seat belts
60–61
Seat belts, rear
33
Seats, heated
19
Seats, rear
36