2021 PEUGEOT BOXER brake light
[x] Cancel search: brake lightPage 76 of 212

74
Driving
Parking brake
Application
► Apply the parking brake to immobilise the
vehicle.
►
Check that the parking brake is correctly
applied before leaving the vehicle.
Apply the parking brake only when the
vehicle is stationary.
When parking on a slope, turn your
wheels towards the kerb and pull the
parking brake lever up.
There is no advantage in engaging a gear
after parking the vehicle, particularly if the
vehicle is loaded.
In the event of a failure of the
hydraulic braking system
While driving , to avoid any accidental
movement of the vehicle, use the parking
brake while depressing the brake pedal.
In this exceptional circumstance, it is
advisable to pull the parking brake up gently
so as not to block the rear wheels - risk of
skidding!
Release
► Pull the lever up gently and press the button
to release the parking brake.
When the vehicle is being driven, this
warning lamp coming on indicates that
the parking brake is still applied or has not been
fully released.
Manual gearbox
To change gear easily, always fully depress the
clutch pedal.
To prevent the mat from becoming caught under
the pedal:
–
ensure that the mat is positioned correctly
,
–
never fit one mat on top of another
.
Avoid leaving your hand on the gear knob as
the force exerted, even if slight, may wear the
internal components of the gearbox over time.
Engaging reverse gear
► Lift the ring under the knob to engage reverse
gear .
Never engage it until the vehicle has
come to a complete stop.
The movement must be done slowly to reduce
the noise when engaging reverse gear.
If fitted to the vehicle, the parking
sensors are activated when reverse gear
is engaged; an audible signal sounds.
For more information on the Parking
sensors, refer to the corresponding section.
Page 77 of 212
75
Driving
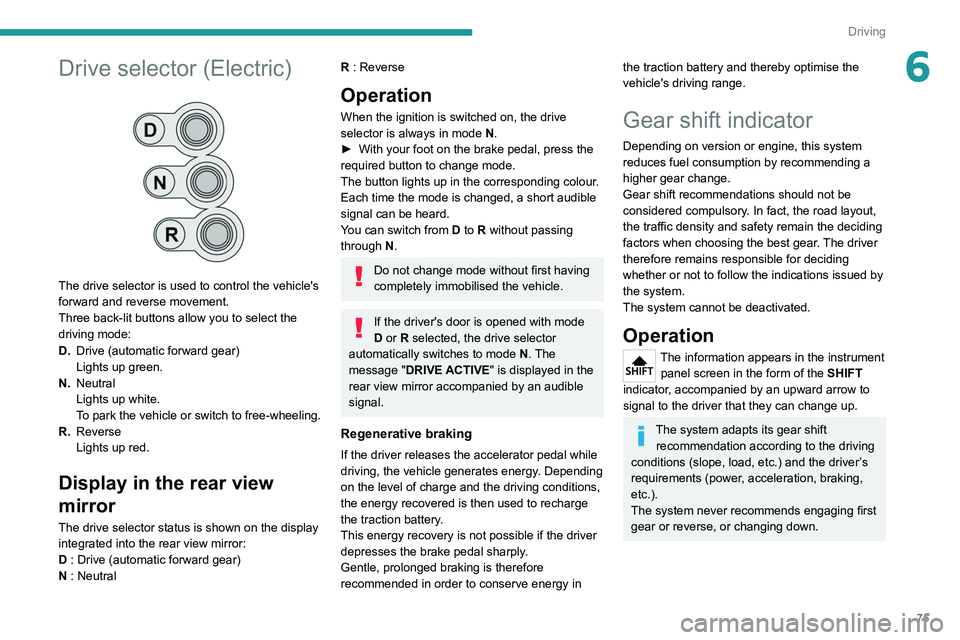
6Drive selector (Electric)
The drive selector is used to control the vehicle's
forward and reverse movement.
Three back-lit buttons allow you to select the
driving mode:
D.Drive (automatic forward gear)
Lights up green.
N. Neutral
Lights up white.
To park the vehicle or switch to free-wheeling.
R. Reverse
Lights up red.
Display in the rear view
mirror
The drive selector status is shown on the display
integrated into the rear view mirror:
D : Drive (automatic forward gear)
N : Neutral
R : Reverse
Operation
When the ignition is switched on, the drive
selector is always in mode N.
►
With your foot on the brake pedal, press the
required button to change mode.
The button lights up in the corresponding colour
.
Each time the mode is changed, a short audible
signal can be heard.
You can switch from D to R without passing
through N.
Do not change mode without first having
completely immobilised the vehicle.
If the driver's door is opened with mode
D or R selected, the drive selector
automatically switches to mode N. The
message "DRIVE ACTIVE" is displayed in the
rear view mirror accompanied by an audible
signal.
Regenerative braking
If the driver releases the accelerator pedal while
driving, the vehicle generates energy. Depending
on the level of charge and the driving conditions,
the energy recovered is then used to recharge
the traction battery.
This energy recovery is not possible if the driver
depresses the brake pedal sharply.
Gentle, prolonged braking is therefore
recommended in order to conserve energy in
the traction battery and thereby optimise the
vehicle's driving range.
Gear shift indicator
Depending on version or engine, this system
reduces fuel consumption by recommending a
higher gear change.
Gear shift recommendations should not be
considered compulsory. In fact, the road layout,
the traffic density and safety remain the deciding
factors when choosing the best gear. The driver
therefore remains responsible for deciding
whether or not to follow the indications issued by
the system.
The system cannot be deactivated.
Operation
The information appears in the instrument panel screen in the form of the SHIFT
indicator, accompanied by an upward arrow to
signal to the driver that they can change up.
The system adapts its gear shift recommendation according to the driving
conditions (slope, load, etc.) and the driver’s
requirements (power, acceleration, braking,
etc.).
The system never recommends engaging first
gear or reverse, or changing down.
Page 80 of 212

78
Driving
Operation
With the brake pedal and clutch pedal pressed,
from the time you release the brake pedal,
without using the parking brake, you have
approximately 2 seconds to move off before the
vehicle starts to roll back.
During the moving off phase, the function is
deactivated automatically, gradually releasing
the braking pressure. During this phase, you
may hear the typical mechanical brake release
noise, signalling the imminent movement of the
vehicle.
Do not leave the vehicle while it is being
held temporarily by hill start assist.
If you need to get out of the vehicle with
the engine running, apply the parking brake
manually then ensure that the parking brake
indicator lamp is on. Hill start assist is deactivated in the following
situations:
–
when the clutch pedal is released,
–
when the parking brake is applied,
–
when the engine is switched off,
–
if the engine stalls.
Malfunction
In the event of a malfunction, this warning
lamp lights up on the instrument panel,
accompanied by the display of a message and
an audible signal.
Have it checked by a PEUGEOT dealer or a
qualified workshop.
Tyre under-inflation detection
System which automatically checks the
pressures of the tyres while driving.
The system continuously monitors the pressures
of the four tyres, as soon as the vehicle is
moving.
A pressure sensor is located in the valve of each
tyre (except the spare wheel).
The system triggers an alert as soon as it
detects a drop in the inflation pressure of one or
more tyres.
The under-inflation detection system
does not replace the need for vigilance
on the part of the driver.
This system does not avoid the need to
regularly check the tyre pressures (including
the spare wheel) as well as before a long
journey.
Driving with under-inflated tyres, particularly
in adverse conditions (heavy load, high
speed, long journey):
–
worsens road-holding,
–
lengthens braking distances,
–
causes premature wear of the tyres,
–
increases energy consumption.
The inflation pressures defined for the vehicle can be found on the tyre pressure
label.
Tyre pressures should be checked when the
tyres are "cold" (vehicle stopped for 1 hour or
after a journey of less than 6 miles (10 km) at
moderate speeds). Otherwise, add 0.3 bar to
the pressures shown on the label.
For more information on Identification
markings, including the tyre pressure label,
refer to the corresponding section.
The tyre pressure measurement unit can be configured via the MODE button: in the
"Tyre pressure" menu, select "psi/bar/kPa".
For more information on Vehicle configuration
(MODE), refer to the corresponding section.
Page 87 of 212
85
Driving
6Cruise control - Specific
recommendations
The cruise control function does not guarantee compliance with the maximum
authorised speed and the safety distance
between vehicles, the driver remains
responsible for their driving.
In the interest of public safety, only use cruise
control if the traffic conditions enable vehicles
to drive at a steady speed and maintain an
adequate safety distance.
Remain vigilant while cruise control is
activated. If you press and hold one of the
speed setting modification buttons, your
vehicle may change speed very abruptly.
When descending a steep hill , the cruise
control system cannot prevent the vehicle
from exceeding the set speed. Brake if
necessary to control the vehicle speed.
On steep climbs or when towing, the set
speed may not be reached or maintained.
Exceeding the programmed speed
setting
You can temporarily exceed the speed
setting by pressing the accelerator pedal (the
programmed speed flashes).
To return to the speed setting, release the
accelerator pedal (when the set speed is
reached again, the displayed speed stops
flashing).
Operating limits
Never use the system in the following
situations:
–
In an urban area with the risk of
pedestrians crossing the road.
–
In heavy traffic.
–
On winding or steep roads.
–
On slippery or flooded roads.
–
In poor weather conditions.
–
In the event of restricted visibility for the
driver
.
–
Driving on a speed circuit.
–
Driving on a rolling road.
–
When using a ‘space-saver
’ type spare
wheel.
–
When using snow chains, non-slip covers
or studded tyres.
Cruise control
For more information, refer to the
General recommendations on the use
of driving and manoeuvring aids and the
Cruise control - particular
recommendations.
System which automatically maintains the
speed of the vehicle at the cruise setting
programmed by the driver, without using the
accelerator pedal. To be programmed or activated, the speed of the
vehicle must be above 19 mph (30 km/h), with at
least 2
nd gear engaged.
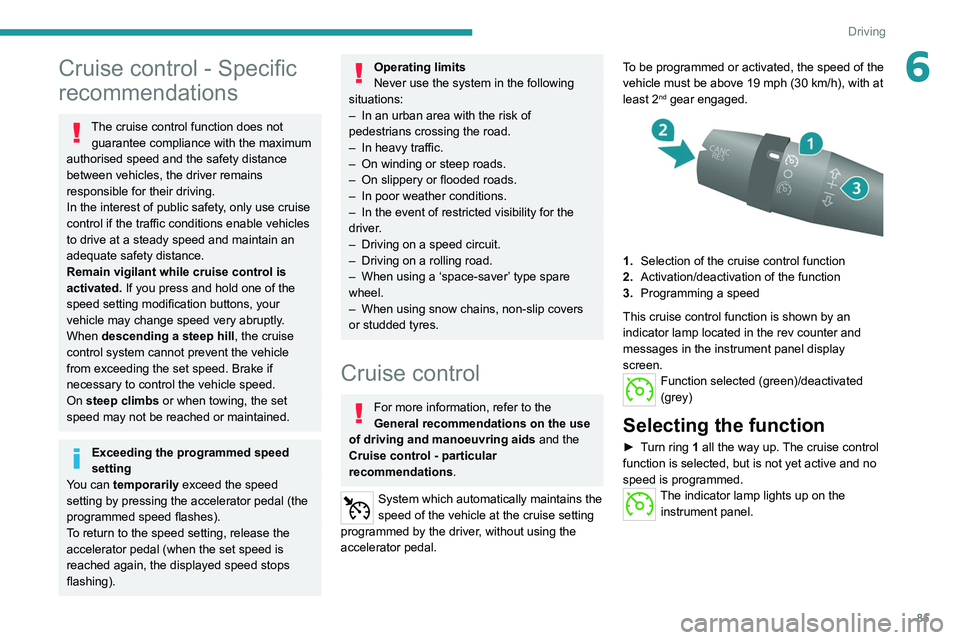
1.
Selection of the cruise control function
2. Activation/deactivation of the function
3. Programming a speed
This cruise control function is shown by an
indicator lamp located in the rev counter and
messages in the instrument panel display
screen.
Function selected (green)/deactivated
(grey)
Selecting the function
► Turn ring 1 all the way up. The cruise control
function is selected, but is not yet active and no
speed is programmed.
The indicator lamp lights up on the instrument panel.
Page 92 of 212
90
Driving
The trailer detection mode is set via the
MODE button.
For more information on Vehicle configuration
(MODE), refer to the corresponding section.
Two modes are available:
–
Max
: for a trailer length greater than 9 metres.
–
Auto
: for an automatic detection of the trailer
length (3 m, 6 m or 9 m).
In Auto mode, an icon appears in the instrument
panel indicating the length detected by the
system.
It may be necessary to make a 90° turn
to allow the system to detect the length
of the trailer.
When a trailer is detected, vehicle detection
when reversing is deactivated.
Operating conditions
– All vehicles are moving in the same direction
and in adjacent lanes.
–
The speed of your vehicle is 6 mph (10 km/h)
minimum.
–
When you overtake a vehicle, the speed
difference is less than 16
mph (25 km/h).
–
When another vehicle overtakes you, the
speed difference is less than 31
mph (50 km/h).
Active Safety Brake with Collision Risk Alert and
Intelligent emergency
braking assistance
For more information, refer to the
General recommendations on the use
of driving and manoeuvring aids .
This system:
–
warns the driver that their vehicle is at risk of
collision with the vehicle in front.
–
reduces the vehicle's speed to avoid a
collision or limit its severity
.
This system is comprised of three functions:
–
Collision
Risk Alert.
–
Intelligent emergency braking assistance
(iEBA).
–
Active Safety Brake (automatic emergency
braking).
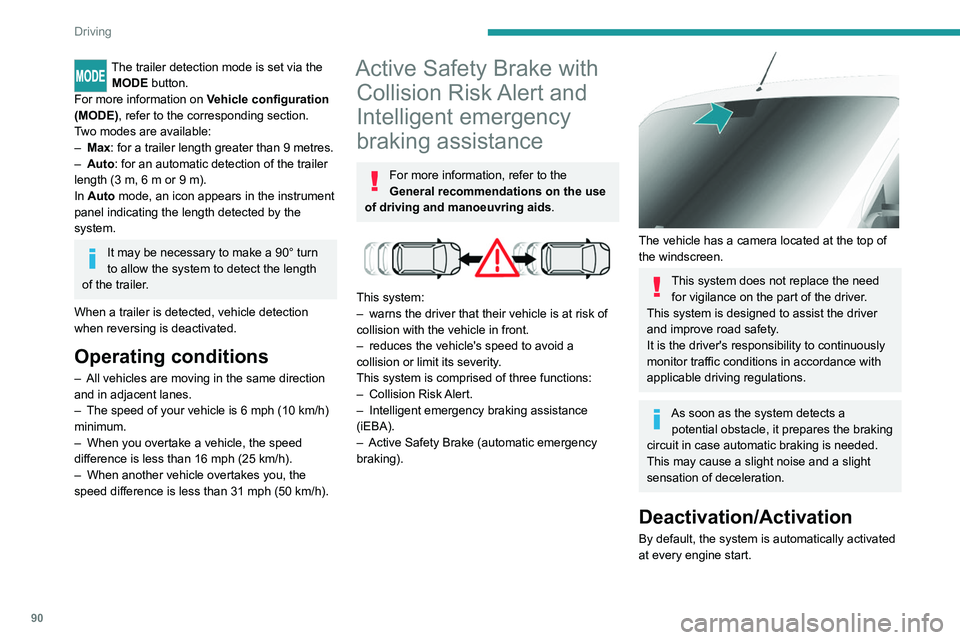
The vehicle has a camera located at the top of
the windscreen.
This system does not replace the need for vigilance on the part of the driver.
This system is designed to assist the driver
and improve road safety.
It is the driver's responsibility to continuously
monitor traffic conditions in accordance with
applicable driving regulations.
As soon as the system detects a potential obstacle, it prepares the braking
circuit in case automatic braking is needed.
This may cause a slight noise and a slight
sensation of deceleration.
Deactivation/Activation
By default, the system is automatically activated
at every engine start.
Page 95 of 212

93
Driving
6This warning lamp flashes (for approximately 10 seconds) as soon as
the function applies the vehicle’s brakes.
With a manual gearbox, in the event of automatic
emergency braking bringing the vehicle to a
complete stop, the engine may stall.
The driver can maintain control of the vehicle at any time by firmly turning the
steering wheel and/or firmly depressing the
accelerator pedal.
The brake pedal may vibrate slightly while the function is operating.
If the vehicle comes to a complete stop,
automatic braking is maintained for 1 to 2
seconds.
Malfunction
In the event of a system malfunction, this
warning lamp comes on on the instrument
panel, accompanied by an onscreen message
and an audible signal.
Contact a PEUGEOT dealer or a qualified
workshop to have the system checked.
If these warning lamps come on
after the engine has been switched
off and then restarted, contact a PEUGEOT
dealer or a qualified workshop to have the
system checked.
Audible rear parking sensors
For more information, refer to the
General recommendations on the use
of driving and manoeuvring aids .
If fitted to your vehicle, the system consists of 4
proximity sensors installed in the rear bumper.
They detect any obstacle, e.g. person, vehicle,
tree, barrier, which is behind the vehicle while
manoeuvring.
Certain types of obstacle detected at the
beginning of the manoeuvre will no longer be
detected at the end of manoeuvre if they are
located in the blind spots between and under the
sensors. Examples: stake, roadworks cone or
pavement post.
The rear parking sensors may be associated
with the reversing camera.
Switching on
► Engage reverse gear with the gear lever .
The proximity information is indicated by an
audible signal which becomes more rapid as the
vehicle approaches the obstacle.
When the distance between the rear of
the vehicle and the obstacle is less than
approximately 30 centimetres, the audible signal
becomes continuous.
Switching off
► Disengage reverse gear and shift to neutral.
Malfunction
In the event of a malfunction, this warning
lamp lights up on the instrument panel.
Consult a PEUGEOT dealer or a qualified
workshop.
Page 121 of 212
11 9
In the event of a breakdown
8connected to the compressor and the sealant will
not be injected.
If the tyre needs to be deflated, connect hose
I to the tyre valve and press the yellow button
located in the centre of the compressor switch.
Replacing the cartridge
To replace the sealant cartridge, proceed as
follows:
►
Disconnect the hose
I
.
►
T
urn the cartridge to be replaced anti-
clockwise and lift it.
►
Insert the new cartridge and turn it clockwise,
►
Reconnect the hose
I
and connect pipe B to
its location.
The cartridge contains ethylene glycol, which is harmful if swallowed and irritates
the eyes.
It must be kept out of the reach of children.
After use, do not discard the cartridge in standard waste, take it to a
PEUGEOT dealer or an authorised waste
disposal site.
Spare wheel
Parking
► Immobilise the vehicle where it does not
obstruct traffic: the ground must be level, stable
and non-slippery
.
►
In case of sloping or deformed road, place an
object under the wheels to act as a chock.
►
With a manual gearbox, engage first gear
then switch off the ignition to lock the wheels.
►
Apply the parking brake and check that the
indicator lamp lights up on the instrument panel.
►
Y
ou must ensure that the occupants have
exited the vehicle and have moved to a safe
place.
►
Put on your safety vest and indicate that
the vehicle is immobilised using the measures
required by law in the country where you are
driving (warning triangle, hazard warning lamps,
etc.).
►
T
ake out the tools.
Special feature with pneumatic
suspension
If fitted to the vehicle, activate the vehicle lifting
mode before lifting the vehicle with a jack.
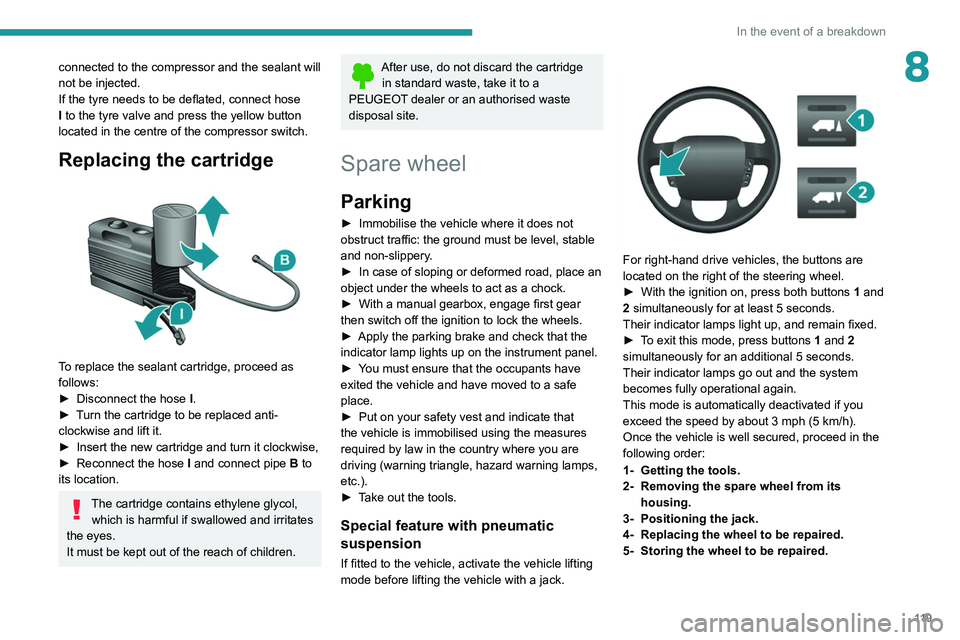
For right-hand drive vehicles, the buttons are
located on the right of the steering wheel.
►
With the ignition on, press both buttons 1
and
2 simultaneously for at least 5 seconds.
Their indicator lamps light up, and remain fixed.
►
T
o exit this mode, press buttons 1 and 2
simultaneously for an additional 5 seconds.
Their indicator lamps go out and the system
becomes fully operational again.
This mode is automatically deactivated if you
exceed the speed by about 3 mph (5 km/h).
Once the vehicle is well secured, proceed in the
following order:
1- Getting the tools.
2- Removing the spare wheel from its housing.
3- Positioning the jack.
4- Replacing the wheel to be repaired.
5- Storing the wheel to be repaired.
Page 161 of 212
159
Special features
10Dimensions
This adaptation is available only on L2 single
cab; refer to the table below for the specifications
of the tipper truck.
Tipper truck (in mm)
Useable length3,200
Overall length 3,248
Useable width 2,000
Overall width 2,100
Height of boards 350
Weight of the conversion (in
kg) 550
For the L2 chassis cab specifications,
refer to the Dimensions section of the
platform version.
Weights and towed loads
(kg)
To have a towing device fitted, contact a PEUGEOT dealer or qualified workshop.
The braked trailer weight with load transfer can
be increased, provided that the equivalent of this
load is removed from the vehicle so as not to
exceed the GTW. Warning! Towing using a lightly
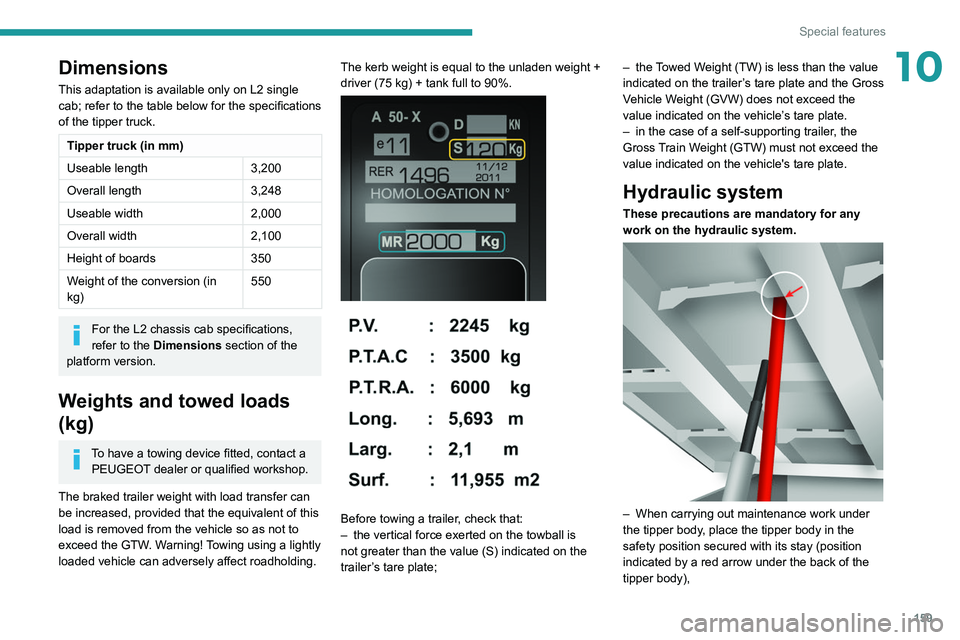
loaded vehicle can adversely affect roadholding. The kerb weight is equal to the unladen weight +
driver (75 kg) + tank full to 90%.
Before towing a trailer, check that:
–
the vertical force exerted on the towball is
not greater than the value (S) indicated on the
trailer
’s tare plate; –
the
Towed Weight (TW) is less than the value
indicated on the trailer’s tare plate and the Gross
Vehicle Weight (GVW) does not exceed the
value indicated on the vehicle’s tare plate.
–
in the case of a self-supporting trailer
, the
Gross Train Weight (GTW) must not exceed the
value indicated on the vehicle's tare plate.
Hydraulic system
These precautions are mandatory for any
work on the hydraulic system.
– When carrying out maintenance work under
the tipper body , place the tipper body in the
safety position secured with its stay (position
indicated by a red arrow under the back of the
tipper body),