2021 PEUGEOT BOXER air conditioning
[x] Cancel search: air conditioningPage 40 of 212
38
Ease of use and comfort
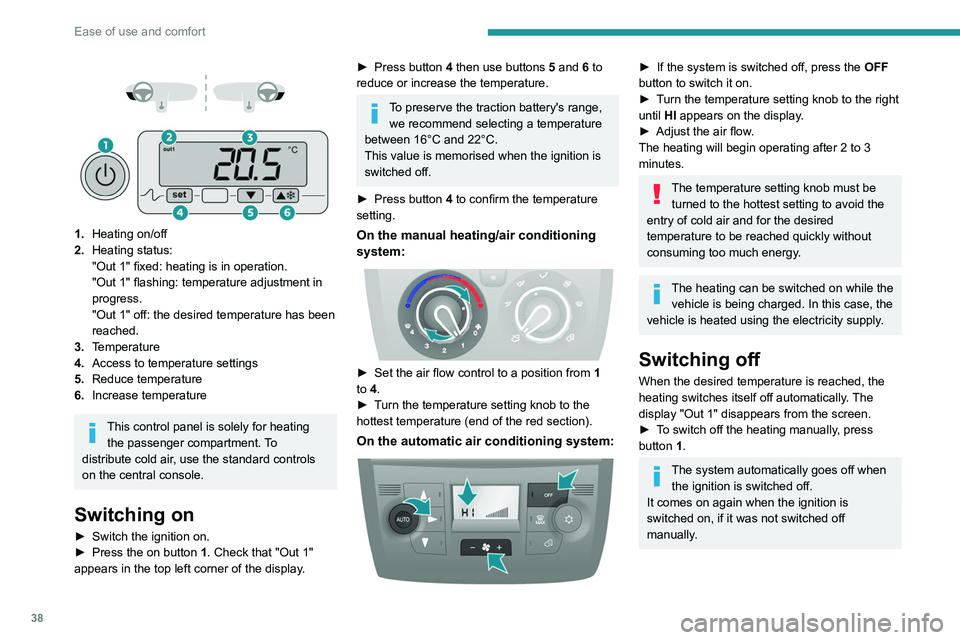
1. Heating on/off
2. Heating status:
"Out 1" fixed: heating is in operation.
"Out 1" flashing: temperature adjustment in
progress.
"Out 1" off: the desired temperature has been
reached.
3. Temperature
4. Access to temperature settings
5. Reduce temperature
6. Increase temperature
This control panel is solely for heating
the passenger compartment. To
distribute cold air, use the standard controls
on the central console.
Switching on
► Switch the ignition on.
► Press the on button 1. Check that "Out 1"
appears in the top left corner of the display.
► Press button 4 then use buttons 5 and 6 to
reduce or increase the temperature.
To preserve the traction battery's range, we recommend selecting a temperature
between 16°C and 22°C.
This value is memorised when the ignition is
switched off.
►
Press button
4 to confirm the temperature
setting.
On the manual heating/air conditioning
system:
► Set the air flow control to a position from 1
to 4.
►
T
urn the temperature setting knob to the
hottest temperature (end of the red section).
On the automatic air conditioning system:
► If the system is switched off, press the OFF
button to switch it on.
►
T
urn the temperature setting knob to the right
until HI appears on the display.
►
Adjust the air flow
.
The heating will begin operating after 2 to 3
minutes.
The temperature setting knob must be turned to the hottest setting to avoid the
entry of cold air and for the desired
temperature to be reached quickly without
consuming too much energy.
The heating can be switched on while the vehicle is being charged. In this case, the
vehicle is heated using the electricity supply.
Switching off
When the desired temperature is reached, the
heating switches itself off automatically. The
display "Out 1" disappears from the screen.
►
T
o switch off the heating manually, press
button 1.
The system automatically goes off when the ignition is switched off.
It comes on again when the ignition is
switched on, if it was not switched off
manually.
Page 41 of 212
39
Ease of use and comfort
3Additional rear ventilation
This system is complementary
to the standard passenger
compartment ventilation
equipment.
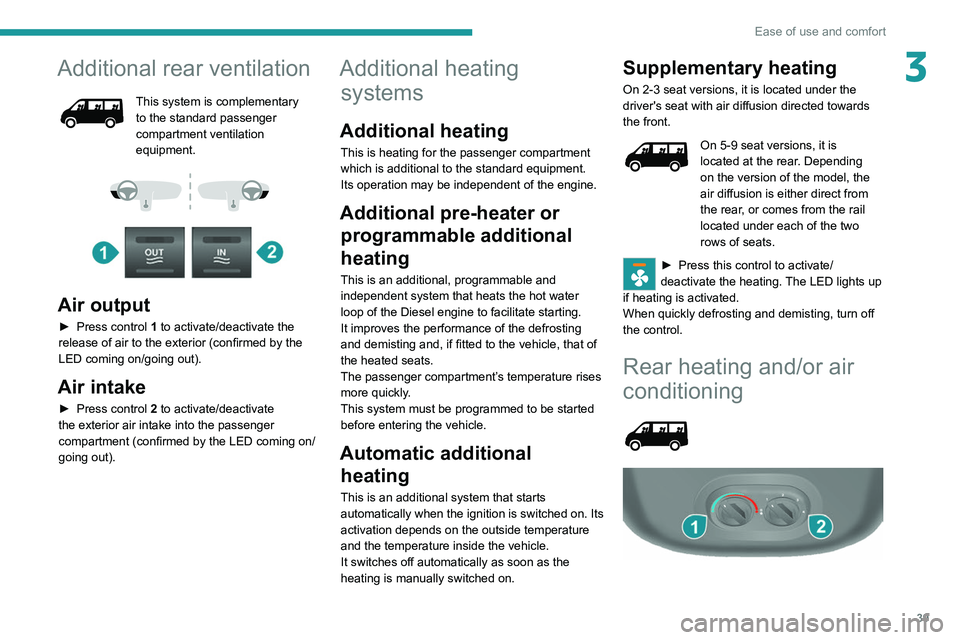
Air output
► Press control 1 to activate/deactivate the
release of air to the exterior (confirmed by the
LED coming on/going out).
Air intake
► Press control 2 to activate/deactivate
the exterior air intake into the passenger
compartment (confirmed by the LED coming on/
going out).
Additional heating systems
Additional heating
This is heating for the passenger compartment
which is additional to the standard equipment.
Its operation may be independent of the engine.
Additional pre-heater or
programmable additional
heating
This is an additional, programmable and
independent system that heats the hot water
loop of the Diesel engine to facilitate starting.
It improves the performance of the defrosting
and demisting and, if fitted to the vehicle, that of
the heated seats.
The passenger compartment’s temperature rises
more quickly.
This system must be programmed to be started
before entering the vehicle.
Automatic additional heating
This is an additional system that starts
automatically when the ignition is switched on. Its
activation depends on the outside temperature
and the temperature inside the vehicle.
It switches off automatically as soon as the
heating is manually switched on.
Supplementary heating
On 2-3 seat versions, it is located under the
driver's seat with air diffusion directed towards
the front.
On 5-9 seat versions, it is
located at the rear. Depending
on the version of the model, the
air diffusion is either direct from
the rear, or comes from the rail
located under each of the two
rows of seats.
► Press this control to activate/
deactivate the heating. The LED lights up
if heating is activated.
When quickly defrosting and demisting, turn off
the control.
Rear heating and/or air
conditioning
Page 42 of 212
40
Ease of use and comfort
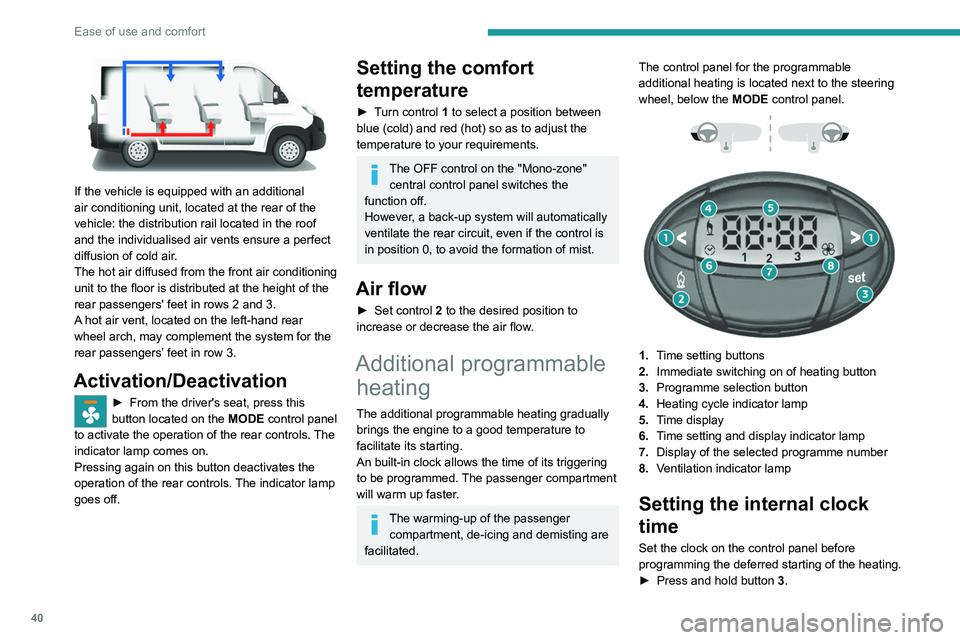
If the vehicle is equipped with an additional
air conditioning unit, located at the rear of the
vehicle: the distribution rail located in the roof
and the individualised air vents ensure a perfect
diffusion of cold air.
The hot air diffused from the front air conditioning
unit to the floor is distributed at the height of the
rear passengers' feet in rows 2 and 3.
A hot air vent, located on the left-hand rear
wheel arch, may complement the system for the
rear passengers’ feet in row 3.
Activation/Deactivation
► From the driver's seat, press this
button located on the MODE
control panel
to activate the operation of the rear controls. The
indicator lamp comes on.
Pressing again on this button deactivates the
operation of the rear controls. The indicator lamp
goes off.
Setting the comfort
temperature
► Turn control 1 to select a position between
blue (cold) and red (hot) so as to adjust the
temperature to your requirements.
The OFF control on the "Mono-zone" central control panel switches the
function off.
However, a back-up system will automatically
ventilate the rear circuit, even if the control is
in position 0, to avoid the formation of mist.
Air flow
► Set control 2 to the desired position to
increase or decrease the air flow.
Additional programmable heating
The additional programmable heating gradually
brings the engine to a good temperature to
facilitate its starting.
An built-in clock allows the time of its triggering
to be programmed. The passenger compartment
will warm up faster.
The warming-up of the passenger
compartment, de-icing and demisting are
facilitated. The control panel for the programmable
additional heating is located next to the steering
wheel, below the
MODE control panel.
1. Time setting buttons
2. Immediate switching on of heating button
3. Programme selection button
4. Heating cycle indicator lamp
5. Time display
6. Time setting and display indicator lamp
7. Display of the selected programme number
8. Ventilation indicator lamp
Setting the internal clock
time
Set the clock on the control panel before
programming the deferred starting of the heating.
►
Press and hold button 3
.
Page 44 of 212
42
Ease of use and comfort
The memorisation is confirmed by the
disappearance of the duration on the screen or
by pressing button 3 again.
Switching the heating off
In the event of a delayed start, the heating
switches off automatically at the end of the
programmed duration.
►
In the event of an immediate start, press
button
2 again to switch it off manually.
The heating cycle indicator lamp and the screen
switch off.
Have the additional heating checked at
least once a year at the beginning of
winter.
For maintenance and repairs, contact a
PEUGEOT dealer or a qualified workshop
only.
Only use approved replacement parts.
To avoid the risks of poisoning or asphyxia, the programmable heating
must not be used, even for short periods, in a
closed environment such as a garage or
workshop which is not equipped with an
exhaust gas extraction system.
The additional heating turns off when the
battery voltage is low, to allow the vehicle to
start.
The additional heating is supplied by the
vehicle fuel tank. Make sure the fuel gauge
level indicator is not in the reserve.
Always switch off the additional heating when
refuelling to avoid any risk of fire or explosion!
The temperature in the vicinity of the heater
must not exceed 120°C. A higher temperature
(e.g. in the case of oven painting) could
damage electronic circuits components.
The additional heating is equipped with a
thermal limiter which cuts off combustion in
case of engine overheating due to lack of
coolant. Check the level and top-up with fluid,
if necessary.
For more information on Checking levels,
refer to the corresponding section.
Then press the programme selection button
before turning on the heating again.
Front demist - defrost
These markings on the control panel indicate the control positions for rapid
demisting or defrosting of the windscreen and
side windows.
With manual air
conditioning
► Set the air flow and air distribution
controls to the appropriately marked
positions.
T
o make the windscreen de-icing and demisting
more efficient and faster:
►
increase the air flow setting,
► momentarily swi tch the exterior air
intake control to air recirculation.
With automatic air
conditioning
► Press this button. The indicator lamp
lights up.
The system manages the air conditioning, the air
flow and intake, the de-icing of the rear screen
and distributes air optimally to the windscreen
and front side windows.
If the vehicle is equipped with an additional
heating system, deactivate it to ensure fast and
efficient demisting / de-icing.
De-icing the rear screen
and/or door mirrors
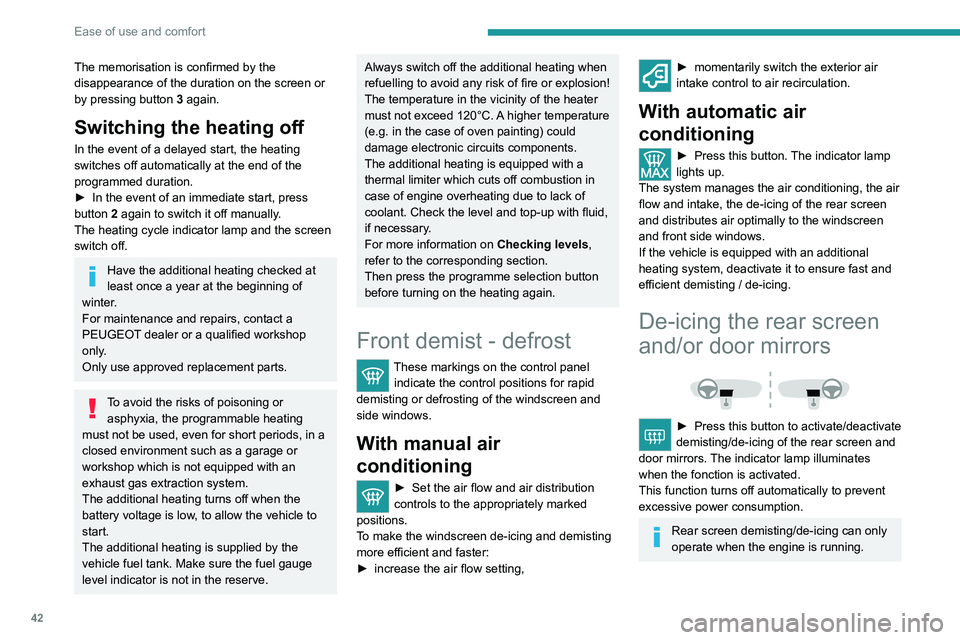
► Press this button to activate/deactivate
demisting/de-icing of the rear screen and
door mirrors.
The indicator lamp illuminates
when the fonction is activated.
This function turns off automatically to prevent
excessive power consumption.
Rear screen demisting/de-icing can only
operate when the engine is running.
Page 78 of 212

76
Driving
Stop & Start
The Stop & Start function puts the engine temporarily into standby - STOP mode - during
phases when the vehicle is stopped (red lights,
queues, etc.). The engine restarts automatically
- START mode - as soon as the driver wishes to
move off again.
Primarily designed for urban use, the function
is intended to reduce fuel consumption and
exhaust emissions as well as the noise level
when stationary.
The function does not affect the functionalities of
the vehicle, in particular the braking.
Deactivation/Reactivation
The function is activated by default when the
ignition is switched on.
To deactivate/reactivate the function:
► Press the button.
A message in the instrument panel confirms the
change of status.
When the function is deactivated, the indicator
lamp is lit; if the engine was in standby, it restarts
immediately.
To allow continuous operation of the air conditioning, deactivate the Stop & Start.
Opening the bonnet
Before doing anything under the bonnet,
deactivate the Stop & Start system to avoid
any risk of injury caused by the engine
restarting automatically.
Driving on flooded roads
Before entering into a flooded area, it is
strongly recommended that you deactivate
the Stop & Start system.
For more information on Driving
recommendations, particularly on flooded
roads, refer to the corresponding section.
Going into engine STOP
mode
With the vehicle stationary, place the gear lever
in neutral and release the clutch pedal.
This indicator lamp comes on in the instrument panel and the engine goes into
standby.
Automatic engine shutdown is only possible when the speed of the vehicle
has exceeded 6 mph (10 km/h), to avoid
repeated engine shutdowns when driving
slowly.
Never leave the vehicle without first
switching the ignition off with the key.
Never refuel with the engine in STOP
mode; you must switch off the ignition
using the key.
Special cases: STOP mode
not available
STOP mode is not activated when:
– the system is initialising,
–
the driver's door is open,
–
the driver's seat belt is not fastened,
–
the air conditioning is on,
–
the rear screen demisting is on,
–
the windscreen wipers are on fast wipe,
–
the reverse gear is engaged for the parking
manoeuvre,
–
some special conditions (battery charge,
engine temperature, particle filter regeneration,
braking assistance, exterior temperature, etc.)
Page 79 of 212
77
Driving
6where the engine is needed to assure control of
a system.
–
during intensive use of Stop & Start, it may
be deactivated to conserve starting ability; go
to a PEUGEOT
dealer to have the function
reactivated.
This indicator lamp in the instrument panel flashes for a few seconds, then
goes off.
This operation is perfectly normal.
Going into engine START
mode
With a gear engaged, the automatic restarting of
the engine is only possible by fully depressing
the clutch pedal.
This indicator lamp goes off and the engine restarts.
If, after an automatic restart in START mode, the
driver does not perform any action on the vehicle
within 3 minutes, the system stops the engine
permanently. The engine can only be restarted
with the ignition key.
Special cases: START mode
activated automatically
The START mode may be invoked automatically
in the following circumstances:
–
the vehicle is free-wheeling on a gradient,
–
the windscreen wipers are on fast wipe,
–
the air conditioning is on,
– the engine has been stopped for around 3
minutes with Stop & Start,
–
some special conditions (battery charge,
engine temperature, braking assistance, air
conditioning setting, etc.) where the engine is
needed for control of the system or vehicle.
In this case, a message appears in the
instrument panel screen, accompanied by
this indicator lamp, which flashes for a few
seconds, then goes off.
This operation is perfectly normal.
While in STOP mode with a manual
gearbox, if a gear is engaged without
fully depressing the clutch pedal, restarting
may not take place.
An indicator lamp and/or message is
displayed in the instrument panel asking
you to fully depress the clutch pedal to allow
restarting.
With the engine stopped in STOP mode,
if the driver unfastens their seat belt and
opens a front door, the engine can only be
restarted using the ignition key. There is an
audible signal, accompanied by flashing of this
indicator lamp, and the display of a message.
Malfunction
In the event of a malfunction, the Stop &
Start is deactivated and this warning lamp
comes on, accompanied by a message on the
instrument panel display.
Have it checked by a PEUGEOT dealer or a
qualified workshop.In the event of a malfunction
in STOP mode, the engine can be restarted by
fully
depressing the clutch pedal or putting the
gear lever in neutral.
Hill start assist
This system keeps your vehicle briefly stationary
(for approximately 2 seconds) when making a hill
start, while you transfer your foot from the brake
pedal to the accelerator pedal.
This system (also called HHC - Hill Hold
Control), integrated with the dynamic stability
control system, is activated in the following
conditions:
–
the vehicle must be stationary
, engine running,
foot on the brake,
–
the gradient of the road must be steeper than
5%,
–
uphill, the gearbox must be in neutral or in a
gear other than reverse,
–
downhill, reverse gear must be engaged.
The hill start assist system is a driving aid. It is not an automatic vehicle parking
function or an automatic parking brake.
Page 109 of 212
107
Practical information
7Roof-mounted carrying
systems
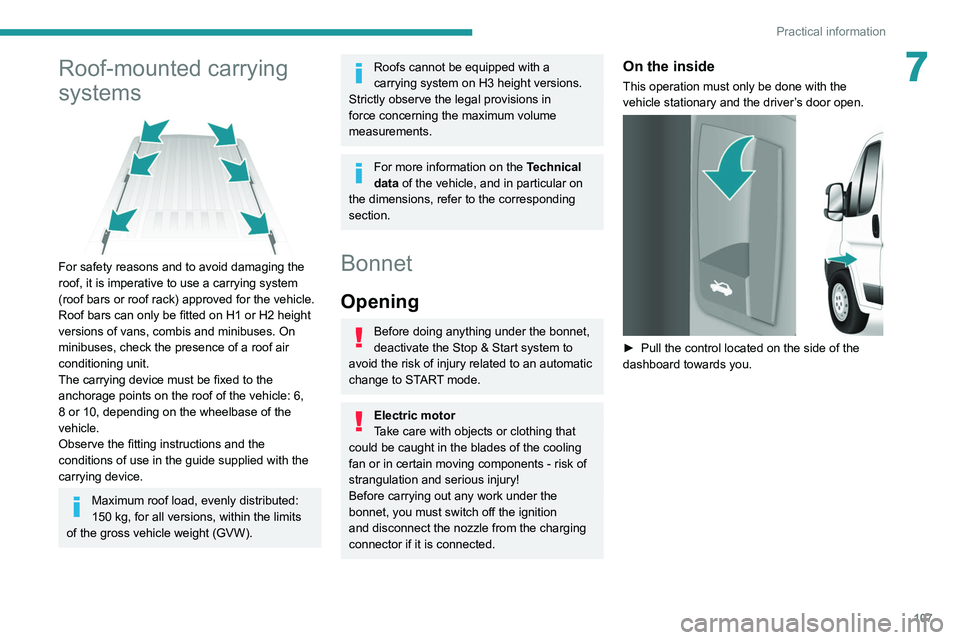
For safety reasons and to avoid damaging the
roof, it is imperative to use a carrying system
(roof bars or roof rack) approved for the vehicle.
Roof bars can only be fitted on H1 or H2 height
versions of vans, combis and minibuses. On
minibuses, check the presence of a roof air
conditioning unit.
The carrying device must be fixed to the
anchorage points on the roof of the vehicle: 6,
8 or 10, depending on the wheelbase of the
vehicle.
Observe the fitting instructions and the
conditions of use in the guide supplied with the
carrying device.
Maximum roof load, evenly distributed:
150 kg, for all versions, within the limits
of the gross vehicle weight (GVW).
Roofs cannot be equipped with a
carrying system on H3 height versions.
Strictly observe the legal provisions in
force concerning the maximum volume
measurements.
For more information on the Technical
data of the vehicle, and in particular on
the dimensions, refer to the corresponding
section.
Bonnet
Opening
Before doing anything under the bonnet,
deactivate the Stop & Start system to
avoid the risk of injury related to an automatic
change to START mode.
Electric motor
Take care with objects or clothing that
could be caught in the blades of the cooling
fan or in certain moving components - risk of
strangulation and serious injury!
Before carrying out any work under the
bonnet, you must switch off the ignition
and
disconnect the nozzle from the charging
connector
if it is connected.
On the inside
This operation must only be done with the
vehicle stationary and the driver’s door open.
► Pull the control located on the side of the
dashboard towards you.
Page 114 of 212
11 2
Practical information
For more information on the precautions
to take before any work on the 12 V
battery, refer to the corresponding section.
Versions equipped with Stop & Start are
fitted with a 12 V lead-acid battery of
specific technology and specification.
Its replacement should be carried out only by
a PEUGEOT dealer or a qualified workshop.
Air filter
Depending on the environment and the
use of the vehicle (e.g. dusty atmosphere,
city driving), change it twice as often, if
necessary .
Passenger compartment
filter
Depending on the environment and the
use of the vehicle (e.g. dusty atmosphere,
city driving), change it twice as often, if
necessary .
A clogged passenger compartment filter
can adversely affect air conditioning
system performance and generate
undesirable odours.
Oil filter
Change the oil filter each time the engine
oil is changed.
Particle filter (Diesel)
In addition to the catalytic converter, this filter
actively contributes to the preservation of
air quality by trapping the unburnt pollutant
particles. Black exhaust fumes are therefore not
emitted.
Operation
This filter, inserted into the exhaust system,
accumulates the carbonaceous particles. The
engine management computer automatically
and periodically manages the removal of
carbonaceous particles (regeneration).
The regeneration procedure is triggered
according to the amount of accumulated
particles and the conditions of use of the vehicle.
During this phase, you may notice certain
phenomena - accelerated idling, triggering of
the cooling fan, increased smoke and increased
temperature at the exhaust - which have no
impact on the operation of the vehicle and the
environment.
Following prolonged operation of the
vehicle at very low speed or at idle, you
may, in exceptional circumstances, notice the
emission of water vapour at the exhaust while
accelerating. This has no impact on the
vehicle’s behaviour and the environment.
Due to the high exhaust temperatures
caused by the normal operation of the
particle filter, it is recommended not to park
the vehicle on flammable materials (grass, dry
leaves, pine needles, etc.) to avoid any risk of
fire.
Saturation/Regeneration
If there is a risk of clogging, this warning
lamp comes on, accompanied by a
message on the instrument panel display.
This warning is due to the start of saturation of
the particle filter (exceptionally long urban driving
conditions: reduced speed, traffic jams, etc.).
In order to regenerate the filter, it is
recommended to drive as soon as possible -
when traffic conditions and regulations permit
- at a speed of at least 37 mph (60 km/h), with
an engine speed above 2,000 rpm for about
15 minutes (until the warning lamp and/or the
message disappear).
If possible, avoid switching off the engine
before the end of filter regeneration; repeated
interruptions can lead to early deterioration of the
engine oil. It is not recommended to terminate
the filter regeneration with the vehicle stationary.
Malfunction
If this alert persists, do not ignore this warning;
this indicates that a malfunction has occurred in
the exhaust system/particle filter assembly.
Have it checked by a PEUGEOT dealer or a
qualified workshop.