2021 PEUGEOT 508 start stop button
[x] Cancel search: start stop buttonPage 129 of 292

127
Driving
6Use
Activating the system (pause)
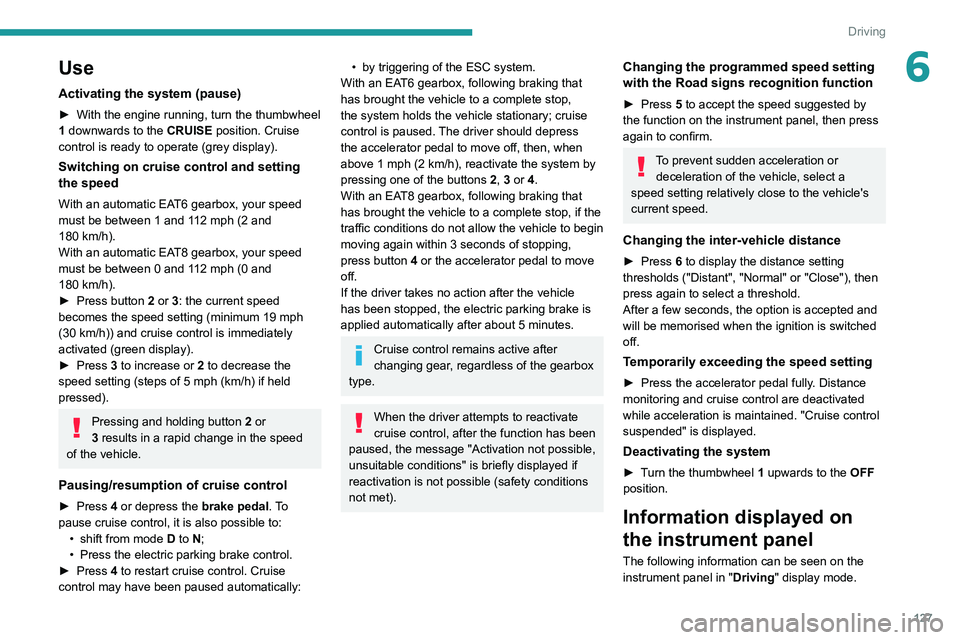
► With the engine running, turn the thumbwheel
1 downwards to the CRUISE position. Cruise
control is ready to operate (grey display).
Switching on cruise control and setting
the speed
With an automatic EAT6 gearbox, your speed
must be between 1 and 112 mph (2 and
180
km/h).
With an automatic EAT8 gearbox, your speed
must be between 0 and 112
mph (0 and
180
km/h).
►
Press button
2 or 3: the current speed
becomes the speed setting (minimum 19 mph
(30
km/h)) and cruise control is immediately
activated (green display).
►
Press
3 to increase or 2 to decrease the
speed setting (steps of 5
mph (km/h) if held
pressed).
Pressing and holding button 2 or
3 results in a rapid change in the speed
of the vehicle.
Pausing/resumption of cruise control
► Press 4 or depress the brake pedal. To
pause cruise control, it is also possible to: •
shift from mode
D to N;
•
Press the electric parking brake control.
►
Press
4 to restart cruise control. Cruise
control may have been paused automatically:
• by triggering of the ESC system.
With an EA T6 gearbox, following braking that
has brought the vehicle to a complete stop,
the system holds the vehicle stationary; cruise
control is paused. The driver should depress
the accelerator pedal to move off, then, when
above 1 mph (2
km/h), reactivate the system by
pressing one of the buttons 2, 3 or 4.
With an EAT8 gearbox, following braking that
has brought the vehicle to a complete stop, if the
traffic conditions do not allow the vehicle to begin
moving again within 3
seconds of stopping,
press button 4 or the accelerator pedal to move
off.
If the driver takes no action after the vehicle
has been stopped, the electric parking brake is
applied automatically after about 5 minutes.
Cruise control remains active after
changing gear, regardless of the gearbox
type.
When the driver attempts to reactivate
cruise control, after the function has been
paused, the message "Activation not possible,
unsuitable conditions" is briefly displayed if
reactivation is not possible (safety conditions
not met).
Changing the programmed speed setting
with the Road signs recognition function
► Press 5 to accept the speed suggested by
the function on the instrument panel, then press
again to confirm.
To prevent sudden acceleration or deceleration of the vehicle, select a
speed setting relatively close to the vehicle's
current speed.
Changing the inter-vehicle distance
► Press 6 to display the distance setting
thresholds ("Distant", "Normal" or "Close"), then
press again to select a threshold.
After a few seconds, the option is accepted and
will be memorised when the ignition is switched
off.
Temporarily exceeding the speed setting
► Press the accelerator pedal fully . Distance
monitoring and cruise control are deactivated
while acceleration is maintained. "Cruise control
suspended" is displayed.
Deactivating the system
► Turn the thumbwheel 1 upwards to the OFF
position.
Information displayed on
the instrument panel
The following information can be seen on the
instrument panel in " Driving" display mode.
Page 144 of 292

142
Driving
Take care not to cover the warning zone in
the door mirrors, or the detection zones on
the front and rear bumpers with adhesive
labels or other objects; they may hamper
correct operation of the system.
Active Blind Spot Detection
In addition to the fixed warning lamp in the
door mirror on the side in question, a trajectory
correction will be felt if you attempt to cross
a lane marking with the direction indicator
activated, to help you avoid a collision.
This system is a combination of the Active
lane departure warning system and Blind spot
monitoring functions.
These two functions must be activated and in
operation.
The vehicle speed must be between 43 and
87 mph (70 and 140 km/h).
These functions are especially suitable for
driving on motorways and main roads.
For more information on the Active lane
departure warning system and Blind spot
monitoring , refer to the corresponding sections.
Parking sensors
For more information, refer to the
General recommendations on the use
of driving and manoeuvring aids .
This system detects and signals the proximity of
obstacles (e.g.
pedestrian, vehicle, tree, barrier)
using sensors located in the bumper.
Rear parking sensors
► Engage reverse gear to start the system
(confirmed by an audible signal).
The system is switched off when reverse gear is
disengaged.
Audible assistance
The system signals the presence of obstacles
which are both within the sensors’ detection zone
and in the vehicle path defined by the direction of
the steering wheel.
Depending on version, in the example shown,
only the obstacles present in the shaded area
will be signalled by the audible assistance.
The proximity information is given by an
intermittent audible signal, the frequency of
which increases as the vehicle approaches the
obstacle.
When the distance between the vehicle and
the obstacle becomes less than about thirty
centimetres, the audible signal becomes
continuous.
The sound emitted by the speaker (right or
left) indicates the side on which the obstacle is
located.
Adjusting the audible signalDepending on version, with
PEUGEOT Connect Radio or
PEUGEOT Connect Nav, pressing this button
opens the window for adjusting the volume of
the audible signal.
Visual assistance
This supplements the audible signal, without
taking account of the vehicle's trajectory, by
displaying bars on the screen whose location
represents the distance between the obstacle
and the vehicle (white: more distant, orange:
close, red: very close).
When the obstacle is very close, the "Danger"
symbol is displayed on the screen.
Front parking sensors
Supplementing the rear parking sensors, the
front parking sensors are triggered when an
obstacle is detected in front and the speed of the
vehicle is below 6 mph (10 km/h).
Front parking sensor operation is suspended if
the vehicle stops for more than three seconds in
forward gear, if an obstacle is no longer detected
or the vehicle speed exceeds 6 mph (10 km/h).
The sound emitted by the speaker (front or rear) locates the obstacle relative to
the vehicle, whether in front of or behind it on
its path.
Page 154 of 292

152
Driving
Activation/Deactivation
To activate assistance when approaching a
parking area:
►
Reduce the speed of the vehicle to a
maximum of 19
mph (30 km/h).
► Press the button on the gear selector or , on
the touch screen, select Driving/Vehicle > Full
Park Assist.
Activating the system deactivates Blind spot monitoring.
Sequence
Once the system is activated, the following steps
will be performed successively:
–
Select the type of manoeuvre via the touch
screen.
–
Search for an available space.
–
Prepare for the manoeuvre.
–
Perform the manoeuvre.
–
Finalise the manoeuvre.
You can deactivate the system at any time up until the start of the manoeuvre,
by pressing the red arrow in the top left corner
of the window.
Full Park Assist is not always able to
react automatically and appropriately due
to the performance limits inherent to the
system.
The manoeuvre remains the responsibility
of the driver, who must not leave the driving
position and must never try to lock the system
control button.
The driver's seat belt must remain fastened
during the manoeuvre.
Manoeuvre type selection
and parking space search
Depending on whether the vehicle has been
driven or not since the ignition was switched
on, the function offers to enter or exit a parking
space on the touch screen.
► Select the type and side of the manoeuvre to
activate the parking space search.
This lamp comes on to confirm activation.
You can change the type of manoeuvre at any
time, including during the available parking
space search phase.
►
Drive at a distance of 0.50 to 1.50
m from the
row of parked vehicles, not exceeding 19
mph
(30
km/h), until the system finds an available
space (indicated by OK on the display and an
audible signal).
For "parallel" parking, the space must at
least equal to the length of your vehicle
plus 1
m.
For "bay" parking, the space must at least
equal to the width of your vehicle plus 0.70
m.
Preparing for the
manoeuvre
► Move very slowly until the request to stop
the vehicle and the " ST
OP" sign are displayed,
accompanied by an audible signal.
Once the vehicle has stopped, an instructions
page is displayed on the screen.
►
T
o prepare for the manoeuvre, you must fulfil
all of these instructions.
This symbol will be displayed automatically when the instruction has
been applied.
When all of the instructions have been validated,
a new page is displayed, indicating that you can
undertake the manoeuvre.
► To undertake the manoeuvre, press
this button.
► While holding down the button, gradually
release the brake pedal.
The button must be held down
throughout the manoeuvre.
The start of the manoeuvre is indicated by
the display of a window with the message
"Manoeuvre in progress", accompanied by an
audible signal.
The Visiopark 1 or Visiopark 2 and
the parking sensors are automatically
activated to help monitor the vehicle's close
surroundings throughout the manoeuvre.
Performing the manoeuvre
As soon as the driver releases the brake
pedal, the system automatically takes control
of choosing the travel direction, forwards or
reverse, acceleration, braking and the steering
direction.
The manoeuvring status is indicated by these
symbols:
Manoeuvre in progress.
Manoeuvre interrupted.
Manoeuvre completed or aborted.
Page 182 of 292

180
Practical information
for a few hours to allow the top-up to be carried
out.
Never pour the AdBlue® into the Diesel
fuel tank.
If any AdBlue® is splashed, or if there are
any spillages on the bodywork, rinse
immediately with cold water or wipe with a
damp cloth.
If the fluid has crystallised, clean it off using a
sponge and hot water.
Important: in the event of a top-up after
an AdBlue breakdown, you must wait
about 5
minutes before switching on the
ignition, without opening the driver's door,
unlocking the vehicle or bringing the
electronic key into the passenger
compartment.
Switch on the ignition, then wait for 10
seconds before starting the engine.
►
Press the "
START/STOP" button to switch off
the engine.
► Turn the blue cap of the AdBlue® tank anti-
clockwise and remove it.
►
With a container of
AdBlue
®: after checking
the expiry date, read the instructions on the
label carefully before pouring the contents of the
container into the vehicle's AdBlue tank.
►
With an
AdBlue® pump: insert the nozzle and
fill the tank until the nozzle automatically cuts
out.
In order not to overfill the AdBlue® tank:
–
Add between 10 and 13 litres using
AdBlue® containers.
–
Stop after the nozzle’ s first automatic cut-
out, if you are refilling at a service station.
The system only registers AdBlue
® top-ups of
5
litres or more.
If the AdBlue® tank is completely empty
– which is confirmed by the message
“Top up
AdBlue: Starting impossible ” – it is
essential to add at least 5 litres.
Free-wheeling
In certain situations, it is necessary to put the
vehicle into free-wheeling mode (e.g. towing, on
a rolling road, automatic car wash (Wash mode),
rail or sea transport).
The procedure varies according to the type of
gearbox and parking brake.
/
Release procedure
► With the vehicle stationary and the engine
running, select mode N and switch off the
ignition.
Within 5
seconds:
►
Switch on the ignition again.
►
While depressing the brake pedal, move the
push selector forwards or backwards to confirm
mode
N.
►
While depressing the brake pedal, press the
control to release the parking brake.
►
Release the brake pedal, switch off the
ignition.
If the 5-second time limit is exceeded, the
gearbox engages mode P
; it is then necessary to
restart the procedure.
Reverting to normal operation
► While depressing the brake pedal, restart the
engine.
Keyless Entry and Start
You must not depress the brake pedal
while switching the ignition on again, then
switching it off. If you do, the engine will start,
requiring you to restart the procedure.
Advice on care and maintenance
General recommendations
Observe the following recommendations to avoid
damaging the vehicle.
Exterior
Never use a high-pressure jet wash in
the engine compartment - risk of
damaging the electrical components!
Do not wash the vehicle in bright sunshine or
extremely cold conditions.
When washing the vehicle in an
automatic roller-brush car wash, be sure
to lock the doors and, depending on version,
move the electronic key away and deactivate
the "hands-free" function (Hands-Free
Tailgate Access).
When using a pressure washer, keep the jet
nozzle at a minimum distance of 30 cm from
the vehicle (particularly when cleaning areas
containing chipped paint, sensors or seals).
Promptly clean up any stains containing
chemicals liable to damage the vehicle's
paintwork (including tree resin, bird
droppings, insect secretions, pollen and tar).
Depending on the environment, clean the
vehicle frequently to remove salty deposits
(in coastal areas), soot (in industrial areas)
Page 189 of 292

187
In the event of a breakdown
8► Switch the ignition on.
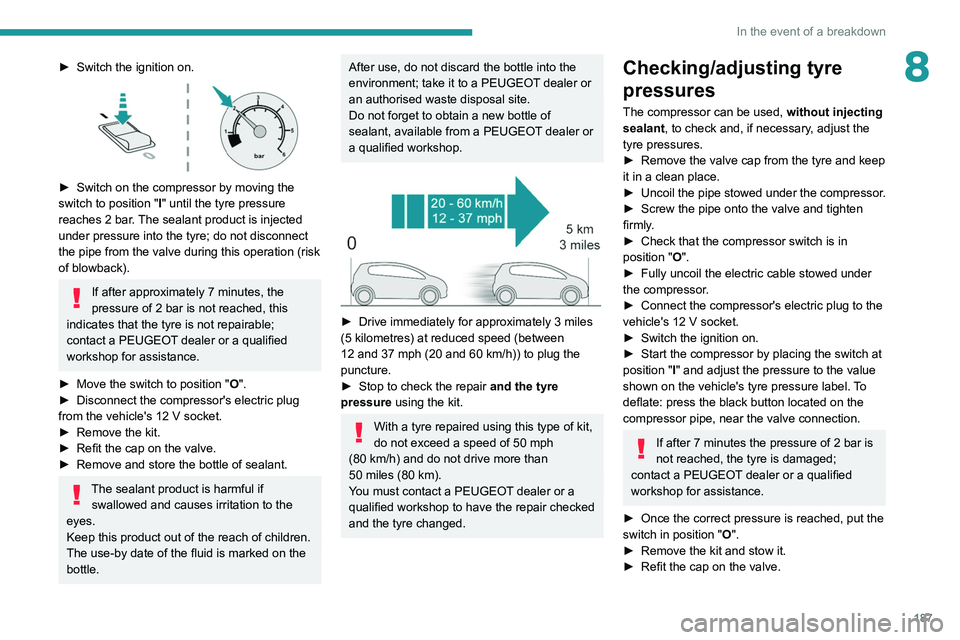
► Switch on the compressor by moving the
switch to position " I
" until the tyre pressure
reaches 2 bar. The sealant product is injected
under pressure into the tyre; do not disconnect
the pipe from the valve during this operation (risk
of blowback).
If after approximately 7 minutes, the
pressure of 2 bar is not reached, this
indicates that the tyre is not repairable;
contact a PEUGEOT dealer or a qualified
workshop for assistance.
►
Move the switch to position " O
".
►
Disconnect the compressor's electric plug
from the vehicle's 12
V socket.
►
Remove the kit.
►
Refit the cap on the valve.
►
Remove and store the bottle of sealant.
The sealant product is harmful if swallowed and causes irritation to the
eyes.
Keep this product out of the reach of children.
The use-by date of the fluid is marked on the
bottle.
After use, do not discard the bottle into the
environment; take it to a PEUGEOT dealer or
an authorised waste disposal site.
Do not forget to obtain a new bottle of
sealant, available from a PEUGEOT dealer or
a qualified workshop.
► Drive immediately for approximately 3 miles
(5 kilometres) at reduced speed (between
12 and 37 mph (20 and 60
km/h)) to plug the
puncture.
►
Stop to check the repair
and the tyre
pressure using the kit.
With a tyre repaired using this type of kit,
do not exceed a speed of 50
mph
(80
km/h) and do not drive more than
50
miles (80 km).
You must contact a PEUGEOT dealer or a
qualified workshop to have the repair checked
and the tyre changed.
Checking/adjusting tyre
pressures
The compressor can be used, without injecting
sealant, to check and, if necessary, adjust the
tyre pressures.
►
Remove the valve cap from the tyre and keep
it in a clean place.
►
Uncoil
the pipe stowed under the compressor.
►
Screw the pipe onto the valve and tighten
firmly
.
►
Check that the compressor switch is in
position " O
".
►
Fully uncoil the electric cable stowed under
the compressor
.
►
Connect the compressor's electric plug to the
vehicle's 12
V socket.
►
Switch the ignition on.
►
Start the compressor by placing the switch at
position " I
" and adjust the pressure to the value
shown on the vehicle's tyre pressure label. To
deflate: press the black button located on the
compressor pipe, near the valve connection.
If after 7 minutes the pressure of 2 bar is
not reached, the tyre is damaged;
contact a PEUGEOT dealer or a qualified
workshop for assistance.
►
Once the correct pressure is reached, put the
switch in position " O
".
►
Remove the kit and stow it.
►
Refit the cap on the valve.
Page 226 of 292

224
PEUGEOT Connect Nav
PEUGEOT Connect Nav
GPS navigation -
Applications - Multimedia
audio system - Bluetooth
®
telephone
The functions and settings described
vary according to the vehicle version and
configuration, as well as the country of sale.
For safety reasons and because they
require sustained attention by the driver,
the following operations must be carried out
with the vehicle stationary and the ignition
on:
–
Pairing the smartphone with the system via
Bluetooth.
–
Using the smartphone.
– Connecting to the CarPlay® or Android
Auto applications (certain applications stop
displaying when the vehicle is moving).
–
W
atching a video (the video stops when the
vehicle starts to move again).
–
Changing the system settings and
configuration.
AM and DAB radio are not available on Hybrid vehicles.
The system is protected so that it only operates in the vehicle.
The message Energy economy mode is
displayed when the system is about to go into
standby.
System and map updates can be
downloaded from the Brand's website.
The update procedure is also available there.
The system’s Open Source Software (OSS) source codes are available at the
following addresses:
https://www.groupe-psa.com/fr/oss/
https://www.groupe-psa.com/en/oss/
First steps
With the engine running, a press mutes
the sound.
With the ignition off, a press turns the system on.
Increase or decrease the volume using
the wheel or the "plus" or "minus" buttons
(depending on the equipment).
Use the menu buttons on either side of or below
the touch screen for access to the menus, then
press the virtual buttons in the touch screen.
Depending on the model, use the "Source" or
"Menu" buttons to access the rolling menus, then
press the virtual buttons in the touch screen.
Display the rolling menus at any time by pressing
the screen briefly with three fingers.
All of the touch areas of the screen are white.
Press the back arrow to go back a level.
Press "OK" to confirm.
The touch screen is of the "capacitive" type.
To clean the screen, use a soft, non-abrasive
cloth (e.g. spectacles cloth) with no additional
product.
Do not use sharp objects on the screen.
Do not touch the screen with wet hands.
Certain information is displayed permanently
in the side bars or in the upper bar of the touch
screen (depending on equipment):
–
Air conditioning status information (depending
on version), and direct access to the
corresponding menu.
–
Go directly to the audio source selection
option, to view the list of radio stations (or list of
titles depending on the source).
Page 242 of 292

240
PEUGEOT Connect Nav
Selecting the source
Press Radio Media to display the main
page.
Select "SOURCES".
Select the source.
Watching a video
Depending on equipment/Depending on version/
Depending on country.
Insert a USB memory stick in the USB port.
Video control commands are accessible
only through the touch screen.
Press Radio Media to display the main
page.
Select "SOURCES".
Select Video to start the video.
To remove the USB memory stick, press the pause button to stop the video, then
remove the memory stick.
The system can play video files in the MPEG-4
Part 2, MPEG-2, MPEG-1, H.264, H.263, VP8,
WMV and RealVideo formats.
Streaming Bluetooth®
Streaming allows you to listen to the audio feed
from your smartphone.
The Bluetooth profile must be activated.
First adjust the volume on the portable device (to
a high level).
Then adjust the volume of the audio system.
If play does not start automatically, it may be
necessary to start the audio playback from the
smartphone.
Control is from the portable device or by using
the system's touch buttons.
Once connected in streaming mode, the
smartphone is considered to be a media
source.
Connecting Apple® players
Connect the Apple® player to the USB port using
a suitable cable (not supplied).
Play starts automatically.
Control is via the audio system.
The classifications available are those of the portable device connected (artists/
albums/genres/playlists/audio books/
podcasts).
The default classification used is by artist. To
modify the classification used, return to the
first level of the menu then select the desired
classification (playlists for example) and
confirm to go down through the menu to the
desired track.
The version of software in the audio system may
not be compatible with the generation of the
Apple
® player.
Information and advice
The system supports USB mass storage
devices, BlackBerry® devices and Apple® players
via the USB ports. The adapter cable is not
supplied.
Devices are managed using the audio system
controls.
Other devices, not recognised on connection,
must be connected to the auxiliary socket using
a jack cable (not supplied) or via Bluetooth
streaming, if compatible.
The audio system will only play audio files with
".wma", ".aac", ".flac", ".ogg" and ".mp3" file
extensions, at bit rates between 32 Kbps and
320 Kbps.
It also supports VBR (Variable Bit Rate) mode.
No other file types (".mp4", etc.) can be read.
All ".wma" files must be standard WMA 9 files.
The supported sampling rates are 32, 44 and
48 KHz.
To avoid reading and display problems, we
recommend choosing file names less than 20
characters long that do not contain any special
characters (e.g. “ ? .
; ù).
Use only USB memory sticks in FAT32 format
(File Allocation Table).
We recommend using the original USB
cable for the portable device.
Telephone
Pairing a Bluetooth®
telephone
The services available depend on the
network, the SIM card and the
compatibility of the Bluetooth devices used.
Consult the telephone user guide and the
service provider to check which services are
available.
The Bluetooth function must be activated and the telephone configured as "Visible
to all” (in the telphone settings).
To complete the pairing, whichever procedure is
used (from the telephone or from the system),
ensure that the code is the same in the system
and in the telephone.
If the pairing procedure fails, we
recommend deactivating and then
reactivating the Bluetooth function on the
telephone.
Procedure from the telephone
Select the system name in the list of
detected devices.
In the system, accept the connection request
from the telephone.