2021 PEUGEOT 508 seats
[x] Cancel search: seatsPage 94 of 292
92
Safety
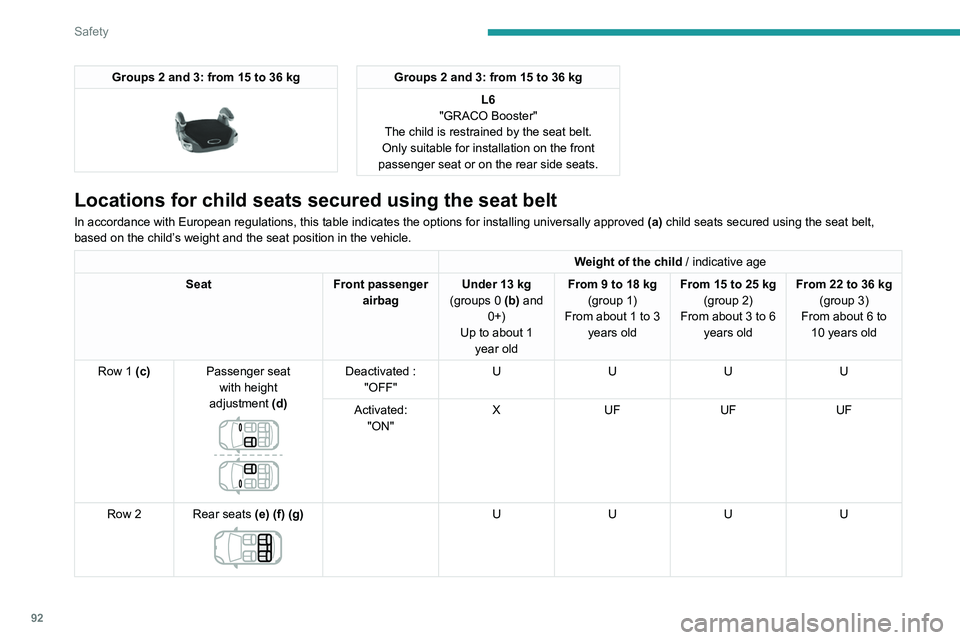
Groups 2 and 3: from 15 to 36 kg
Groups 2 and 3: from 15 to 36 kgL6
"GRACO Booster"
The child is restrained by the seat belt.
Only suitable for installation on the front
passenger seat or on the rear side seats.
Locations for child seats secured using the seat belt
In accordance with European regulations, this table indicates the option\
s for installing universally approved (a) child seats secured using the seat belt,
based on the child’s weight and the seat position in the vehicle.
Weight of the child / indicative age
Seat Front passenger
airbag Under 13
kg
(groups 0 (b) and 0+)
Up to about 1 year old From 9 to 18
kg
(group 1)
From about 1 to 3 years old From 15 to 25
kg
(group 2)
From about 3 to 6 years old From 22 to 36
kg
(group 3)
From about 6 to 10 years old
Row 1 (c) Passenger seat
with height
adjustment
(d)
Deactivated : "OFF" U
UUU
Activated: "ON" X
UF UFUF
Row 2 Rear seats
(e) (f) (g)
U UUU
Page 95 of 292
93
Safety
5U:Seat position suitable for the installation of
a child seat secured using the seat belt and
universally approved for "rearward facing"
and/or "forward facing" use.
UF: Seat position suitable for the installation a
child seat secured using the seat belt and
universally approved for "forward facing"
use.
X: Seat position not suitable for the installation
of a child seat for the specified weight
group.
(a) Universal child seat: child seat that can be
installed in all vehicles using the seat belt.
(b) Group 0: from birth to 10
kg. Carrycots and
"car" infant carriers cannot be installed on
the front passenger seat.
(c) Refer to the current legislation in your
country before placing a child in this seat
position.
(d) Adjust the front passenger seat to the
highest position.
(e) To install a "rearward facing" or "forward
facing" child seat in a rear side seat, move
the front seat forwards, then straighten the
backrest to allow enough room for the child
seat and the child's legs.
(f) Never install a child seat with a support leg
on the centre rear seat. (g)
Before installing the child seat in the centre
rear seat, store the right-hand side buckle in
the space provided in the seat cushion.
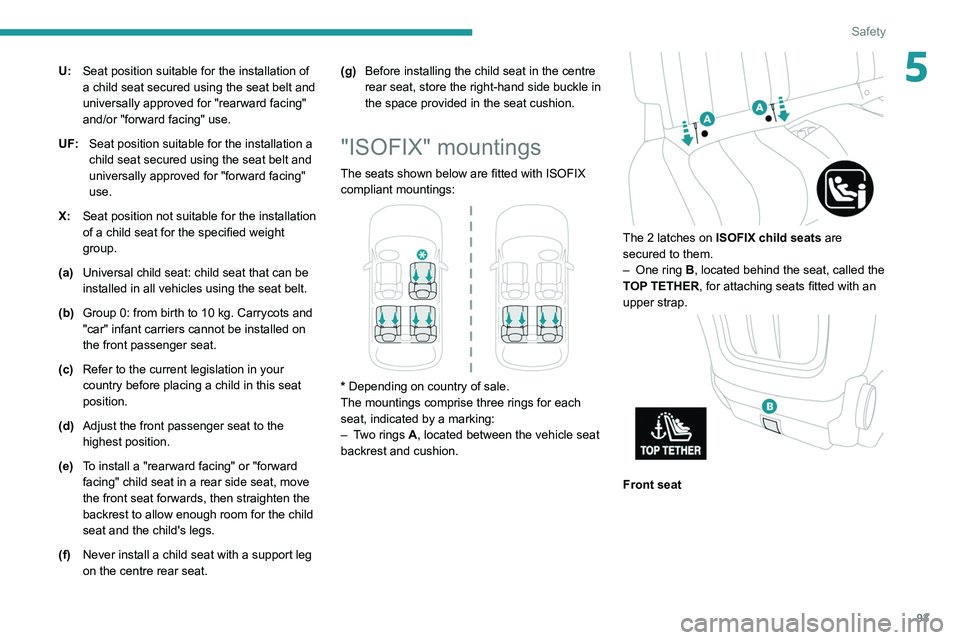
"ISOFIX" mountings
The seats shown below are fitted with ISOFIX
compliant mountings:
* Depending on country of sale.
The mountings comprise three rings for each
seat, indicated by a marking:
–
T
wo rings A, located between the vehicle seat
backrest and cushion.
The 2 latches on ISOFIX child seats are
secured to them.
–
One ring
B, located behind the seat, called the
TOP TETHER, for attaching seats fitted with an
upper strap.
Front seat
Page 96 of 292
94
Safety
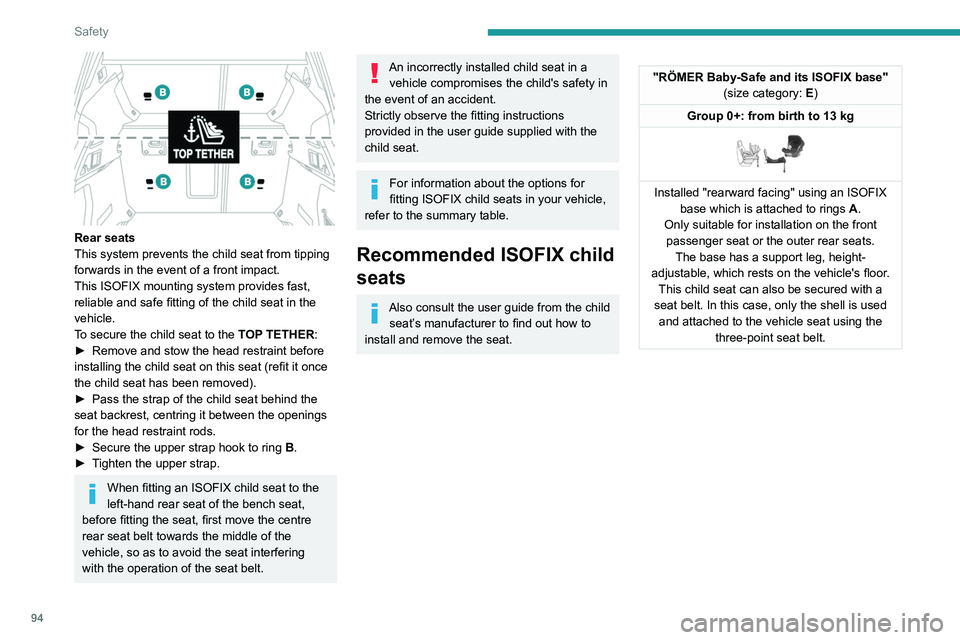
Rear seats
This system prevents the child seat from tipping
forwards in the event of a front impact.
This ISOFIX mounting system provides fast,
reliable and safe fitting of the child seat in the
vehicle.
To secure the child seat to the TOP TETHER:
►
Remove and stow the head restraint before
installing the child seat on this seat (refit it once
the child seat has been removed).
►
Pass the strap of the child seat behind the
seat backrest, centring it between the openings
for the head restraint rods.
►
Secure the upper strap hook to ring
B
.
►
T
ighten the upper strap.
When fitting an ISOFIX child seat to the
left-hand rear seat of the bench seat,
before fitting the seat, first move the centre
rear seat belt towards the middle of the
vehicle, so as to avoid the seat interfering
with the operation of the seat belt.
An incorrectly installed child seat in a vehicle compromises the child's safety in
the event of an accident.
Strictly observe the fitting instructions
provided in the user guide supplied with the
child seat.
For information about the options for
fitting ISOFIX child seats in your vehicle,
refer to the summary table.
Recommended ISOFIX child
seats
Also consult the user guide from the child seat’s manufacturer to find out how to
install and remove the seat.
"RÖMER Baby-Safe and its ISOFIX base" (size category: E)
Group 0+: from birth to 13 kg
Installed "rearward facing" using an ISOFIX base which is attached to rings A .
Only suitable for installation on the front passenger seat or the outer rear seats. The base has a support leg, height-
adjustable, which rests on the vehicle's floor. This child seat can also be secured with a
seat belt. In this case, only the shell is used and attached to the vehicle seat using the three-point seat belt.
Page 97 of 292
95
Safety
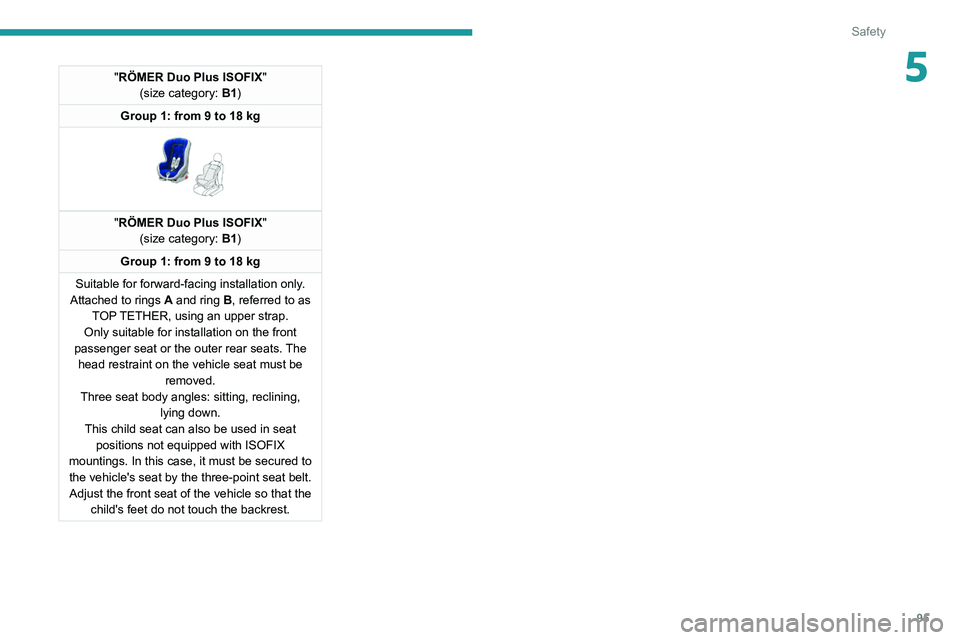
5"RÖMER Duo Plus ISOFIX"
(size category: B1)
Group 1: from 9 to 18 kg
"RÖMER Duo Plus ISOFIX "
(size category: B1)
Group 1: from 9 to 18 kg
Suitable for forward-facing installation only.
Attached to rings
A and ring B, referred to as
TOP TETHER, using an upper strap.
Only suitable for installation
on the front
passenger seat or the outer rear seats. The head restraint on the vehicle seat must be removed.
Three seat body angles: sitting, reclining, lying down.
This child seat can also be used in seat positions not equipped with ISOFIX
mountings. In this case, it must be secured to the vehicle's seat by the three-point seat belt. Adjust the front seat of the vehicle so that the child's feet do not touch the backrest.
Page 98 of 292
96
Safety
– a carrycot fitted with an upper strap or a support leg.
For securing the upper strap using the ISOFIX mountings, refer to the corresponding section.
X: Seat position not suitable for the installation of an ISOFIX seat or carrycot for the specified weight group.
(a) Refer to the current legislation in your country before placing a child\
in this seat position.
(b) The installation of a carrycot on this seat may prevent the use of one o\
r more of the other seats in this row.
(c) Remove the head restraints.
(d) The front height-adjustable seat must be adjusted to its highest positio\
n and moved as far back as possible.
(e) To install a "rearward facing" or "forward facing" child seat on a rear s\
eat, move the front seat forward, then straighten the backrest to allow \
enough
room for the child seat and the child's legs.
i-Size child seats
i-Size child seats have two latches that are anchored to the two rings A.
These i-Size child seats also have:
– either an upper strap that is attached to ring B.
– or a support leg that rests on the vehicle floor, compatible with the approved i-Size seat position.
Their role is to prevent the child seat from tipping forward in the even\
t of a collision.
For more information on the ISOFIX mountings, refer to the corresponding section.
In accordance with European regulations, this table indicates the options for installing i-Size child seats on seats in the vehicle fitted with ISOFIX
mountings approved for i-Size.
Seat Front passenger airbagi-Size restraint system
Row 1 (a) Passenger seat (b)
Deactivated: "OFF" i-U
Activated: "ON" i-UF
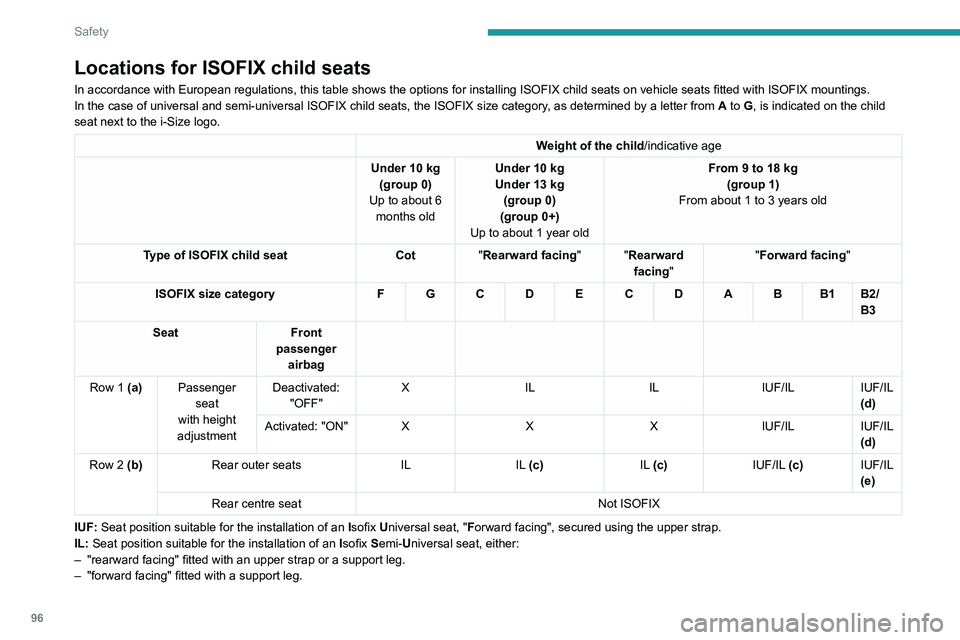
Locations for ISOFIX child seats
In accordance with European regulations, this table shows the options for installing ISOFIX child seats on vehicle seats fitted with ISOFIX mountings.
In the case of universal and semi-universal ISOFIX child seats, the ISOF\
IX size category, as determined by a letter from A to G, is indicated on the child
seat next to the i-Size logo.
Weight of the child/indicative age
Under 10
kg
(group
0)
Up to about 6 months old Under 10
kg
Under 13
kg
(group
0)
(group
0+)
Up to about 1 year old From 9 to 18
kg
(group 1)
From about 1 to 3 years old
Type of ISOFIX child seat Cot"Rearward facing" "Rearward
facing""Forward facing
"
ISOFIX size category F G C D E C D A B B1 B2/
B3
Seat Front
passenger airbag
Row 1 (a) Passenger
seat
with height
adjustment Deactivated:
"OFF" X
IL ILIUF/ILIUF/IL
(d)
Activated: "ON" XXXIUF/ILIUF/IL
(d)
Row 2 (b) Rear outer seats ILIL (c) IL (c)IUF/IL (c)IUF/IL
(e)
Rear centre seat Not ISOFIX
IUF: Seat position suitable for the installation of an Isofix Universal seat, "Forward facing", secured using the upper strap.
IL:
Seat position suitable for the installation of an Isofix Semi-Universal seat, either:
–
"rearward facing" fitted with an upper strap or a support leg.
–
"forward facing" fitted with a support leg.
Page 99 of 292
97
Safety
5– a carrycot fitted with an upper strap or a support leg.
For securing the upper strap using the ISOFIX mountings, refer to the corresponding section.
X:
Seat position not suitable for the installation of an ISOFIX seat or carrycot for the specified weight group.
(a) Refer to the current legislation in your country before placing a child\
in this seat position.
(b)
The installation of a carrycot on this seat may prevent the use of one o\
r more of the other seats in this row
.
(c)
Remove the head restraints.
(d) The front height-adjustable seat must be adjusted to its highest positio\
n and moved as far back as possible.
(e) To install a "rearward facing" or "forward facing" child seat on a rear s\
eat, move the front seat forward, then straighten the backrest to allow \
enough
room for the child seat and the child's legs.
i-Size child seats
i-Size child seats have two latches that are anchored to the two rings A.
These i-Size child seats also have:
–
either an upper strap that is attached to ring B
.
–
or a support leg that rests on the vehicle floor
, compatible with the approved i-Size seat position.
Their role is to prevent the child seat from tipping forward in the even\
t of a collision.
For more information on the ISOFIX mountings, refer to the corresponding section.
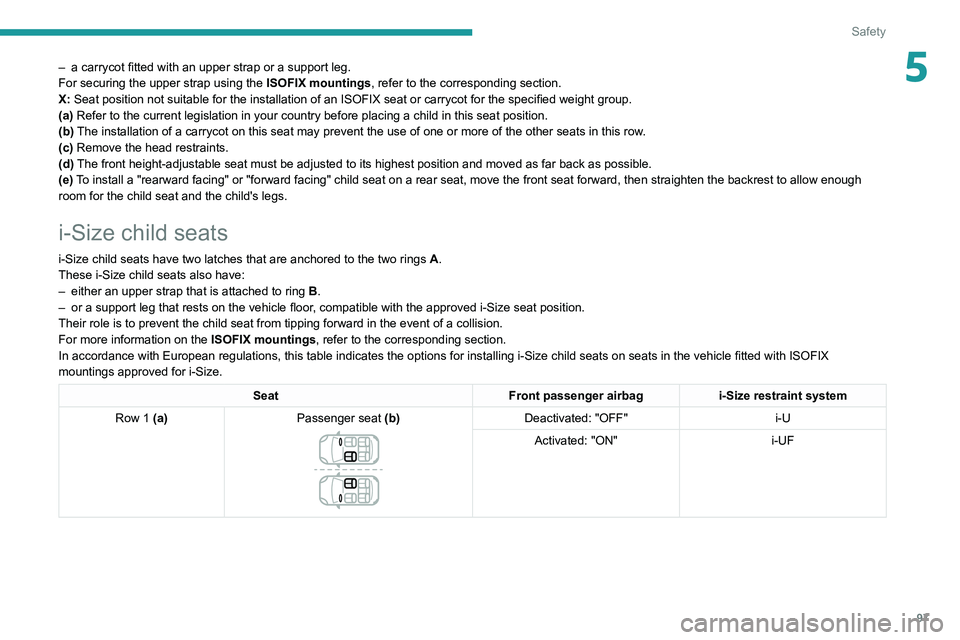
In accordance with European regulations, this table indicates the options for installing i-Size child seats on seats in the vehicle fitted with ISOFIX
mountings approved for i-Size.
Seat Front passenger airbagi-Size restraint system
Row 1 (a) Passenger seat (b)
Deactivated: "OFF" i-U
Activated: "ON" i-UF
Page 100 of 292
98
Safety
Activation/Deactivation
► With the ignition on, press this button to
activate/deactivate the child lock.
When the indicator lamp is on, the child lock is
activated.
With the child lock activated, it is still
possible to open the doors from outside
and to operate the rear electric windows from
the driver's controls.
This system is independent and in no circumstances does it take the place of
the central locking control.
Check the status of the child lock each time
you switch on the ignition.
Always keep the electronic key with you when
leaving the vehicle, even for a short time.
In the event of a serious impact, the electric
child lock is switched off automatically to
permit the exit of the rear passengers.
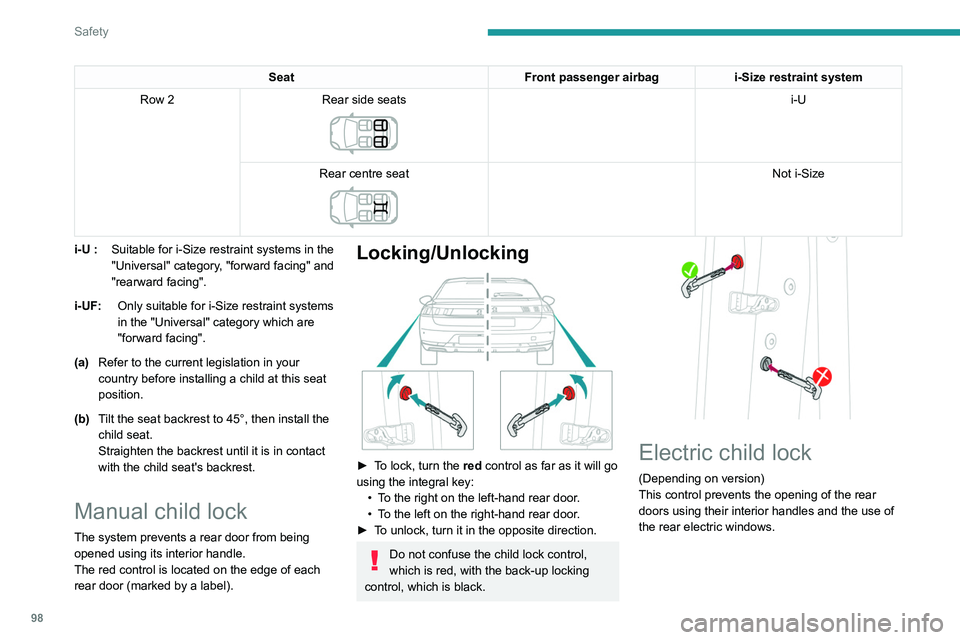
Seat Front passenger airbagi-Size restraint system
Row 2 Rear side seats
i-U
Rear centre seat
Not i-Size
i-U
: Suitable for i-Size restraint systems in the
"Universal" category, "forward facing" and
"rearward facing".
i-UF: Only suitable for i-Size restraint systems
in the "Universal" category which are
"forward facing".
(a) Refer to the current legislation in your
country before installing a child at this seat
position.
(b) Tilt the seat backrest to 45°, then install the
child seat.
Straighten the backrest until it is in contact
with the child seat's backrest.
Manual child lock
The system prevents a rear door from being
opened using its interior handle.
The red control is located on the edge of each
rear door (marked by a label).
Locking/Unlocking
► To lock, turn the red control as far as it will go
using the integral key:
•
T
o the right on the left-hand rear door.
•
T
o the left on the right-hand rear door.
►
T
o unlock, turn it in the opposite direction.
Do not confuse the child lock control,
which is red, with the back-up locking
control, which is black.
Electric child lock
(Depending on version)
This control prevents the opening of the rear
doors using their interior handles and the use of
the rear electric windows.
Page 162 of 292
160
Practical information
When washing
Before washing the vehicle, always
check that the charging flap is closed
correctly.
Never wash the vehicle while the battery is
on charge.
High-pressure washing
To avoid damaging the electrical
components, it is expressly prohibited to
use high-pressure washing in the engine
compartment or under the body.
Do not use a pressure greater than 80 bar
when washing the bodywork.
Never allow water or dust to enter the
connector or charging nozzle - risk of
electrocution or fire!
Never connect / disconnect the charging
nozzle or cable with wet hands - risk of
electrocution!
Traction battery
The Li-ion (Lithium-ion) traction battery stores
the electrical energy needed to propel the
vehicle.
It is located under the rear seats.
The traction battery's range varies depending
on the type of driving, the route, the use of
thermal comfort equipment and the ageing of its
components.
The traction battery ageing depends on several factors, such as climatic
conditions and the distance travelled.
In the event of damage to the traction
battery
It is strictly prohibited to work on the vehicle
yourself.
Do not touch liquids coming from the traction
battery; in the event of contact between the
skin and these products, wash abundantly
with water and contact a doctor as soon as
possible.
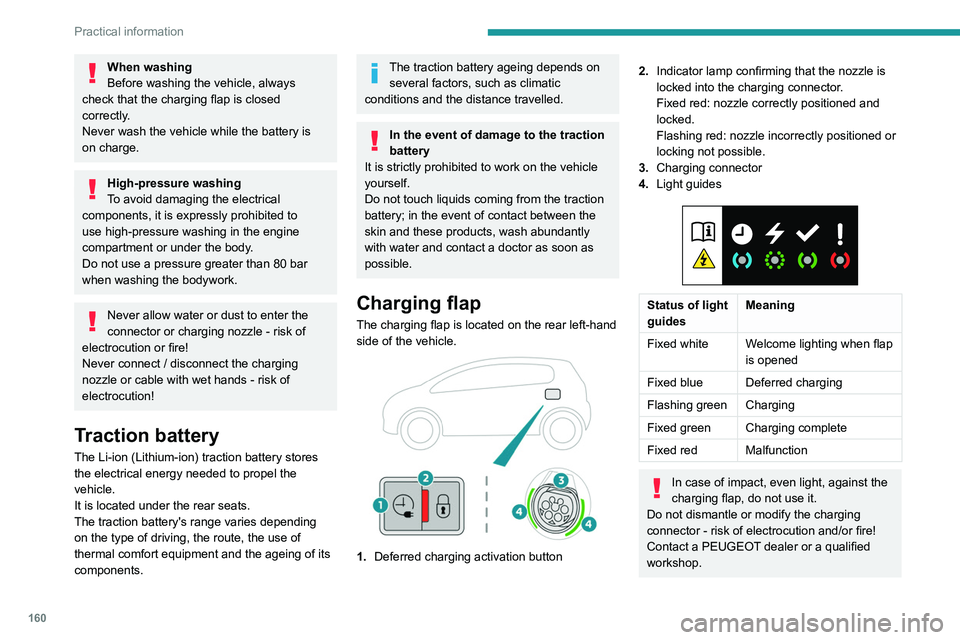
Charging flap
The charging flap is located on the rear left-hand
side of the vehicle.
1. Deferred charging activation button
2.Indicator lamp confirming that the nozzle is
locked into the charging connector.
Fixed red: nozzle correctly positioned and
locked.
Flashing red: nozzle incorrectly positioned or
locking not possible.
3. Charging connector
4. Light guides
Status of light
guides Meaning
Fixed white Welcome lighting when flap
is opened
Fixed blue Deferred charging
Flashing green Charging
Fixed green Charging complete
Fixed red Malfunction
In case of impact, even light, against the
charging flap, do not use it.
Do not dismantle or modify the charging
connector - risk of electrocution and/or fire!
Contact a PEUGEOT dealer or a qualified
workshop.
Charging cables, sockets
and chargers
The traction battery can be charged using
several different types of cables.
The charging cable supplied with the vehicle is
compatible with the electrical installations of the
country of sale. If you are travelling abroad, refer
to the following tables to check the compatibility
of local electrical installations with the charging
cable.