2021 PEUGEOT 508 belt
[x] Cancel search: beltPage 96 of 292
94
Safety
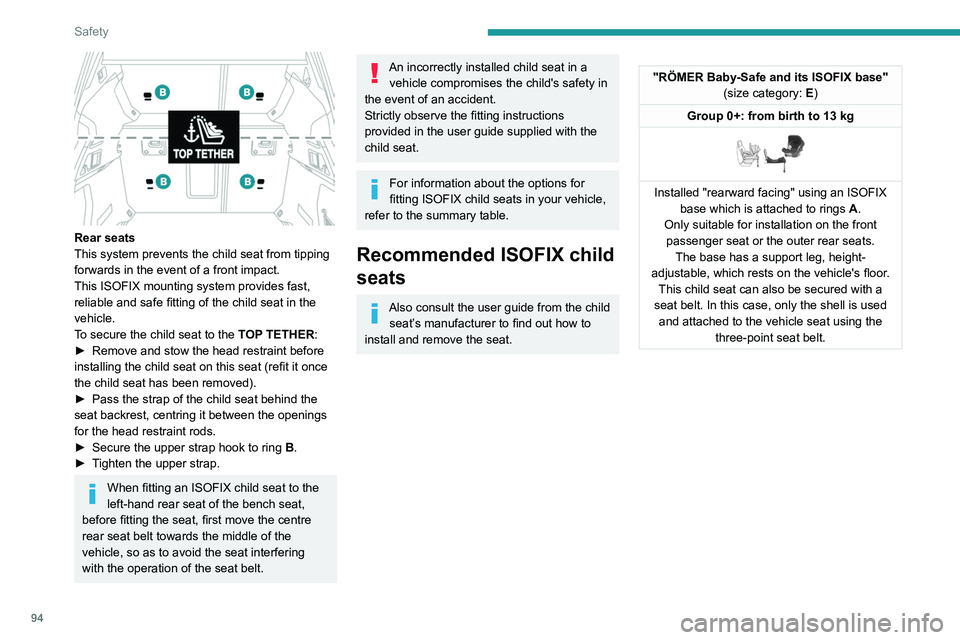
Rear seats
This system prevents the child seat from tipping
forwards in the event of a front impact.
This ISOFIX mounting system provides fast,
reliable and safe fitting of the child seat in the
vehicle.
To secure the child seat to the TOP TETHER:
►
Remove and stow the head restraint before
installing the child seat on this seat (refit it once
the child seat has been removed).
►
Pass the strap of the child seat behind the
seat backrest, centring it between the openings
for the head restraint rods.
►
Secure the upper strap hook to ring
B
.
►
T
ighten the upper strap.
When fitting an ISOFIX child seat to the
left-hand rear seat of the bench seat,
before fitting the seat, first move the centre
rear seat belt towards the middle of the
vehicle, so as to avoid the seat interfering
with the operation of the seat belt.
An incorrectly installed child seat in a vehicle compromises the child's safety in
the event of an accident.
Strictly observe the fitting instructions
provided in the user guide supplied with the
child seat.
For information about the options for
fitting ISOFIX child seats in your vehicle,
refer to the summary table.
Recommended ISOFIX child
seats
Also consult the user guide from the child seat’s manufacturer to find out how to
install and remove the seat.
"RÖMER Baby-Safe and its ISOFIX base" (size category: E)
Group 0+: from birth to 13 kg
Installed "rearward facing" using an ISOFIX base which is attached to rings A .
Only suitable for installation on the front passenger seat or the outer rear seats. The base has a support leg, height-
adjustable, which rests on the vehicle's floor. This child seat can also be secured with a
seat belt. In this case, only the shell is used and attached to the vehicle seat using the three-point seat belt.
Page 97 of 292
95
Safety
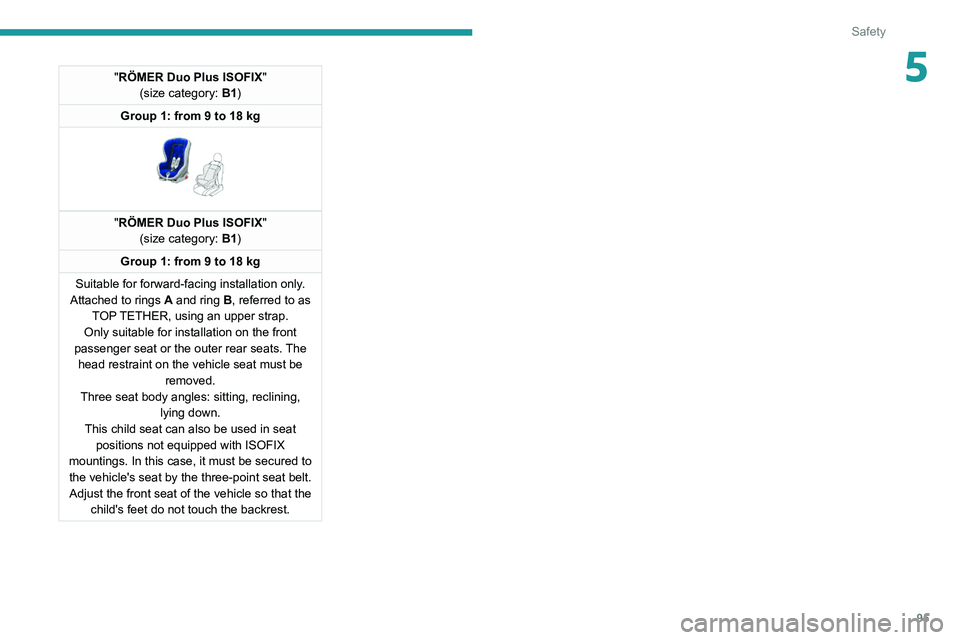
5"RÖMER Duo Plus ISOFIX"
(size category: B1)
Group 1: from 9 to 18 kg
"RÖMER Duo Plus ISOFIX "
(size category: B1)
Group 1: from 9 to 18 kg
Suitable for forward-facing installation only.
Attached to rings
A and ring B, referred to as
TOP TETHER, using an upper strap.
Only suitable for installation
on the front
passenger seat or the outer rear seats. The head restraint on the vehicle seat must be removed.
Three seat body angles: sitting, reclining, lying down.
This child seat can also be used in seat positions not equipped with ISOFIX
mountings. In this case, it must be secured to the vehicle's seat by the three-point seat belt. Adjust the front seat of the vehicle so that the child's feet do not touch the backrest.
Page 116 of 292
11 4
Driving
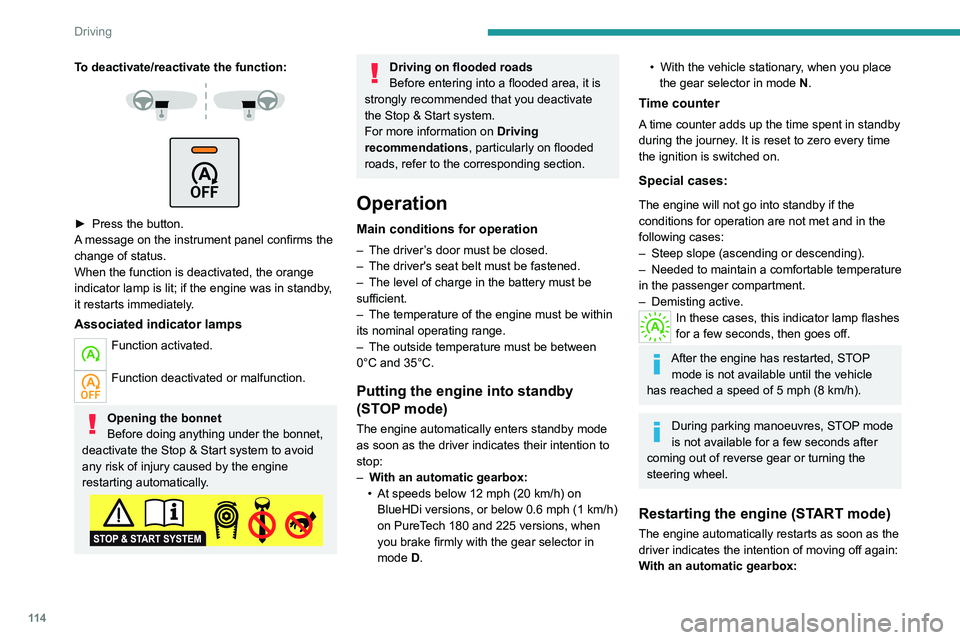
To deactivate/reactivate the function:
► Press the button.
A message on the instrument panel confirms the
change of status.
When the function is deactivated, the orange
indicator lamp is lit; if the engine was in standby,
it restarts immediately.
Associated indicator lamps
Function activated.
Function deactivated or malfunction.
Opening the bonnet
Before doing anything under the bonnet,
deactivate the Stop & Start system to avoid
any risk of injury caused by the engine
restarting automatically.
Driving on flooded roads
Before entering into a flooded area, it is
strongly recommended that you deactivate
the Stop & Start system.
For more information on Driving
recommendations, particularly on flooded
roads, refer to the corresponding section.
Operation
Main conditions for operation
– The driver ’s door must be closed.
– The driver's seat belt must be fastened.
–
The level of charge in the battery must be
sufficient.
–
The temperature of the engine must be within
its nominal operating range.
–
The outside temperature must be between
0°C and 35°C.
Putting the engine into standby
(STOP mode)
The engine automatically enters standby mode
as soon as the driver indicates their intention to
stop:
–
W
ith an automatic gearbox:
•
At speeds below 12 mph (20
km/h) on
BlueHDi versions, or below 0.6 mph (1
km/h)
on PureTech 180 and 225 versions, when
you brake firmly with the gear selector in
mode D.
• With the vehicle stationary , when you place
the gear selector in mode N.
Time counter
A time counter adds up the time spent in standby
during the journey. It is reset to zero every time
the ignition is switched on.
Special cases:
The engine will not go into standby if the
conditions for operation are not met and in the
following cases:
–
Steep slope (ascending or descending).
–
Needed
to maintain a comfortable temperature
in the passenger compartment.
–
Demisting active.
In these cases, this indicator lamp flashes
for a few seconds, then goes off.
After the engine has restarted, STOP mode is not available until the vehicle
has reached a speed of 5 mph (8
km/h).
During parking manoeuvres, STOP mode
is not available for a few seconds after
coming out of reverse gear or turning the
steering wheel.
Restarting the engine (START mode)
The engine automatically restarts as soon as the
driver indicates the intention of moving off again:
With an automatic gearbox:
– With the selector in mode D or M: with the
brake pedal released.
– With the selector in mode N and the brake
pedal released: with the selector at D or M.
– With the selector in mode P and the brake
pedal depressed: with the selector at R, N, D
or M.
– With reverse gear engaged.
Special cases
The engine will restart automatically if the
conditions for operation are met again and in the
following cases:
– With an automatic gearbox, in mode N, vehicle
speed exceeds 0.6 mph (1 km/h).
In these cases, this indicator lamp flashes
for a few seconds, then goes off.
Malfunctions
In the event of a fault with the system, this
warning lamp flashes for a few moments
on the instrument panel, then remains on,
accompanied by the display of a message.
Have it checked by a PEUGEOT dealer or a
qualified workshop.
The vehicle stalls in STOP mode
All of the instrument panel warning lamps come
on if there is a fault.
► Switch off the ignition then start the engine
again with the " START/STOP" button.
Page 136 of 292
134
Driving
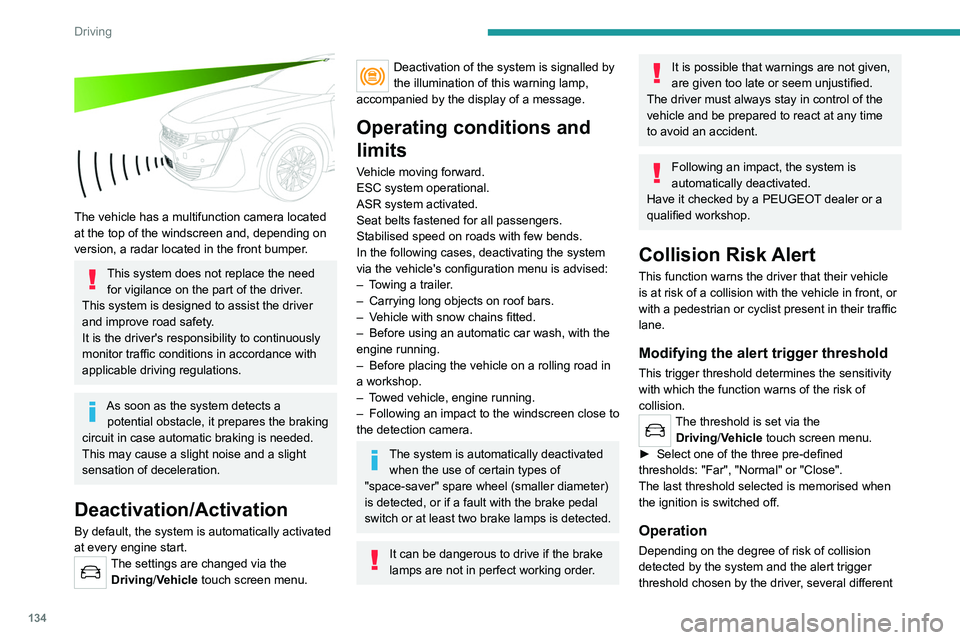
The vehicle has a multifunction camera located
at the top of the windscreen and, depending on
version, a radar located in the front bumper.
This system does not replace the need for vigilance on the part of the driver.
This system is designed to assist the driver
and improve road safety.
It is the driver's responsibility to continuously
monitor traffic conditions in accordance with
applicable driving regulations.
As soon as the system detects a potential obstacle, it prepares the braking
circuit in case automatic braking is needed.
This may cause a slight noise and a slight
sensation of deceleration.
Deactivation/Activation
By default, the system is automatically activated
at every engine start.
The settings are changed via the Driving/Vehicle touch screen menu.
Deactivation of the system is signalled by
the illumination of this warning lamp,
accompanied by the display of a message.
Operating conditions and
limits
Vehicle moving forward.
ESC system operational.
ASR system activated.
Seat belts fastened for all passengers.
Stabilised speed on roads with few bends.
In the following cases, deactivating the system
via the vehicle's configuration menu is advised:
–
T
owing a trailer.
–
Carrying long objects on roof bars.
–
V
ehicle with snow chains fitted.
–
Before using an automatic car wash, with the
engine running.
–
Before placing the vehicle on a rolling road in
a workshop.
–
T
owed vehicle, engine running.
–
Following
an impact to the windscreen close to
the detection camera.
The system is automatically deactivated when the use of certain types of
"space-saver" spare wheel (smaller diameter)
is detected, or if a fault with the brake pedal
switch or at least two brake lamps is detected.
It can be dangerous to drive if the brake
lamps are not in perfect working order.
It is possible that warnings are not given,
are given too late or seem unjustified.
The driver must always stay in control of the
vehicle and be prepared to react at any time
to avoid an accident.
Following an impact, the system is
automatically deactivated.
Have it checked by a PEUGEOT dealer or a
qualified workshop.
Collision Risk Alert
This function warns the driver that their vehicle
is at risk of a collision with the vehicle in front, or
with a pedestrian or cyclist present in their traffic
lane.
Modifying the alert trigger threshold
This trigger threshold determines the sensitivity
with which the function warns of the risk of
collision.
The threshold is set via the Driving/Vehicle touch screen menu.
►
Select one of the three pre-defined
thresholds: "Far", "Normal" or "Close".
The last threshold selected is memorised when
the ignition is switched off.
Operation
Depending on the degree of risk of collision
detected by the system and the alert trigger
threshold chosen by the driver, several different
Page 138 of 292
136
Driving
The brake pedal may vibrate slightly while the function is operating.
If the vehicle comes to a complete stop,
automatic braking is maintained for 1 to 2
seconds.
Malfunction
In the event of a malfunction, this warning
lamp lights up on the instrument panel,
accompanied by the display of a message and
an audible signal.
Have it checked by a PEUGEOT dealer or a
qualified workshop.
If these warning lamps come on
after the engine has been switched
off and then restarted, contact a PEUGEOT
dealer or a qualified workshop to have the
system checked.
These warning lamps light up on the instrument panel to indicate
that the driver's and/or front passenger's seat
belt is not fastened (depending on version). The
automatic braking system is deactivated until the
seat belts are fastened.
Distraction detection
For more information, refer to the
General recommendations on the use
of driving and manoeuvring aids .
The function comprises the "Driver Attention
Warning" system combined with the "Driver
Attention Warning by Camera" system.
These systems are in no way designed
to keep the driver awake or to prevent
the driver from falling asleep at the wheel.
It is the driver’s responsibility to stop if feeling
tired.
Take a break if you are feeling tired or at least
every 2 hours.
Activation/Deactivation
This function is set via the touch screen Driving/Vehicle menu.
The state of the system is memorised when the
ignition is switched off.
Driver Attention Warning
The system triggers an alert when it detects that the driver has not taken a
break after two hours of driving at a speed above
43 mph (70
km/h).
This alert is issued via the display of a message
encouraging the driver to take a break,
accompanied by an audible signal.
If the driver does not follow this advice, the alert
is repeated hourly until the vehicle is stopped.
The system resets itself if one of the following
conditions is met:
–
With the engine running, the vehicle has been
stationary for more than 15 minutes.
– The ignition has been switched off for a few
minutes.
–
The driver's seat belt is unfastened and their
door is opened.
As soon as the speed of the vehicle drops below 43 mph (70 km/h), the
system goes into standby.
Driving time starts being counted again once
the speed reaches above 43
mph (70 km/h).
Driver Attention Warning by
Camera
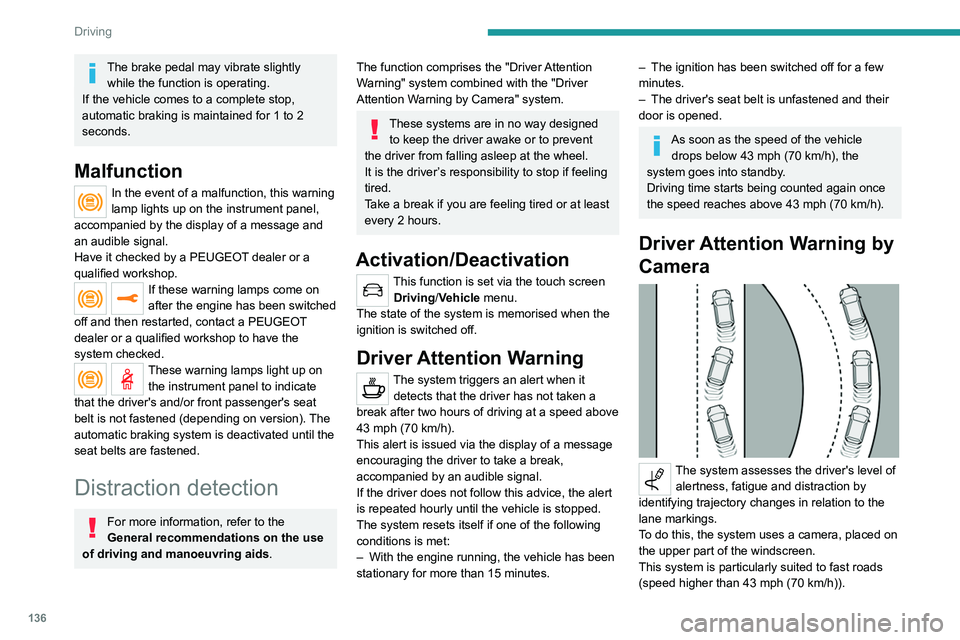
The system assesses the driver's level of alertness, fatigue and distraction by
identifying trajectory changes in relation to the
lane markings.
To do this, the system uses a camera, placed on
the upper part of the windscreen.
This system is particularly suited to fast roads
(speed higher than 43 mph (70
km/h)).
At a first alert level, the driver is warned by the
message "Be vigilant!", accompanied by an
audible signal.
After three first-level alerts, the system triggers
a further alert with the message " Dangerous
driving: take a break", accompanied by a more
pronounced audible signal.
In certain driving conditions (poor road
surface or strong winds), the system may
give alerts independent of the driver's level of
vigilance.
The following situations may interfere with the operation of the system or
prevent it from working:
– lane markings absent, worn, hidden (snow,
mud) or multiple (roadworks);
– close to the vehicle ahead (lane markings
not detected);
– roads that are narrow, winding, etc.
Active lane departure
warning system
For more information, refer to the
General recommendations on the use
of driving and manoeuvring aids .
The system corrects the vehicle's trajectory by
alerting the driver as soon as it detects a risk of
Page 152 of 292

150
Driving
The manoeuvring status is indicated by these
symbols:
Manoeuvre in progress (green).
Manoeuvre cancelled or finished (red)
(the arrows indicate that the driver must
resume control of the vehicle).
The maximum speeds during manoeuvres are
indicated by these symbols:
75 mph or 7 km/h, for parking space entry.
53 mph or 5 km/h, for parking space exit.
During manoeuvring phases, the steering
wheel performs rapid turns: do not hold
the steering wheel or put your hands between
the spokes of the steering wheel. Watch out
for any objects that could interfere with the
manoeuvre (loose clothing, scarf, tie, etc.).
Risk of injury!
It is the driver's responsibility to constantly
monitor the traffic, especially vehicles coming
towards you.
The driver should check that no objects or
people are obstructing the vehicle’s path.
The images from the camera(s) displayed on the touch screen may be
distorted by the terrain.
In shady areas, or in inadequate sunlight
or lighting conditions, the image may be
darkened and with lower contrast. The manoeuvre can be permanently interrupted
at any time, either by the driver or automatically
by the system.
Interruption by the driver:
–
taking over control of the steering.
–
activating the direction indicator lamps on the
opposite side to that of the manoeuvre.
–
unfastening the driver's seat belt.
–
switching off the ignition.
Interruption by the system:
–
vehicle exceeding the speed limit of
5
mph (7 km/h) during parking space entry
manoeuvres, or 3 mph (5 km/h) during parking
space exit manoeuvres.
–
activation of anti-slip regulation on a slippery
road.
–
opening of a door or the boot.
–
engine stall.
–
system malfunction.
–
after 10 manoeuvres to enter or exit a parallel
parking space and after 7 manoeuvres to enter a
parking bay
.
Interrupting the manoeuvre automatically
deactivates the function.
The manoeuvre symbol is displayed in red,
accompanied by the " Manoeuvre cancelled"
message on the touch screen.
A message prompts the driver to take back
control of the vehicle.
The function is deactivated after a few seconds; this indicator lamp goes off and
the function returns to the initial display.
End of the parking space
entry or exit manoeuvre
The vehicle stops as soon as the manoeuvre is
completed.
The manoeuvre symbol is displayed in red,
accompanied by the message " Manoeuvre
completed" on the touch screen.
When the function is deactivated, this
indicator lamp goes off, accompanied by
an audible signal.
When entering a parking space, the driver may
be required to complete the manoeuvre.
Operating limits
– The system may suggest an inappropriate
parking space (parking prohibited, work in
progress with damaged road surface, location
alongside a ditch, etc.).
–
The system may indicate that a space has
been found but will not offer it because of a fixed
obstacle on the opposite side of the manoeuvre,
which would not allow the vehicle to follow a
trajectory required for parking.
–
The system may indicate that a space has
been found but the manoeuvre will not be
triggered, because the width of the lane is
insufficient.
–
The system is not designed for performing the
parking manoeuvre on a sharp bend.
–
The system does not detect spaces that
are much larger than the vehicle itself or that
are delimited by obstacles that are too low
(pavements, studs, etc.) or too thin (trees, posts,
wire fences, etc.).
– If the boot is heavily loaded, the tilt of the
vehicle towards the rear may interfere with the
distance measurements.
Do not use the function under the
following exterior conditions:
– Alongside a soft shoulder (e.g. ditch) or
quay or on the edge of a drop.
– When the road surface is slippery (e.g. ice).
If any of the following malfunctions
occurs, do not use the system:
– If a tyre is under-inflated.
– If one of the bumpers is damaged.
– If one of the cameras is faulty.
If the vehicle has undergone any of the
following modifications, do not use the
function:
– When carrying an object extending beyond
the dimensions of the vehicle (ladder on the
roof bars, bicycle carrier on the tailgate, etc.).
– With a non-approved towball in place.
– With snow chains fitted.
– When driving on a small-diameter or
"space-saver" type spare wheel.
– When the wheels fitted are a different size
from the original ones.
– After modifying one or both bumpers
(added protection).
Page 154 of 292

152
Driving
Activation/Deactivation
To activate assistance when approaching a
parking area:
►
Reduce the speed of the vehicle to a
maximum of 19
mph (30 km/h).
► Press the button on the gear selector or , on
the touch screen, select Driving/Vehicle > Full
Park Assist.
Activating the system deactivates Blind spot monitoring.
Sequence
Once the system is activated, the following steps
will be performed successively:
–
Select the type of manoeuvre via the touch
screen.
–
Search for an available space.
–
Prepare for the manoeuvre.
–
Perform the manoeuvre.
–
Finalise the manoeuvre.
You can deactivate the system at any time up until the start of the manoeuvre,
by pressing the red arrow in the top left corner
of the window.
Full Park Assist is not always able to
react automatically and appropriately due
to the performance limits inherent to the
system.
The manoeuvre remains the responsibility
of the driver, who must not leave the driving
position and must never try to lock the system
control button.
The driver's seat belt must remain fastened
during the manoeuvre.
Manoeuvre type selection
and parking space search
Depending on whether the vehicle has been
driven or not since the ignition was switched
on, the function offers to enter or exit a parking
space on the touch screen.
► Select the type and side of the manoeuvre to
activate the parking space search.
This lamp comes on to confirm activation.
You can change the type of manoeuvre at any
time, including during the available parking
space search phase.
►
Drive at a distance of 0.50 to 1.50
m from the
row of parked vehicles, not exceeding 19
mph
(30
km/h), until the system finds an available
space (indicated by OK on the display and an
audible signal).
For "parallel" parking, the space must at
least equal to the length of your vehicle
plus 1
m.
For "bay" parking, the space must at least
equal to the width of your vehicle plus 0.70
m.
Preparing for the
manoeuvre
► Move very slowly until the request to stop
the vehicle and the " ST
OP" sign are displayed,
accompanied by an audible signal.
Once the vehicle has stopped, an instructions
page is displayed on the screen.
►
T
o prepare for the manoeuvre, you must fulfil
all of these instructions.
This symbol will be displayed automatically when the instruction has
been applied.
When all of the instructions have been validated,
a new page is displayed, indicating that you can
undertake the manoeuvre.
► To undertake the manoeuvre, press
this button.
► While holding down the button, gradually
release the brake pedal.
The button must be held down
throughout the manoeuvre.
The start of the manoeuvre is indicated by
the display of a window with the message
"Manoeuvre in progress", accompanied by an
audible signal.
The Visiopark 1 or Visiopark 2 and
the parking sensors are automatically
activated to help monitor the vehicle's close
surroundings throughout the manoeuvre.
Performing the manoeuvre
As soon as the driver releases the brake
pedal, the system automatically takes control
of choosing the travel direction, forwards or
reverse, acceleration, braking and the steering
direction.
The manoeuvring status is indicated by these
symbols:
Manoeuvre in progress.
Manoeuvre interrupted.
Manoeuvre completed or aborted.
Page 155 of 292

153
Driving
6When all of the instructions have been validated,
a new page is displayed, indicating that you can
undertake the manoeuvre.
► To undertake the manoeuvre, press
this button.
►
While holding down the button, gradually
release the brake pedal.
The button must be held down
throughout the manoeuvre.
The start of the manoeuvre is indicated by
the display of a window with the message
"Manoeuvre in progress", accompanied by an
audible signal.
The Visiopark 1 or Visiopark 2 and
the parking sensors are automatically
activated to help monitor the vehicle's close
surroundings
throughout the manoeuvre.
Performing the manoeuvre
As soon as the driver releases the brake
pedal, the system automatically takes control
of choosing the travel direction, forwards or
reverse, acceleration, braking and the steering
direction.
The manoeuvring status is indicated by these
symbols:
Manoeuvre in progress.
Manoeuvre interrupted.
Manoeuvre completed or aborted.
The white arrows indicate that the driver must
take back control of the vehicle.
The direction of the manoeuvre is indicated by
these symbols:
Forward gear.
Reverse gear.
The central arrow is green whilst the vehicle
is moving, or white to indicate the next
manoeuvring direction.
Throughout the whole manoeuvre, indicated by the green " AUTO" symbol,
the driver must hold down the function control
button.
During manoeuvring phases, the steering
wheel performs rapid turns: do not hold
the steering wheel or put your hands between
the spokes of the steering wheel. Beware of
any object likely to block the manoeuvre
(e.g.
loose clothing, scarves, ties) - risk of
injury!
If the vehicle slows down significantly,
the brake lamps may come on.
Suspending/resuming the manoeuvre
The manoeuvre can be interrupted temporarily
at any time, either automatically by the system if
an obstacle is detected, or by driver action. If the driver notices a hazard, they may also interrupt
the manoeuvre permanently.
To suspend the manoeuvre, the driver can:
–
Release the function control button.
–
Depress the brake pedal.
–
Resume control of the steering.
–
Change the gearbox status (except changing
to
P).
The vehicle is immediately immobilised if the
manoeuvre is suspended.
This is confirmed by the display of this symbol, accompanied by the message
"Manoeuvre suspended".
Resuming the manoeuvre after resolving the
conditions for suspending it:
►
Release all controls (brake pedal, function
control button, steering wheel, gear selector).
►
Press the function control button again.
Permanent interruption after suspending the
manoeuvre:
►
Depress the brake pedal and engage a gear
.
Aborting the manoeuvre
The manoeuvre is aborted in the following
situations:
–
No action by the driver within 30 seconds of
the manoeuvre being suspended.
–
Intentional application of the parking brake.
–
Gearbox mode P
engaged by the driver.
–
Driver's seat belt unfastened.
–
Opening of a door or the boot.
–
Activation of the direction indicator lamps on
the opposite side to that of the manoeuvre.