2021 Peugeot 308 lock
[x] Cancel search: lockPage 50 of 244
48
Ease of use and comfort
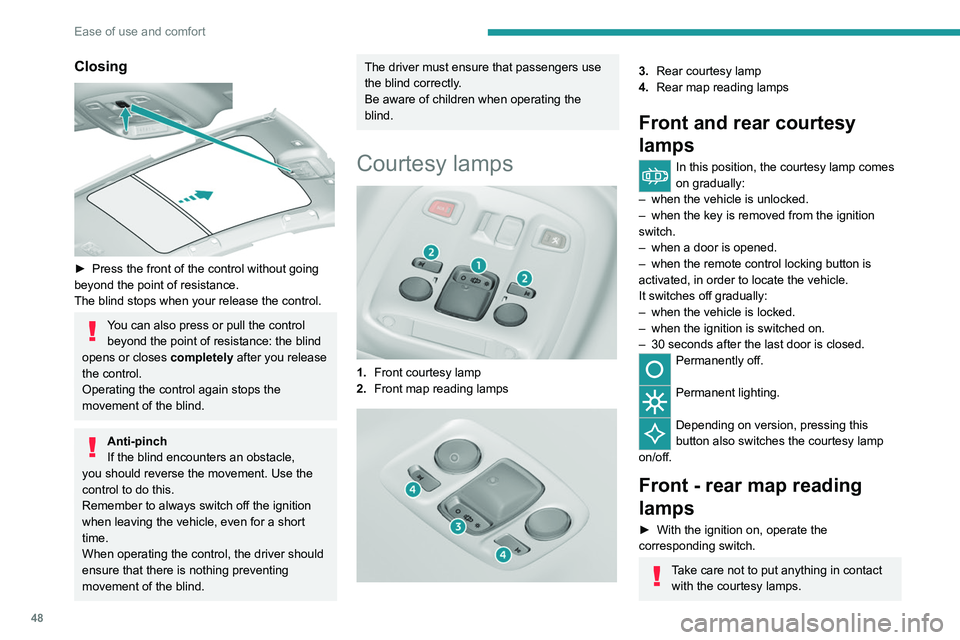
Closing
► Press the front of the control without going
beyond the point of resistance.
The blind stops when your release the control.
You can also press or pull the control beyond the point of resistance: the blind
opens or closes completely after you release
the control.
Operating the control again stops the
movement of the blind.
Anti-pinch
If the blind encounters an obstacle,
you should reverse the movement. Use the
control to do this.
Remember to always switch off the ignition
when leaving the vehicle, even for a short
time.
When operating the control, the driver should
ensure that there is nothing preventing
movement of the blind.
The driver must ensure that passengers use
the blind correctly.
Be aware of children when operating the
blind.
Courtesy lamps
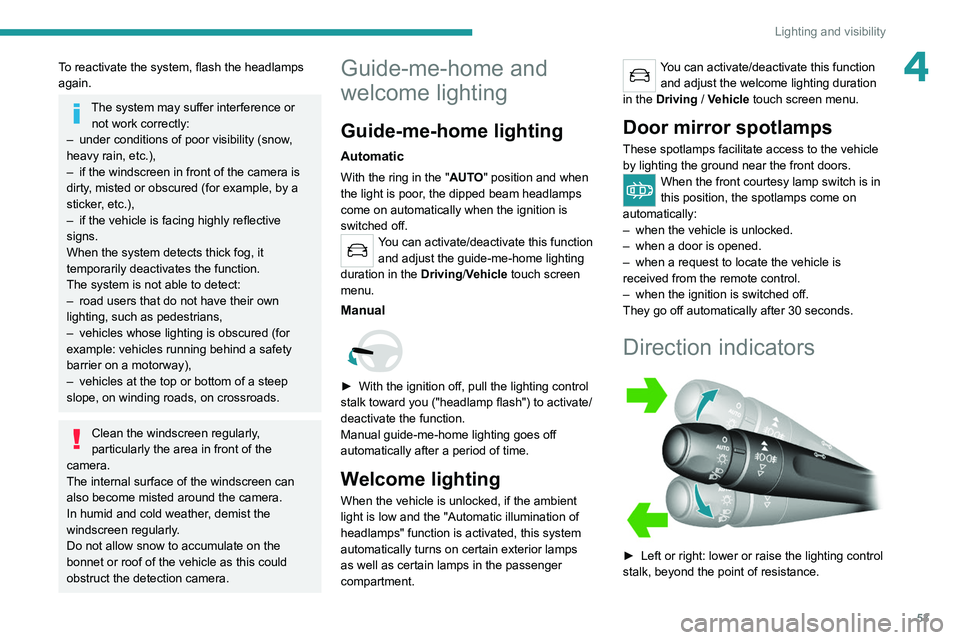
1. Front courtesy lamp
2. Front map reading lamps
3.Rear courtesy lamp
4. Rear map reading lamps
Front and rear courtesy
lamps
In this position, the courtesy lamp comes
on gradually:
–
when the vehicle is unlocked.
–
when the key is removed from the ignition
switch.
–
when a door is opened.
–
when the remote control locking button is
activated, in order to locate the vehicle.
It switches off gradually:
–
when the vehicle is locked.
–
when the ignition is switched on.
–
30 seconds after the last door is closed.
Permanently off.
Permanent lighting.
Depending on version, pressing this
button also switches the courtesy lamp
on/off.
Front - rear map reading
lamps
► With the ignition on, operate the
corresponding switch.
Take care not to put anything in contact with the courtesy lamps.
In "permanent lighting" mode, the lighting
time varies according to the
circumstances:
– when the ignition is off, approximately ten
minutes,
– in energy saving mode, approximately thirty
seconds,
– with the engine running, unlimited.
Footwell lighting
Switching on
Its operation is the same as the courtesy lamps.
The lamps come on when one of the doors is
opened.
Page 55 of 244
53
Lighting and visibility
4To reactivate the system, flash the headlamps
again.
The system may suffer interference or not work correctly:
–
under conditions of poor visibility (snow
,
heavy rain, etc.),
–
if the windscreen in front of the camera is
dirty
, misted or obscured (for example, by a
sticker, etc.),
–
if the vehicle is facing highly reflective
signs.
When the system detects thick fog, it
temporarily deactivates the function.
The system is not able to detect:
–
road users that do not have their own
lighting, such as pedestrians,
–
vehicles whose lighting is obscured (for
example: vehicles running behind a safety
barrier on a motorway),
–
vehicles at the top or bottom of a steep
slope, on winding roads, on crossroads.
Clean the windscreen regularly,
particularly the area in front of the
camera.
The internal surface of the windscreen can
also become misted around the camera.
In humid and cold weather, demist the
windscreen regularly.
Do not allow snow to accumulate on the
bonnet or roof of the vehicle as this could
obstruct the detection camera.
Guide-me-home and
welcome lighting
Guide-me-home lighting
Automatic
With the ring in the "AUTO" position and when
the light is poor, the dipped beam headlamps
come on automatically when the ignition is
switched off.
You can activate/deactivate this function and adjust the guide-me-home lighting
duration in the Driving/Vehicle touch screen
menu.
Manual
► With the ignition off, pull the lighting control
stalk toward you ("headlamp flash") to activate/
deactivate the function.
Manual guide-me-home lighting goes off
automatically after a period of time.
Welcome lighting
When the vehicle is unlocked, if the ambient
light is low and the "Automatic illumination of
headlamps" function is activated, this system
automatically turns on certain exterior lamps
as well as certain lamps in the passenger
compartment.
You can activate/deactivate this function and adjust the welcome lighting duration
in the Driving
/ Vehicle touch screen menu.
Door mirror spotlamps
These spotlamps facilitate access to the vehicle
by lighting the ground near the front doors.
When the front courtesy lamp switch is in
this position, the spotlamps come on
automatically:
–
when the vehicle is unlocked.
–
when a door is opened.
–
when a request to locate the vehicle is
received from the remote control.
–
when the ignition is switched off.
They go off automatically after 30 seconds.
Direction indicators
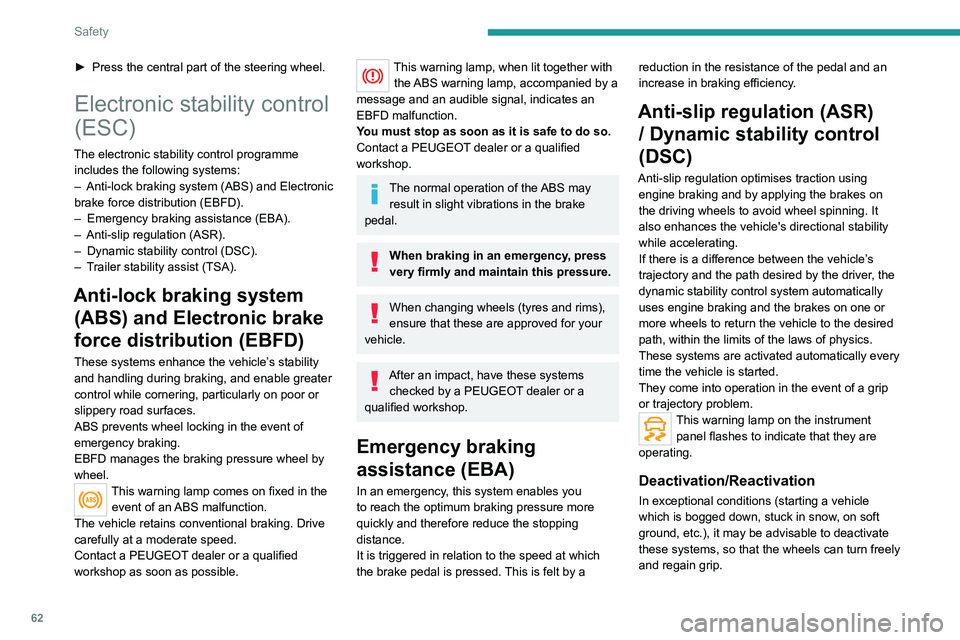
► Left or right: lower or raise the lighting control
stalk, beyond the point of resistance.
Page 64 of 244
62
Safety
► Press the central part of the steering wheel.
Electronic stability control
(ESC)
The electronic stability control programme includes the following systems:
–
Anti-lock braking system (ABS) and Electronic
brake force distribution (EBFD).
–
Emergency braking assistance (EBA).
–
Anti-slip regulation (ASR).
–
Dynamic stability control (DSC).
–
T
railer stability assist (TSA).
Anti-lock braking system (ABS) and Electronic brake
force distribution (EBFD)
These systems enhance the vehicle’s stability
and handling during braking, and enable greater
control while cornering, particularly on poor or
slippery road surfaces.
ABS prevents wheel locking in the event of
emergency braking.
EBFD manages the braking pressure wheel by
wheel.
This warning lamp comes on fixed in the
event of an ABS malfunction.
The vehicle retains conventional braking. Drive
carefully at a moderate speed.
Contact a PEUGEOT dealer or a qualified
workshop as soon as possible.
This warning lamp, when lit together with the ABS warning lamp, accompanied by a
message and an audible signal, indicates an
EBFD malfunction.
You must stop as soon as it is safe to do so.
Contact a PEUGEOT dealer or a qualified
workshop.
The normal operation of the ABS may result in slight vibrations in the brake
pedal.
When braking in an emergency, press
very firmly and maintain this pressure.
When changing wheels (tyres and rims),
ensure that these are approved for your
vehicle.
After an impact, have these systems checked by a PEUGEOT dealer or a
qualified workshop.
Emergency braking
assistance (EBA)
In an emergency, this system enables you
to reach the optimum braking pressure more
quickly and therefore reduce the stopping
distance.
It is triggered in relation to the speed at which
the brake pedal is pressed. This is felt by a reduction in the resistance of the pedal and an
increase in braking efficiency.
Anti-slip regulation (ASR)
/ Dynamic stability control
(DSC)
Anti-slip regulation optimises traction using
engine braking and by applying the brakes on
the driving wheels to avoid wheel spinning. It
also enhances the vehicle's directional stability
while accelerating.
If there is a difference between the vehicle’s
trajectory and the path desired by the driver, the
dynamic stability control system automatically
uses engine braking and the brakes on one or
more wheels to return the vehicle to the desired
path, within the limits of the laws of physics.
These systems are activated automatically every
time the vehicle is started.
They come into operation in the event of a grip
or trajectory problem.
This warning lamp on the instrument panel flashes to indicate that they are
operating.
Deactivation/Reactivation
In exceptional conditions (starting a vehicle
which is bogged down, stuck in snow, on soft
ground, etc.), it may be advisable to deactivate
these systems, so that the wheels can turn freely
and regain grip.
Page 66 of 244
64
Safety
The trailer stability control system provides an extra safety feature under
normal driving conditions, when following the
recommendations for use of trailers and
current legislation in force in your country.
This must not encourage the driver to take
extra risks, such as using a trailer in
sub-optimal conditions (excessive load, failure
to observe trailer nose weight, worn or
under-inflated tyres, faulty braking system,
etc.) or driving at excessive speeds.
In certain cases, the system may not detect
trailer snaking, particularly with a light trailer.
When driving on slippery or poor surfaces, the
system may not be able to prevent sudden
trailer snaking.
Seat belts
Inertia reel
The seat belts are equipped with an inertia reel
which allows the strap length to automatically
adjust to your shape. The seat belt returns to its
storage automatically when it is not used.
The inertia reels are fitted with a device which
automatically locks the strap in the event of a
collision, emergency braking or if the vehicle rolls
over. It can be released by pulling the strap firmly
and then releasing it so that it reels in slightly.
Pyrotechnic pretensioning
This system improves safety in the event of a
frontal or side impact.
Depending on the severity of the impact, the
pyrotechnic pretensioning system instantly
tightens the seat belts against the body of the
occupants.
The pyrotechnic pretensioning seat belts are
enabled when the ignition is on.
Force limiter
This system reduces the pressure of the seat
belt on the chest of the occupant, thus improving
their protection.
In the event of an impact
Depending on the nature and
seriousness of impacts, the pyrotechnic
pretensioner device may trigger before
and independently of airbag deployment.
Deployment of the pretensioners is
accompanied by a slight discharge of
harmless smoke and a noise, due to the
activation of the pyrotechnic cartridge
incorporated in the system.
In all cases, the airbag warning lamp comes
on.
Following an impact, have the seat belt
system checked, and if necessary replaced,
by a PEUGEOT dealer or a qualified
workshop.
Front seat belts
The front seat belts are fitted with a pyrotechnic
pretensioning system and a force limiting
system.
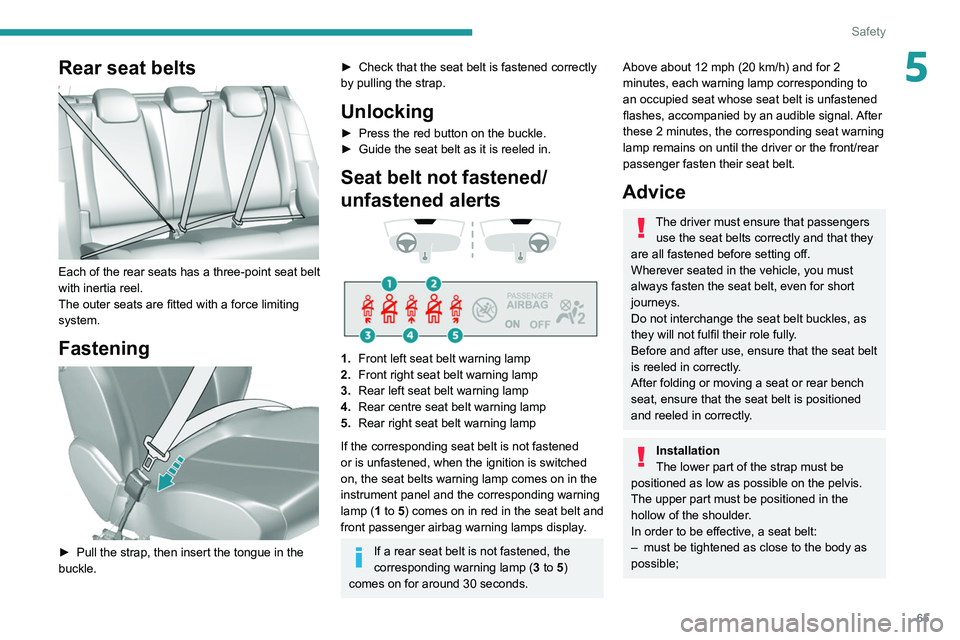
Rear seat belts
Each of the rear seats has a three-point seat belt
with inertia reel.
The outer seats are fitted with a force limiting
system.
Fastening
► Pull the strap, then insert the tongue in the
buckle.
Page 67 of 244
65
Safety
5Rear seat belts
Each of the rear seats has a three-point seat belt
with inertia reel.
The outer seats are fitted with a force limiting
system.
Fastening
► Pull the strap, then insert the tongue in the
buckle.
► Check that the seat belt is fastened correctly
by pulling the strap.
Unlocking
► Press the red button on the buckle.
► Guide the seat belt as it is reeled in.
Seat belt not fastened/
unfastened alerts
1. Front left seat belt warning lamp
2. Front right seat belt warning lamp
3. Rear left seat belt warning lamp
4. Rear centre seat belt warning lamp
5. Rear right seat belt warning lamp
If the corresponding seat belt is not fastened
or is unfastened, when the ignition is switched
on, the seat belts warning lamp comes on in the
instrument panel and the corresponding warning
lamp (1 to 5) comes on in red in the seat belt and
front passenger airbag warning lamps display.
If a rear seat belt is not fastened, the
corresponding warning lamp ( 3 to 5)
comes on for around 30 seconds.
Above about 12 mph (20 km/h) and for 2
minutes, each warning lamp corresponding to
an occupied seat whose seat belt is unfastened
flashes, accompanied by an audible signal. After
these 2 minutes, the corresponding seat warning
lamp remains on until the driver or the front/rear
passenger fasten their seat belt.
Advice
The driver must ensure that passengers use the seat belts correctly and that they
are all fastened before setting off.
Wherever seated in the vehicle, you must
always fasten the seat belt, even for short
journeys.
Do not interchange the seat belt buckles, as
they will not fulfil their role fully.
Before and after use, ensure that the seat belt
is reeled in correctly.
After folding or moving a seat or rear bench
seat, ensure that the seat belt is positioned
and reeled in correctly.
Installation
The lower part of the strap must be
positioned as low as possible on the pelvis.
The upper part must be positioned in the
hollow of the shoulder.
In order to be effective, a seat belt:
–
must be tightened as close to the body as
possible;
Page 71 of 244
69
Safety
5It is recommended that children travel
on the rear seats of the vehicle:
–
‘rear facing’ up to the age of 3,
–
‘forward facing’ over the age of 3.
Make sure that the seat belt is correctly
positioned and tightened.
For child seats with a support leg, ensure that
the support leg is in firm and steady contact
with the floor.
Advice
An incorrectly installed child seat compromises the child's safety in the
event of an accident.
Ensure that there is no seat belt or seat belt
buckle under the child seat, as this could
destabilise it.
Remember to fasten the seat belts or the
harness of child seats, keeping the slack
relative to the child's body to a minimum,
even for short journeys.
When installing a child seat using the seat
belt, ensure that the seat belt is tightened
correctly on the child seat and that it secures
the child seat firmly on the seat of the vehicle.
If the passenger seat is adjustable, move it
forwards if necessary.
Remove the head restraint before
installing a child seat with a backrest on a
passenger seat.
Ensure that the head restraint is stored or
attached securely to prevent it from being
thrown around the vehicle in the event of
sharp braking. Refit the head restraint once
the child seat has been removed.
Installing a booster seat
The chest part of the seat belt must be
positioned on the child's shoulder without
touching the neck.
Ensure that the lap part of the seat belt
passes correctly over the child's thighs.
Use a booster seat with backrest, equipped
with a belt guide at shoulder level.
Additional protections
To prevent accidental opening of the
doors and rear windows, use the "Child lock".
Take care not to open the rear windows by
more than one third.
To protect young children from the rays of the
sun, fit side blinds on the rear windows.
As a safety precaution, do not leave:
–
a child alone and unattended in a vehicle,
–
a child or an animal in a vehicle which is
exposed to the sun, with the windows closed,
–
the keys within reach of children inside the
vehicle.
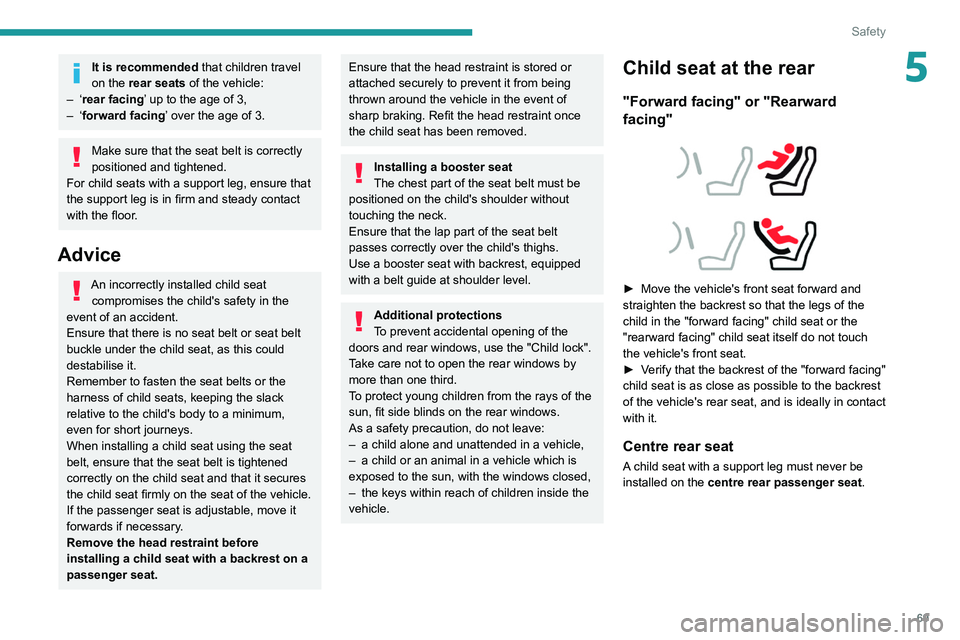
Child seat at the rear
"Forward facing" or "Rearward
facing"
► Move the vehicle's front seat forward and
straighten the backrest so that the legs of the
child in the "forward facing" child seat or the
"rearward facing" child seat itself do not touch
the vehicle's front seat.
►
V
erify that the backrest of the "forward facing"
child seat is as close as possible to the backrest
of the vehicle's rear seat, and is ideally in contact
with it.
Centre rear seat
A child seat with a support leg must never be
installed on the centre rear passenger seat .
Page 80 of 244
78
Safety
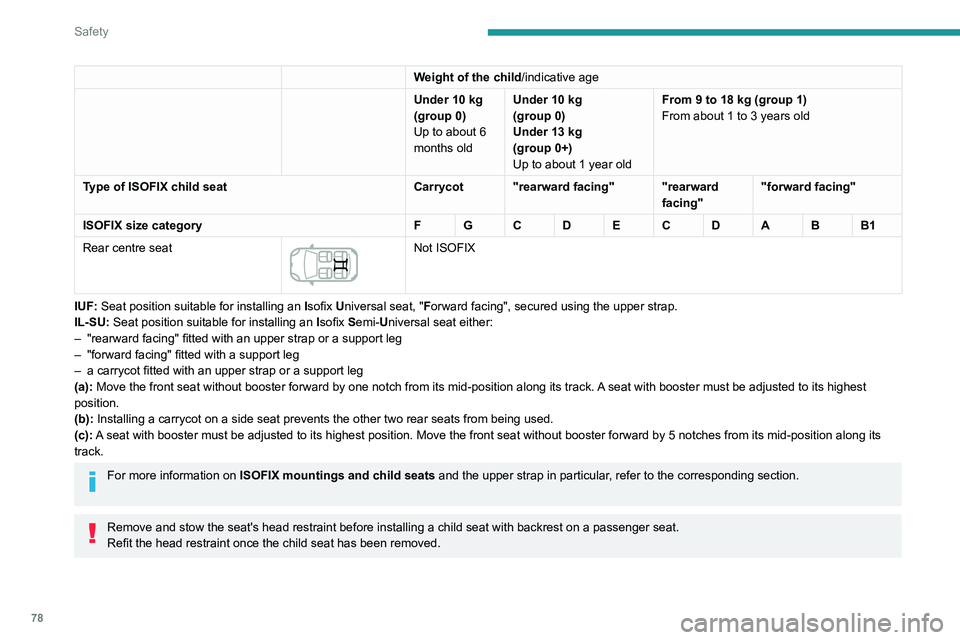
Weight of the child/indicative age
Under 10 kg
(group
0)
Up to about 6
months old Under 10
kg
(group
0)
Under 13
kg
(group
0+)
Up to about 1 year old From 9 to 18
kg (group 1)
From about 1 to 3 years old
Type of ISOFIX child seat Carrycot "rearward facing" "rearward
facing""forward facing"
ISOFIX size category F G C D E C D A B B1
Rear centre seat
Not ISOFIX
IUF: Seat position suitable for installing an Isofix Universal seat, "Forward facing", secured using the upper strap.
IL-SU: Seat position suitable for installing an Isofix Semi-Universal seat either:
–
"rearward facing" fitted with an upper strap or a support leg
–
"forward facing" fitted with a support leg
–
a carrycot fitted with an upper strap or a support leg
(a):
Move the front seat without booster forward by one notch from its mid-p\
osition along its track. A seat with booster must be adjusted to its highest
position.
(b): Installing a carrycot on a side seat prevents the other two rear seats \
from being used.
(c): A seat with booster must be adjusted to its highest position. Move the fr\
ont seat without booster forward by 5 notches from its mid-position alon\
g its
track.
For more information on ISOFIX mountings and child seats and the upper strap in particular, refer to the corresponding section.
Remove and stow the seat's head restraint before installing a child seat\
with backrest on a passenger seat.
Refit the head restraint once the child seat has been removed.
Child lock
This mechanical system prevents opening of a
rear door using its interior control.
The control is located on the edge of each rear
door and locking is independent for each door.
Locking
► Using the built-in key, turn the control as far
as it will go: • to the left on the left-hand rear door,
• to the right on the right-hand rear door.
Unlocking
► Using the built-in key, turn the control as far
as it will go: • to the right on the left-hand rear door,
• to the left on the right-hand rear door.
Page 81 of 244
79
Safety
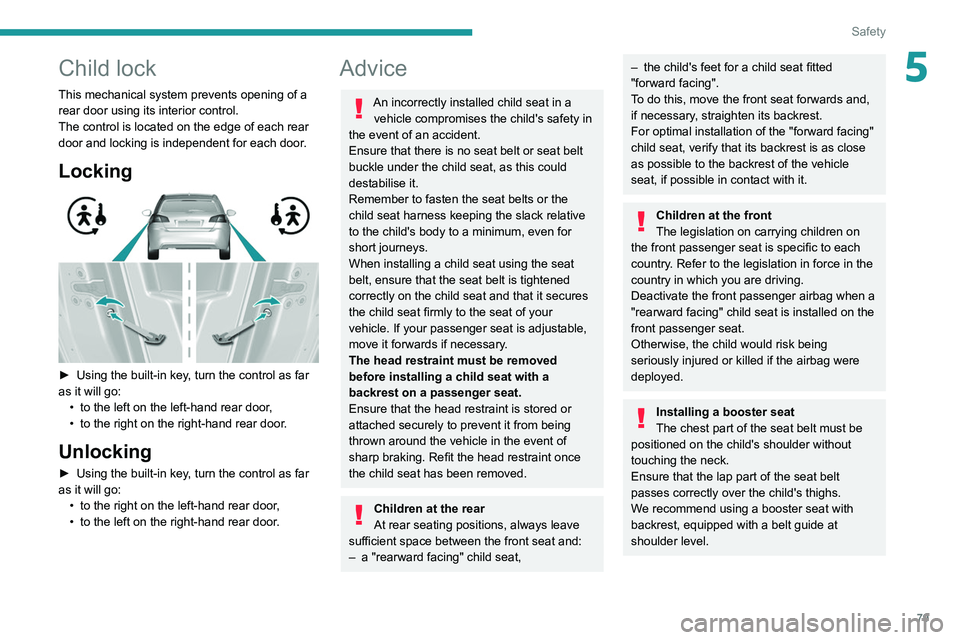
5Child lock
This mechanical system prevents opening of a
rear door using its interior control.
The control is located on the edge of each rear
door and locking is independent for each door.
Locking
► Using the built-in key, turn the control as far
as it will go: •
to the left on the left-hand rear door
,
•
to the right on the right-hand rear door
.
Unlocking
► Using the built-in key, turn the control as far
as it will go: •
to the right on the left-hand rear door
,
•
to the left on the right-hand rear door
.
Advice
An incorrectly installed child seat in a vehicle compromises the child's safety in
the event of an accident.
Ensure that there is no seat belt or seat belt
buckle under the child seat, as this could
destabilise it.
Remember to fasten the seat belts or the
child seat harness keeping the slack relative
to the child's body to a minimum, even for
short journeys.
When installing a child seat using the seat
belt, ensure that the seat belt is tightened
correctly on the child seat and that it secures
the child seat firmly to the seat of your
vehicle. If your passenger seat is adjustable,
move it forwards if necessary.
The head restraint must be removed
before installing a child seat with a
backrest on a passenger seat.
Ensure that the head restraint is stored or
attached securely to prevent it from being
thrown around the vehicle in the event of
sharp braking. Refit the head restraint once
the child seat has been removed.
Children at the rear
At rear seating positions, always leave
sufficient space between the front seat and:
–
a "rearward facing" child seat,
– the child's feet for a child seat fitted
"forward facing".
T
o do this, move the front seat forwards and,
if necessary, straighten its backrest.
For optimal installation of the "forward facing"
child seat, verify that its backrest is as close
as possible to the backrest of the vehicle
seat, if possible in contact with it.
Children at the front
The legislation on carrying children on
the front passenger seat is specific to each
country. Refer to the legislation in force in the
country in which you are driving.
Deactivate the front passenger airbag when a
"rearward facing" child seat is installed on the
front passenger seat.
Otherwise, the child would risk being
seriously injured or killed if the airbag were
deployed.
Installing a booster seat
The chest part of the seat belt must be
positioned on the child's shoulder without
touching the neck.
Ensure that the lap part of the seat belt
passes correctly over the child's thighs.
We recommend using a booster seat with
backrest, equipped with a belt guide at
shoulder level.