2021 Peugeot 308 ECU
[x] Cancel search: ECUPage 156 of 244

154
In the event of a breakdown
enough to inflate a tyre after a puncture
repair.
For more information on the Tool kit,
refer to the corresponding section.
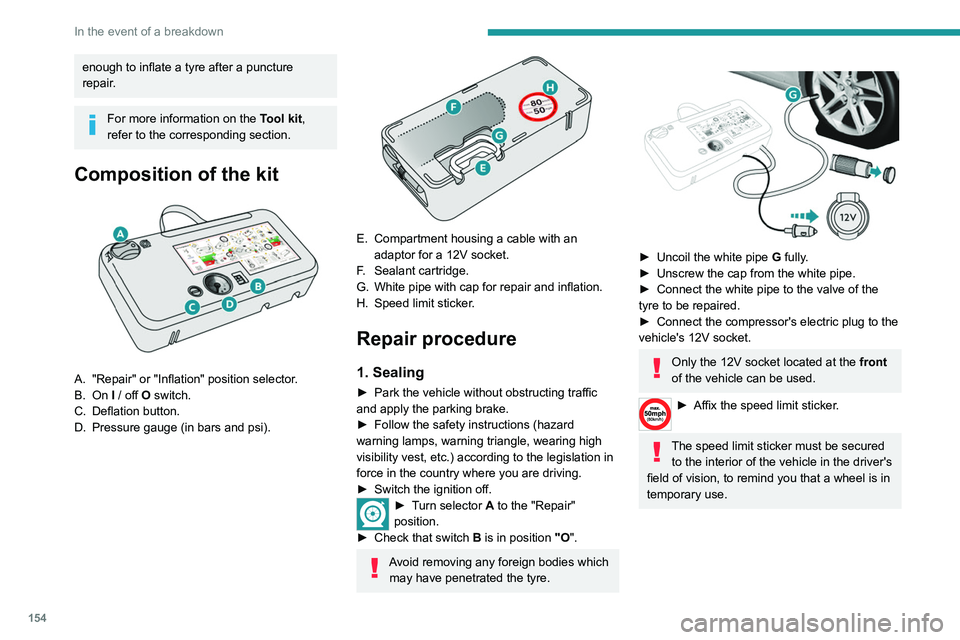
Composition of the kit
A. "Repair" or "Inflation" position selector.
B. On I / off O switch.
C. Deflation button.
D. Pressure gauge (in bars and psi).
E. Compartment housing a cable with an adaptor for a 12V socket.
F. Sealant cartridge.
G. White pipe with cap for repair and inflation.
H. Speed limit sticker.
Repair procedure
1. Sealing
► Park the vehicle without obstructing traffic
and apply the parking brake.
►
Follow the safety instructions (hazard
warning lamps, warning triangle, wearing high
visibility vest, etc.) according to the legislation in
force in the country where you are driving.
►
Switch the ignition off.
► Turn selector A to the "Repair"
position.
►
Check that switch
B is in position "O".
Avoid removing any foreign bodies which
may have penetrated the tyre.
► Uncoil the white pipe G fully.
► Unscrew the cap from the white pipe.
►
Connect the white pipe to the valve of the
tyre to be repaired.
►
Connect the compressor's electric plug to the
vehicle's 12V socket.
Only the 12V socket located at the front
of the vehicle can be used.
► Affix the speed li mit sticker.
The speed limit sticker must be secured
to the interior of the vehicle in the driver's
field of vision, to remind you that a wheel is in
temporary use.
Page 162 of 244

160
In the event of a breakdown
If your vehicle is fitted with alloy wheels, when
tightening the bolts on fitting, it is normal to
notice that the washers do not come into
contact with the "space-saver" spare wheel.
The wheel is secured by the conical contact
of each bolt.
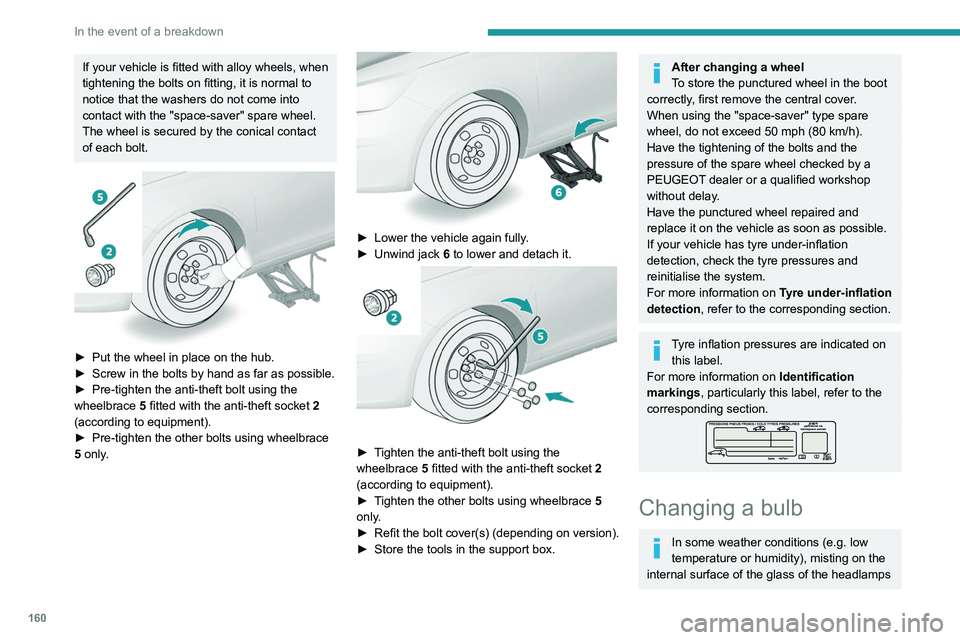
► Put the wheel in place on the hub.
► Screw in the bolts by hand as far as possible.
►
Pre-tighten the anti-theft bolt using the
wheelbrace 5
fitted with the anti-theft socket 2
(according to equipment).
►
Pre-tighten the other bolts using wheelbrace
5
only.
► Lower the vehicle again fully .
► Unwind jack 6
to lower and detach it.
► Tighten the anti-theft bolt using the
wheelbrace 5 fitted with the anti-theft socket 2
(according to equipment).
►
T
ighten the other bolts using wheelbrace 5
only.
►
Refit
the bolt cover(s) (depending on version).
►
Store the tools in the support box.
After changing a wheel
To store the punctured wheel in the boot
correctly, first remove the central cover.
When using the "space-saver" type spare
wheel, do not exceed 50 mph (80 km/h).
Have the tightening of the bolts and the
pressure of the spare wheel checked by a
PEUGEOT dealer or a qualified workshop
without delay.
Have the punctured wheel repaired and
replace it on the vehicle as soon as possible.
If your vehicle has tyre under-inflation
detection, check the tyre pressures and
reinitialise the system.
For more information on Tyre under-inflation
detection, refer to the corresponding section.
Tyre inflation pressures are indicated on this label.
For more information on Identification
markings, particularly this label, refer to the
corresponding section.
Changing a bulb
In some weather conditions (e.g. low
temperature or humidity), misting on the
internal surface of the glass of the headlamps
and rear lamps is normal, and will disappear
after the lamps have been on for a few
minutes.
The headlamps have polycarbonate lenses with a protective coating:
– Do not clean them with a dry or abrasive
cloth, nor with detergent or solvent
products.
– Use a sponge and soapy water or a pH
neutral product.
– When using a high-pressure washer on
persistent marks, do not keep the lance
directed towards the headlamps, lamps or
their edges for too long, so as not to damage
their protective coating and seals.
Changing a bulb must only be done with
the ignition off and after the headlamp /
lamp has been switched off for several
minutes - risk of serious burns!
Do not touch the bulb directly with your
fingers; use a lint-free cloth.
It is essential only to use anti-ultraviolet
(UV) type bulbs, so as not to damage the
headlamp.
Always replace a failed bulb with a new bulb
of the same type and specification. To avoid
lighting imbalance, replace the bulbs in pairs.
Page 169 of 244

167
In the event of a breakdown
8► Identify the defective fuse using the current
allocation tables and diagrams.
T
o replace a fuse, it is essential to:
►
Use the special tweezers to extract the fuse
from its housing and check the condition of its
filament.
►
Always replace the failed fuse with a fuse of
the same rating (same colour); use of a different
rating may cause malfunctions - risk of fire!
If the fault recurs after replacing a fuse, have
the electrical system checked by a PEUGEOT
dealer or a qualified workshop.
The fuse allocation tables and the corresponding diagrams are available
from a PEUGEOT dealer or from a qualified
workshop.
The replacement of a fuse not shown in the allocation tables may cause a serious
malfunction of your vehicle. Contact a
PEUGEOT dealer or a qualified workshop.
Good
Failed
Tweezers
Installing electrical accessories
Your vehicle's electrical system is
designed to operate with standard or optional
equipment.
Before installing other electrical equipment
or accessories on your vehicle, contact a
PEUGEOT dealer or a qualified workshop.
PEUGEOT will not accept responsibility
for the cost incurred in repairing your
vehicle or for rectifying malfunctions resulting
from the installation of accessories not
supplied and not recommended by
PEUGEOT and not installed in accordance
with its instructions, in particular when the
combined consumption of all of the additional
equipment connected exceeds 10
milliamperes.
Fuses in the dashboard
The fusebox is located in the lower dashboard
(left-hand side).
Accessing the fuses
► Unclip the cover by pulling at the top left, then
right.
Page 172 of 244

170
In the event of a breakdown
► Secure the bonnet stay.
► Remove the plastic cover on the (+) terminal.
The battery (-) terminal is not accessible.
A
remote earth point is located on the engine.
Starting using another
battery
If your vehicle's battery is flat, the engine can be
started using a backup battery (either external or
from another vehicle) and jump leads or using a
battery booster.
Never start the engine by connecting a
battery charger.
Never use a 24
V or higher battery booster.
Check beforehand that the backup battery
has a nominal voltage of 12
V and a capacity
at least equal to that of the discharged
battery.
The two vehicles must not be in contact with
each other.
Switch off all electricity-consuming equipment
on both vehicles (audio system, wipers,
lighting, etc.).
Make sure that the jump leads are well away
from the engine’s moving parts (fan, belt,
etc.).
Do not disconnect the (+) terminal while the
engine is running.
► Lift the plastic cover on the (+) terminal, if the
vehicle has one.
►
Connect the red cable to the (+) terminal of
flat battery
A (at the metal elbow), then to the
(+) terminal of the backup battery
B or of the
booster.
►
Connect one end of the green or black cable
to the (-) terminal of the backup battery
B or of
the booster (or to an earth point on the assisting
vehicle).
►
Connect the other end of the green or black
cable to the earth point
C
.
►
Start the engine on the assisting vehicle and
leave it running for a few minutes.
►
Operate the starter on the broken down
vehicle and let the engine run.
If the engine does not start immediately, switch
off the ignition and wait a few moments before
trying again.
►
W
ait for it to return to idle.
►
Disconnect the jump leads in reverse order.
►
Refit the plastic cover to the (+) terminal, if
the vehicle has one.
►
Allow the engine to run for at least
30
minutes, with the vehicle stationary, so that
the battery reaches an adequate state of charge.
Drive cautiously during the first 30
minutes after starting the engine.
With an automatic gearbox, never try to
start the engine by pushing the vehicle.
Charging the battery using a
battery charger
For optimum service life of the battery, it is
essential to maintain an adequate state of
charge.
In some circumstances, it may be necessary to
charge the battery:
–
When using the vehicle mainly for short
journeys.
–
If the vehicle is to be taken off the road for
several weeks.
Contact a PEUGEOT
dealer or a qualified
workshop.
Page 209 of 244

207
PEUGEOT Connect Nav
11legislation and subscription to the
corresponding service.
Connected navigation
Connected navigation
connection
Depending on version, vehicle trim level and
subscription to online services and options.
Network connection provided by the
vehicle
If you use the Peugeot Connect Packs
solution, the system is automatically
connected to the Internet and connected
services, and does not require the user to
provide a connection via their smartphone.
OR
Network connection provided by the
user
For the list of suitable smartphones, visit
the Brand's national website.
Activate and enter settings for sharing the
smartphone connection.
As processes and standards are constantly changing, we recommend you
update the smartphone operating system
as well as the date and time on the
smartphone and system, to ensure that the
communication process between the
smartphone and the system functions
correctly.
USB connection
Connect the USB cable.
The smartphone charges when
connected by the USB cable.
Bluetooth connection
Activate the Bluetooth function on the telephone and ensure that it is visible to
all (see the "Connect-App" section).
Wi-Fi connection
Select a Wi-Fi network detected by the
system and connect to it.
This function is only available if it has been activated either via the
"Notifications" or via the "Applications" menu.
Press "Notifications".
Select Wi-Fi to activate it.
OR
Press Connect-App to display the main
page.
Press the "OPTIONS " button to access the
secondary page.
Select "Wi-Fi network connection".
Select the "Secured", "Not secured" or
"Stored” tab.
Select a network.
Using the virtual keypad, enter the Wi-Fi
network "Key” and "Password".
Press "OK" to establish a connection
between the smartphone and the
vehicle’s system.
Usage restrictions:
– With CarPlay®, connection sharing is
only available with a Wi-Fi connection.
–
With MirrorLinkTM, connection sharing is
only available with a USB connection.
The quality of services depends on the quality
of the network connection.
Authorize sending information
Press Settings to display the main page.
Press the "OPTIONS " button to access the
secondary page.
Select "System configuration".
Select the "Private mode” tab.
OR
Press "Notifications".
Page 213 of 244

2 11
PEUGEOT Connect Nav
11Procedure from the system
Press Connect-App to display the main
page.
Press the "OPTIONS " button to access the
secondary page.
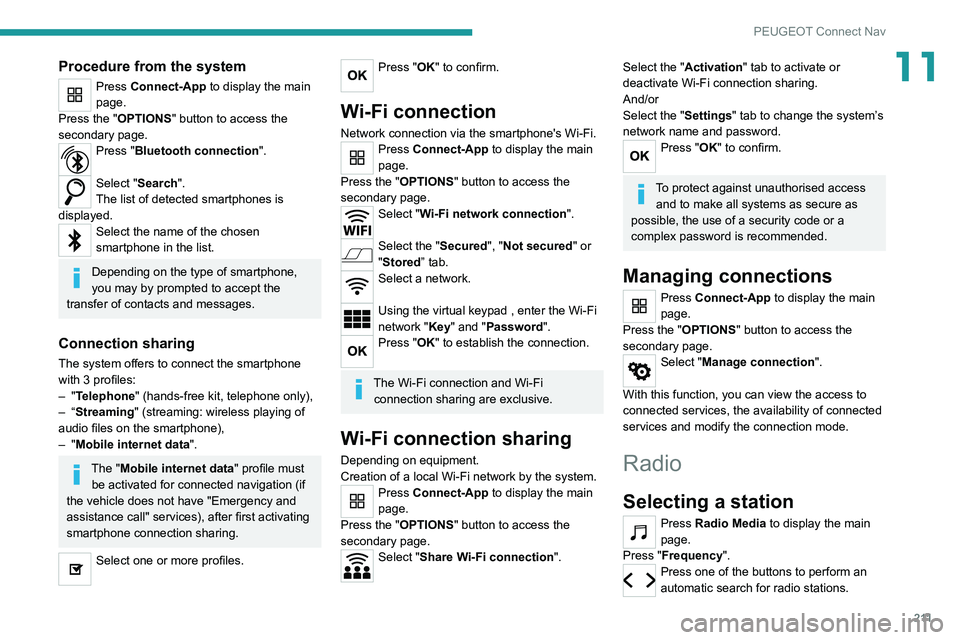
Press "Bluetooth connection".
Select "Search".
The list of detected smartphones is
displayed.
Select the name of the chosen
smartphone in the list.
Depending on the type of smartphone,
you may by prompted to accept the
transfer of contacts and messages.
Connection sharing
The system offers to connect the smartphone
with 3 profiles:
–
"Telephone" (hands-free kit, telephone only),
–
“Streaming" (streaming: wireless playing of
audio files on the smartphone),
–
"Mobile internet data ".
The "Mobile internet data " profile must
be activated for connected navigation (if
the vehicle does not have "Emergency and
assistance call" services), after first activating
smartphone connection sharing.
Select one or more profiles.
Press "OK" to confirm.
Wi-Fi connection
Network connection via the smartphone's Wi-Fi.Press Connect-App to display the main
page.
Press the "OPTIONS " button to access the
secondary page.
Select "Wi-Fi network connection".
Select the "Secured", "Not secured" or
"Stored” tab.
Select a network.
Using the virtual keypad , enter the Wi-Fi
network "Key" and "Password".
Press "OK" to establish the connection.
The Wi-Fi connection and Wi-Fi connection sharing are exclusive.
Wi-Fi connection sharing
Depending on equipment.
Creation of a local Wi-Fi network by the system.
Press Connect-App to display the main
page.
Press the "OPTIONS " button to access the
secondary page.
Select "Share Wi-Fi connection".
Select the "Activation" tab to activate or
deactivate Wi-Fi connection sharing.
And/or
Select the "Settings" tab to change the system’s
network name and password.
Press "OK" to confirm.
To protect against unauthorised access and to make all systems as secure as
possible, the use of a security code or a
complex password is recommended.
Managing connections
Press Connect-App to display the main
page.
Press the "OPTIONS " button to access the
secondary page.
Select "Manage connection".
With this function, you can view the access to
connected services, the availability of connected
services and modify the connection mode.
Radio
Selecting a station
Press Radio Media to display the main
page.
Press "Frequency".
Press one of the buttons to perform an
automatic search for radio stations.