2021 NISSAN NV200 engine
[x] Cancel search: enginePage 134 of 300
fan speed
control dial to the desired position and
press the
button to turn on the air
conditioner. To turn off the air conditioner,
press the
button again.
The air conditioner cooling function op-
erates only when the engine is running.
Rear window and/or outside
mirror defroster switch (if so
equipped)
For additional information, see “Rear win-
dow and/or outside mirror defroster
switch (if so equipped)” (P. 2-21).
HEATER OPERATION
Heating
This mode is used to direct heated air to
the foot outlets. Some air also flows from
the defrost outlets.
1. Move the air intake lever to the
position for normal heating.
2. Turn the air flow control dial to the
position. 3. Turn the
fan speed control dial to
the desired position.
4. Turn the temperature control dial to the desired position between the middle
and the hot position.
Ventilation
This mode directs outside air to the side
and center vents.
1. Move the air intake lever to the
position.
2. Turn the air flow control dial to the
position.
3. Turn the
fan speed control dial to
the desired position.
4. Turn the temperature control dial to the desired position.
Defrosting or defogging
This mode directs the air to the defrost
outlets to defrost/defog the windows.
1. Move the air intake lever to the
position.
2. Turn the air flow control dial to the
position. 3. Turn the
fan speed control dial to
the desired position.
4. Turn the temperature control dial to the desired position between the middle
and the hot position.
• To quickly remove ice or fog from the win- dows, turn the
fan speed control dial
to the maximum position and the tem-
perature control dial to the full hot
position.
When the
orposition is se-
lected, the air conditioner automatically
turns on (however, the indicator light will
not illuminate). In this position, the air con-
ditioner cannot be turned off. When the air
flow control is turned to any position other
than
or(the air conditioner will
continue operating). and can be turned off
using the air conditioner button. This dehu-
midifies the air, which helps defog the
windshield.
Bi-level heating
This mode directs cooler air from the side
and center vents and warmer air from the
floor outlets. When the temperature con-
trol dial is moved to the full hot or full cool
position, the air between the vents and the
floor outlets is the same temperature.
4-12Monitor, climate, audio, phone and voice recognition systems
Page 135 of 300
position.
2. Turn the air flow control dial to the
position.
3. Turn the
fan speed control dial to
the desired position.
4. Turn the temperature control dial to the desired position.
Heating and defogging
This mode heats the interior and defogs
the windshield.
1. Move the air intake lever to the
position.
2. Turn the air flow control dial to the
position.
3. Turn the
fan speed control dial to
the desired position.
4. Turn the temperature control dial to the desired position between the middle
and the hot position.
When the
orposition is se-
lected, the air conditioner automatically
turns on (however, the indicator light will
not illuminate). In this position, the air con-
ditioner cannot be turned off. When the air
flow control is turned to any position other than
or(the air conditioner will
continue operating) and can be turned off
using the air conditioner button. This dehu-
midifies the air, which helps defog the
windshield.
Operating tips
Clear snow and ice from the wiper blades
and air inlet in front of the windshield.
This improves heater operation.
AIR CONDITIONER OPERATION
Start the engine, turn thefan speed
control dial to the desired position, and
press the
button to activate the air
conditioner. When the air conditioner is on,
cooling and dehumidif ying functions are
added to the heater operation.
The air conditioner cooling function op-
erates only when the engine is running.
Cooling
This mode is used to cool and dehumidif y
the air.
1. Move the air intake lever to the
position.
2. Turn the air flow control dial to the
position. 3. Turn the
fan speed control dial to
the desired position.
4. Press the
button. The indicator
light comes on.
5. Turn the temperature control dial to the desired position.
• For quick cooling when the outside tem- perature is high, move the air intake lever
to the
position. Be sure to return to
theposition for normal cooling.
Dehumidified heating
This mode is used to heat and dehumidif y
the air.
1. Move the air intake lever to the
position.
2. Turn the air flow control dial to the
position.
3. Turn the
fan speed control dial to
the desired position.
4. Press the
button. The indicator
light comes on.
5. Turn the temperature control dial to the desired position.
Monitor, climate, audio, phone and voice recognition systems4-13
Page 145 of 300
CAUTION
• Do not use leaded gasoline. Deposits
from leaded gasoline will seriously
reduce the three-way catalyst's abil-
ity to help reduce exhaust pollutants.
• Keep your engine tuned up. Malfunc-
tions in the ignition, fuel injection, or
electrical systems can cause over
rich fuel flow into the three-way
catalyst, causing it to overheat. Do
not keep driving if the engine mis-
fires, or if noticeable loss of perfor-
mance or other unusual operating
conditions are detected. Have the ve-
hicle inspected promptly. It is recom-
mended that you visit a NISSAN
dealer for this service.
• Avoid driving with an extremely low
fuel level. Running out of fuel could
cause the engine to misfire, damag-
ing the three-way catalyst.
• Do not race the engine while warm-
ing it up.
• Do not push or tow your vehicle to
start the engine.TIRE PRESSURE MONITORING
SYSTEM (TPMS)
Each tire, including the spare (if provided),
should be checked monthly when cold and
inflated to the inflation pressure recom-
mended by the vehicle manufacturer on
the vehicle placard or tire inflation pressure
label.
(If your vehicle has tires of a different size
than the size indicated on the vehicle plac-
ard or tire inflation pressure label, you
should determine the proper tire inflation
pressure for those tires.)
As an added safety feature, your vehicle
has been equipped with a Tire Pressure
Monitoring System (TPMS) that illuminates
a low tire pressure telltale when one or
more of your tires is significantly under-
inflated. Accordingly, when the low tire
pressure telltale illuminates, you should
stop and check your tires as soon as pos-
sible, and inflate them to the proper pres-
sure. Driving on a significantly under-
inflated tire causes the tire to overheat and
can lead to tire failure. Under-inflation also
reduces fuel efficiency and tire tread life,
and may affect the vehicle’s handling and
stopping ability. Please note that the TPMS is not a substi-
tute for proper tire maintenance, and it is
the driver’s responsibility to maintain cor-
rect tire pressure, even if under-inflation
has not reached the level to trigger illumi-
nation of the TPMS low tire pressure telltale.
Your vehicle has also been equipped with a
TPMS malfunction indicator to indicate
when the system is not operating properly.
The TPMS malfunction indicator is com-
bined with the low tire pressure telltale.
When the system detects a malfunction,
the telltale will flash for approximately one
minute and then remain continuously illu-
minated. This sequence will continue upon
subsequent vehicle start-ups as long as
the malfunction exists. When the malfunc-
tion indicator is illuminated, the system
may not be able to detect or signal low tire
pressure as intended. TPMS malfunctions
may occur for a variety of reasons, includ-
ing the installation of replacement or alter-
nate tires or wheels on the vehicle that
prevent the TPMS from functioning prop-
erly. Always check the TPMS malfunction
telltale af ter replacing one or more tires or
wheels on your vehicle to ensure that the
replacement or alternate tires and wheels
allow the TPMS to continue to function
properly.
Starting and driving5-3
Page 152 of 300
1. Apply the parking brake.
2. Move the shif t lever to P (Park) or N (Neu-tral). P (Park) is recommended.
The shif t lever cannot be moved out of
P (Park) and into any of the other gear
positions if the ignition switch is
turned to the OFF position or if the key
is removed from the ignition switch.
The starter is designed not to operate
if the shif t lever is in any of the driving
positions.
3. Crank the engine with your foot off the
accelerator pedal by placing the igni-
tion switch in the START position. Re-
lease the key when the engine starts. If
the engine starts, but fails to run, repeat
the above procedure.
• If the engine is very hard to start in extremely cold weather or when re-
starting, depress the accelerator
pedal a little (approximately 1/3 to the
floor) and hold it and then crank the
engine. Release the key and the accel-
erator pedal when the engine starts. • If the engine is very hard to start be-
cause it is flooded, depress the accel-
erator pedal all the way to the floor
and hold it. Crank the engine for 5–6
seconds. Af ter cranking the engine, re-
lease the accelerator pedal. Crank the
engine with your foot off the accel-
erator pedal by turning the ignition
key to the START position. Release the
key when the engine starts. If the en-
gine starts, but fails to run, repeat the
above procedure.
Page 153 of 300
ENGINE PROTECTION MODE
The engine has an engine protection mode
to reduce the chance of damage if the
coolant temperature becomes too high
(for example, when climbing steep grades
in high temperature with heavy loads, such
as when towing a trailer). When the engine
temperature reaches a certain level:
• The high temperature warning light willturn on.
• Engine power may be reduced.
• The air conditioning cooling function may be automatically turned off for a short
time (the blower will continue to operate).
Engine power and, under some conditions,
vehicle speed will decrease. Vehicle speed
can be controlled with the accelerator
pedal, but the vehicle may not accelerate at
the desired speed. The transmission will
downshif t or upshif t as it reaches pre-
scribed shif t points. You can also shif t
manually.
As driving conditions change and engine
coolant temperature is reduced, vehicle
speed can be increased using the accel-
erator pedal, and air conditioning cooling
function will automatically be turned back
on. Move the vehicle off the road in a safe area
and allow the engine to cool if the following
occurs:
1. The engine coolant temperature is not
reduced.
2. The air conditioning cooling function does not turn back on.
3. The engine oil pressure low and high temperature warning light
illumi-
nates. This may indicate a malfunction.
If af ter checking the oil and coolant, the
remains on, do not continue to drive. It
is recommended that you visit a NISSAN
dealer for servicing.
The Malfunction Indicator Light (MIL) may
also come ON. If onlyit remains on, you do
not need to have your vehicle towed, but
have it inspected soon. It is recommended
that you visit a NISSAN dealer for this ser-
vice. For additional information, see “Mal-
function Indicator Light (MIL)” (P. 2-14).
CAUTION
Running the engine with the engine oil
pressure warning light on could cause
serious damage to the engine almost
immediately. Such damage is not cov-
ered by warranty. Turn off the engine as
soon as it is safe to do so.
DRIVING THE VEHICLE
Starting and driving5-11
Page 154 of 300
CONTINUOUSLY VARIABLE
TRANSMISSION (CVT)CAUTION
• Except in an emergency, do not shif t
to the N (Neutral) position while driv-
ing. Coasting with the transmission
in the N (Neutral) position may cause
serious damage to the transmission.
• To avoid possible damage to your ve-
hicle, when stopping the vehicle on
an uphill grade, do not hold the ve-
hicle by depressing the accelerator
pedal. The foot brake should be used
for this purpose.
The CVT in your vehicle is electronically
controlled to produce maximum power
and smooth operation.
The recommended operating procedures
for this transmission are shown on the fol-
lowing pages. Follow these procedures for
maximum vehicle performance and driv-
ing enjoyment.
NOTE:
Engine power may be automatically re-
duced to protect the CVT if the engine
speed increases quickly when driving on
slippery roads or while being tested on
some dynamometers.
Starting the vehicle
Page 155 of 300
CAUTION
To avoid possible damage to your ve-
hicle, when stopping the vehicle on an
uphill grade, do not hold the vehicle by
depressing the accelerator pedal. The
foot brake should be used for this
purpose.
1. Af ter starting the engine, fully depress the foot brake pedal before moving the
shif t lever out of the P (Park) position.
2. Keep the foot brake pedal depressed and move the shif t lever into a driving
gear.
3. Release the foot brake, then gradually start the vehicle in motion.
4. Stop the vehicle completely before mov- ing the shif t lever into the P (Park)
position.
The Continuously Variable Transmission
is designed so the foot brake pedal MUST
be depressed before shif ting from P
(Park) to any drive position while the ig-
nition switch is in the ON position. The shif t lever cannot be moved out of P
(Park) and into any of the other gear po-
sitions if the ignition switch is placed in
the LOCK, OFF or ACC position or if the
keyisremoved.
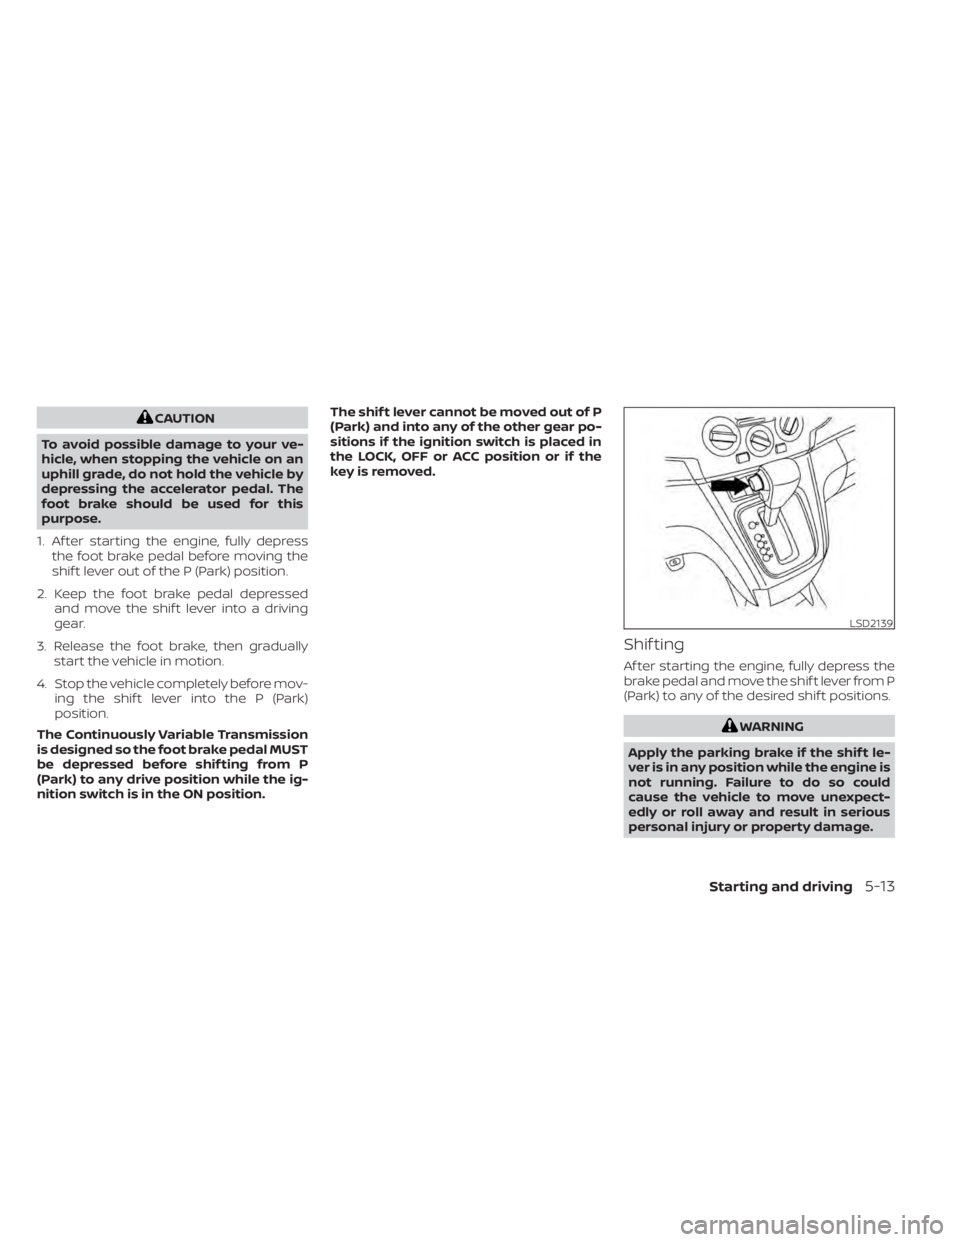
Shif ting
Af ter starting the engine, fully depress the
brake pedal and move the shif t lever from P
(Park) to any of the desired shif t positions.
Page 156 of 300
If the ignition switch is placed in the OFF or
ACC position for any reason while the ve-
hicle is in N (Neutral), or any drive position,
the key cannot be turned to the LOCK po-
sition and cannot be removed from the
ignition switch. If this occurs, perform the
following steps:
1. Apply the parking brake when the ve-hicle is stopped.
2. Move the shif t lever to P (Park) to park the vehicle and place the ignition switch
in the LOCK position to remove the key.
P (Park)
CAUTION
To prevent transmission damage, use
the P (Park) position only when the ve-
hicle is completely stopped.
Use the P (Park) shif t lever position when
the vehicle is parked or when starting the
engine. Make sure the vehicle is completely
stopped. The brake pedal must be de-
pressed and the shif t lever button
pressed in to move the shif t lever from N
(Neutral) or any drive position to P (Park).
Apply the parking brake. When parking on a
hill, apply the parking brake first, then place
the shif t lever into the P (Park) position.
R (Reverse)
CAUTION
To prevent transmission damage, use
the R (Reverse) position only when the
vehicle is completely stopped.
Use the R (Reverse) position to back up.
Make sure the vehicle is completely
stopped before selecting the R (Reverse)
position. R (Reverse) speed is limited to 30
mph (48 km/h). Do not exceed 30 mph (48
km/h) in the R (Reverse) position. The
brake pedal must be depressed and the
shif t lever button pressed in to move the
shif t lever from P (Park), N (Neutral) or
any drive position to R (Reverse).
N (Neutral)
Neither forward nor reverse gear is en-
gaged. The engine can be started in this
position. You may shif t to N (Neutral) and
restart a stalled engine while the vehicle is
moving.
D (Drive)
Use this position for all normal forward
driving.
L(Low)
Use this position for engine braking on
steep downhill gradients/climbing steep
slopes and whenever approaching sharp
bends. Do not use the L (Low) position in
any other circumstances.
5-14Starting and driving