Page 206 of 300

CHECKING ENGINE COOLANT
LEVEL
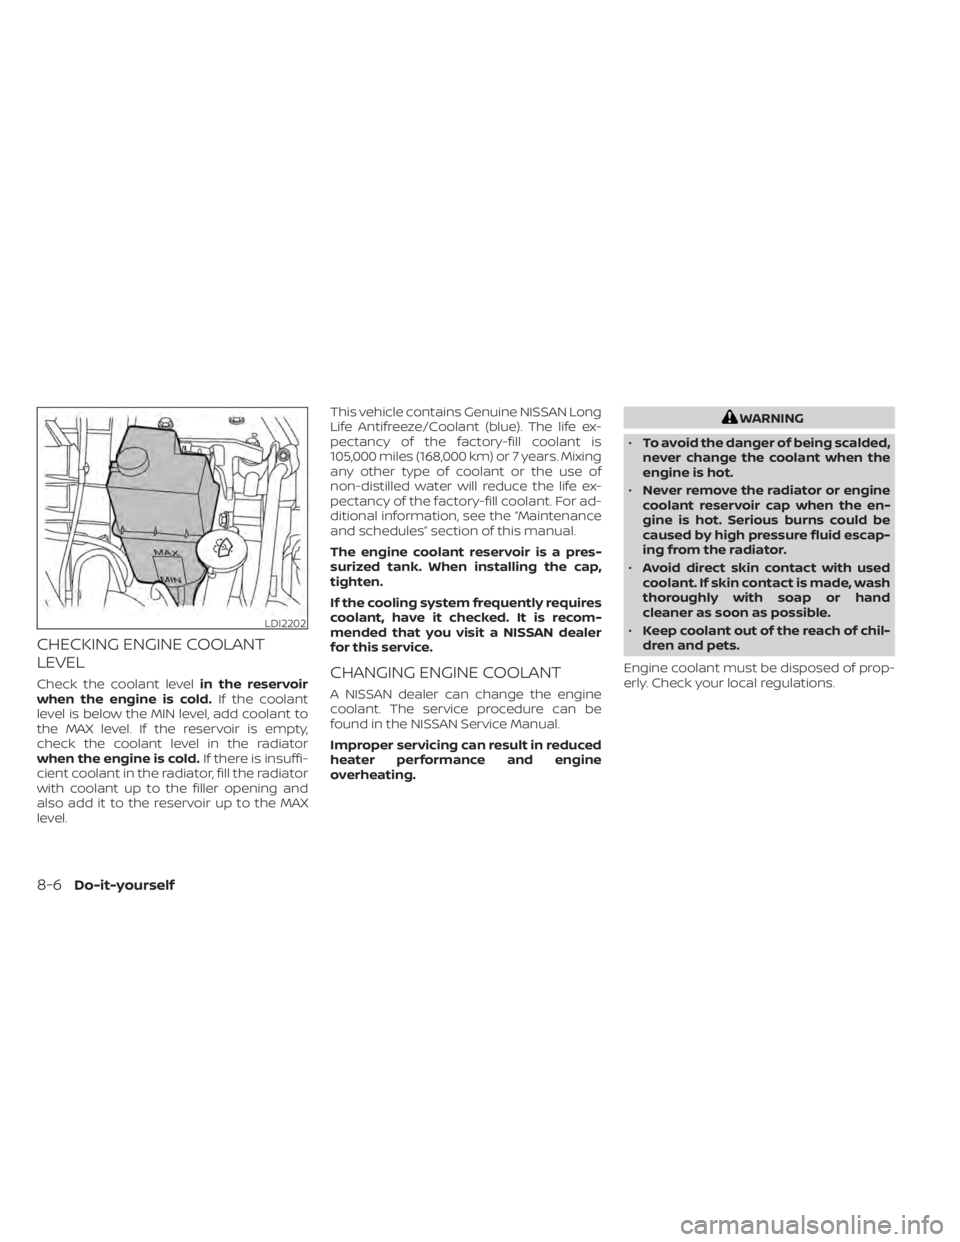
Check the coolant levelin the reservoir
when the engine is cold. If the coolant
level is below the MIN level, add coolant to
the MAX level. If the reservoir is empty,
check the coolant level in the radiator
when the engine is cold. If there is insuffi-
cient coolant in the radiator, fill the radiator
with coolant up to the filler opening and
also add it to the reservoir up to the MAX
level. This vehicle contains Genuine NISSAN Long
Life Antifreeze/Coolant (blue). The life ex-
pectancy of the factory-fill coolant is
105,000 miles (168,000 km) or 7 years. Mixing
any other type of coolant or the use of
non-distilled water will reduce the life ex-
pectancy of the factory-fill coolant. For ad-
ditional information, see the “Maintenance
and schedules” section of this manual.
The engine coolant reservoir is a pres-
surized tank. When installing the cap,
tighten.
If the cooling system frequently requires
coolant, have it checked. It is recom-
mended that you visit a NISSAN dealer
for this service.CHANGING ENGINE COOLANT
A NISSAN dealer can change the engine
coolant. The service procedure can be
found in the NISSAN Service Manual.
Improper servicing can result in reduced
heater performance and engine
overheating.
WARNING
• To avoid the danger of being scalded,
never change the coolant when the
engine is hot.
• Never remove the radiator or engine
coolant reservoir cap when the en-
gine is hot. Serious burns could be
caused by high pressure fluid escap-
ing from the radiator.
• Avoid direct skin contact with used
coolant. If skin contact is made, wash
thoroughly with soap or hand
cleaner as soon as possible.
• Keep coolant out of the reach of chil-
dren and pets.
Engine coolant must be disposed of prop-
erly. Check your local regulations.
LDI2202
8-6Do-it-yourself
Page 207 of 300

CHECKING ENGINE OIL LEVEL
1. Park the vehicle on a level surface andapply the parking brake.
2. Start the engine and let it idle until it reaches operating temperature.
3. Turn off the engine. Wait more than 10
minutes for the oil to drain back into
the oil pan.
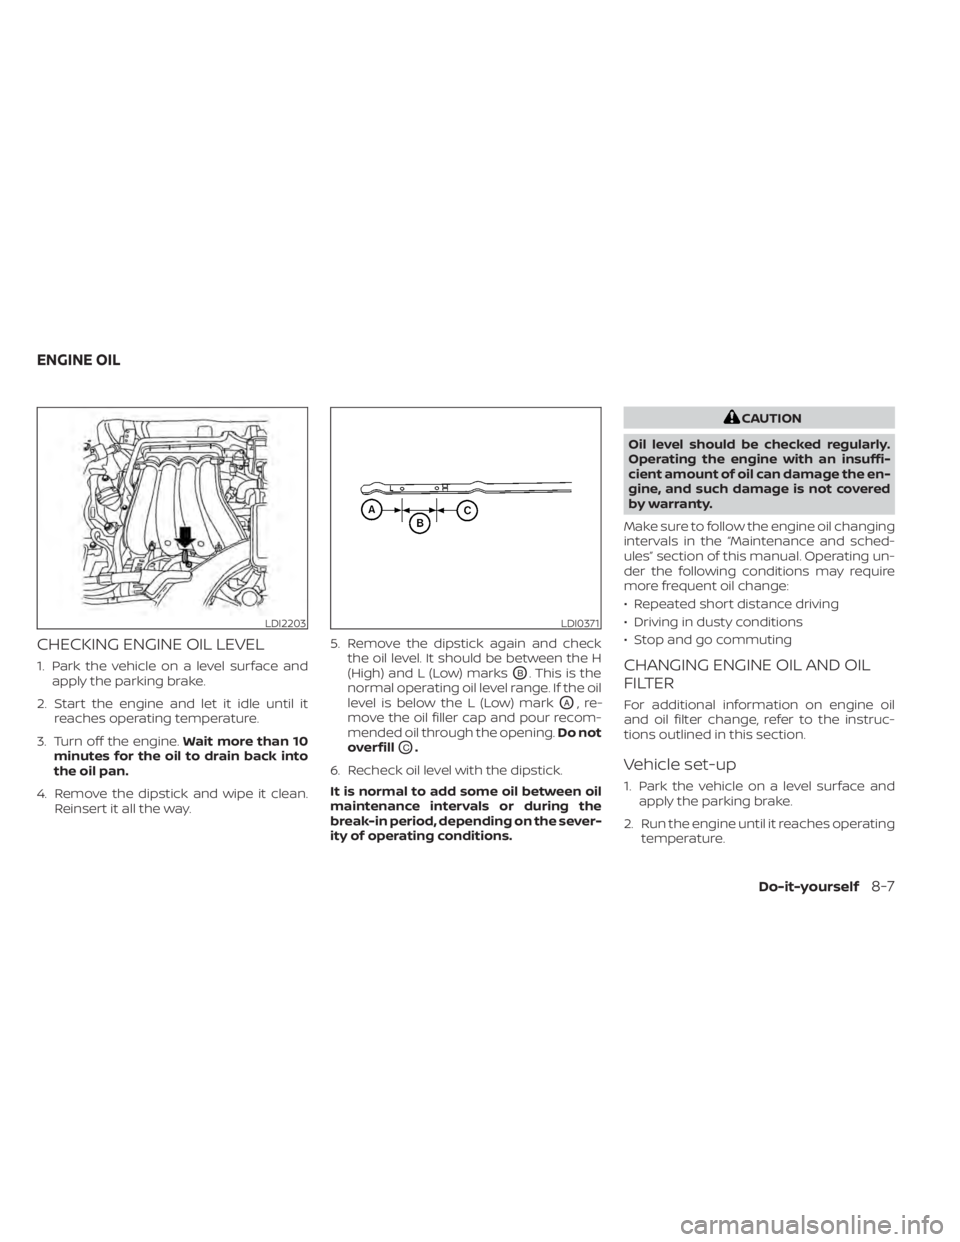
4. Remove the dipstick and wipe it clean. Reinsert it all the way. 5. Remove the dipstick again and check
the oil level. It should be between the H
(High) and L (Low) marksOB. This is the
normal operating oil level range. If the oil
level is below the L (Low) mark
OA,re-
move the oil filler cap and pour recom-
mended oil through the opening. Do not
overfill
OC.
6. Recheck oil level with the dipstick.
It is normal to add some oil between oil
maintenance intervals or during the
break-in period, depending on the sever-
ity of operating conditions.
CAUTION
Oil level should be checked regularly.
Operating the engine with an insuffi-
cient amount of oil can damage the en-
gine, and such damage is not covered
by warranty.
Make sure to follow the engine oil changing
intervals in the “Maintenance and sched-
ules” section of this manual. Operating un-
der the following conditions may require
more frequent oil change:
• Repeated short distance driving
• Driving in dusty conditions
• Stop and go commuting
CHANGING ENGINE OIL AND OIL
FILTER
For additional information on engine oil
and oil filter change, refer to the instruc-
tions outlined in this section.
Vehicle set-up
1. Park the vehicle on a level surface and apply the parking brake.
2. Run the engine until it reaches operating temperature.
LDI2203LDI0371
ENGINE OIL
Do-it-yourself8-7
Page 208 of 300
3. Turn the engine off and wait for 15minutes.
4. Raise and support the vehicle using a suitable floor jack and safety jack
stands.
• Place the safety jack stands under the vehicle jack-up points.
• A suitable adapter should be attached to the jack stand saddle.
WARNING
• Prolonged and repeated contact
with used engine oil may cause skin
cancer.
• Try to avoid direct skin contact with
used oil. If skin contact is made, wash
thoroughly with soap or hand
cleaner as soon as possible.
• Keep used engine oil out of reach of
children.
Page 209 of 300
4. Loosen the oil filter with an oil filterwrench by turning it counterclockwise.
Remove the oil filter by turning it by
hand.
5. Wipe the engine oil filter mounting sur- face with a clean rag.
LDI3451
O3Oil filter
Do-it-yourself8-9
Page 212 of 300

• Keep the battery surface clean and dry.Clean the battery with a solution of bak-
ing soda and water.
• Make certain the terminal connections are clean and securely tightened.
• If the vehicle is not to be used for 30 days or longer, disconnect the negative (-) bat-
tery terminal cable to prevent discharge.
NOTE:
Care should be taken to avoid situa-
tions that can lead to potential bat-
tery discharge and potential no-start
conditions such as:
1. Installation or extended use of elec- tronic accessories that consume bat-
tery power when the engine is not
running (Phone chargers, GPS, DVD
players, etc.).
2. Vehicle is not driven regularly and/or only driven short distances.
In these cases, the battery may need to
be charged to maintain battery health.
WARNING
• Do not expose the battery to flames,
an electrical spark or a cigarette. Hy-
drogen gas generated by the battery
is explosive. Explosive gases can
cause blindness or injury. Do not al-
low battery fluid to contact your skin,
eyes, fabrics or painted surfaces. Sul-
furic acid can cause blindness or in-
jury. Af ter touching a battery or bat-
tery cap, do not touch or rub your
eyes. Thoroughly wash your hands. If
the acid contacts your eyes, skin or
clothing, immediately flush with wa-
ter for at least 15 minutes and seek
medical attention.
• Do not operate the vehicle if the fluid
in the battery is low. Low battery fluid
can cause a higher load on the bat-
tery which can generate heat, reduce
battery life, and in some cases lead to
an explosion.
• When working on or near a battery,
always wear suitable eye protection
and remove all jewelry.
• Battery posts, terminals and related
accessories contain lead and lead
compounds. Wash hands af ter
handling. •
Keep battery out of the reach of
children.
• Do not tip the battery. Keep the vent
caps tight and the battery level.
BATTERY
8-12Do-it-yourself
Page 213 of 300
NOTE:
Do not try to open the top of this battery.
This battery is not equipped with remov-
able vent caps.
JUMP STARTING
If jump starting is necessary, see “Jump
starting” (P. 6-10). If the engine does not
start by jump starting, the battery may
have to be replaced. It is recommended
that you visit a NISSAN dealer for this
service.
LDI3455LDI2178
VARIABLE VOLTAGE CONTROL
SYSTEM
Do-it-yourself8-13
Page 215 of 300

WARNING
Be sure the engine and ignition switch
are off and that the parking brake is
engaged securely.
CAUTION
Be sure to use the correct socket to re-
move the spark plugs. An incorrect
socket can damage the spark plugs.
If replacement is required, it is recom-
mended that you visit a NISSAN dealer for
this service. The air cleaner filter should not be cleaned
and reused. Replace it according to the
maintenance log shown in the “Mainte-
nance and schedules” section of this
manual.
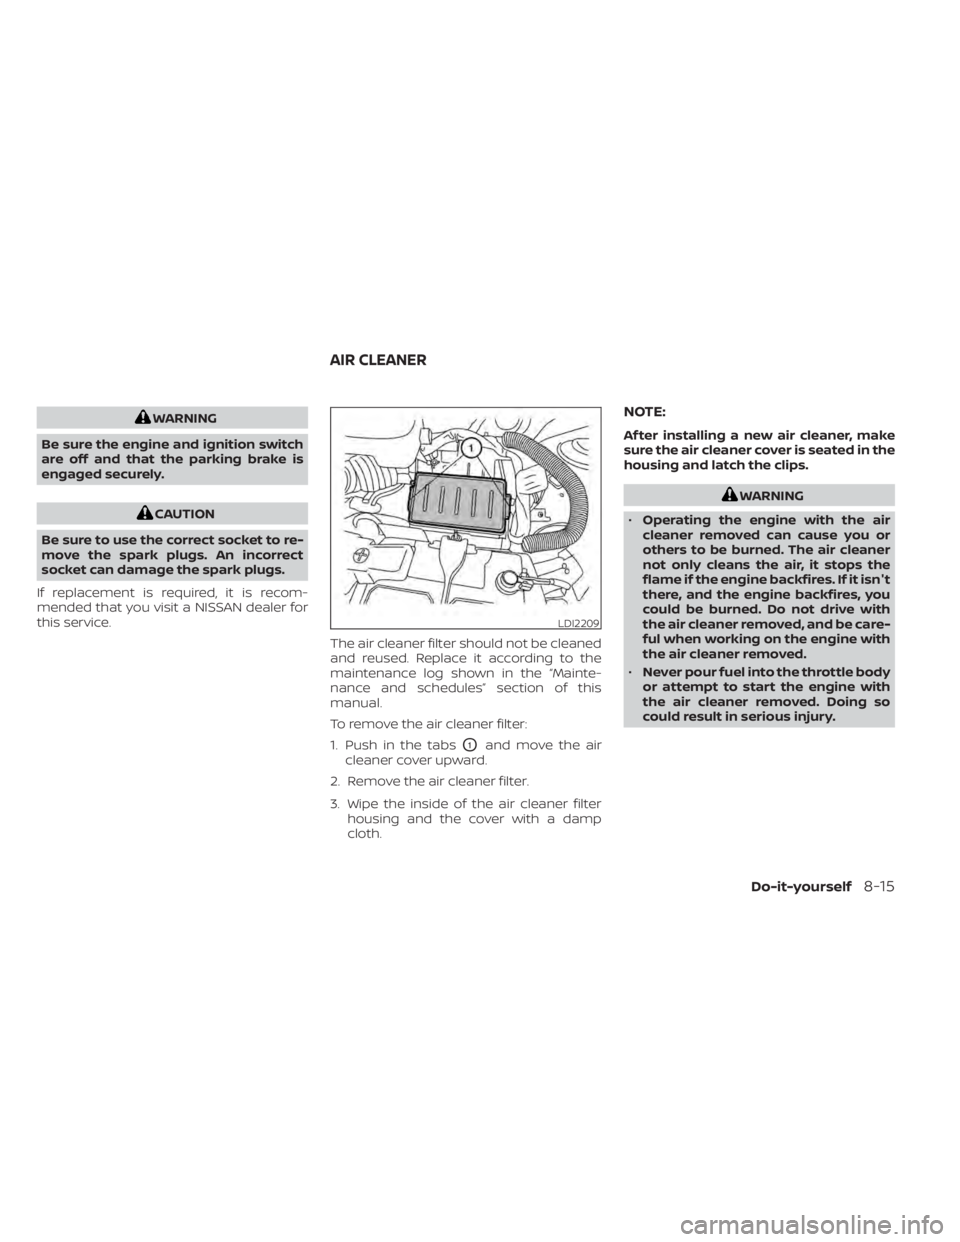
To remove the air cleaner filter:
1. Push in the tabs
O1and move the air
cleaner cover upward.
2. Remove the air cleaner filter.
3. Wipe the inside of the air cleaner filter housing and the cover with a damp
cloth.
NOTE:
Af ter installing a new air cleaner, make
sure the air cleaner cover is seated in the
housing and latch the clips.
WARNING
• Operating the engine with the air
cleaner removed can cause you or
others to be burned. The air cleaner
not only cleans the air, it stops the
flame if the engine backfires. If it isn't
there, and the engine backfires, you
could be burned. Do not drive with
the air cleaner removed, and be care-
ful when working on the engine with
the air cleaner removed.
• Never pour fuel into the throttle body
or attempt to start the engine with
the air cleaner removed. Doing so
could result in serious injury.
Do-it-yourself8-15
Page 218 of 300
If any electrical equipment does not oper-
ate, check for an open fuse.
Fuses are used in the passenger and en-
gine compartment. Spare fuses are pro-
vided and can be found in the passenger
compartment fuse box.
When installing a fuse make sure the fuse is
installed in the fuse box securely.
NOTE:
Your vehicle may not be equipped with
all fuses listed on the fuse label.
ENGINE COMPARTMENT
LDI2384LDI3456
FUSES