Page 421 of 603
SCE0377
10. Once the spare wheel is completelylowered, remove the jack rod and
reach under the vehicle to remove
the hanging plate.
11. Carefully slide the spare wheel from under the rear of the vehicle.
After preparing the spare tire, to remove
the rod, pull out the rod while moving the
rod to the right and left with the screw of
the extension facing the side.
CAUTION
When storing the wheel, make sure
that the hanging plate is in the center of the wheel and then lift it
up into the storage area.
WAG0102X
CAUTION
When storing the wheel, be sure to
mount the wheel horizontally. Secur-
ing the wheel that is in a tilted
position as illustrated may cause
In case of emergency6-7
Page 423 of 603
SCE0876
2. Loosen each wheel nut one or twoturns by turning counterclockwise
with the wheel nut wrench. Do not
remove the wheel nuts until the tire
is off the ground.
NCE130
3. Install the assembled jack rod into the
jack as shown.
4. Carefully raise the vehicle until the clearance between the tire and
ground is achieved.
5. To lift the vehicle, securely hold the jack lever and rod with both hands
and turn the jack lever.
NOTE:
Before jacking up the vehicle, make
sure the ignition switch is placed in
the OFF position. If the vehicle is lifted
up with the engine running, the auto-
leveling suspension will become dis-
abled after 120 seconds. To reset the
auto-leveling suspension, cycle the
In case of emergency6-9
Page 424 of 603

6-10In case of emergency
ignition switch ON/OFF one time.
SCE0910
Installing the spare tire
The full-size temporary use only spare
tire (if so equipped) is designed for
emergency use. (See specific instruc-
tions under the heading “Wheels and
tires” (P.8-28).)
1. Clean any mud or dirt from the sur-face between the wheel and hub.
2. Carefully put the spare tire on and tighten the wheel nuts finger tight.
3. With the wheel nut wrench, tighten wheel nuts alternately and evenly in
the sequence illustrated (
,,,,,) until they are tight. 4. Lower the vehicle slowly until the tire
touches the ground. Then, with the
wheel nut wrench, tighten the wheel
nuts securely in the sequence as
illustrated. Lower the vehicle comple-
tely.
WARNING
.Incorrect wheel nuts or impro-
perly tightened wheel nuts can
cause the wheel to become loose
or come off. This could cause an
accident.
. Do not use oil or grease on the
wheel studs or nuts. This could
cause the nuts to become loose.
. Retighten the wheel nuts when
the vehicle has been driven for
600 miles (1,000 km) (also in
cases of a flat tire, etc.).
.As soon as possible, tighten the
wheel nuts to the specified torque
with a torque wrench.
Wheel nut tightening torque: 98 ft-lb (133 N·m)
The wheel nuts must be kept
tightened to specification at all
times. It is recommended that
wheel nuts be tightened to speci-
Page 425 of 603

fications at each lubrication inter-
val.
.Adjust tire pressure to the COLDpressure.
COLD pressure:
After the vehicle has been parked
for three hours or more or driven
less than 1 mile (1.6 km).
COLD tire pressures are shown on
the Tire and Loading Information
label affixed to the driver side
center pillar.
After adjusting tire pressure to the COLD
tire pressure, the display of the tire
pressure information may show higher
pressure than the COLD tire pressure
after the vehicle has been driven more
than 1 mile (1.6 km). This is because the
tire pressurizes as the tire temperature
rises. This does not indicate a system
malfunction.
Stowing the damaged tire and
tools
1. Securely store the damaged tire, jack and tools in the storage area.
2. Close the cargo floor cover.
3. Replace the cargo floor board.
4. Close the liftgate.
WARNING
. Always make sure that the spare
tire and jacking equipment are
properly secured after use. Such
items can become dangerous
projectiles in an accident or sud-
den stop.
. The full-size temporary use only
spare tire (if so equipped) is de-
signed for emergency use. (See
specific instructions under the
heading “Wheels and tires” (P.8-
28).)
In case of emergency6-11
Page 431 of 603
SCE0925
Two-Wheel Drive (2WD) models
TOWING RECOMMENDED BY
NISSAN
Two-Wheel Drive (2WD) models
NISSAN recommends that your vehicle be
towed with the driving (rear) wheels off
the ground or place the vehicle on a flat
bed truck as illustrated.
CAUTION
.Never tow automatic transmis-
sion models with the rear wheels
on the ground or four wheels on
the ground (forward or back- ward), as this may cause serious
and expensive damage to the
transmission. If it is necessary to
tow the vehicle with the front
wheels raised, always use towing
dollies under the rear wheels.
. When towing rear wheel drive
models with the front wheels on
the ground or on towing dollies:
Place the ignition in the ACC or ON
position, and secure the steering
wheel in a straight-ahead posi-
tion with a rope or similar device.
In case of emergency6-17
Page 436 of 603
6-22In case of emergency
CAUTION
The connector must be fastened
securely. Not doing so may result in
damage to the connector due to
interference with other parts.
SCE0961
4. Remove the 4 boltsthat secure the
4WD shift motor using the wrench
that is equipped in the vehicle.
5. Remove the 4WD shift motor assem- bly.
CAUTION
Be careful not to allow the assembly
to contact water, dirt or sand.
SCE0962
6. Completely insert the wrench into the
internal gearof the transfer.
7. Fully turn the wrench clockwise
as
far as it will go. This shifts the transfer
to the 4L position.
8. Install the 4WD shift motor assembly. Securely tighten the 4 bolts using the
wrench.
CAUTION
.Do not connect the harness con-
nector of the 4WD shift motor
after the above procedure has
been performed.
Page 444 of 603

7-6Appearance and care
.Use only genuine NISSAN floor
mats or equivalent floor mats
that are specifically designed for
use in your vehicle model and
model year.
. Properly position the mats in the
floorwell using the floor mat po-
sitioning hooks. See “Floor mat
installation” (P.7-6).
. Make sure the floor mat does not
interfere with pedal operation.
. Periodically check the floor mats
to make sure they are properly
installed.
. After cleaning the vehicle interior,
check the floor mats to make
sure they are properly installed.
The use of genuine NISSAN floor mats can
extend the life of your vehicle carpet and
make it easier to clean the interior. Mats
should be maintained with regular clean-
ing and replaced if they become exces-
sively worn.
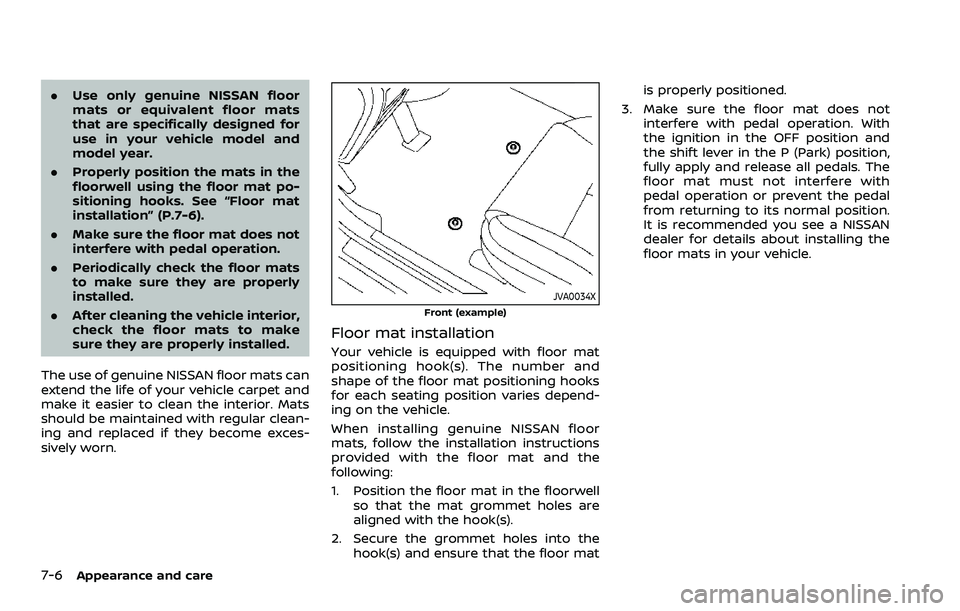
JVA0034X
Front (example)
Floor mat installation
Your vehicle is equipped with floor mat
positioning hook(s). The number and
shape of the floor mat positioning hooks
for each seating position varies depend-
ing on the vehicle.
When installing genuine NISSAN floor
mats, follow the installation instructions
provided with the floor mat and the
following:
1. Position the floor mat in the floorwell so that the mat grommet holes are
aligned with the hook(s).
2. Secure the grommet holes into the hook(s) and ensure that the floor mat is properly positioned.
3. Make sure the floor mat does not interfere with pedal operation. With
the ignition in the OFF position and
the shift lever in the P (Park) position,
fully apply and release all pedals. The
floor mat must not interfere with
pedal operation or prevent the pedal
from returning to its normal position.
It is recommended you see a NISSAN
dealer for details about installing the
floor mats in your vehicle.
Page 448 of 603

8-2Do-it-yourself
When performing any inspection or main-
tenance work on your vehicle, always
take care to prevent serious accidental
injury to yourself or damage to the
vehicle. The following are general precau-
tions which should be closely observed.
WARNING
.Park the vehicle on a level sur-
face, apply the parking brake
securely and block the wheels to
prevent the vehicle from moving.
Move the shift lever to P (Park).
. Be sure the ignition switch is in
the OFF or LOCK position when
performing any parts replace-
ment or repairs.
. Never connect or disconnect the
battery or any transistorized
component while the ignition
switch is in the ON position.
. Never leave the engine or auto-
matic transmission related com-
ponent harnesses disconnected
while the ignition switch is in the
ON position.
. If you must work with the engine
running, keep your hands, cloth-
ing, hair and tools away from
moving fans, belts and any other moving parts.
. It is advisable to secure or re-
move any loose clothing and
remove any jewelry, such as
rings, watches, etc. before work-
ing on your vehicle.
. Always wear eye protection
whenever you work on your ve-
hicle.
. If you must run the engine in an
enclosed space such as a garage,
be sure there is proper ventilation
for exhaust gases to escape.
. Never get under the vehicle while
it is supported only by a jack. If it
is necessary to work under the
vehicle, support it with safety
stands.
. Keep smoking materials, flame
and sparks away from fuel tank
and the battery.
. Your vehicle is equipped with an
automatic engine cooling fan. It
may come on at any time without
warning, even if the ignition key is
in the OFF position and the en-
gine is not running. To avoid
injury, always disconnect the ne-
gative battery cable before work-
ing near the fan. .
Because the fuel lines are under
high pressure even when the
engine is off, it is recommended
you visit a NISSAN dealer for
service of the fuel filter or fuel
lines.
CAUTION
.Do not work under the hood while
the engine is hot. Turn the engine
off and wait until it cools down.
. Avoid direct contact with used
engine oil and coolant. Impro-
perly disposed engine oil, coolant,
and/or other vehicle fluids can
damage the environment. Always
conform to local regulations for
disposal of vehicle fluid.
This “8. Do-it-yourself” section gives in-
structions regarding only those items
which are relatively easy for an owner to
perform.
A genuine NISSAN Service Manual is also
available. (See “Owner’s Manual/Service
Manual order information” (P.10-40).)
You should be aware that incomplete or
improper servicing may result in operat-
ing difficulties or excessive emissions, and
MAINTENANCE PRECAUTIONS