2021 NISSAN ARMADA reset
[x] Cancel search: resetPage 347 of 603
.“Not available: Poor Road Conditions”:
— When the VDC (including the trac-
tion control system) is operating
— When a wheel is slipping (To use the ICC system, make sure the wheels
are no longer slipping. Push the
MAIN switch to turn off the ICC, and
reset the ICC system by pushing
the MAIN switch again.)
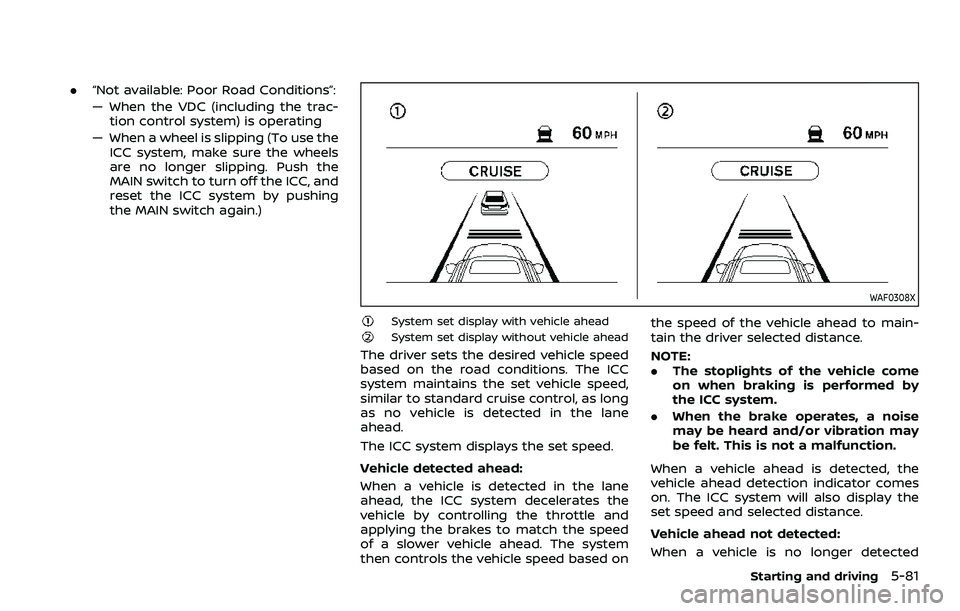
WAF0308X
System set display with vehicle aheadSystem set display without vehicle ahead
The driver sets the desired vehicle speed
based on the road conditions. The ICC
system maintains the set vehicle speed,
similar to standard cruise control, as long
as no vehicle is detected in the lane
ahead.
The ICC system displays the set speed.
Vehicle detected ahead:
When a vehicle is detected in the lane
ahead, the ICC system decelerates the
vehicle by controlling the throttle and
applying the brakes to match the speed
of a slower vehicle ahead. The system
then controls the vehicle speed based on the speed of the vehicle ahead to main-
tain the driver selected distance.
NOTE:
.
The stoplights of the vehicle come
on when braking is performed by
the ICC system.
. When the brake operates, a noise
may be heard and/or vibration may
be felt. This is not a malfunction.
When a vehicle ahead is detected, the
vehicle ahead detection indicator comes
on. The ICC system will also display the
set speed and selected distance.
Vehicle ahead not detected:
When a vehicle is no longer detected
Starting and driving5-81
Page 348 of 603
5-82Starting and driving
ahead, the ICC system gradually acceler-
ates your vehicle to resume the pre-
viously set vehicle speed. The ICC
system then maintains the set speed.
When a vehicle is no longer detected the
vehicle ahead detection indicator turns
off.
If a vehicle ahead appears during accel-
eration to the set vehicle speed or any
time the ICC system is in operation, the
system controls the distance to that
vehicle.
When a vehicle is no longer detected
under approximately 15 MPH (25 km/h),
the system will be canceled.
WAF0309X
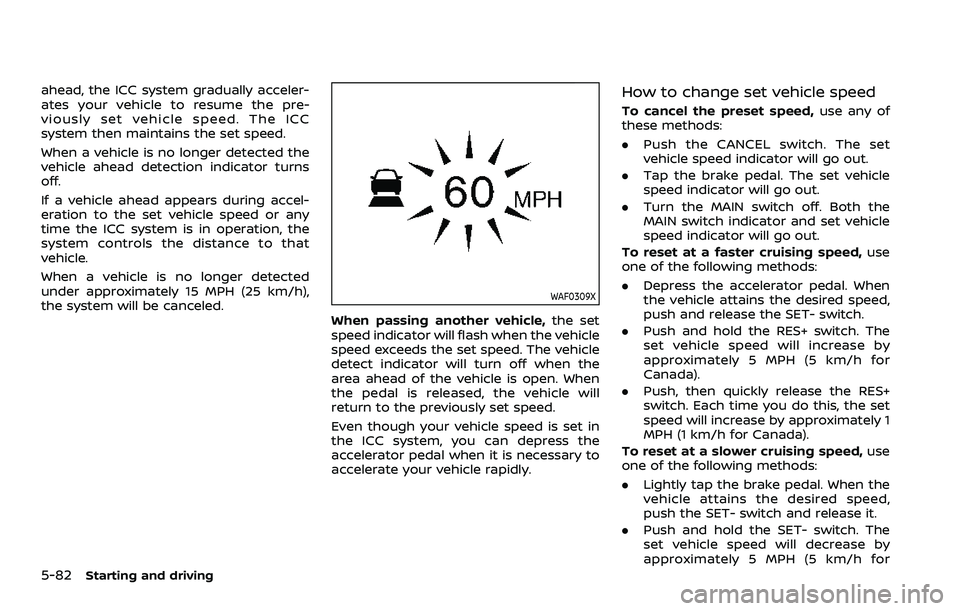
When passing another vehicle,the set
speed indicator will flash when the vehicle
speed exceeds the set speed. The vehicle
detect indicator will turn off when the
area ahead of the vehicle is open. When
the pedal is released, the vehicle will
return to the previously set speed.
Even though your vehicle speed is set in
the ICC system, you can depress the
accelerator pedal when it is necessary to
accelerate your vehicle rapidly.
How to change set vehicle speed
To cancel the preset speed, use any of
these methods:
. Push the CANCEL switch. The set
vehicle speed indicator will go out.
. Tap the brake pedal. The set vehicle
speed indicator will go out.
. Turn the MAIN switch off. Both the
MAIN switch indicator and set vehicle
speed indicator will go out.
To reset at a faster cruising speed, use
one of the following methods:
. Depress the accelerator pedal. When
the vehicle attains the desired speed,
push and release the SET- switch.
. Push and hold the RES+ switch. The
set vehicle speed will increase by
approximately 5 MPH (5 km/h for
Canada).
. Push, then quickly release the RES+
switch. Each time you do this, the set
speed will increase by approximately 1
MPH (1 km/h for Canada).
To reset at a slower cruising speed, use
one of the following methods:
. Lightly tap the brake pedal. When the
vehicle attains the desired speed,
push the SET- switch and release it.
. Push and hold the SET- switch. The
set vehicle speed will decrease by
approximately 5 MPH (5 km/h for
Page 349 of 603
Canada).
. Push, then quickly release the SET-
switch. Each time you do this, the set
speed will decrease by approximately
1 MPH (1 km/h for Canada).
To resume the preset speed, push and
release the RES+ switch. The vehicle will
resume the last set cruising speed when
the vehicle speed is over 20 MPH (30
km/h).
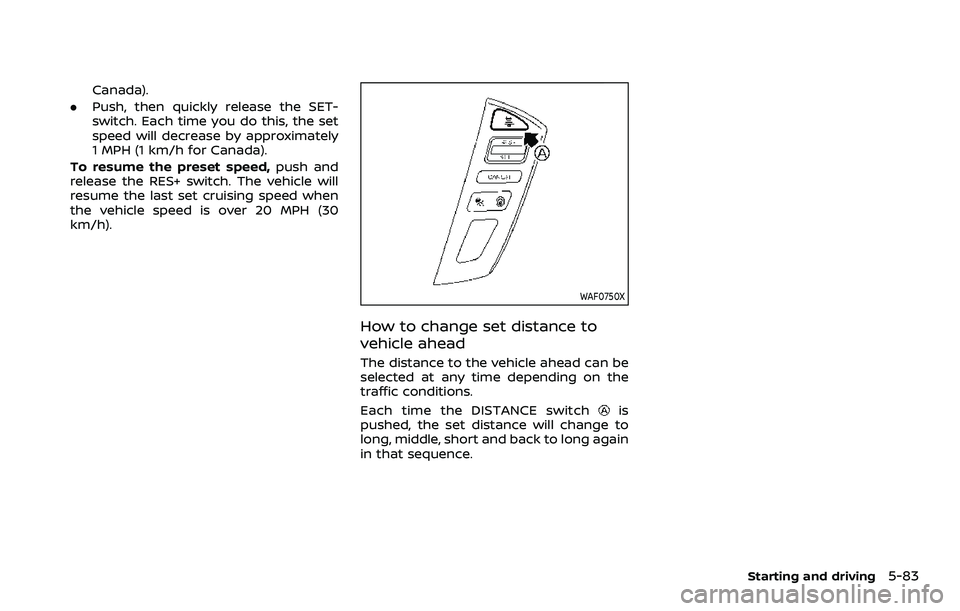
WAF0750X
How to change set distance to
vehicle ahead
The distance to the vehicle ahead can be
selected at any time depending on the
traffic conditions.
Each time the DISTANCE switch
is
pushed, the set distance will change to
long, middle, short and back to long again
in that sequence.
Starting and driving5-83
Page 361 of 603
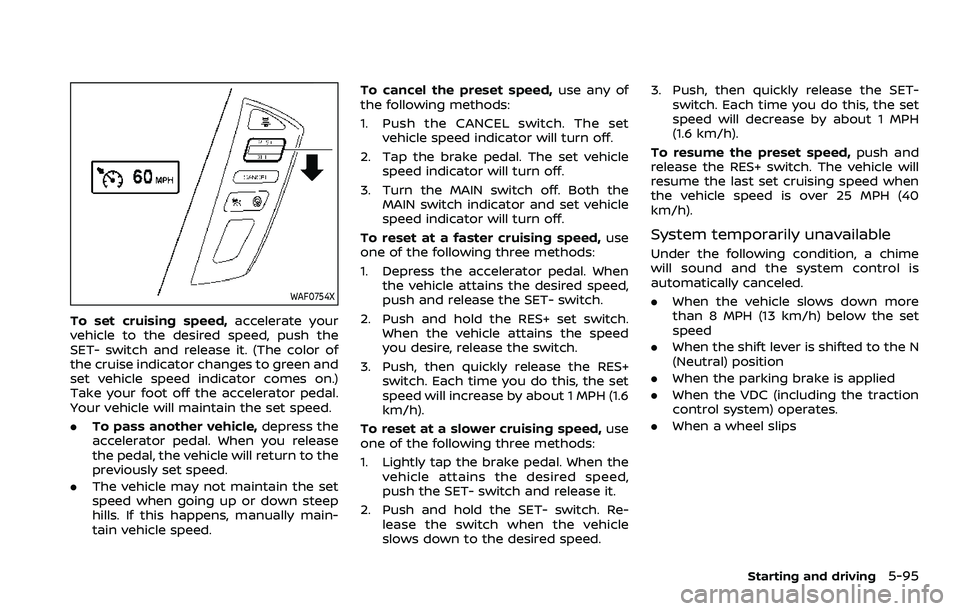
WAF0754X
To set cruising speed,accelerate your
vehicle to the desired speed, push the
SET- switch and release it. (The color of
the cruise indicator changes to green and
set vehicle speed indicator comes on.)
Take your foot off the accelerator pedal.
Your vehicle will maintain the set speed.
. To pass another vehicle, depress the
accelerator pedal. When you release
the pedal, the vehicle will return to the
previously set speed.
. The vehicle may not maintain the set
speed when going up or down steep
hills. If this happens, manually main-
tain vehicle speed. To cancel the preset speed,
use any of
the following methods:
1. Push the CANCEL switch. The set vehicle speed indicator will turn off.
2. Tap the brake pedal. The set vehicle speed indicator will turn off.
3. Turn the MAIN switch off. Both the MAIN switch indicator and set vehicle
speed indicator will turn off.
To reset at a faster cruising speed, use
one of the following three methods:
1. Depress the accelerator pedal. When the vehicle attains the desired speed,
push and release the SET- switch.
2. Push and hold the RES+ set switch. When the vehicle attains the speed
you desire, release the switch.
3. Push, then quickly release the RES+ switch. Each time you do this, the set
speed will increase by about 1 MPH (1.6
km/h).
To reset at a slower cruising speed, use
one of the following three methods:
1. Lightly tap the brake pedal. When the
vehicle attains the desired speed,
push the SET- switch and release it.
2. Push and hold the SET- switch. Re- lease the switch when the vehicle
slows down to the desired speed. 3. Push, then quickly release the SET-
switch. Each time you do this, the set
speed will decrease by about 1 MPH
(1.6 km/h).
To resume the preset speed, push and
release the RES+ switch. The vehicle will
resume the last set cruising speed when
the vehicle speed is over 25 MPH (40
km/h).
System temporarily unavailable
Under the following condition, a chime
will sound and the system control is
automatically canceled.
. When the vehicle slows down more
than 8 MPH (13 km/h) below the set
speed
. When the shift lever is shifted to the N
(Neutral) position
. When the parking brake is applied
. When the VDC (including the traction
control system) operates.
. When a wheel slips
Starting and driving5-95
Page 381 of 603
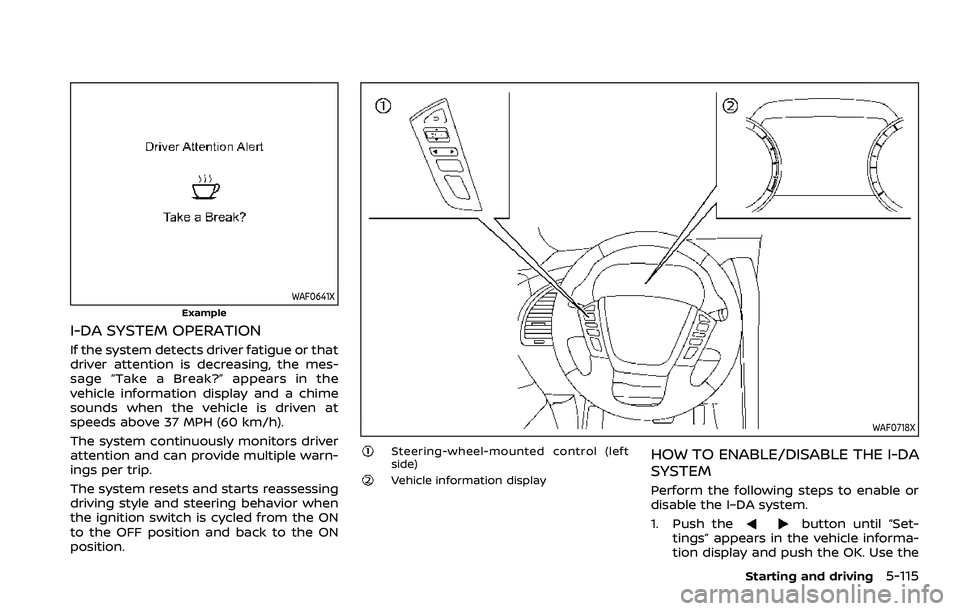
WAF0641X
Example
I-DA SYSTEM OPERATION
If the system detects driver fatigue or that
driver attention is decreasing, the mes-
sage “Take a Break?” appears in the
vehicle information display and a chime
sounds when the vehicle is driven at
speeds above 37 MPH (60 km/h).
The system continuously monitors driver
attention and can provide multiple warn-
ings per trip.
The system resets and starts reassessing
driving style and steering behavior when
the ignition switch is cycled from the ON
to the OFF position and back to the ON
position.
WAF0718X
Steering-wheel-mounted control (left
side)
Vehicle information display
HOW TO ENABLE/DISABLE THE I-DA
SYSTEM
Perform the following steps to enable or
disable the I–DA system.
1. Push the
button until “Set-
tings” appears in the vehicle informa-
tion display and push the OK. Use the
Starting and driving5-115
Page 410 of 603

5-144Starting and driving
illuminates the ABS warning light on the
instrument panel. The brake system then
operates normally, but without anti-lock
assistance.
If the ABS warning light illuminates during
the self-test or while driving, have the
vehicle checked. It is recommended you
visit a NISSAN dealer for this service.
Normal operation
The ABS operates at speeds above 3 to 6
MPH (5 to 10 km/h). The speed varies
according to road conditions.
When the ABS senses that one or more
wheels are close to locking up, the
actuator rapidly applies and releases
hydraulic pressure. This action is similar
to pumping the brakes very quickly. You
may feel a pulsation in the brake pedal
and hear a noise from under the hood or
feel a vibration from the actuator when it
is operating. This is normal and indicates
that the ABS is operating properly. How-
ever, the pulsation may indicate that road
conditions are hazardous and extra care
is required while driving.The Vehicle Dynamic Control (VDC) sys-
tem uses various sensors to monitor
driver inputs and vehicle motion. Under
certain driving conditions, the VDC sys-
tem helps to perform the following func-
tions.
.
Controls brake pressure to reduce
wheel slip on one slipping drive wheel
so power is transferred to a non
slipping drive wheel on the same axle.
. Controls brake pressure and engine
output to reduce drive wheel slip
based on vehicle speed (traction con-
trol function).
. Controls brake pressure at individual
wheels and engine output to help the
driver maintain control of the vehicle
in the following conditions:
— understeer (vehicle tends to not
follow the steered path despite
increased steering input)
— oversteer (vehicle tends to spin due to certain road or driving condi-
tions).
The VDC system can help the driver to
maintain control of the vehicle, but it
cannot prevent loss of vehicle control in
all driving situations.
When the VDC system operates, the VDC
warning light
in the instrument panel
flashes so note the following: .
The road may be slippery or the
system may determine some action
is required to help keep the vehicle on
the steered path.
. You may feel a pulsation in the brake
pedal and hear a noise or vibration
from under the hood. This is normal
and indicates that the VDC system is
working properly.
. Adjust your speed and driving to the
road conditions.
If a malfunction occurs in the system, the
VDC warning light
illuminates in the
instrument panel. The VDC system auto-
matically turns off.
The VDC OFF switch is used to turn off the
VDC system. The VDC off indicator
illuminates to indicate the VDC system is
off. When the VDC switch is used to turn
off the system, the VDC system still
operates to prevent one drive wheel from
slipping by transferring power to a non
slipping drive wheel. The VDC warning
light
flashes if this occurs. All other
VDC functions are off, and the VDC
warning light
will not flash. The VDC
system is automatically reset to on when
the ignition switch is placed in the OFF
position then back to the ON position.
When the 4L position is selected with the
4WD shift switch, the VDC system is
disabled and the VDC off indicator light
VEHICLE DYNAMIC CONTROL (VDC) SYSTEM
Page 417 of 603

To shut off the engine in an emergency
situation while driving, perform the fol-
lowing procedure:
.Rapidly push the push-button ignition
switch 3 consecutive times in less
than 1.5 seconds, or
. Push and hold the push-button igni-
tion switch for more than 2 seconds.TIRE PRESSURE MONITORING SYS-
TEM (TPMS)
This vehicle is equipped with the Tire
Pressure Monitoring System (TPMS). It
monitors tire pressure of all tires except
the spare. When the low tire pressure
warning light is lit and the “Tire Pressure
Low Add Air” warning appears in the
vehicle information display, one or more
of your tires is significantly under-inflated.
If the vehicle is being driven with low tire
pressure, the TPMS will activate and warn
you of it by the low tire pressure warning
light. This system will activate only when
the vehicle is driven at speeds above 16
MPH (25 km/h). For more details, see “Low
tire pressure warning light” (P.2-15) and
“Tire Pressure Monitoring System (TPMS)”
(P.5-5).
WARNING
.If the low tire pressure warning
light illuminates or Low Pressure
information is displayed on the
monitor screen while driving,
avoid sudden steering maneu-
vers or abrupt braking, reduce
vehicle speed, pull off the road
to a safe location and stop the
vehicle as soon as possible. Driv-
ing with under-inflated tires may permanently damage the tires
and increase the likelihood of tire
failure. Serious vehicle damage
could occur and may lead to an
accident and could result in ser-
ious personal injury. Check the
tire pressure for all four tires.
Adjust the tire pressure to the
recommended COLD tire pressure
shown on the Tire and Loading
Information label to turn the low
tire pressure warning light OFF. If
the light still illuminates while
driving after adjusting the tire
pressure, a tire may be flat. If
you have a flat tire, replace it with
a spare tire as soon as possible.
. Since the spare tire is not
equipped with the TPMS, when a
spare tire is mounted or a wheel
is replaced, the TPMS will not
function and the low tire pressure
warning light will flash for ap-
proximately 1 minute. The light
will remain on after 1 minute.
Have your tires replaced and/or
TPMS system reset as soon as
possible. It is recommended you
visit a NISSAN dealer for these
services.
. Replacing tires with those not
originally specified by NISSAN
In case of emergency6-3
EMERGENCY ENGINE SHUT OFF FLAT TIRE
Page 423 of 603

SCE0876
2. Loosen each wheel nut one or twoturns by turning counterclockwise
with the wheel nut wrench. Do not
remove the wheel nuts until the tire
is off the ground.
NCE130
3. Install the assembled jack rod into the
jack as shown.
4. Carefully raise the vehicle until the clearance between the tire and
ground is achieved.
5. To lift the vehicle, securely hold the jack lever and rod with both hands
and turn the jack lever.
NOTE:
Before jacking up the vehicle, make
sure the ignition switch is placed in
the OFF position. If the vehicle is lifted
up with the engine running, the auto-
leveling suspension will become dis-
abled after 120 seconds. To reset the
auto-leveling suspension, cycle the
In case of emergency6-9