2021 NISSAN ARMADA reset
[x] Cancel search: resetPage 484 of 603

8-38Do-it-yourself
the same size and you are only
replacing 2 of the 4 tires, install
the new tires on the rear axle.
Placing new tires on the front
axle may cause loss of vehicle
control in some driving condi-
tions and cause an accident and
personal injury.
. If the wheels are changed for any
reason, always replace with
wheels which have the same off-
set dimension. Wheels of a differ-
ent off-set could cause prema-
ture tire wear, degrade vehicle
handling characteristics and/or
interference with the brake
discs/drums. Such interference
can lead to decreased braking
efficiency and/or early brake
pad/shoe wear. See “Wheels and
tires” (P.10-9) for wheel off-set
dimensions.
. Since the spare tire is not
equipped with the TPMS, when a
spare tire is mounted or a wheel
is replaced, the TPMS will not
function and the low tire pressure
warning light will flash for ap-
proximately 1 minute. The light
will remain on after 1 minute.
Have your tires replaced and/or
TPMS system reset as soon as possible. It is recommended you
visit a NISSAN dealer for these
services.
. Replacing tires with those not
originally specified by NISSAN
could affect the proper operation
of the TPMS.
. The TPMS sensor may be da-
maged if it is not handled cor-
rectly. Be careful when handling
the TPMS sensor.
. When replacing the TPMS sensor,
the ID registration may be re-
quired. It is recommended you
visit a NISSAN dealer for ID regis-
tration.
. Do not use a valve stem cap that
is not specified by NISSAN. The
valve stem cap may become
stuck.
. Be sure that the valve stem caps
are correctly fitted. Otherwise the
valve may be clogged up with dirt
and cause a malfunction or loss
of pressure.
. Do not install a damaged or
deformed wheel or tire even if it
has been repaired. Such wheels
or tires could have structural
damage and could fail without
warning. .
The use of retread tire is not
recommended.
. For additional information re-
garding tires, refer to “Important
Tire Safety Information” (US) or
“Tire Safety Information” (Cana-
da) in the Warranty Information
Booklet.
Four-Wheel Drive (4WD) models
CAUTION
.Always use tires of the same type,
size, brand, construction (bias,
bias-belted or radial), and tread
pattern on all four wheels. Failure
to do so may result in a circum-
ference difference between tires
on the front and rear axles which
will cause excessive tire wear and
may damage the transmission,
transfer case and differential
gears.
. ONLY use spare tires specified for
the 4WD model.
If excessive tire wear is found, it is
recommended that all four tires be re-
placed with tires of the same size, brand,
Page 547 of 603

the vehicle may be reset to a “not ready
condition”. Before taking the I/M test,
check the vehicle’s inspection/mainte-
nance test readiness condition. Place the
ignition switch in the ON position without
starting the engine. If the Malfunction
Indicator Light (MIL) comes on steady for
20 seconds and then blinks for 10 sec-
onds, the I/M test condition is “not ready”.
If the MIL does not blink after 20 seconds,
the I/M test condition is “ready”.
It is recommended you visit a NISSAN
dealer to set “ready condition” or to
prepare the vehicle for testing.This vehicle is equipped with an Event
Data Recorder (EDR). The main purpose of
an EDR is to record, in certain crash or
near crash-like situations, such as an air
bag deployment or hitting a road obsta-
cle, data that will assist in understanding
how a vehicle’s systems performed. The
EDR is designed to record data related to
vehicle dynamics and safety systems for a
short period of time, typically 30 seconds
or less. The EDR in this vehicle is designed
to record such data as:
.How various systems in your vehicle
were operating;
. Whether or not the driver and passen-
ger safety belts were buckled/fas-
tened;
. How far (if at all) the driver was
depressing the accelerator and/or
brake pedal; and,
. How fast the vehicle was traveling.
. Sounds are not recorded.
These data can help provide a better
understanding of the circumstances in
which crashes and injuries occur.
NOTE: EDR data are recorded by your
vehicle only if a nontrivial crash situation
occurs; no data are recorded by the EDR
under normal driving conditions and no
personal data (e.g. name, gender, age and
crash location) are recorded. However,
other parties, such as law enforcement, could combine the EDR data with the type
of personally identifying data routinely
acquired during a crash investigation.
To read data recorded by an EDR, special
equipment is required and access to the
vehicle or the EDR is needed. In addition
to the vehicle manufacturer and NISSAN
dealer, other parties, such as law enforce-
ment, that have the special equipment,
can read the information if they have
access to the vehicle or the EDR. EDR data
will only be accessed with the consent of
the vehicle owner or lessee or as other-
wise required or permitted by law.
Technical and consumer information10-39
EVENT DATA RECORDERS (EDR)
Page 570 of 603

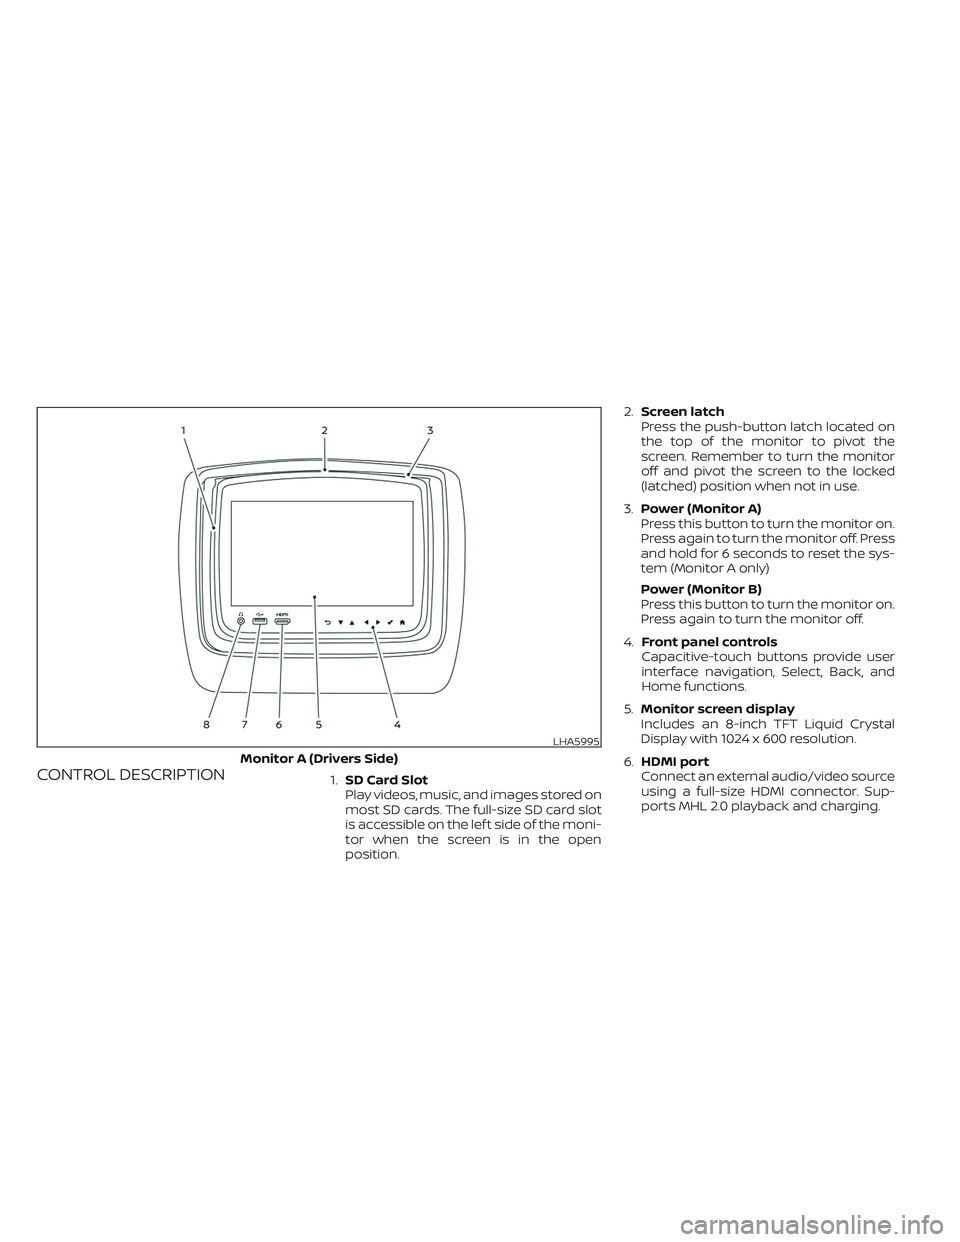
CONTROL DESCRIPTION1.SD Card Slot
Play videos, music, and images stored on
most SD cards. The full-size SD card slot
is accessible on the lef t side of the moni-
tor when the screen is in the open
position.2.Screen latch
Press the push-button latch located on
the top of the monitor to pivot the
screen. Remember to turn the monitor
off and pivot the screen to the locked
(latched) position when not in use.
3.Power (Monitor A)
Press this button to turn the monitor on.
Press again to turn the monitor off. Press
and hold for 6 seconds to reset the sys-
tem (Monitor A only)
Power (Monitor B)
Press this button to turn the monitor on.
Press again to turn the monitor off.
4.Front panel controls
Capacitive-touch buttons provide user
interface navigation, Select, Back, and
Home functions.
5.Monitor screen display
Includes an 8-inch TFT Liquid Crystal
Display with 1024 x 600 resolution.
6.HDMI port
Connect an external audio/video source
using a full-size HDMI connector. Sup-
ports MHL 2.0 playback and charging.
LHA5995
Monitor A (Drivers Side)
Page 590 of 603

Display
Adjust Brightness, Contrast, and Sharp-
ness settings.
Audio
Select the monitor to use for Bluetooth®
audio streaming and set the maximum
volume level when using wired head-
phones.
Advanced
Change the language of the GUI (Graphic
User Interface), reset the RSI system, and
update the sof tware.
Customize
Change the background image of the
home screen using content from an SD
card or USB storage device.
Parental
Set or change the password to limit video
content playback using parental control
based on the Motion Picture Association of
America (MPAA) ratings.
Bluetooth
Control Bluetooth® audio streaming (On/
Off ) and select from the available list of
paired devices.
Using Wi-Fi
Access Point
Access Point is used when connecting
other mobile devices to the RSI’s built-in
internal network. This mode allows the RSI
system to connect to devices "inside" the
vehicle, using an optional UPnP application
installed on a mobile device.
To change the SSID, navigate the keyboard
and enter the desired network name. Se-
lect Enter when complete. The default SSID
name is RSI-WiFi.To change the network password, navigate
the keyboard and enter the desired nu-
meric password. Select Enter when com-
plete. Select the Show Password check box
to display the current password. Select
Save to save the SSID and password.
Client Mode
Client Mode is used when connecting the
RSI system to an external network or to the
internet using a mobile hotspot. This mode
allows the RSI system to connect "outside"
the vehicle.
Enable Client mode by highlighting the Sta-
tus switch. The switch will turn green when
on. The RSI system will begin searching for
available wireless networks and display
them below. Navigate to the desired net-
work and pressto select it. Enter the
password (if necessary) to complete the
connection. The system will automatically
connect to the last connected network un-
til Client Mode is disabled.
NOTE:
Client mode will use data from the ex-
ternal Wi-Fi connection. Use with care
as additional data is consumed when
using mobile device data plans.
LHA4912
Page 593 of 603

NOTE:
• When monitor A is selected as the
source to stream from, the audio out-
put to the wireless and wired head-
phones will be disabled (only on moni-
tor A).
• To use the wireless or wired head-
phones with monitor A, you must turn
off the Bluetooth® streaming feature.
For additional information, see
“Bluetooth® streaming” in this section.
Advanced settings
Language
The system language used for the GUI
(Graphic User Interface) can be changed to
any of the following languages English,
Spanish, French, Arabic, Simplified Chinese,
Traditional Chinese, and Hebrew. To
change the language, highlight and select
the current language and a drop-down list
will appear containing the available lan-
guages. Choose the desired language and
select Save to display the confirmation dia-
log box. Select Yes to confirm and reboot
the RSI system.Reset
A master reset will return the RSI system
settings to the factory defaults. Any user
options and customization will be lost and
reset back to factory default settings. To
reset the system, select Yes when the dia-
log confirmation box appears.
Update
Displays the current sof tware version infor-
mation. Select Update to begin a sof tware
update (reserved for future use).
LHA4917
Page 594 of 603

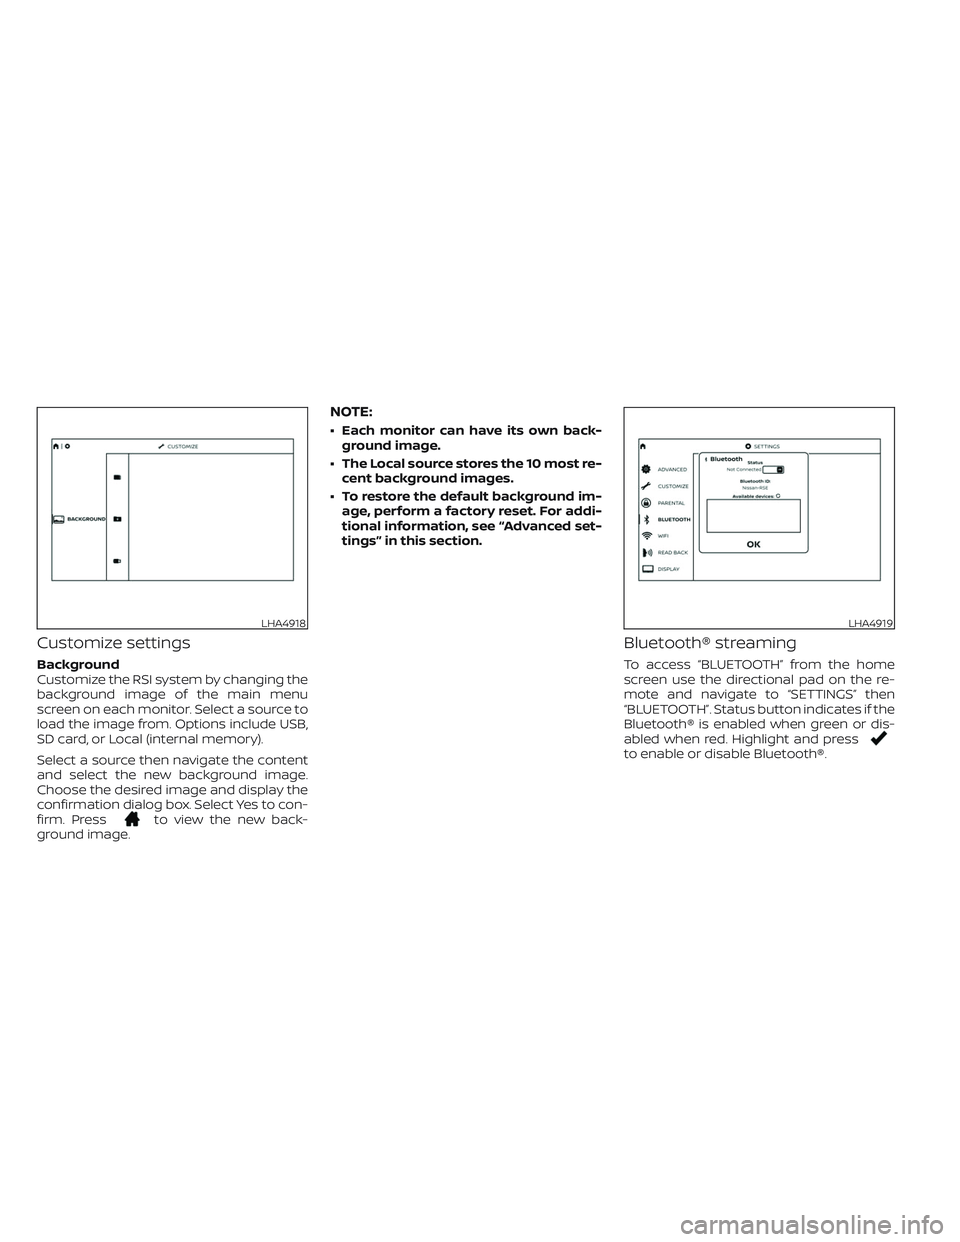
Customize settings
Background
Customize the RSI system by changing the
background image of the main menu
screen on each monitor. Select a source to
load the image from. Options include USB,
SD card, or Local (internal memory).
Select a source then navigate the content
and select the new background image.
Choose the desired image and display the
confirmation dialog box. Select Yes to con-
firm. Press
to view the new back-
ground image.
NOTE:
• Each monitor can have its own back-
ground image.
• The Local source stores the 10 most re-
cent background images.
• To restore the default background im-
age, perform a factory reset. For addi-
tional information, see “Advanced set-
tings” in this section.
Bluetooth® streaming
To access “BLUETOOTH” from the home
screen use the directional pad on the re-
mote and navigate to “SETTINGS” then
“BLUETOOTH”. Status button indicates if the
Bluetooth® is enabled when green or dis-
abled when red. Highlight and press
to enable or disable Bluetooth®.
LHA4918LHA4919
Page 597 of 603

For example, to set the ratings limit for PG
and below, select “RATINGS” then “3” using
the directional pad and press
, based
on the rating levels. For additional informa-
tion, see “About parental lock” in this sec-
tion.To change password, select “SETTINGS”
then “PARENTAL” from the home screen.
Enter the current password, select “PASS-
WORD” then “MODIFY” to set new password,
press
once to enter, and select again
to confirm. To exit “PARENTAL” menu press
.To remove the parental lock password, se-
lect “SETTINGS” then “PARENTAL” from the
home screen. Enter the current password.
Select “PASSWORD” then “REMOVE”, press
to enter, and select again to confirm.
To exit Parental menu press.
TROUBLESHOOTING
SymptomRemedy
Monitor does not power onVerif y the vehicle is in the ON or ACC position.
Verif y the battery is installed correctly in the remote control.
Verif y the in-line fuse protection is good. Refer to the RSI system installation instructions for vehicle-specific fuse location.
Monitor front panel controls
flash redFor further diagnosis, it is recommended that you visit a NISSAN dealer.
System frozen - will not re-
spondSof t reset the system by pressing and holding the power button on the top of the driver side monitor for 5 seconds.
Hard reset the system by turning the ignition off, then back on.
No pictureCheck that the signal source is connected.
Check the menu source setting. Match your monitor mode with the source correctly.
No sound or distorted soundMake sure that the external media device is connected properly, and all cables are securely inserted into the appropriate jacks.
Verif y that the batteries in the headphones are fresh.
If you are using the wireless headphones, make sure you turn on the power and select the correct monitor (A or B).
Verif y the volume is turned up on headphones and the system.
Verif y nothing is blocking the path between the monitor IR sensor and headphones.
When placing the headphones on your head, make sure to observe the Lef t and Right orientation. The headphones must be ori-
ented correctly (facing forward) to receive the audio signal.
Monitor feels warm When the monitor is in use for a long period of time, the surface will be warm. This is normal.