2021 MERCEDES-BENZ GLC SUV light
[x] Cancel search: lightPage 327 of 481

&
WARNING Risk ofexplosion during
ch arging process and starting assis tance
During thech arging process and starting
assis tance, the battery may release an explo‐
sive gas mixture. #
Avoid fire , naked flames, creating
spar ksand smoking. #
Make sure there is suf ficient ventila‐
tion. #
Do not lean over a batter y. &
WARNING Risk ofexplosion from a fro‐
zen battery
A dischar ged battery may freeze at temp era‐
tures slightly abo veor below freezing point.
During starting assis tance or battery charg‐
ing, bat tery gas can be released. #
Alw ays allow a battery tothaw before
ch arging it or per form ing starting assis‐
ta nce. If
th e indicator/warning lamps in the instrument
clus ter do not light up at low temp eratures, it is
ve ry likely that the dischar ged battery has fro‐
zen. In this case you may neither jump-s tart the
ve hicle nor charge the batter y.
The service life of a battery that has been
th awe d may be dramatically shor tened. The
st arting characteristics may be impaired, espe‐
cially at low temp eratures.
It is recommended that you ha veathaw ed bat‐
te ry checked at a qualified specialist workshop.
Plug-in hybrid: be sure toobser vethe no tes in
th e Supplement. You could otherwise failto rec‐
ognise dangers.
All vehicles
* NO
TEDama gecaused bynumerous or
ex tended attempt sto start the engine Nume
rous or extended attempt sto start the
engine may damage the catalytic con verter
due tonon-combu sted fuel. #
Avoid numerous and extended attem pts
to start the engine. Obser
vethefo llowing points during starting
assis tance and when charging the battery:
R Only use undamaged jump lead/charging
cables with a suf ficient cross-section and
insula tedte rm inal clamps.
R Non- insulated parts of thete rm inal clamps
must not come into con tact with other me tal
parts while the jump lead/charging cable is
connected tothe battery/jump-s tart connec‐
tion point.
R The jump lead/charging cable must not
come into contact wi thany parts which may
mo vewhen the engine is running.
R Alw ays make sure that nei ther you nor the
battery is elect rostatically charge d.
R Keep away from fire and naked flames.
R Do not lean overth e batter y.
Obser vethe additional following points when
ch arging the battery:
R Only use battery charge rs tested and
appr oved for Mercedes-Benz.
R Read the battery charge r's operating instruc‐
tions before charging the batter y. 324
Breakdown assis tance
Page 328 of 481
Obser
vethe additional following points during
st arting assistance:
R Starting assis tance may only be pr ovided
using vehicles, batteries or other jump start
devices with a nominal voltage of 12V.
R The vehicles must not touch.
R Vehicles with a petrol engine: jump-start
th eve hicle only when the engine and exhaust
sy stem are cold. St
arting assi stance and charging the12 V
battery Requ
irements:
R The vehicle is secured with the electric park‐
ing brake.
R Vehicles with automatic transmission: the
transmission is in position j.
R The ignition and all electrical consumers are
switched off.
R The bonnet is open. Example: engine compartment
#
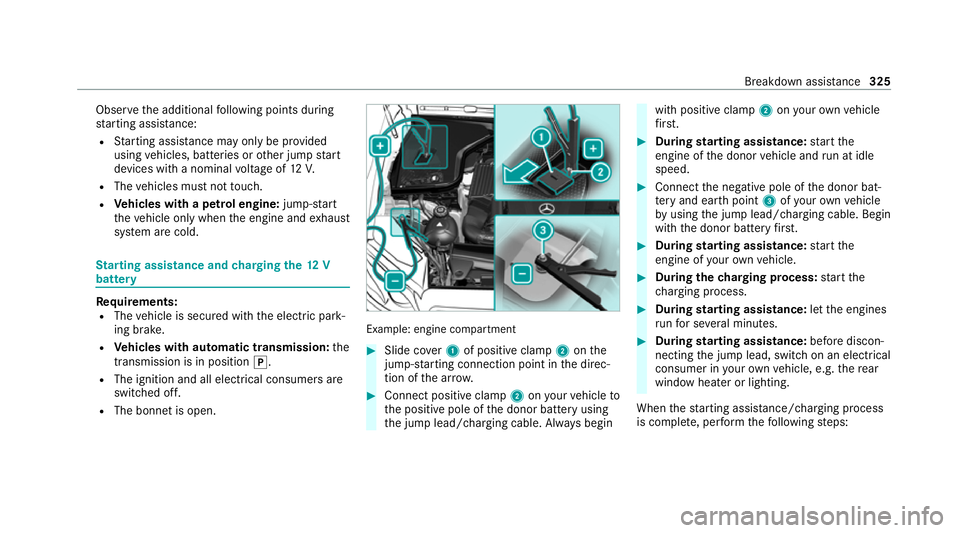
Slide co ver1 of positive clamp 2onthe
jump-s tarting connection point in the direc‐
tion of the ar row. #
Connect positive clamp 2onyour vehicle to
th e positive pole of the donor battery using
th e jump lead/charging cable. Alw ays begin with positive clamp
2onyour ow nve hicle
fi rs t. #
During starting assi stance: start the
engine of the donor vehicle and run at idle
speed. #
Connect the negative pole of the donor bat‐
te ry and ear thpoint 3ofyour ow nve hicle
by using the jump lead/charging cable. Begin
with the donor battery firs t. #
During starting assi stance: start the
engine of your ow nve hicle. #
During thech arging process: start the
ch arging process. #
During starting assi stance: letthe engines
ru nfo r se veral minutes. #
During starting assi stance: before discon‐
necting the jump lead, switch on an electrical
consumer in your ow nve hicle, e.g. there ar
wind owheater or lighting.
When thest arting assis tance/charging process
is compl ete, per form thefo llowing steps: Breakdown assis
tance 325
Page 340 of 481
#
Adjust the tyre pressure where neces‐
sar y. Ty
re pressure which is too high or too low can:
R Shor tenth e service life of the tyres.
R Cause increased tyre damage.
R Adversely af fect driving characteristics and
th us driving saf ety, e.g. due toaquaplaning. &
WARNING Risk of accident due torepea‐
te d pressure drop in the tyres
The wheels, valves or tyres could be dam‐
aged.
To o low a tyre pressure can lead tothe tyres
bur sting. #
Examine the tyres forfo re ign objects. #
Check whe ther the tyre has a puncture
or theva lve has a leak. #
Ifyo u are unable torectify the damage,
conta ct aqualified specialist workshop. Information on
there commended tyre pressure
fo rth eve hicle's factor y-fitted tyres can be found on
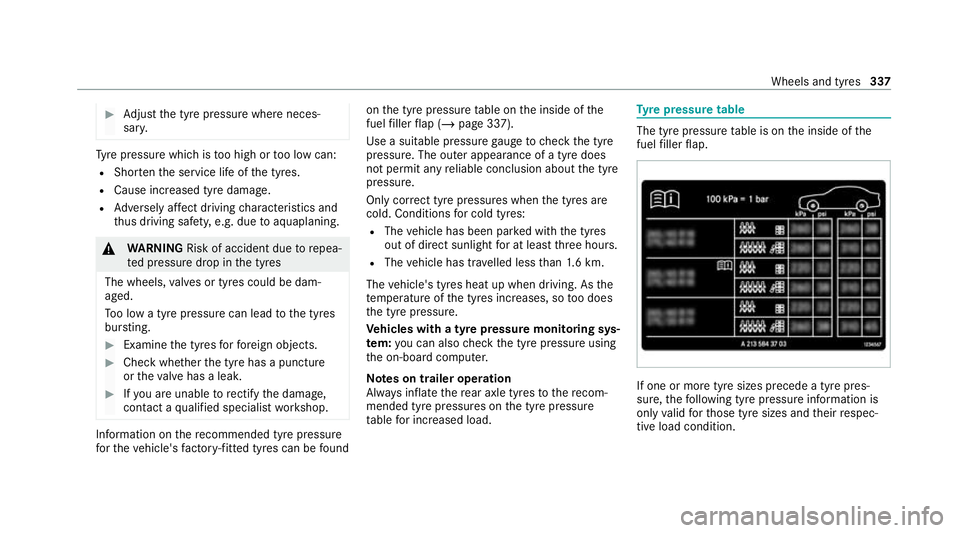
the tyre pressure table on the inside of the
fuel filler flap (/ page 337).
Use a suitable pressure gauge tocheck the tyre
pressure. The outer appearance of a tyre does
not permit any reliable conclusion about the tyre
pressure.
Only cor rect tyre pressures when the tyres are
cold. Conditions for cold tyres:
R The vehicle has been par ked with the tyres
out of direct sunlight for at least thre e hours.
R The vehicle has tr avelled less than 1.6 km.
The vehicle's tyres heat up when driving. As the
te mp erature of the tyres increases, so too does
th e tyre pressure.
Ve hicles with a tyre pressure monitoring sys‐
te m: you can also check the tyre pressure using
th e on-board computer.
Note s on trailer operation
Alw ays inflate there ar axle tyres tothere com‐
mended tyre pressures on the tyre pressure
ta ble for increased load. Ty
re pressure table The tyre pressure
table is on the inside of the
fuel filler flap. If one or more tyre sizes precede a tyre pres‐
sure,
thefo llowing tyre pressure information is
only valid forth ose tyre sizes and their respec‐
tive load condition. Wheels and tyres
337
Page 341 of 481
If
th e preceding tyre sizes are complemented by
th e+ symbol, the tyre pressure information
fo llowing sho wsalternative tyre pressures. Fuel
consum ption may then increase slightl y.
The load conditions "partially laden" and "fully
laden" are defined in theta ble for dif fere nt num‐
be rs of passengers and amounts of luggage. The
actual number of seats may dif fer from this. Ty
re pressure moni toring sy stem Fu
nction of the ty repressure moni toring sys‐
tem
The sy stem checks the tyre pressure and the
tyre temp erature of the tyres fitted totheve hicle
by means of a tyre pressu resensor.
The tyre pressure and the tyre temp erature
appear in the on-board computer (/ page 338).
If th ere is a subs tantial pressure loss or if the
tyre temp erature is excessive, you will be
wa rned with display messages (/ page415) or
th eh warning lamp in the instrument clus ter
( / page 438). The tyre pressure monitoring sy
stem is only an
aid. It is the driver's responsibility toset the tyre
pressure tothere commended cold tyre pressure
suitable forth e operating situation.
In most cases, the tyre pressure monitoring sys‐
te m will auto matically update the new refere nce
va lues af teryo u ha vechanged the tyre pressure.
Yo u can, ho wever,also update there fere nce val‐
ues byrestarting the tyre pressure monitoring
sy stem manually (/ page 339).
Sy stem limits
The sy stem may be impaired or may not function
particularly in thefo llowing situations:
R the tyre pressure has been set incor rectly
R sudden pressure loss caused byafo re ign
object penetrating the tyre, forex ample
R there is a malfunction caused byano ther
ra dio signal source
Checking the ty repressure with the tyre
pressure moni toring sy stem
Requ irements:
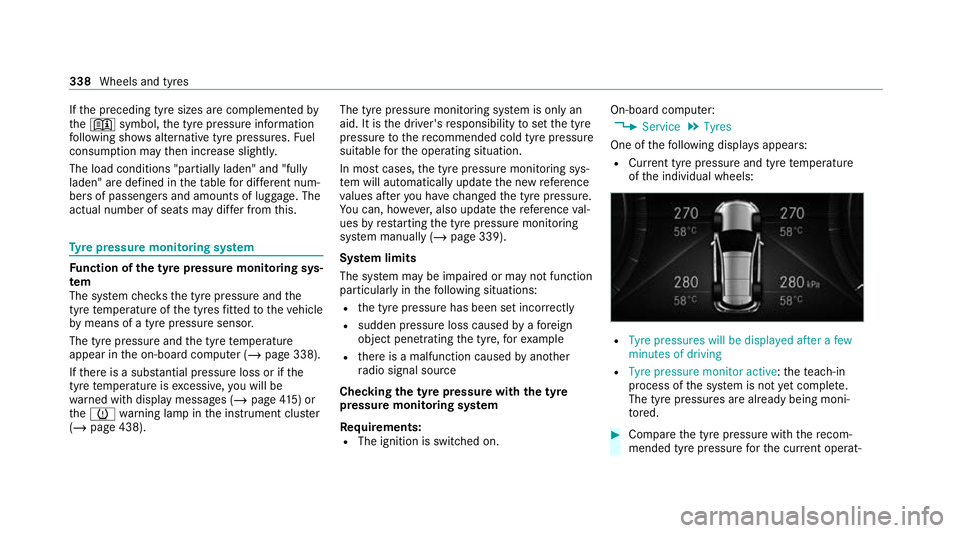
R The ignition is switched on. On-board computer:
4 Service 5
Tyres
One of thefo llowing displa ysappears:
R Cur rent tyre pressure and tyre temp erature
of the individual wheels: R
Tyre pressures will be displayed after a few
minutes of driving
R Tyre pressure monitor active: thete ach-in
process of the sy stem is not yet compl ete.
The tyre pressures are already being moni‐
to re d. #
Compare the tyre pressure with there com‐
mended tyre pressure forth e cur rent operat‐ 338
Wheels and tyres
Page 354 of 481
R
Do not fit th e emer gency spa rewheel with
sn ow chains.
R Replace the emer gency spa rewheel af ter six
ye ars at the latest, rega rdless of wear.
% Ve
hicles with a tyre pressure loss warn‐
ing sy stem: if an emer gency spa rewheel is
fi tted, the tyre pressure loss warning sy stem
cann otfunction reliabl y.Only restart the sys‐
te m again when the emer gency spa rewheel
has been replaced with a new wheel.
Ve hicles with a tyre pressure monitoring
sy stem: if an emer gency spa rewheel is fit‐
te d, the tyre pressure monitoring sy stem
cann otfunction reliabl y.Fo r a few minutes
af te r an emer gency spa rewheel is fitted, the
sy stem may still display the tyre pressure of
th ere mo ved wheel. Only restart the sy stem
again when the emer gency spa rewheel has
been replaced with a new wheel.
Be sure toalso obse rveth efo llowing fur ther
re lated subjects:
R Notes on tyre pressure (/ page 336)
R Tyre pressure table (/ page 337) R
Notes on fitting tyres (/ page 340) Inflating
the emer gency spare wheel *
NO
TEOverheating due tothe tyre infla‐
tion compressor running too long #
Do not runth e tyre inflation compres‐
sor for longer than ten minu tes without
inter ruption. Re
quirements:
Comply with the manufacturer's saf ety no tes on
th est icke r of the emer gency spa rewheel and on
th e tyre inflation compressor. #
Remo vethest icke r with the label 80 km/h
from the tyre inflation compressor housing
and af fix it tothe instrument clus ter within
th e driver's field of vision. #
Remo vethe tyre inflation compressor from
th estow age space under the luggage com‐
partment floor (/ page316). #
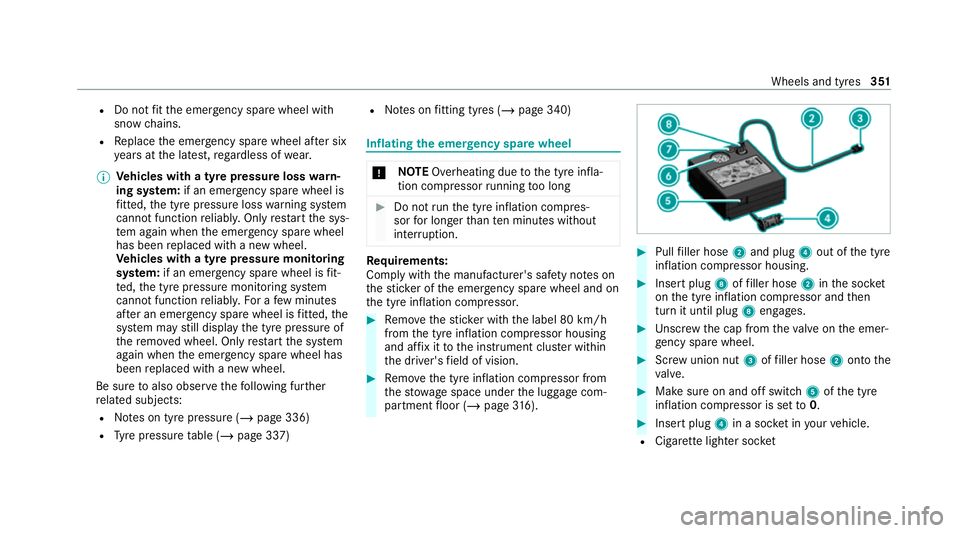
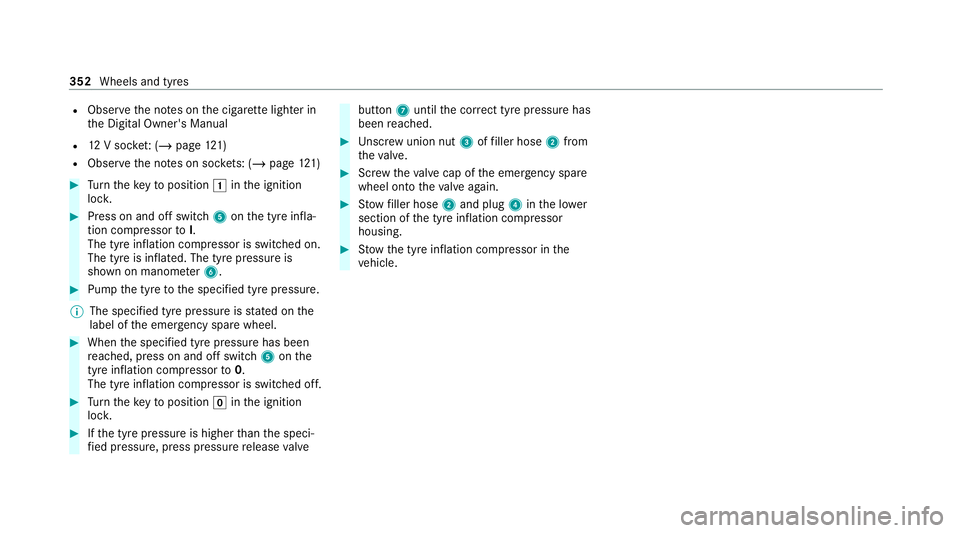
Pull filler hose 2and plug 4out of the tyre
inflation compressor housing. #
Insert plug 8offiller hose 2inthe soc ket
on the tyre inflation compressor and then
turn it until plug 8engages. #
Unscr ew the cap from theva lve on the emer‐
ge ncy spa rewheel. #
Screw union nut 3offiller hose 2onto the
va lve. #
Make sure on and off switch 5ofthe tyre
inflation compressor is set to0. #
Insert plug 4in a soc ket in your vehicle.
R Cigar ette lighter soc ket Wheels and tyres
351
Page 355 of 481
R
Obser vethe no tes on the cigar ette lighter in
th e Digital Owner's Manual
R 12V soc ket: ( / page 121)
R Obse rveth e no tes on soc kets: (/ page 121) #
Turn theke yto position 1inthe ignition
loc k. #
Press on and off switch 5onthe tyre infla‐
tion compressor toI.
The tyre inflation compressor is switched on.
The tyre is inflated. The tyre pressure is
shown on manome ter6. #
Pump the tyre tothe specified tyre pressure.
% The specified tyre pressure is stated on the
label of the emer gency spa rewheel. #
When the specified tyre pressure has been
re ached, press on and off swit ch5 onthe
tyre inflation compressor to0.
The tyre inflation compressor is switched off. #
Turn theke yto position ginthe ignition
loc k. #
Ifth e tyre pressure is higher than the speci‐
fi ed pressure, press pressure release valve bu
tton 7until the cor rect tyre pressure has
been reached. #
Unscr ew union nut 3offiller hose 2from
th eva lve. #
Screw theva lve cap of the emer gency spa re
wheel onto theva lve again. #
Stow filler hose 2and plug 4inthe lo wer
section of the tyre inflation compressor
housing. #
Stow th e tyre inflation compressor in the
ve hicle. 352
Wheels and tyres
Page 369 of 481
#
Make sure that no windscre enwasher
concentrate spills out next tothefiller
opening. *
NO
TEDama getotheex terior lighting
due tounsuitable windsc reen washer
fl uid Uns
uitable windsc reen washer fluids may
damage the plastic sur face of theex terior
lighting. #
Only use windscreen washer fluids
which are also suitable for use on plas‐
tic sur faces, e.g. MB SummerFit or MB
Wi nterFit. *
NO
TEBlocked spr aynozzles caused by
mixing windscreen washer fluids #
Do not mix MB SummerFit and MB Win‐
te rFit with other windscreen washer flu‐
ids. Do not use distilled or de-ionised
water.Other‐
wise, thefill le vel sensor may be triggered er ro‐
neously.
Re commended windscreen washer fluid:
R abo vefreezing point: e.g. MB SummerFit
R below freezing point: e.g. MB WinterFit
Fo rth e cor rect mixing ratio, referto the informa‐
tion on the antif reeze contai ner.
Mix washer fluid with windsc reen washer fluid all
ye ar round. Ve
hicle data Ve
hicle dimensions The heights specifi
ed mayvary as a result of the
fo llowing factors:
R tyres
R load
R condition of the suspension
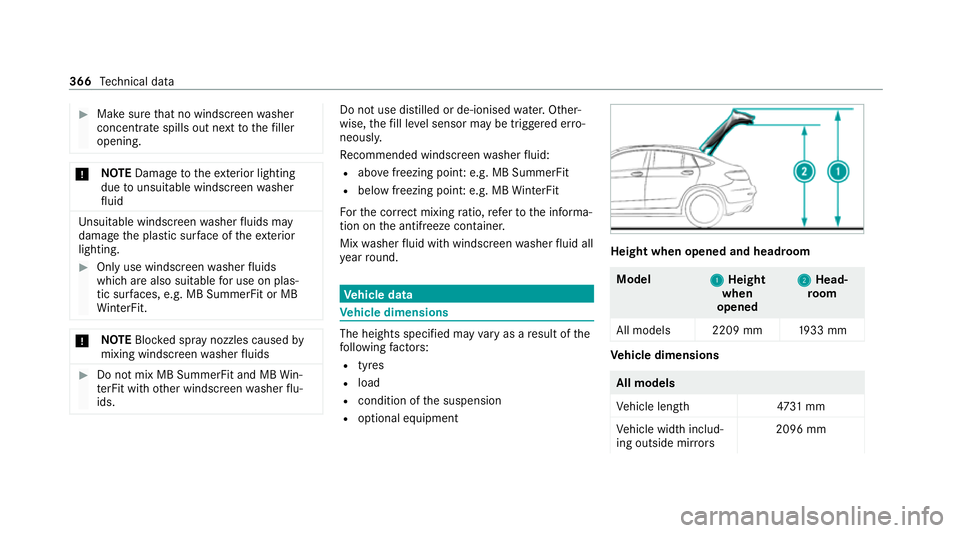
R optional equipment Height when opened and headroom
Model
1 1Height
when
opened 2 2
Head‐
ro om
All models 2209 mm 1933 mm Ve
hicle dimensions All models
Ve
hicle lengt h4 731 mm
Ve hicle width includ‐
ing outside mir rors 2096 mm366
Tech nical da ta
Page 379 of 481

Lights
Display messages
Possible causes/consequences and M MSolutions
: Left dipped beam (examp le) *T
he cor responding light source is defective. #
Drive on carefully. #
Consult a qualified specialist workshop immediatel y.
% LED light sources: the display message forth e cor responding light appears only when allthe light-emitting
diodes in the light are faulty.
: Malfunction See Owner's
Manual *T
heexterior lighting is malfunctioning. #
Consult a qualified specialist workshop.
* Ve hicles with a trailer hitch: a fuse may haveblown. #
Stop theve hicle in accordance with the tra ffic conditions. #
Check the fuses and replace them if necessary (/ page 331).
:
Automatic driving lights
inoperative *T
he light sensor for auto matic driving lights is malfunctioning. #
Consult a qualified specialist workshop. 376
Displaymessa ges and warning/indicator lamps