2021 LINCOLN NAVIGATOR rear view mirror
[x] Cancel search: rear view mirrorPage 126 of 639

Auto-Dimming Mirror
Note:
Do not block the sensors on the front
and back of the mirror. A rear center
passenger or raised rear center head
restraint may also block light from reaching
the sensor.
The mirror dims to reduce the effect of bright
light from behind. It returns to normal when
the bright light from behind is no longer
present or if you shift into reverse (R).
CHILDMINDER MIRROR
On overhead consoles, the childminder
mirror allows the driver to view the rear
seating area. WARNING: Do not use the
childminder mirror to view rearward traffic,
do not allow rear passengers to distract
you from the driving task, and make sure
the rear view mirror has a clear view of
rearward traffic. Failure to do so could
increase the risk of a crash from an unseen
vehicle, which may result in serious injury. Pull down the rear edge of the childminder
mirror to open. You can adjust the
childminder mirror to any position up to full
open to aid in visibility.TOLL READER
Installing the Toll Reader
Install the toll reader or radio-controlled
equipment on the driver side of the
windshield behind the interior mirror.
Note:
Follow the manufacturer's installation
instructions. 123
Navigator (TB9) Canada/United States of America, enUSA, First-Printing Windows and MirrorsE190497 E274072
Page 269 of 639

REAR VIEW CAMERA
WARNING: The rear view camera
system is a reverse aid supplement device
that still requires the driver to use it in
conjunction with the interior and exterior
mirrors for maximum coverage. WARNING:
Objects that are close to
either corner of the bumper or under the
bumper, might not be seen on the screen
due to the limited coverage of the camera
system. WARNING:
Reverse your vehicle
slowly. Failure to follow this instruction
could result in the loss of control of your
vehicle, personal injury or death. WARNING:
Use caution when the
rear cargo door is ajar. If the rear cargo
door is ajar, the camera will be out of
position and the video image may be
incorrect. All guidelines disappear when
the rear cargo door is ajar. Failure to follow
this instruction could result in personal
injury. WARNING:
Use caution when turning
camera features on or off when the
transmission is not in park (P). Make sure
your vehicle is not moving.
The rear view camera system provides a
video image of the area behind your vehicle.
During operation, lines appear in the display
which represent your vehicle ’s path and
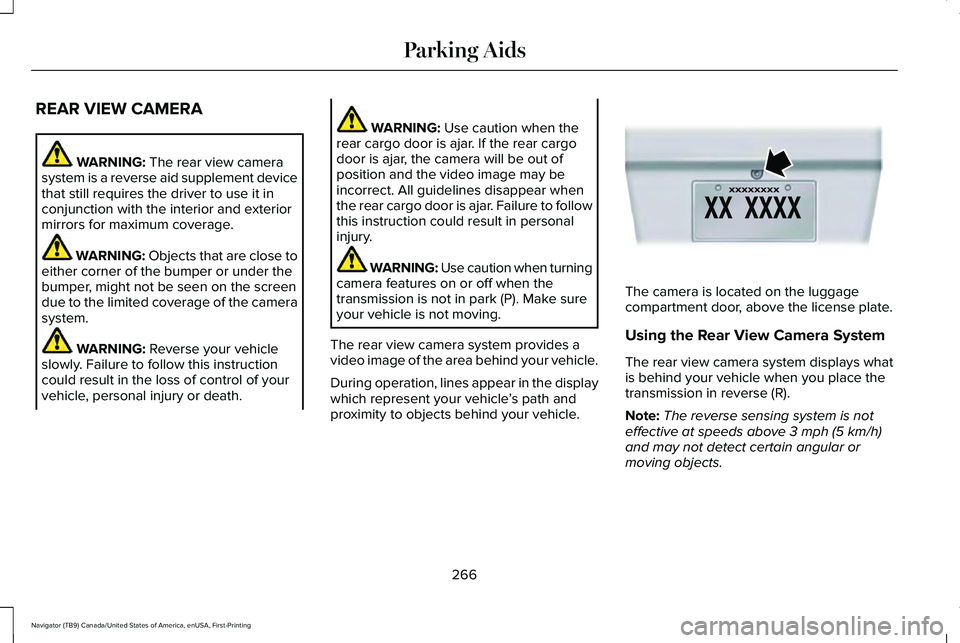
proximity to objects behind your vehicle. The camera is located on the luggage
compartment door, above the license plate.
Using the Rear View Camera System
The rear view camera system displays what
is behind your vehicle when you place the
transmission in reverse (R).
Note:
The reverse sensing system is not
effective at speeds above
3 mph (5 km/h)
and may not detect certain angular or
moving objects.
266
Navigator (TB9) Canada/United States of America, enUSA, First-Printing Parking AidsE142435
Page 271 of 639

Fixed guideline: Yellow zone
D
Fixed guideline: Red zone
E
Rear bumper
F
Active guidelines are only shown with fixed
guidelines. To use active guidelines, turn
the steering wheel to point the guidelines
toward an intended path. If you change the
steering wheel position while reversing, your
vehicle might deviate from the original
intended path.
The fixed and active guidelines fade in and
out depending on the steering wheel
position. The active guidelines do not
display when the steering wheel position is
straight.
Always use caution while reversing. Objects
in the red zone are closest to your vehicle
and objects in the green zone are farther
away. Objects are getting closer to your
vehicle as they move from the green zone
to the yellow or red zones. Use the side view
mirrors and rear view mirror to get better
coverage on both sides and rear of the
vehicle. Obstacle Distance Indicator (If Equipped)
The system will provide an image of your
vehicle and the sensor zones. The zones will
highlight green, yellow and red when the
parking aid sensors detect an object in the
coverage area.Manual Zoom WARNING:
When manual zoom is
on, the full area behind your vehicle may
not show. Be aware of your surroundings
when using the manual zoom feature.
Note: Manual zoom is only available when
the transmission is in reverse (R).
Note: When you enable manual zoom, only
the centerline is shown.
Selectable settings for this feature are Zoom
in (+) and Zoom out (-). Press the symbol in
the camera screen to change the view. The
default setting is Zoom OFF.
This allows you to get a closer view of an
object behind your vehicle. The zoomed
image keeps the bumper in the image to
provide a reference. The zoom is only active
while the transmission is in reverse (R).
Rear Camera Delay
Selectable settings for this feature are ON
and OFF.
268
Navigator (TB9) Canada/United States of America, enUSA, First-Printing Parking AidsE190459
Page 272 of 639

The default setting for the rear camera delay
is OFF.
When shifting the transmission out of reverse
(R) and into any gear other than park (P), the
camera image remains in the display until:
•
Your vehicle speed reaches
approximately 6 mph (10 km/h).
• You shift your vehicle into park (P).
360 DEGREE CAMERA
(IF EQUIPPED) WARNING: The 360 degree camera
system still requires the driver to use it in
conjunction with looking out of the
windows, and checking the interior and
exterior mirrors for maximum coverage. WARNING:
Objects that are close to
either corner of the bumper or under the
bumper, might not be seen on the screen
due to the limited coverage of the camera
system. WARNING:
Use caution when turning
camera features on or off when the
transmission is not in park (P). Make sure
your vehicle is not moving.
Note: The 360 degree camera system turns
off when your vehicle is in motion at low
speed, except when in reverse (R).
The 360 degree camera system consists of
front, side and rear cameras. The system:
• Allows you to see what is directly in front
or behind your vehicle.
• Provides cross traffic view in front and
behind your vehicle.
• Allows you to see a top-down view of the
area outside your vehicle, including the
blind spots.
• Provides visibility around your vehicle in
parking maneuvers such as:
•Centering in a parking space.
• Obstacles near vehicle.
• Parallel parking. Camera Views The front camera enable button is
near the display screen and turns
on the front camera when your
vehicle is not in reverse (R).
When in park (P), neutral (N) or drive (D), only
images from the front cameras are displayed.
Press the camera button to display the front
camera image on the display screen.
When in reverse (R), only images from the
rear cameras are displayed. When you shift
into reverse (R), the rear view camera image
automatically shows on the display screen.
Automatic 360 Degree Camera
Activation
The system activates the 360 degree camera
view when the front parking aid detects an
object. The system displays the
corresponding view when the object
distance indicator detects an object.
See
Front Parking Aid (page 254).
269
Navigator (TB9) Canada/United States of America, enUSA, First-Printing Parking AidsE205884
Page 273 of 639

When the front parking aid system emits an
audible tone, the 360 degree camera views
are active and deactivates a few seconds
after the tone stops. The camera view stays
active for objects detected in the red parking
aid zone regardless of tone. You can turn
the view off by pressing the physical camera
button.
Switching Automatic 360 Degree Camera
Activation On and Off
You can turn the automatic 360 degree
camera activation on and off through the
parking aid button.
The automatic 360 degree camera activation
is only available when you shift into drive (D)
or neutral (N) and if your vehicle speed is
below 6 mph (10 km/h).
The automatic 360 degree camera activation
is not available when you shift into park (P)
or reach speeds over
6 mph (10 km/h).
Note: The rear camera and 360 degree
camera operate normally regardless of
object detection. Advanced Camera Views
(If Equipped) Additional camera views may be
available for vehicles with specific
features. Press the small camera
icon shown on the top left corner of the
display screen to open the camera view
menu.
The following camera views can be accessed
in park (P), neutral (N) or drive (D) when you
press the camera button:
• Front 360 + Normal: Contains the normal
front camera view next to a 360 degree
camera view.
• Front Normal View:
Provides an image
of what is directly in front of your vehicle.
• Front Split View:
Provides an extended
view of what is in front of your vehicle. The following camera views can be accessed
when you shift into reverse (R):
•
Rear 360 + Normal: Contains the normal
rear camera view next to a 360 degree
camera view. Press the zoom (+) button
to quickly access Rear Normal View from
this screen.
• Rear Normal View:
Provides an image
of what is directly behind your vehicle.
• Rear Split View:
Provides an extended
view of what is behind your vehicle.
Keep Out Zone
The Keep Out Zone is represented by the
yellow dotted lines running parallel to your
vehicle. It is designed to give you the
indication on the ground of the fully
extended outside mirror position.
Front Camera WARNING:
The front camera system
still requires the driver to use it in
conjunction with looking out of your
vehicle.
270
Navigator (TB9) Canada/United States of America, enUSA, First-Printing Parking AidsE233726
Page 274 of 639

The front video camera, in the grille, provides
a video image of the area in front of your
vehicle. It adds assistance to the driver while
driving forward at low speeds. To use the
front video camera system, place the
transmission in any gear except reverse (R).
An image will display once the camera
enable button is pressed. The area displayed
on the screen may vary according to your
vehicle's orientation and/or road condition.
The front camera has a washer that activates
when you use the windshield washer. See
Windshield Washers (page 108). Side Camera
The side view camera, in the outside mirror,
provides a video image of the area on the
sides of your vehicle as part of the front 360
+ normal view and rear 360 + normal view.
It aids you while parking your vehicle either
forward or backward.
Note:
Use caution when using the 360 view
while any of the doors are ajar. If a door is
ajar, the camera will be out of position and
the video image may be incorrect.
271
Navigator (TB9) Canada/United States of America, enUSA, First-Printing Parking AidsE250813 E250816