2021 LEXUS LS500 ECO mode
[x] Cancel search: ECO modePage 144 of 520

1443-4. Adjusting the steering wheel and mirrors
1Digital mirror mode
Displays an image of the area behind the
vehicle.
will illuminate in this mode.
2Optical mirror mode
Turns off the display of the Digital Rearview
Mirror allows it to be used as an optical
mirror.
■Digital mirror mode operating condi-
tion
The engine switch is turned to IGNITION
ON mode.
When the engine switch is changed from
IGNITION ON mode to off or ACCES-
SORY mode, the image will disappear after
several seconds.
■When using the Digital Rearview Mir-
ror in digital mirror mode
●If it is difficult to see the displayed image
due to light reflected off the Digital Rear-
view Mirror, the camera being dirty, or if
lights of a vehicle behind your vehicle or
the displayed image are bothering you,
change to optical mirror mode.
●When the trunk is open, the Digital Rear-
view Mirror image may not display prop-
erly. Before driving, make sure the trunk
is closed.
●If the display is difficult to see due to
reflected light, close the sunshade for the
moon roof or the electronic sunshade for
the panoramic moon roof.
●Any of the following conditions may
occur when driving in the dark, such as at
night. None of them indicates that a mal- function has occurred.
• Colors of objects in the displayed image may differ from their actual color.
• Depending on the height of the lights of the vehicle behind, the area around the
vehicle may appear white and blurry.
• Automatic image adjustment for brighter surrounding image may cause flickering.
If it is difficult to see the displayed image or
flickering bothers you, change to optical
mirror mode.
●The Digital Rearview Mirror may
become hot while it is in digital mirror
mode.
This is not a malfunction.
●Depending on your physical condition or
age, it may take longer than usual to focus
on the displayed image. In this case,
change to optical mirror mode.
●Do not let passengers stare at the dis-
played image when the vehicle is being
driven, as doing so may cause motion
sickness.
■When the system malfunctions
If the symbol shown in the illustration is dis-
played when using the Digital Rearview
Mirror in digital mirror mode, the system
may be malfunctioning. The symbol will dis-
appear in a few second s. Operate the lever,
change to optical mirror mode and have the
vehicle inspected by your Lexus dealer.
■Adjusting the mirror height
The height of the rear view mirror can
be adjusted to suit your driving pos-
ture.
Change to optical mirror mode, adjust-
Adjusting the mirror
Page 145 of 520

1453-4. Adjusting the steering wheel and mirrors
3
Before driving
ing the height of the rear view mirror by
moving it up and down.
■Display settings (digital mirror
mode)
Settings of the display in the digital mir-
ror mode, on/off operation of the auto-
matic anti-glare function, etc. can be
changed.
1 Press the menu button.
The icons will be displayed.
2Press the menu button repeatedly
and select the item you want to
adjust.
3 Press or to change the set-
ting.
The icons will disappear if a button is not
operated for approximately 5 seconds or
more.
*: This is a function for the optical mirror
mode, however, the setting can also be
changed while using the digital mirror
mode.
■Enabling/disabling the automatic
anti-glare function (optical mirror
mode)
The automatic anti-glare function in the
optical mirror mode can be
enabled/disabled. The setting can be
changed in both the digital mirror
mode and the optical mirror mode.
When using the digital mirror mode
P.145
When using the op tical mirror mode
1 Press the menu button.
IconsSettings
Select to adjust the brightness of
the display.
Select to adjust the area dis-
played up/down.
Select to adjust the area dis-
played to the left/right.
Select to adjust the angle of the
displayed image.
Select to zoom in/out the dis-
played image.
Select to enable/disable the
automatic anti-glare function.
*
Responding to the brightness of
the headlights of vehicles
behind, the reflected light is
automatically adjusted.
The automatic anti-glare func-
tion is enabled each time the
engine switch is changed to
IGNITION ON mode.
Page 146 of 520

1463-4. Adjusting the steering wheel and mirrors
The icons will be displayed.
2Press the menu button repeatedly
and select .
The setting display will be displayed.
3Press or to enable
(“ON”)/disable (“OFF”) the auto-
matic anti-glare function.
The icons will disappear if a button is not
operated for approximately 5 seconds or
more.
■Adjusting the display (digital mirror
mode)
●If the displayed image is adjusted, it may
appear distorted. This is not a malfunc-
tion.
●If the brightness of the Digital Rearview
Mirror is set too high, it may cause eye
strain. Adjust the Di gital Rearview Mirror
to an appropriate brig htness. If your eyes
become tired, change to optical mirror
mode.
●The brightness of the Digital Rearview
Mirror will change automatically accord-
ing to the brightness of the area in front of
your vehicle.
■To prevent the light sensors from mal-
functioning
To prevent the light sensors from malfunc-
tioning, do not touch or cover them.
■Cleaning the mirror surface
If the mirror surface is dirty, the image
on the display may be difficult to see.
WARNING
Observe the following precautions.
Failure to do so may result in death or
serious injury.
■While driving
●Do not adjust the position of the Digital
Rearview Mirror or adjust the display
settings while driving.
Stop the vehicle and operate the Digi-
tal Rearview Mirror control switches.
Failure to do so may cause a steering
wheel operation error, resulting in an
unexpected accident.
●Always pay attention to the vehicle’s
surroundings.
The size of the vehicles and other objects
may look different when in digital mirror
mode and optical mirror mode.
When backing up, make sure to directly
check the safety of the area around your
vehicle, especially behind the vehicle.
Additionally, if a vehicle approaches from
the rear in the dark, such as at night, the
surrounding area may appear dim.
■To prevent causes of fire
If the driver contin ues using the Digital
Rearview Mirror while smoke or odor
comes from the mirror, it may result in
fire. Stop using the system immediately
and contact your Lexus dealer.
Cleaning the Digital Rearview
Mirror
Page 150 of 520

1503-4. Adjusting the steering wheel and mirrors
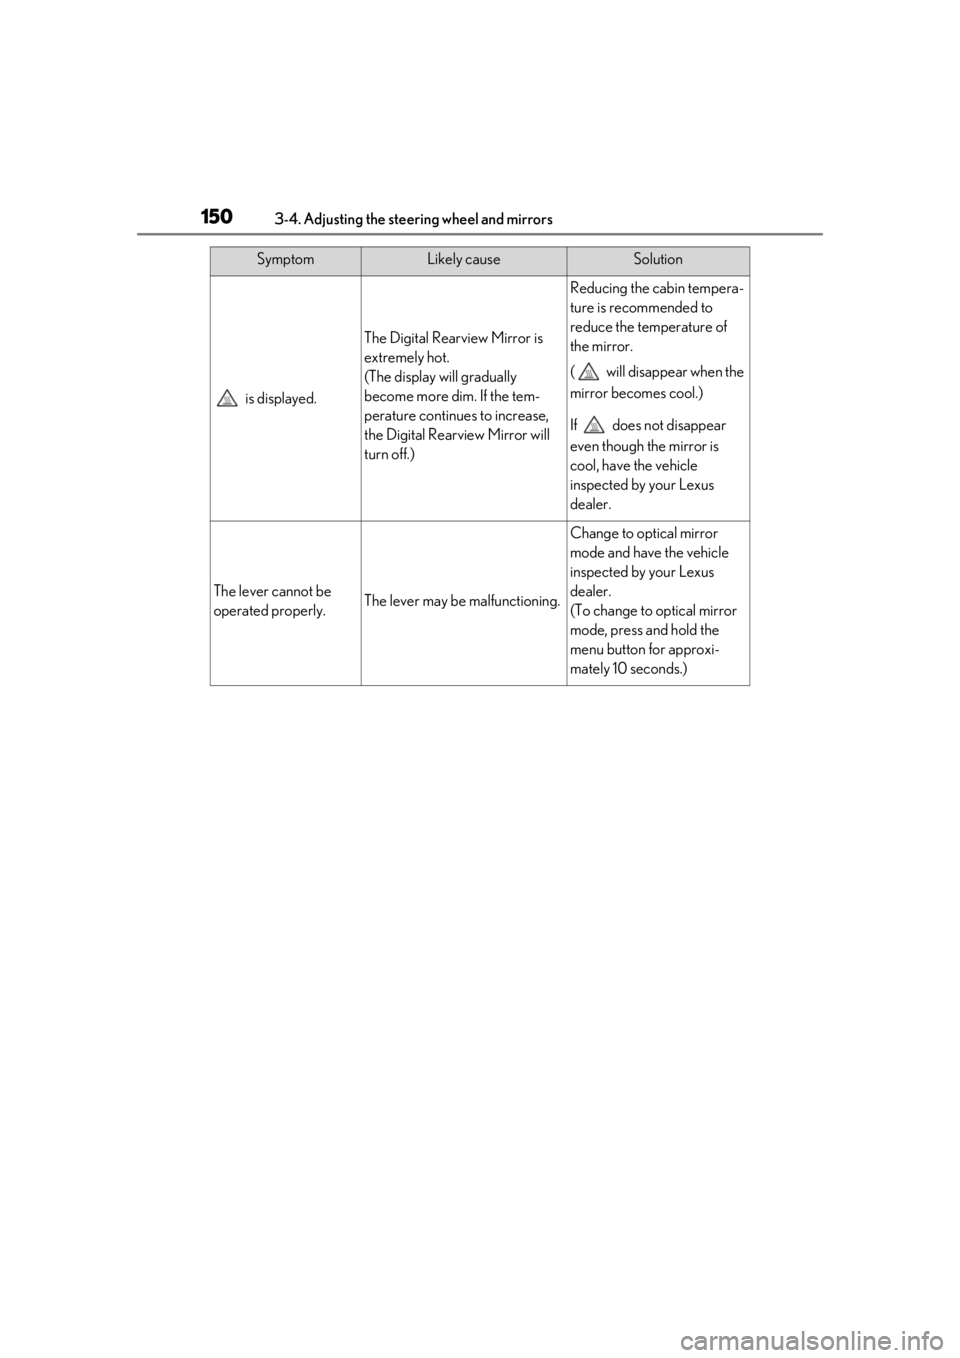
is displayed.
The Digital Rearview Mirror is
extremely hot.
(The display will gradually
become more dim. If the tem-
perature continues to increase,
the Digital Rearview Mirror will
turn off.)
Reducing the cabin tempera-
ture is recommended to
reduce the temperature of
the mirror.
( will disappear when the
mirror becomes cool.)
If does not disappear
even though the mirror is
cool, have the vehicle
inspected by your Lexus
dealer.
The lever cannot be
operated properly.The lever may be malfunctioning.
Change to optical mirror
mode and have the vehicle
inspected by your Lexus
dealer.
(To change to optical mirror
mode, press and hold the
menu button for approxi-
mately 10 seconds.)
SymptomLikely causeSolution
Page 152 of 520

1523-4. Adjusting the steering wheel and mirrors
nor “R”.
To set the mirror angle used when the vehi-
cle is reversing, adjust the mirror angle at a
desired position with the shift position in R.
The adjusted angle will be memorized and
the mirror will automatically tilt to the mem-
orized angle whenever the shift position is
shifted to R from next time.
The memorized downward tilt position of
the mirror is linked to the normal position
(angle adjusted with the shift position in
other than R). Therefore, if the normal posi-
tion is changed after adjustment, the tilt
position will also change.
When the normal position is changed, read-
just the angle in reversing.
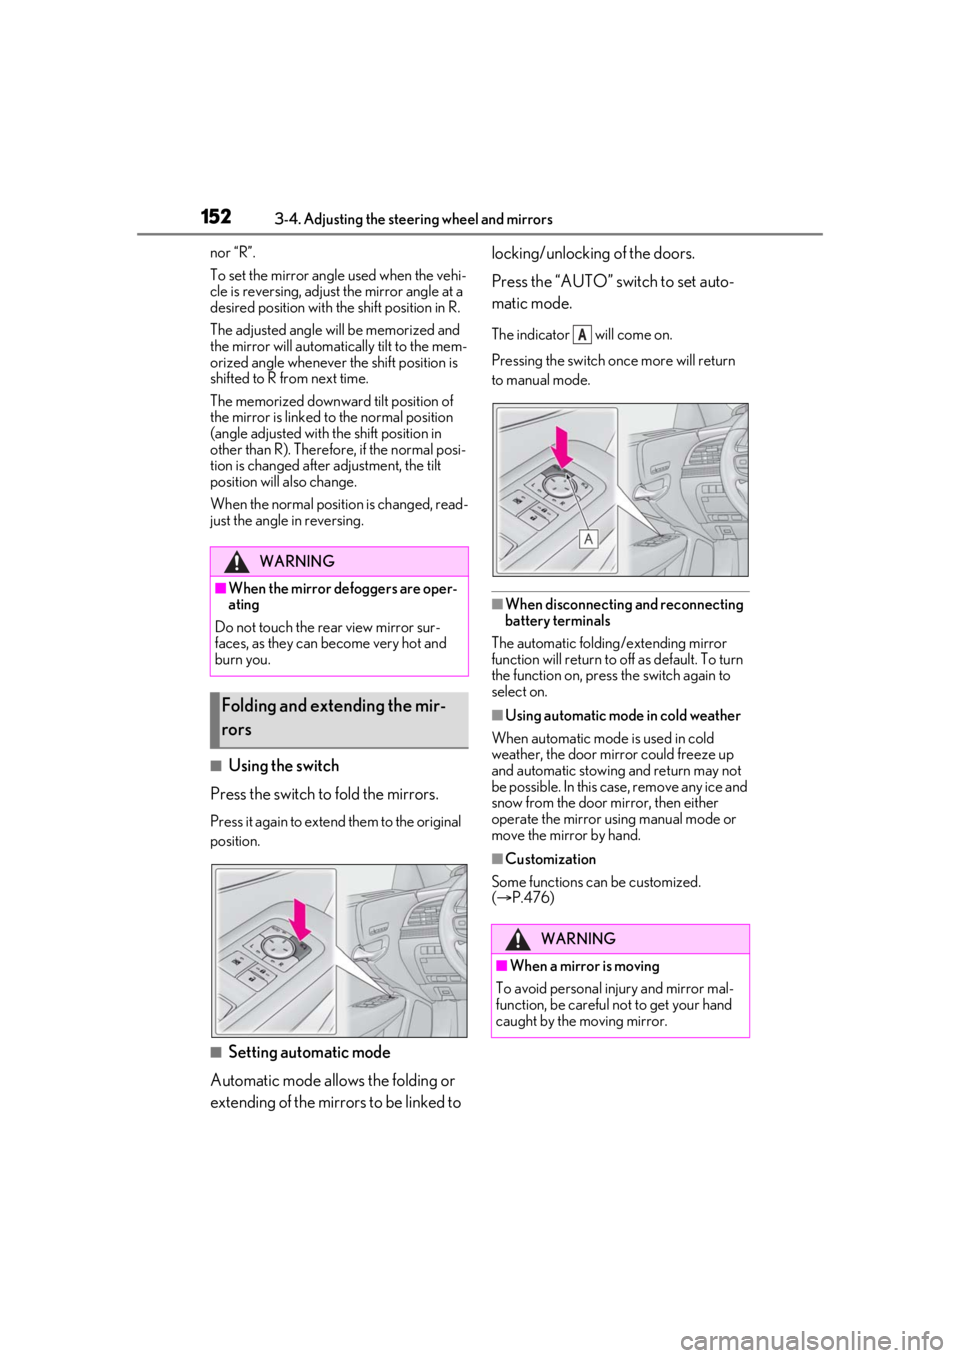
■Using the switch
Press the switch to fold the mirrors.
Press it again to extend them to the original
position.
■Setting automatic mode
Automatic mode allows the folding or
extending of the mirrors to be linked to locking/unlocking of the doors.
Press the “AUTO” switch to set auto-
matic mode.
The indicator will come on.
Pressing the switch on
ce more will return
to manual mode.
■When disconnecting and reconnecting
battery terminals
The automatic folding/extending mirror
function will return to off as default. To turn
the function on, press the switch again to
select on.
■Using automatic mode in cold weather
When automatic mode is used in cold
weather, the door mirror could freeze up
and automatic stowing and return may not
be possible. In this case, remove any ice and
snow from the door mirror, then either
operate the mirror using manual mode or
move the mirror by hand.
■Customization
Some functions can be customized.
( P.476)
WARNING
■When the mirror defoggers are oper-
ating
Do not touch the rear view mirror sur-
faces, as they can become very hot and
burn you.
Folding and extending the mir-
rors
WARNING
■When a mirror is moving
To avoid personal injury and mirror mal-
function, be careful not to get your hand
caught by the moving mirror.
A
Page 153 of 520

1533-5. Opening, closing the windows and moon roof
3
Before driving
3-5.Opening, closing the windows and moon roof
The power windows can be opened
and closed using the switches.
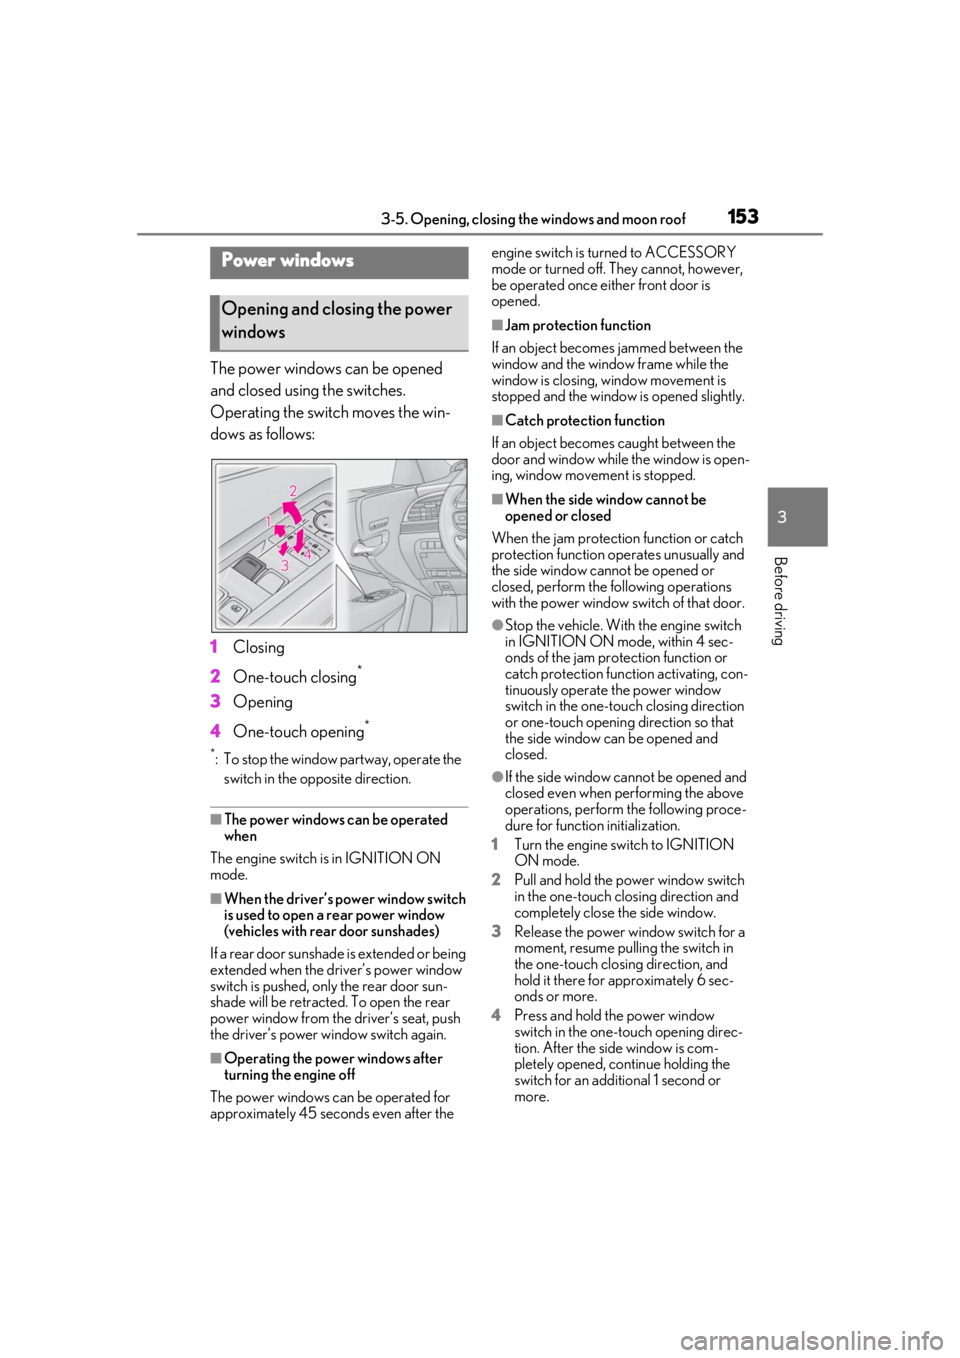
Operating the switch moves the win-
dows as follows:
1Closing
2 One-touch closing
*
3Opening
4 One-touch opening
*
*: To stop the window partway, operate the
switch in the op posite direction.
■The power windows can be operated
when
The engine switch is in IGNITION ON
mode.
■When the driver’s power window switch
is used to open a rear power window
(vehicles with rear door sunshades)
If a rear door sunshade is extended or being
extended when the driver’s power window
switch is pushed, only the rear door sun-
shade will be retracted. To open the rear
power window from the driver’s seat, push
the driver’s power window switch again.
■Operating the power windows after
turning the engine off
The power windows can be operated for
approximately 45 seconds even after the engine switch is turned to ACCESSORY
mode or turned off. They cannot, however,
be operated once either front door is
opened.
■Jam protection function
If an object becomes jammed between the
window and the window frame while the
window is closing, window movement is
stopped and the window is opened slightly.
■Catch protection function
If an object becomes caught between the
door and window while the window is open-
ing, window movement is stopped.
■When the side window cannot be
opened or closed
When the jam protection function or catch
protection function operates unusually and
the side window cannot be opened or
closed, perform the following operations
with the power window switch of that door.
●Stop the vehicle. With the engine switch
in IGNITION ON mode, within 4 sec-
onds of the jam protection function or
catch protection function activating, con-
tinuously operate the power window
switch in the one-touch closing direction
or one-touch opening direction so that
the side window can be opened and
closed.
●If the side window cannot be opened and
closed even when performing the above
operations, perform the following proce-
dure for function initialization.
1 Turn the engine switch to IGNITION
ON mode.
2 Pull and hold the power window switch
in the one-touch closing direction and
completely close the side window.
3 Release the power window switch for a
moment, resume pulling the switch in
the one-touch closing direction, and
hold it there for approximately 6 sec-
onds or more.
4 Press and hold the power window
switch in the one-touch opening direc-
tion. After the side window is com-
pletely opened, continue holding the
switch for an additional 1 second or
more.
Power windows
Opening and closing the power
windows
Page 155 of 520

1553-5. Opening, closing the windows and moon roof
3
Before driving
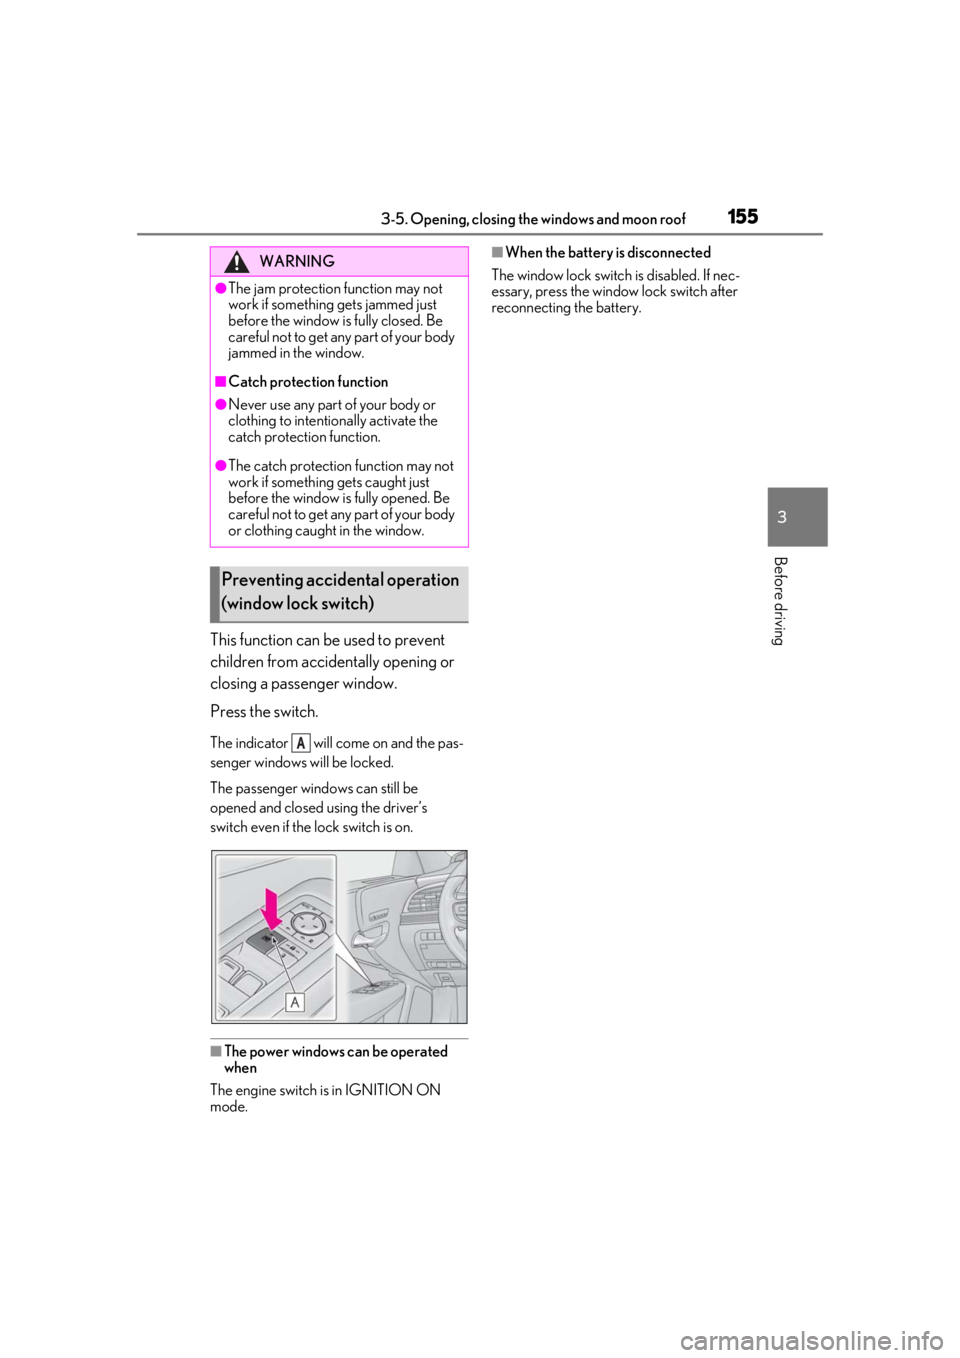
This function can be used to prevent
children from accidentally opening or
closing a passenger window.
Press the switch.
The indicator will come on and the pas-
senger windows will be locked.
The passenger windows can still be
opened and closed using the driver’s
switch even if the lock switch is on.
■The power windows can be operated
when
The engine switch is in IGNITION ON
mode.
■When the battery is disconnected
The window lock switch is disabled. If nec-
essary, press the window lock switch after
reconnecting the battery.WARNING
●The jam protection function may not
work if something gets jammed just
before the window is fully closed. Be
careful not to get any part of your body
jammed in the window.
■Catch protection function
●Never use any part of your body or
clothing to intentio nally activate the
catch protection function.
●The catch protection function may not
work if something gets caught just
before the window is fully opened. Be
careful not to get any part of your body
or clothing caught in the window.
Preventing accidental operation
(window lock switch)
A
Page 156 of 520

1563-5. Opening, closing the windows and moon roof
*:If equipped
■Opening and closing
1 Opens the moon roof
*
The moon roof tilts up and then fully opens.
2Closes the moon roof*
*: Lightly press either side of the moon roof
switch to stop the moon roof partway.
■Tilting up and down
1 Tilts the moon roof up
*
2Tilts the moon roof down*
*: Lightly press either side of the moon roof
switch to stop the moon roof partway.
■The moon roof can be operated when
The engine switch is in IGNITION ON
mode.
■Operating the moon roof after turning
the engine off
The moon roof can be operated for approx-
imately 45 seconds after the engine switch
is turned to ACCESSORY mode or turned
off. It cannot, howeve r, be operated once
either front door is opened.
■Jam protection function
If an object is dete cted between the moon
roof and the frame while the moon roof is
closing or tilting down, travel is stopped and
the moon roof opens slightly.
■Sunshade
The sunshade can be opened and closed
manually. However, the sunshade will open
automatically when the moon roof is
opened.
■Door lock linked moon roof operation
●The moon roof can be opened and
closed using the mechanical key.*
( P.443)
●The moon roof can be opened using the
wireless remote control.* ( P.102)*: These settings must be customized at
your Lexus dealer.
■When the moon roof does not close nor-
mally
Perform the following procedure:
1 Stop the vehicle.
2 Press and hold th e “CLOSE” switch.
*
The moon roof will close, reopen and pause
for approximately 10 seconds. Then it will
close again and stop at the completely
closed position.
3Check to make sure that the moon roof
is completely closed and then release
the switch.
*: If the switch is released at the incorrect
time, the procedure will have to be per-
formed again from the beginning.
If the moon roof does not fully close even
Moon roof*
Use the overhead switches to open
and close the moon roof and tilt it
up and down.
Operating the moon roof