2021 LEXUS ES350 ignition
[x] Cancel search: ignitionPage 133 of 464

133
4
4
Driving
Driving
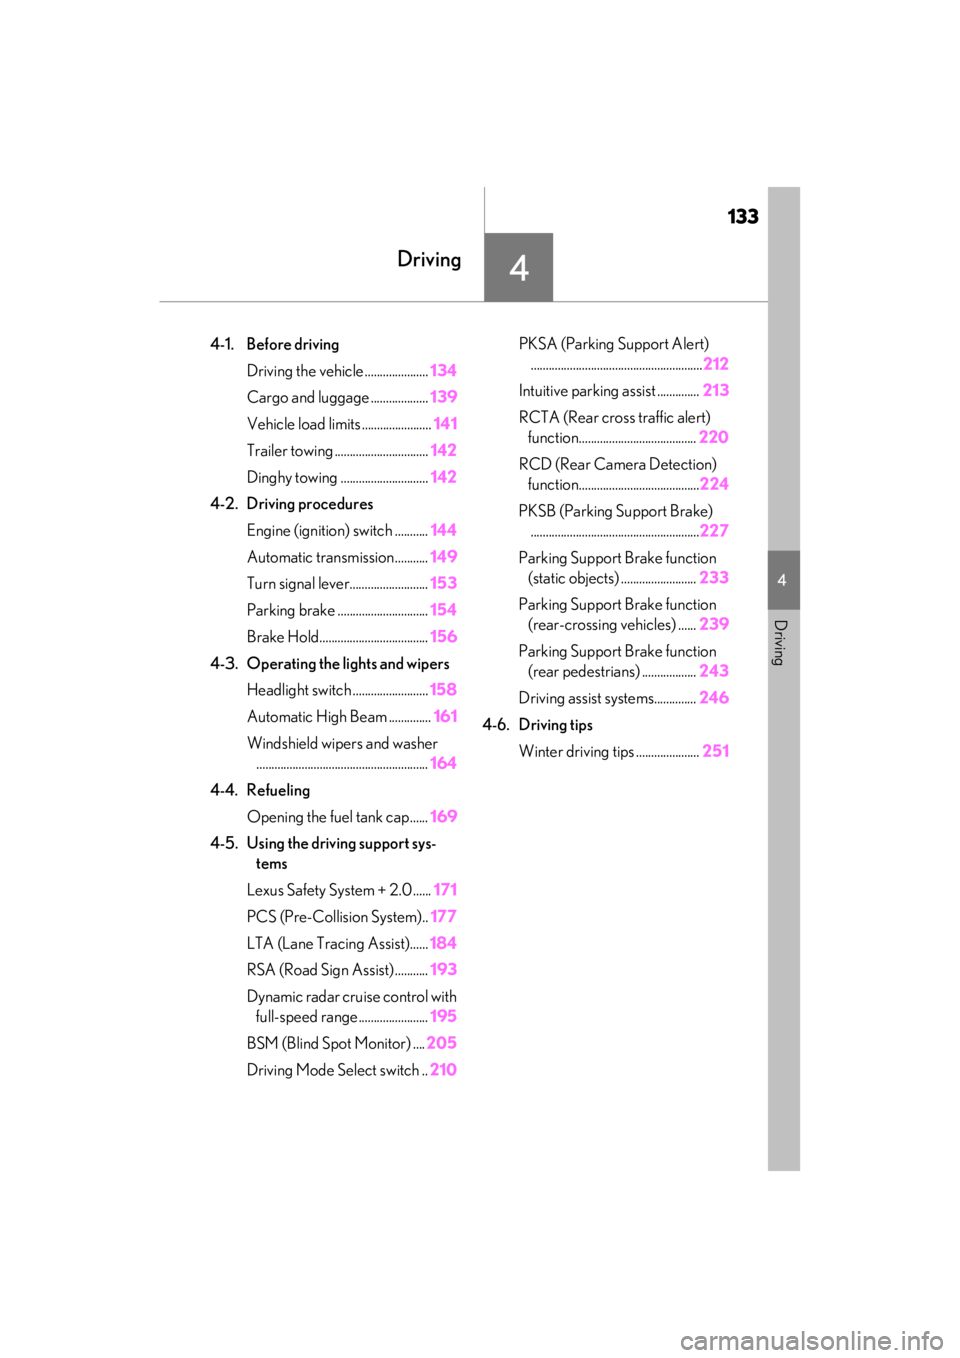
4-1. Before drivingDriving the vehicle ..................... 134
Cargo and luggage ................... 139
Vehicle load limits ....................... 141
Trailer towing ............................... 142
Dinghy towing ............................. 142
4-2. Driving procedures Engine (ignition) switch ........... 144
Automatic transmission........... 149
Turn signal lever.......................... 153
Parking brake .............................. 154
Brake Hold.................................... 156
4-3. Operating the lights and wipers Headlight switch ......................... 158
Automatic High Beam .............. 161
Windshield wipers and washer ......................................................... 164
4-4. Refueling Opening the fuel tank cap...... 169
4-5. Using the driving support sys- tems
Lexus Safety System + 2.0 ...... 171
PCS (Pre-Collision System).. 177
LTA (Lane Tracing Assist)...... 184
RSA (Road Sign Assist) ........... 193
Dynamic radar cruise control with full-speed range....................... 195
BSM (Blind Spot Monitor) .... 205
Driving Mode Select switch .. 210PKSA (Parking Support Alert)
......................................................... 212
Intuitive parking assist .............. 213
RCTA (Rear cross traffic alert) function....................................... 220
RCD (Rear Camera Detection) function........................................ 224
PKSB (Parking Support Brake) ........................................................ 227
Parking Support Brake function (static objects) ......................... 233
Parking Support Brake function (rear-crossing vehicles) ...... 239
Parking Support Brake function (rear pedestrians) .................. 243
Driving assist systems.............. 246
4-6. Driving tips Winter driving tips ..................... 251
Page 144 of 464

1444-2. Driving procedures
4-2.Driving procedures
1Press the parking brake switch to
check that the parking brake is set.
(P.154)
Parking brake indicator will come on.
2 Check that the shift lever is in P.
3 Firmly depress the brake pedal.
and a message will be displayed on
the multi-information display.
If it is not displayed, the engine cannot be
started.
4 Press the engine switch shortly and
firmly.
When operating the engine switch, one
short, firm press is enough. It is not neces-
sary to press and hold the switch.
The engine will crank until it starts or for up
to 30 seconds, whichever is less.
Continue depressing the brake pedal until
the engine is completely started.
The engine can be started from any engine switch mode.
■Engine switch illumination
According to the situation, the engine
switch illumination operates as follows.
●When a door is opened, or the engine
switch mode is changed from ACCES-
SORY or IGNITION ON mode to off,
the engine switch illumination slowly
blinks.
●When depressing the brake pedal with
carrying the electronic key on your per-
son, the engine switch illumination rapidly
blinks.
●When the engine sw itch is in ACCES-
SORY or IGNITION ON mode, the
engine switch illumination illuminates.
■If the engine does not start
●The engine immobilizer system may not
have been deactivated. ( P.61)
Contact your Lexus dealer.
●If a message related to start-up is shown
on the multi-information display, read the
message and follow the instructions.
●If the door is unlock ed with the mechani-
cal key, the engine cannot be started
using the smart access system with push-
button start. Refer to P.388 to start the
engine. However, if the electronic key is
carried inside the vehicle and the doors
are locked ( P.97), the engine can be
started.
Engine (ignition) switch
Performing the following opera-
tions when carryin g the electronic
key on your person starts the
engine or changes engine switch
modes.
Starting the engine
Page 147 of 464

1474-2. Driving procedures
4
Driving
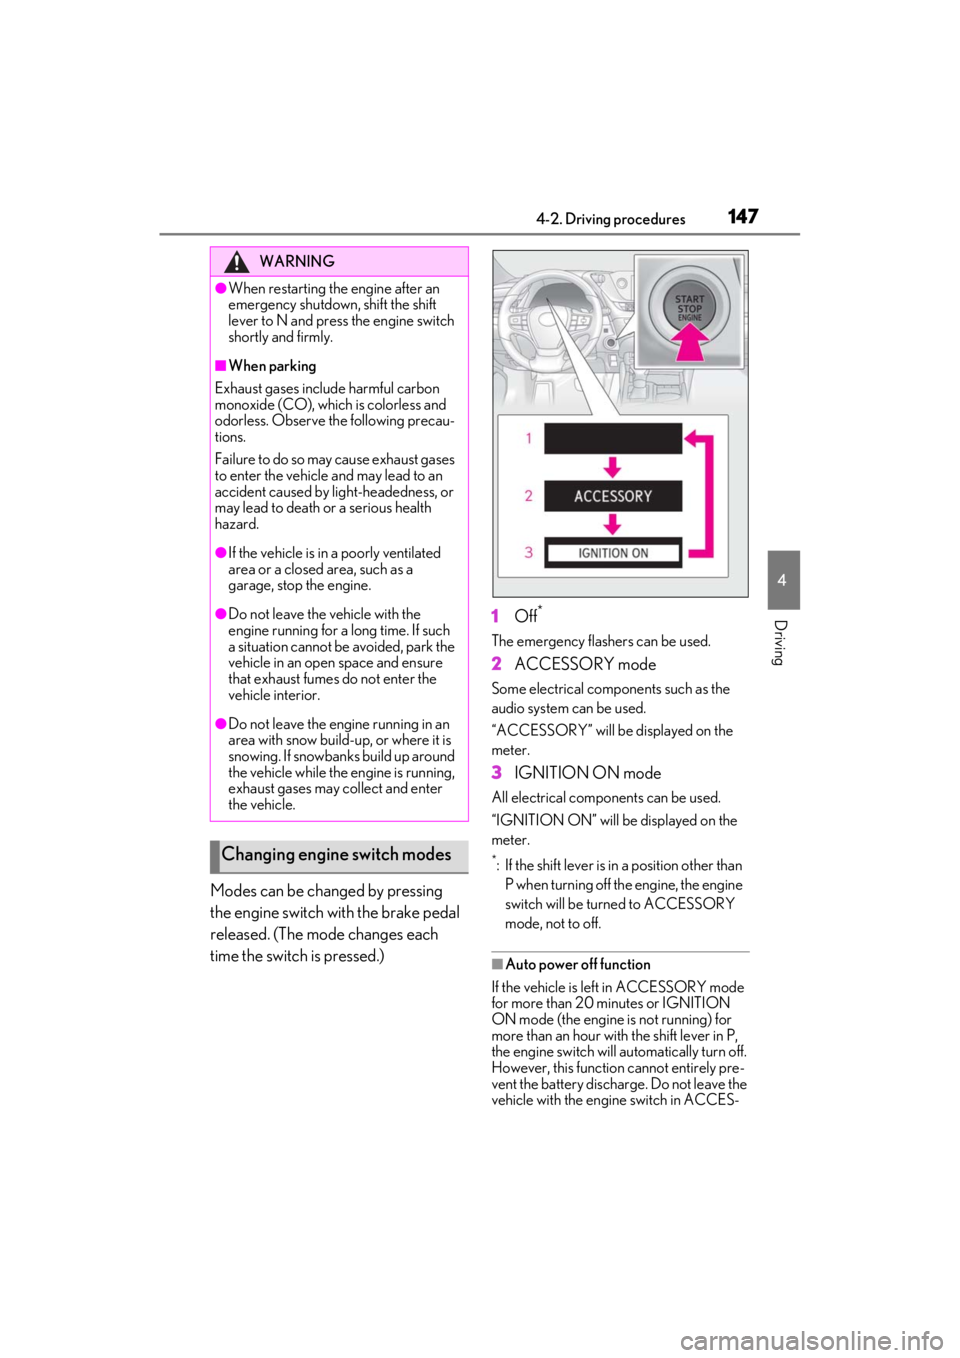
Modes can be changed by pressing
the engine switch with the brake pedal
released. (The mode changes each
time the switch is pressed.)1
Off
*
The emergency flashers can be used.
2ACCESSORY mode
Some electrical components such as the
audio system can be used.
“ACCESSORY” will be displayed on the
meter.
3IGNITION ON mode
All electrical components can be used.
“IGNITION ON” will be displayed on the
meter.
*: If the shift lever is in a position other than
P when turning off the engine, the engine
switch will be turned to ACCESSORY
mode, not to off.
■Auto power off function
If the vehicle is left in ACCESSORY mode
for more than 20 minutes or IGNITION
ON mode (the engine is not running) for
more than an hour with the shift lever in P,
the engine switch will automatically turn off.
However, this function cannot entirely pre-
vent the battery discharge. Do not leave the
vehicle with the engine switch in ACCES-
WARNING
●When restarting the engine after an
emergency shutdown, shift the shift
lever to N and press the engine switch
shortly and firmly.
■When parking
Exhaust gases include harmful carbon
monoxide (CO), which is colorless and
odorless. Observe the following precau-
tions.
Failure to do so may cause exhaust gases
to enter the vehicle and may lead to an
accident caused by light-headedness, or
may lead to death or a serious health
hazard.
●If the vehicle is in a poorly ventilated
area or a closed area, such as a
garage, stop the engine.
●Do not leave the vehicle with the
engine running for a long time. If such
a situation cannot be avoided, park the
vehicle in an open space and ensure
that exhaust fumes do not enter the
vehicle interior.
●Do not leave the engine running in an
area with snow build-up, or where it is
snowing. If snowbanks build up around
the vehicle while the engine is running,
exhaust gases may collect and enter
the vehicle.
Changing engine switch modes
Page 148 of 464

1484-2. Driving procedures
SORY or IGNITION ON mode for long
periods of time when the engine is not run-
ning.
If the engine is stopped with the shift
lever in a position other than P, the
engine switch will not be turned off but
instead be turned to ACCESSORY
mode. Perform the following proce-
dure to turn the switch off:
1If the parking brake is in manual
mode, set the parking brake.
(P.154)
2 Shift the shift lever to P.
3 Check that “Turn Power Off” is dis-
played on the multi-information dis-
play and then press the engine
switch once.
4 Check that “Turn Power Off” on
the multi-information display is
turned off.
When stopping the engine with
the shift lever in a position other
than P
NOTICE
■To prevent battery discharge
●Do not leave the engine switch in
ACCESSORY or IGNITION ON
mode for long period s of time without
the engine running.
●If “ACCESSORY” or “IGNITION
ON” is displayed on the meter, the
engine switch is not off.
Exit the vehicle after turning the
engine switch off.
●Do not stop the engine when the shift
lever is in a position other than P. If the
engine is stopped in another shift lever
position, the engine switch will not be
turned off but instead be turned to
ACCESSORY mode. If the vehicle is
left in ACCESSORY mode, battery
discharge may occur.
Page 150 of 464

1504-2. Driving procedures
While the engine switch is in IGNITION ON mode and the brake pedal
depressed*, shift the shift lever while pushing the shift release button on the shift
knob.
Shift the shift lever while pushing the shift release button on the shift knob.
Shift the shift lever normally.
When shifting the shift lever between P and D, make sure that the vehicle is completely
stopped and the brake pedal is depressed.
*: For the vehicle be able to be shifted from P, the brake pedal must be depressed before the shift release button is pushed. If the shift release button is pushed first, the shift lock
will not be released.
■Shift lock system
The shift lock system is a system to prevent
accidental operation of the shift lever in
starting.
The shift lever can be shifted from P only
when the engine switch is in IGNITION
ON mode the brake pedal is depressed
and the shift release button is pushed.■If the shift lever cannot be shifted from P
First, check whether the brake pedal is
being depressed.
If the shift lever cannot be shifted even
though the brake pedal is depressed and
the shift release button is pushed, there may
be a problem with th e shift lock system.
Have the vehicle inspected by your Lexus
dealer immediately.
Shifting the shift lever
Page 153 of 464

1534-2. Driving procedures
4
Driving
■If the S indicator does not come on or
the D indicator is displayed even after
shifting the shift lever to S
This may indicate a malfunction in the auto-
matic transmission system. Have the vehicle
inspected by your Lexus dealer immedi-
ately. (In this situation, the transmission will
operate in the same manner as when the
shift lever is in D.)
1 Right turn
2 Lane change to the right (move the
lever partway and release it)
The right hand signals will flash 3 times.
3Lane change to the left (move the
lever partway and release it)
The left hand signals will flash 3 times.
4Left turn
■Turn signals can be operated when
The engine switch is in IGNITION ON
mode.
■If the indicator flashes faster than usual
Check that a light bulb in the front or rear
turn signal lights has not burned out.
■If the turn signals stop flashing before a
lane change has been performed
Operate the lever again.
Turn signal lever
Operating instructions
Page 155 of 464

1554-2. Driving procedures
4
Driving
■Turning the automatic mode off
While the vehicle is stopped, pull and
hold the parking brake switch until a
message is shown on the multi-infor-
mation display
■Parking brake operation
●When the engine swit ch is not in IGNI-
TION ON mode, the parking brake can-
not be released using the parking brake
switch.
●When the engine swit ch is not in IGNI-
TION ON mode, automatic mode (auto-
matic brake setting and releasing) is not
available.
■Parking brake automatic release func-
tion
●When the shift lever is shifted from P, the
parking brake will be released in auto-
matic mode.
●When all of the foll owing conditions are
met in manual mode, the parking brake
can be released by depressing the accel-
erator pedal.
• The driver’s door is closed
• The driver is wearing the seat belt
• The shift lever is in D, S or R
■If “Parking Brake Temporarily Unavail-
able” is displayed on the multi-informa-
tion display
If the parking brake is operated repeatedly
over a short period of time, the system may
restrict operation to prevent overheating. If
this happens, refrain from operating the
parking brake. Normal operation will return
after about 1 minute.
■If “Parking Brake Unavailable” or “EPB
Unavailable” is displayed on the multi-
information display
Operate the parking brake switch. If the
message does not disappear after operat-
ing the switch several times, the system may
be malfunctioning. Have the vehicle
inspected by your Lexus dealer.
■Parking brake operation sound
When the parking brake operates, a motor
sound (whirring sound) may be heard. This
does not indicate a malfunction.
■Parking brake indicator light
●Depending on the engine switch mode,
the parking brake indicator light will turn
on and stay on as described below:
IGNITION ON mode: Comes on until
the parking brake is released.
Not in IGNITION ON mode: Stays on
for approximately 15 seconds.
●When the engine switch is turned off with
the parking brake set, the parking brake
indicator light will stay on for about 15
seconds. This does not indicate a mal-
function.
■When the parking brake switch mal-
functions
Automatic mode (automatic brake setting
and releasing) will be turned on automati-
cally.
■Parking the vehicle
P.134
■Parking brake engaged warning buzzer
A buzzer will sound if the vehicle is driven
with the parking brake engaged. “EPB
Applied” is displayed on the multi-informa-
tion display (with the vehicle reached a
speed of 3 mph [5 km/h]).
■If the brake system warning light comes
on
P.361
■Usage in winter time
P.251
Page 158 of 464

1584-3. Operating the lights and wipers
4-3.Operating the lights and wipers
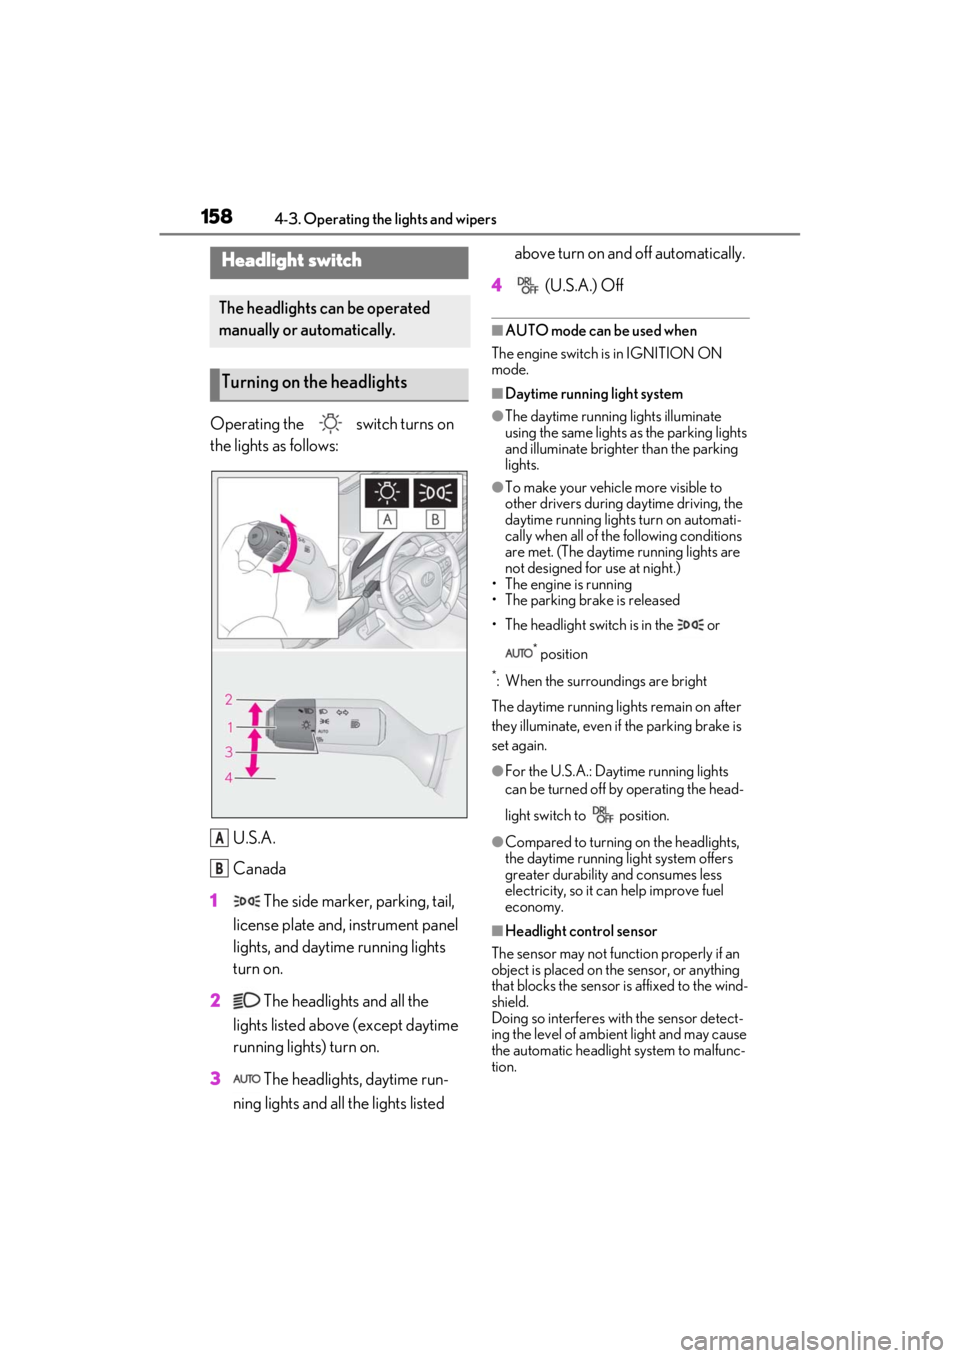
Operating the switch turns on
the lights as follows:U.S.A.
Canada
1 The side marker, parking, tail,
license plate and, instrument panel
lights, and daytime running lights
turn on.
2 The headlights and all the
lights listed above (except daytime
running lights) turn on.
3 The headlights, daytime run-
ning lights and all the lights listed above turn on and off automatically.
4 (U.S.A.) Off
■AUTO mode can be used when
The engine switch is in IGNITION ON
mode.
■Daytime running light system
●The daytime running lights illuminate
using the same lights as the parking lights
and illuminate brighter than the parking
lights.
●To make your vehicle more visible to
other drivers during daytime driving, the
daytime running lights turn on automati-
cally when all of the following conditions
are met. (The daytime running lights are
not designed for use at night.)
• The engine is running
• The parking brake is released
• The headlight switch is in the or
* position
*: When the surroundings are bright
The daytime running lights remain on after
they illuminate, even if the parking brake is
set again.
●For the U.S.A.: Daytime running lights
can be turned off by operating the head-
light switch to position.
●Compared to turning on the headlights,
the daytime running light system offers
greater durability and consumes less
electricity, so it can help improve fuel
economy.
■Headlight control sensor
The sensor may not function properly if an
object is placed on the sensor, or anything
that blocks the sensor is affixed to the wind-
shield.
Doing so interferes with the sensor detect-
ing the level of ambien t light and may cause
the automatic headlight system to malfunc-
tion.
Headlight switch
The headlights can be operated
manually or automatically.
Turning on the headlights
A
B