2021 LEXUS ES350 change wheel
[x] Cancel search: change wheelPage 33 of 464

331-1. For safe use
1
For safety and security
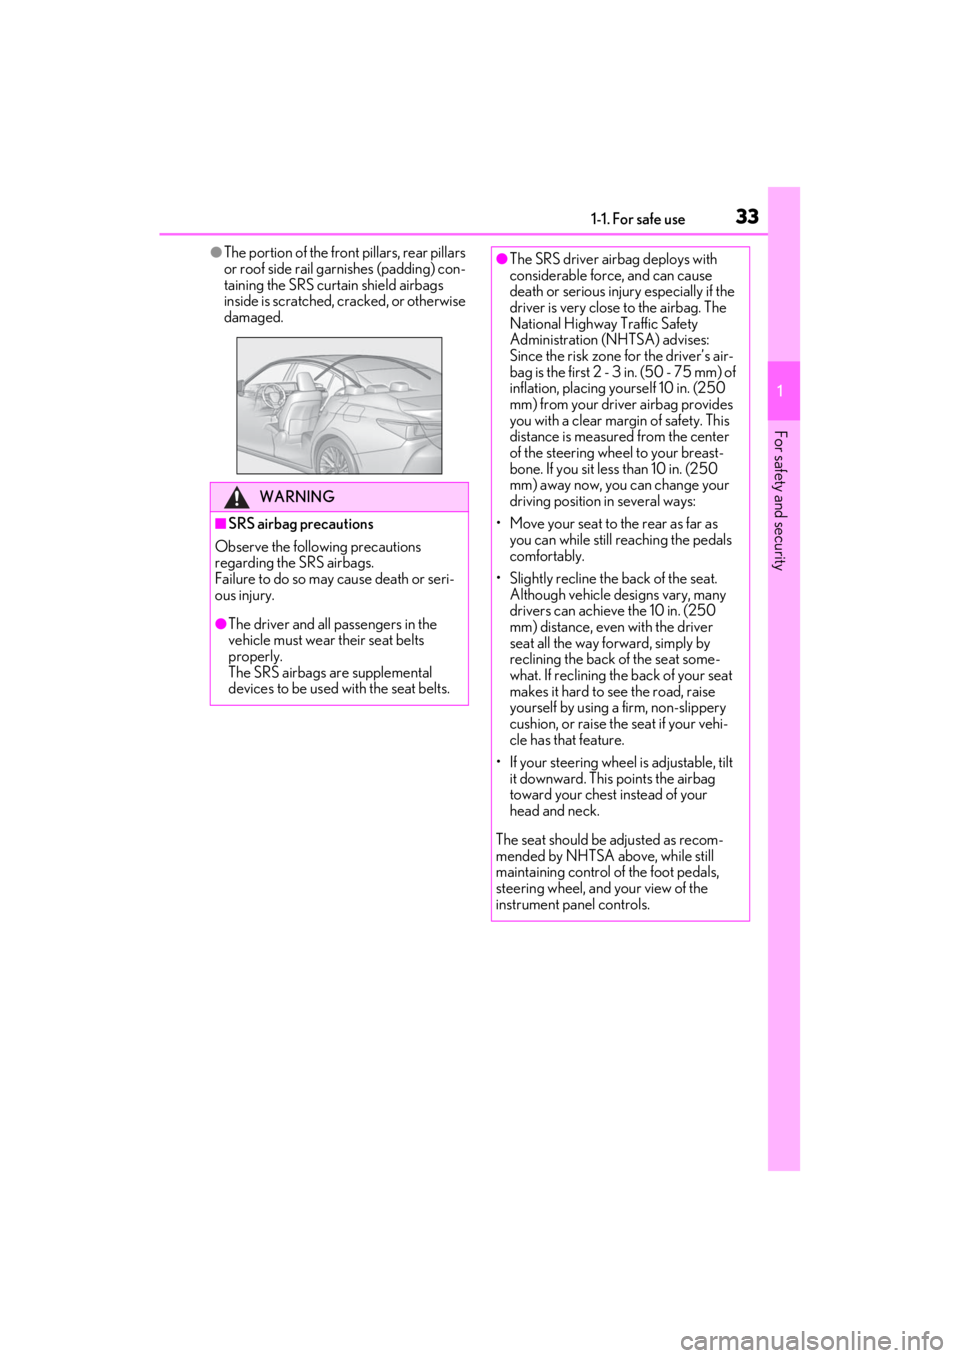
●The portion of the front pillars, rear pillars
or roof side rail garnishes (padding) con-
taining the SRS curtain shield airbags
inside is scratched, cracked, or otherwise
damaged.
WARNING
■SRS airbag precautions
Observe the following precautions
regarding the SRS airbags.
Failure to do so may cause death or seri-
ous injury.
●The driver and all passengers in the
vehicle must wear their seat belts
properly.
The SRS airbags are supplemental
devices to be used with the seat belts.
●The SRS driver airbag deploys with
considerable force, and can cause
death or serious injury especially if the
driver is very close to the airbag. The
National Highway Traffic Safety
Administration (NHTSA) advises:
Since the risk zone for the driver’s air-
bag is the first 2 - 3 in. (50 - 75 mm) of
inflation, placing yourself 10 in. (250
mm) from your driver airbag provides
you with a clear margin of safety. This
distance is measured from the center
of the steering wheel to your breast-
bone. If you sit less than 10 in. (250
mm) away now, you can change your
driving position in several ways:
• Move your seat to the rear as far as you can while still reaching the pedals
comfortably.
• Slightly recline the back of the seat. Although vehicle designs vary, many
drivers can achieve the 10 in. (250
mm) distance, even with the driver
seat all the way forward, simply by
reclining the back of the seat some-
what. If reclining the back of your seat
makes it hard to see the road, raise
yourself by using a firm, non-slippery
cushion, or raise the seat if your vehi-
cle has that feature.
• If your steering wheel is adjustable, tilt it downward. This points the airbag
toward your chest instead of your
head and neck.
The seat should be adjusted as recom-
mended by NHTSA above, while still
maintaining control of the foot pedals,
steering wheel, and your view of the
instrument panel controls.
Page 114 of 464

1143-3. Adjusting the seats
*:If equipped
When all of the following have been
performed, the driver’s seat and steer-
ing wheel are automatically adjusted to
a position that allows the driver to
enter and exit the vehicle easily.
The shift lever has been shifted to P.
The engine switch has been turned
off.
The driver’s seat belt has been
unfastened. When any of the following has been
performed, the driver’s seat and steer-
ing wheel automatically return to their
original positions.
The engine switch has been turned
to ACCESSORY mode or IGNI-
TION ON mode.
The driver’s seat belt has been fas-
tened.
■Operation of the power easy access
system
●When exiting the vehicle, the power easy
access system may not operate if the seat
is already in the rearmost or uppermost
position or close to the rear seat.
●If the seat position is adjusted during
power easy access syst em operation, the
automatic operation will stop. (The seat
will change to manual operation.)
●If the seat position is adjusted during or
after the power easy access system oper-
ation when the driver is exiting the vehi-
cle, the power easy access system will not
operate when entering the vehicle.
■Customization
The seat movement amou nt settings of the
power easy access system can be custom-
ized. (Customizable features: P.419)
1 Check that the shift lever is in P.
2 Turn the engine switch to IGNI-
TION ON mode.
3 Adjust the driver’s seat, steering
wheel, outside rear view mirrors
and head-up display (if equipped)
to the desired positions.
4 While pressing the “SET” button, or
within 3 seconds after the “SET”
Driving position memory*
This feature auto matically adjusts
the positions of the driver’s seat,
steering wheel (power adjustment
type), outside rear view mirrors and
head-up display (if equipped) to
make entering and exiting the vehi-
cle easier or to suit your prefer-
ences.
Up to 3 different driving positions
can be recorded.
Each electronic key can be regis-
tered to recall your preferred driv-
ing position.
Power easy access system
Recording a driving position into
memory
Page 119 of 464

1193-4. Adjusting the steering wheel and mirrors
3
Before driving
3-4.Adjusting the steering wheel and mirrors
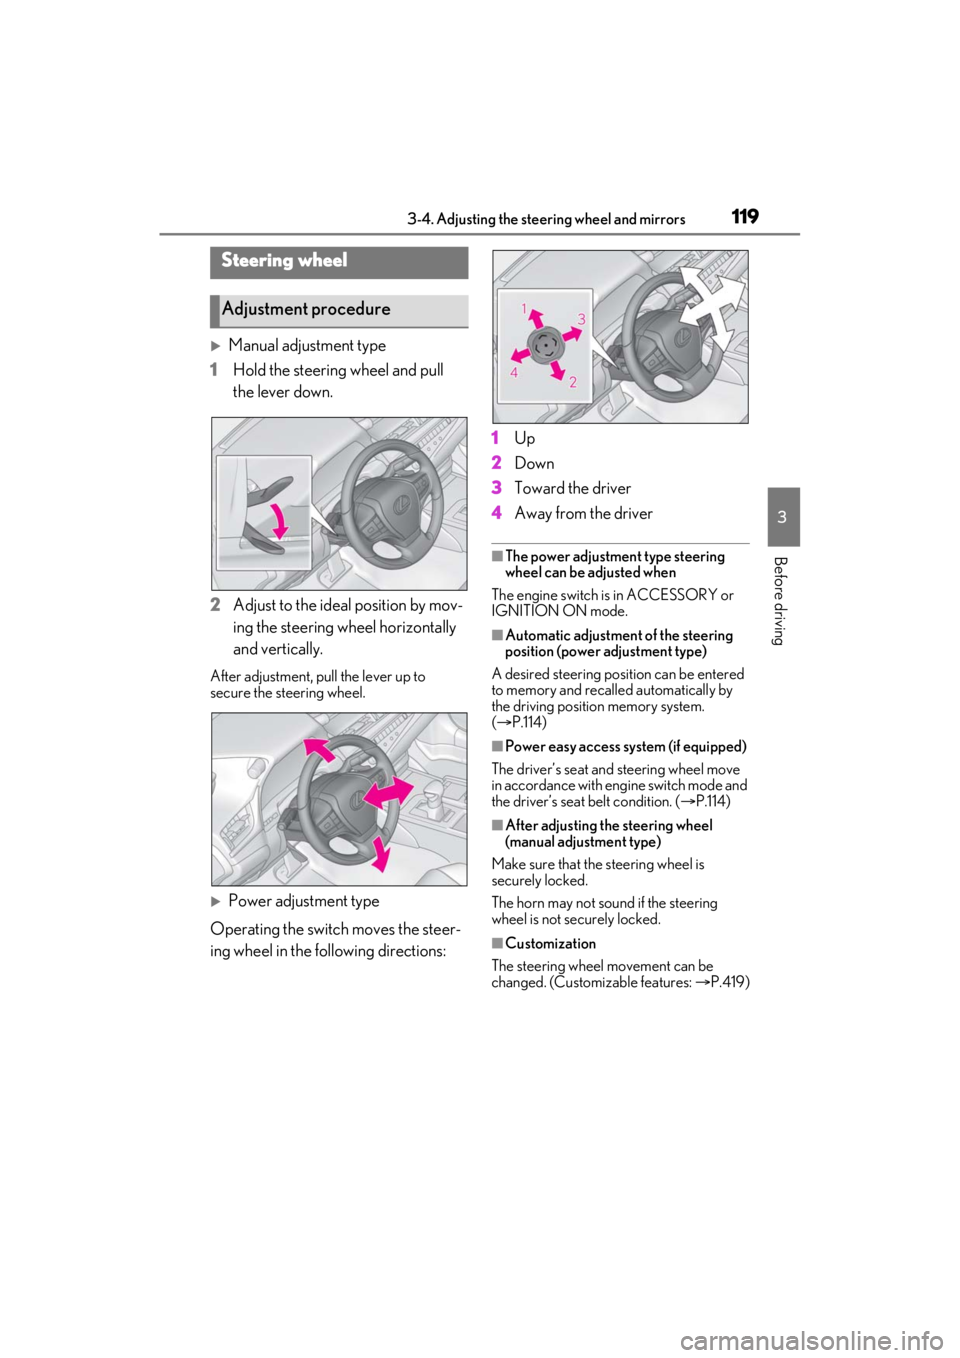
Manual adjustment type
1 Hold the steering wheel and pull
the lever down.
2 Adjust to the ideal position by mov-
ing the steering wheel horizontally
and vertically.
After adjustment, pull the lever up to
secure the steering wheel.
Power adjustment type
Operating the switch moves the steer-
ing wheel in the following directions: 1
Up
2 Down
3 Toward the driver
4 Away from the driver
■The power adjustment type steering
wheel can be adjusted when
The engine switch is in ACCESSORY or
IGNITION ON mode.
■Automatic adjustment of the steering
position (power adjustment type)
A desired steering posi tion can be entered
to memory and recalled automatically by
the driving position memory system.
( P.114)
■Power easy access system (if equipped)
The driver’s seat and steering wheel move
in accordance with engine switch mode and
the driver’s seat belt condition. ( P.114)
■After adjusting the steering wheel
(manual adjustment type)
Make sure that the steering wheel is
securely locked.
The horn may not sound if the steering
wheel is not securely locked.
■Customization
The steering wheel movement can be
changed. (Customizable features: P.419)
Steering wheel
Adjustment procedure
Page 123 of 464

1233-4. Adjusting the steering wheel and mirrors
3
Before driving
■Using automatic mode in cold weather
(power type)
When automatic mode is used in cold
weather, the door mirror could freeze up
and automatic stowing and return may not
be possible. In this case, remove any ice and
snow from the door mirror, then either
operate the mirror using manual mode or
move the mirror by hand.
■Customization
The automatic mirror fo lding and extending
operation can be changed.
(Customizable features: P.419)
When the mirror select switch is in the
“L” or “R” position, the outside rear
view mirrors will automatically angle
downwards when the vehicle is revers-
ing in order to give a better view of the
ground.
To disable this function, move the mir-
ror select switch to the neutral position
(between “L” or “R”).
■Adjusting the mirror angle when
the vehicle is reversing
With the shift lever in R, adjust the mir-
ror angle at a desired position. The
adjusted angle will be memorized and
the mirror will automatically tilt to the
memorized angle whenever the shift
lever is shifted to R from next time.
The memorized downward tilt position of
the mirror is linked to the normal position
(angle adjusted with th e shift lever in other
than R). Therefore, if the normal position is
changed after adjustment, the tilt position
will also change.
When the normal position is changed,
readjust the angle in reversing.
WARNING
■When a mirror is moving
To avoid personal injury and mirror mal-
function, be careful not to get your hand
caught by the moving mirror.
Linked mirror function when
reversing (vehicles with driving
position memory)
Page 136 of 464

1364-1. Before driving
WARNING
●Use engine braking (downshift) to
maintain a safe speed when driving
down a steep hill.
Using the brakes continuously may
cause the brakes to overheat and lose
effectiveness. (P.149)
●Do not adjust the positions of the
steering wheel, the seat, or the inside
or outside rear view mirrors while driv-
ing.
Doing so may result in a loss of vehicle
control.
●Always check that all passengers’
arms, heads or other parts of their
body are not outside the vehicle.
●AWD models: Do not drive the vehicle
off-road. This is not an AWD vehicle
designed for off-road driving. Proceed
with all due caution if it becomes
unavoidable to drive off-road.
●Do not drive across a river or through
other bodies of water. This may cause
electric/electronic components to
short circuit, damage the engine or
cause other serious damage to the
vehicle.
●Do not drive in excess of the speed
limit. Even if the legal speed limit per-
mits it, do not drive over 85 mph (140
km/h) unless your vehicle has high-
speed capability tires. Driving over 85
mph (140 km/h) may result in tire fail-
ure, loss of control and possible injury.
Be sure to consult a tire dealer to
determine whether the tires on your
vehicle are high-speed capability tires
or not before driving at such speeds.
■When driving on slippery road sur-
faces
●Sudden braking, acceleration and
steering may cause tire slippage and
reduce your ability to control the vehi-
cle.
●Sudden acceleration, engine braking
due to shifting, or changes in engine
speed could cause the vehicle to skid,
resulting in an accident.
●After driving through a puddle, lightly
depress the brake pedal to make sure
that the brakes are functioning prop-
erly. Wet brake pads may prevent the
brakes from functioning properly. If
the brakes on only one side are wet
and not functioning properly, steering
control may be affected.
■When shifting the shift lever
●Do not let the vehicle roll backward
while the shift lever is in a driving posi-
tion or roll forward while the shift lever
is in R.
Doing so may cause the engine to stall
or lead to poor brake and steering
performance, resulting in an accident
or damage to the vehicle.
●Do not shift the shif t lever to P while
the vehicle is moving.
Doing so can damage the transmission
and may result in a loss of vehicle con-
trol.
●Do not shift the shift lever to R while
the vehicle is moving forward.
Doing so can damage the transmission
and may result in a loss of vehicle con-
trol.
●Do not shift the shift lever to a driving
position while the vehicle is moving
backward.
Doing so can damage the transmission
and may result in a loss of vehicle con-
trol.
●Shifting the shift lever to N while the
vehicle is moving will disengage the
engine from the transmission. Engine
braking is not available when N is
selected.
Page 145 of 464

1454-2. Driving procedures
4
Driving
■If the battery is discharged
The engine cannot be started using the
smart access system with push-button start.
Refer to P.389 to restart the engine.
■Electronic key battery depletion
P.92
■Conditions affe cting operation
P.108
■Notes for the entry function
P.108
■Steering lock function
●After turning the engine switch off and
opening and closing the doors, the steer-
ing wheel will be lock ed due to the steer-
ing lock function. Operating the engine
switch again automatically cancels the
steering lock.
●When the steering lock cannot be
released, “Push Engine Switch while
Turning Steering Whee l in Either Direc-
tion” will be displayed on the multi-infor-
mation display.
Check that the shift leve r is set in P. Press
the engine switch shor tly and firmly while
turning the steering wheel left and right.
●To prevent the steering lock motor from
overheating, operation of the motor may
be suspended if the engine is turned on
and off repeatedly in a short period of
time. In this case, refrain from operating
the engine switch. After about 10 sec-
onds, the steering lock motor will resume
functioning.
■If there is a malfun ction in the smart
access system with push-button start
If “Access System with Elec. Key Malfunc-
tion See Owner’s Manual” is displayed on
the multi-information display, the system
may be malfunctioning. Have the vehicle inspected by your Lexus dealer immedi-
ately.
■Electronic key battery
P.341
■Operation of the engine switch
●If the switch is no t pressed shortly and
firmly, the engine switch mode may not
change or the engine may not start.
●If attempting to restart the engine imme-
diately after turning th e engine switch off,
the engine may not start in some cases.
After turning the engine switch off, please
wait a few seconds be fore restarting the
engine.
■Customization
If the smart access system with push-button
start has been deactivated in a customized
setting, refer to P.419.
WARNING
■When starting the engine
Always start the engine while sitting in
the driver’s seat. Do not depress the
accelerator pedal while starting the
engine under any circumstances.
Doing so may cause an accident result-
ing in death or serious injury.
■Caution while driving
If engine failure occurs while the vehicle
is moving, do not lock or open the doors
until the vehicle reaches a safe and com-
plete stop. Activation of the steering lock
in this circumstance may lead to an acci-
dent, resulting in death or serious injury.
NOTICE
■When starting the engine
●Do not race a cold engine.
●If the engine becomes difficult to start
or stalls frequently, have your vehicle
checked by your Lexus dealer imme-
diately.
Page 162 of 464

1624-3. Operating the lights and wipers
●House lights, street lights, traffic signals,
and illuminated billboards or signs may
cause the high beam to switch to the low
beams, or the low beams to remain on.
●The following factors may affect the
amount of time taken to turn the high
beam on or off:
• The brightness of headlights, fog lights,
and tail lights of vehicles ahead
• The movement and direction of vehicles ahead
• When a vehicle ahead only has opera- tional lights on one side
• When a vehicle ahead is a two-wheeled
vehicle
• The condition of the road (gradient, curve, condition of the road surface etc.)
• The number of passengers and amount of luggage
●The high beam may be turned on or off
when the driver does not expect it.
●Bicycles or similar objects may not be
detected.
●In the situations show n below, the system
may not be able to accurately detect sur-
rounding brightness levels. This may
cause the low beams to remain on or the
high beams to cause problems for pedes-
trians, vehicles ahead or other parties. In
these cases, manually switch between the
high and low beams.
• In bad weather (rain, snow, fog, sand-
storms etc.)
• The windshield is obscured by fog, mist, ice, dirt etc.
• The windshield is cracked or damaged.
• The camera sensor is deformed or dirty.
• When the temperature of the camera sensor is extremely high
• Surrounding brightness levels are equal to those of headlights, tail lights or fog
lights.
• When headlights or tail lights of vehicles ahead are turned off, dirty, changing
color, or not aimed properly
• When the vehicle is hit by water, snow, dust, etc. from a preceding vehicle
• When driving through an area of inter-
mittently changing brightness and dark-
ness.
• When frequently and repeatedly driving
ascending/descending roads, or roads with rough, bumpy or uneven surfaces
(such as stone-paved roads, gravel tracks
etc.).
• When frequently and repeatedly taking curves or driving on a winding road.
• There is a highly re flective object ahead
of the vehicle, such as a sign or a mirror.
• The back of a vehicle ahead is highly reflective, such as a container on a truck.
• The vehicle’s headlights are damaged or dirty.
• The vehicle is listing or tilting, due to a flat
tire, a trailer being towed etc.
• The high beam and low beam are repeat- edly being switched between in an
abnormal manner.
• The driver believes that the high beam may be causing problems or distress to
other drivers or pedestrians nearby.
■Temporarily lowering sensor sensitivity
The sensitivity of the sensor can be tempo-
rarily lowered.
1 Turn the engine switch off while the fol-
lowing conditions are met.
• The headlight swit ch is in or .
• The headlight switch lever is in low beam
position.
• Automatic High Be am switch is on.
2 Turn the engine switch to IGNITION
ON mode.
3 Within 60 seconds after 2, repeat pull-
ing the headlight switch lever to the
original position then pushing it to the
high beam position quickly 10 times,
then leave the lever in high beam posi-
tion.
4 If the sensitivity is changed, the Auto-
matic High Beam indicator turns on and
off 3 times.
Automatic High Beam (headlights) may
turn on even the vehicle is stopped.
■Switching to high beam
Push the lever away from you.
Turning the high beam on/off
manually
Page 178 of 464

1784-5. Using the driving support systems
WARNING
■Limitations of the pre-collision sys-
tem
●The driver is solely responsible for safe
driving. Always drive safely, taking
care to observe your surroundings.
Do not use the pre-collision system
instead of normal braking operations
under any circumstances. This system
will not prevent collisions or lessen col-
lision damage or injury in every situa-
tion. Do not overly rely on this system.
Failure to do so may lead to an acci-
dent, resulting in death or serious
injury.
●Although this system is designed to
help avoid a collision or help reduce
the impact of the coll ision, its effective-
ness may change according to various
conditions, therefore the system may
not always be able to achieve the same
level of performance.
Read the following conditions care-
fully. Do not overly rely on this system
and always drive carefully.
• Conditions under which the system may operate even if there is no possi-
bility of a collision: P.181
• Conditions under which the system may not operate properly: P.182
●Do not attempt to test the operation of
the pre-collision system yourself.
Depending on the objects used for
testing (dummies, cardboard objects
imitating detectable objects, etc.), the
system may not operate properly, pos-
sibly leading to an accident.
■Pre-collision braking
●When the pre-collision braking func-
tion is operating, a large amount of
braking force will be applied.
●If the vehicle is stopped by the opera-
tion of the pre-collision braking func-
tion, the pre-collision braking function
operation will be canceled after
approximately 2 seconds.
Depress the brake pedal as necessary.
●The pre-collision braking function may
not operate if certain operations are
performed by the driver. If the acceler-
ator pedal is being depressed strongly
or the steering wheel is being turned,
the system may determine that the
driver is taking evasive action and pos-
sibly prevent the pre-collision braking
function from operating.
●In some situations, while the pre-colli-
sion braking function is operating,
operation of the function may be can-
celed if the accelerator pedal is
depressed strongly or the steering
wheel is turned and the system deter-
mines that the driver is taking evasive
action.
●If the brake pedal is being depressed,
the system may determine that the
driver is taking evasive action and pos-
sibly delay the operat ion timing of the
pre-collision braking function.
■When to disable the pre-collision sys-
tem
In the following situations, disable the
system, as it may not operate properly,
possibly leading to an accident resulting
in death or serious injury:
●When the vehicle is being towed
●When your vehicle is towing another
vehicle
●When transporting the vehicle via
truck, boat, train or similar means of
transportation
●When the vehicle is raised on a lift with
the engine running and the tires are
allowed to rotate freely
●When inspecting the vehicle using a
drum tester such as a chassis dyna-
mometer or speedometer tester, or
when using an on vehicle wheel bal-
ancer
●When a strong impact is applied to the
front bumper or front grille, due to an
accident or other reasons