2021 LEXUS ES350 snow chains
[x] Cancel search: snow chainsPage 179 of 464

1794-5. Using the driving support systems
4
Driving
■Enabling/disabling the pre-colli-
sion system
The pre-collision system can be
enabled/disabled on ( P.78) of
the multi-information display.
The system is automatically enabled each
time the engine switch is turned to IGNI-
TION ON mode.
If the system is disabled, the PCS warn-
ing light will turn on and a message will
be displayed on the multi-information
display.
■Changing the pre-collision warn-
ing timing
The pre-collision warning timing can
be changed on ( P.78) of the
multi-information display.
The warning timing setting is retained
when the engine switch is turned off. How-
ever, if the pre-collision system is disabled
and re-enabled, the operation timing will
return to the default setting (middle).
1 Early
2 Middle
This is the default setting.
3Late
■Operational conditions
The pre-collision system is enabled and the syst em determines that the possibility of a fron-
WARNING
●If the vehicle cannot be driven in a sta-
ble manner, such as when the vehicle
has been in an accident or is malfunc-
tioning
●When the vehicle is driven in a sporty
manner or off-road
●When the tires are not properly
inflated
●When the tires are very worn
●When tires of a size other than speci-
fied are installed
●When tire chains are installed
●When a compact spare tire or an
emergency tire puncture repair kit is
used
●If equipment (snow plow, etc.) that
may obstruct the radar sensor or front
camera is temporarily installed to the
vehicle
Changing settings of the pre-
collision system
Page 184 of 464

1844-5. Using the driving support systems
LTA (Lane Tracing Assist)
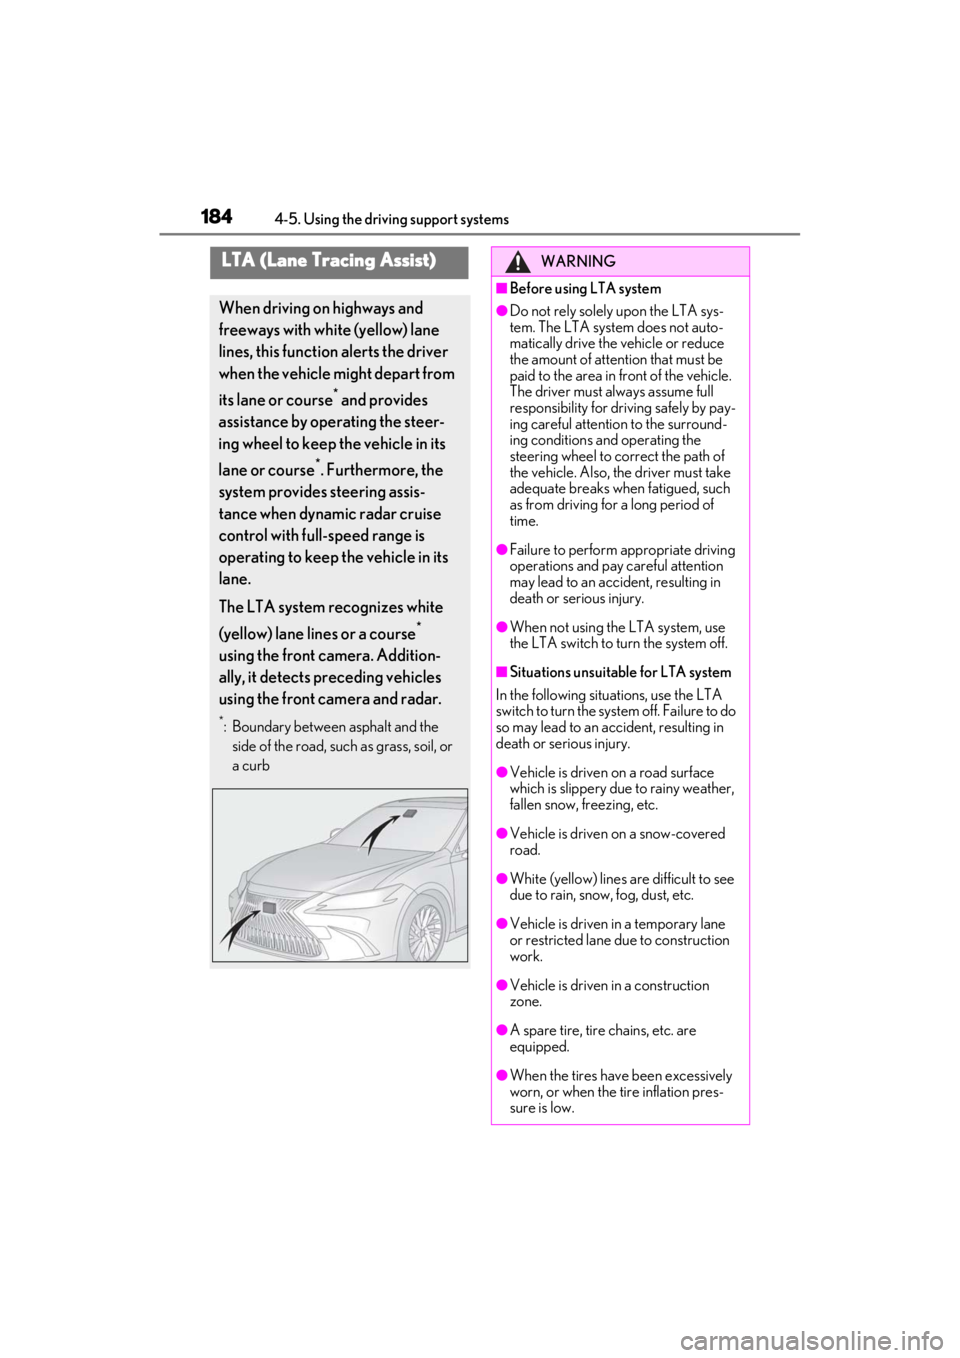
When driving on highways and
freeways with white (yellow) lane
lines, this function alerts the driver
when the vehicle might depart from
its lane or course
* and provides
assistance by operating the steer-
ing wheel to keep the vehicle in its
lane or course
*. Furthermore, the
system provides steering assis-
tance when dynamic radar cruise
control with full-speed range is
operating to keep the vehicle in its
lane.
The LTA system recognizes white
(yellow) lane lines or a course
*
using the front camera. Addition-
ally, it detects preceding vehicles
using the front camera and radar.
*: Boundary between asphalt and the side of the road, such as grass, soil, or
a curb
WARNING
■Before using LTA system
●Do not rely solely upon the LTA sys-
tem. The LTA system does not auto-
matically drive the vehicle or reduce
the amount of attention that must be
paid to the area in front of the vehicle.
The driver must always assume full
responsibility for driving safely by pay-
ing careful attention to the surround-
ing conditions and operating the
steering wheel to correct the path of
the vehicle. Also, the driver must take
adequate breaks when fatigued, such
as from driving for a long period of
time.
●Failure to perform appropriate driving
operations and pay careful attention
may lead to an accident, resulting in
death or serious injury.
●When not using the LTA system, use
the LTA switch to turn the system off.
■Situations unsuitable for LTA system
In the following situations, use the LTA
switch to turn the system off. Failure to do
so may lead to an accident, resulting in
death or serious injury.
●Vehicle is driven on a road surface
which is slippery due to rainy weather,
fallen snow, freezing, etc.
●Vehicle is driven on a snow-covered
road.
●White (yellow) lines are difficult to see
due to rain, snow, fog, dust, etc.
●Vehicle is driven in a temporary lane
or restricted lane due to construction
work.
●Vehicle is driven in a construction
zone.
●A spare tire, tire chains, etc. are
equipped.
●When the tires have been excessively
worn, or when the tire inflation pres-
sure is low.
Page 249 of 464

2494-5. Using the driving support systems
4
Driving
return to normal within 10 minutes.
■If a message about AWD is shown on the multi-information display
Perform the following actions.
MessageDetails/Actions
“AWD System Overheated
Switching to 2WD Mode”
AWD system is overheating.
Perform the following actions.
Reduce the vehicle speed until the message disappears.
Stop the vehicle in a safe pl ace and let the engine idle.
Once the display message on the multi-information display
turns off, there is no problem continuing to drive.
If the message does not disappear, have your vehicle
checked by your Lexus dealer immediately.
“AWD System Overheated
2WD Mode Engaged”
The vehicle switched from all-wheel drive (AWD) to front
wheel drive due to overheating.
Perform the following actions.
Reduce the vehicle speed until the message disappears.
Stop the vehicle in a safe pl ace and let the engine idle.
Once the display message on the multi-information display
turns off, the AWD system returns to normal.
If the message does not disappear, have your vehicle
checked by your Lexus dealer immediately.
“AWD System Malfunction
2WD Mode Engaged Visit
Your Dealer”A malfunction occurred in the AWD system.
Have your vehicle checked by your Lexus dealer imme-
diately.
WARNING
■The ABS does not operate effectively
when
●The limits of tire gripping performance
have been exceeded (such as exces-
sively worn tires on a snow covered
road).
●The vehicle hydroplanes while driving
at high speed on wet or slick roads.
■Stopping distance when the ABS is
operating may exceed that of normal
conditions
The ABS is not designed to shorten the
vehicle’s stopping distance. Always
maintain a safe distance from the vehicle
in front of you, especially in the following
situations:
●When driving on dirt, gravel or snow-
covered roads
●When driving with tire chains
●When driving over bumps in the road
●When driving over roads with pot-
holes or uneven surfaces
Page 251 of 464

2514-6. Driving tips
4
Driving
4-6.Driving tips
Use fluids that are appropriate to
the prevailing outside temperatures.
•Engine oil
• Engine coolant
•Washer fluid
Have a service technician inspect
the condition of the battery.
Have the vehicle fitted with four
snow tires or purchase a set of tire
chains for the front tires.
*
Ensure that all tires are the specified size
and brand, and that chains match the size
of the tires.
*: Tire chains cannot be mounted on vehi-
cles with 18-inch/19-inch tires.
Perform the following according to the
driving conditions:
Do not try to forcibly open a window
Winter driving tips
Carry out the necessary prepara-
tions and inspections before driving
the vehicle in winter. Always drive
the vehicle in a manner appropriate
to the prevailing weather condi-
tions.
Preparation for winter
WARNING
■Driving with snow tires
Observe the following precautions to
reduce the risk of accidents.
Failure to do so may result in a loss of
vehicle control and cause death or seri-
ous injury.
●Use tires of the specified size.
●Maintain the recommended level of air
pressure.
●Do not drive in excess of 75 mph (120
km/h), regardless of the type of snow
tires being used.
●Use snow tires on all, not just some
wheels.
■Driving with tire chains (vehicles with
17-inch tires)
Observe the following precautions to
reduce the risk of accidents.
Failure to do so may result in the vehicle
being unable to be driven safely, and may
cause death or serious injury.
●Do not drive in excess of the speed
limit specified for the tire chains being
used, or 30 mph (50 km/h), which-
ever is lower.
●Avoid driving on bumpy road surfaces
or over potholes.
●Avoid sudden acceleration, abrupt
steering, sudden br aking and shifting
operations that cause sudden engine
braking.
●Slow down sufficiently before entering
a curve to ensure that vehicle control
is maintained.
●Do not use LTA (Lane Tracing Assist)
system.
NOTICE
■Repairing or replacing snow tires
Request repairs or replacement of snow
tires from Lexus dealers or legitimate tire
retailers.
This is because the removal and attach-
ment of snow tires affects the operation
of the tire pressure warning valves and
transmitters.
Before driving the vehicle
Page 252 of 464

2524-6. Driving tips
or move a wiper that is frozen. Pour
warm water over the frozen area to
melt the ice. Wipe away the water
immediately to prevent it from
freezing.
To ensure proper operation of the
climate control system fan, remove
any snow that has accumulated on
the air inlet vents in front of the
windshield.
Check for and remove any excess
ice or snow that may have accumu-
lated on the exterior lights, vehicle’s
roof, chassis, around the tires or on
the brakes.
Remove any snow or mud from the
bottom of your shoes before getting
in the vehicle.
■To protect the windshield wipers
P.166
Accelerate the vehicle slowly, keep a
safe distance between you and the
vehicle ahead, and drive at a reduced
speed suitable to road conditions.
Park the vehicle and move the shift
lever to P without setting the park-
ing brake. The parking brake may
freeze up, preventing it from being
released. If the vehicle is parked
without setting the parking brake,
make sure to block the wheels.
Failure to do so may be dangerous
because it may cause the vehicle to move unexpectedly, possibly lead-
ing to an accident.
If the vehicle is parked without set-
ting the parking brake, confirm that
the shift lever cannot be moved out
of P
*.
*: The shift lever will be locked if it is
attempted to be shifted from P to any
other position with out depressing the
brake pedal. If the shift lever can be
shifted from P, there may be a problem
with the shift lock system. Have the vehi-
cle inspected by your Lexus dealer
immediately.
Vehicles with 17-inch tires
Use the correct tire chain size when
mounting the tire chains.
Chain size is regulated for each tire
size.
Side chain:
0.12 in. (3 mm) in diameter
0.39 in. (10 mm) in width
1.18 in. (30 mm) in length
Cross chain:
0.16 in. (4 mm) in diameter
0.55 in. (14 mm) in width
When driving the vehicle
When parking the vehicle
Selecting tire chains
A
B
C
D
E
Page 253 of 464

2534-6. Driving tips
4
Driving
0.98 in. (25 mm) in length
Vehicles with 18-inch/19-inch tires
Tire chains cannot be mounted.
Snow tires should be used instead.
Regulations regarding the use of tire
chains vary depending on location and
type of road. Always check local regu-
lations before installing chains.
■Tire chain installation
Observe the following precautions when
installing and removing chains:
●Install and remove tire chains in a safe
location.
●Install tire chains on the front tires. Do not
install tire chains on the rear tires.
●Install tire chains on front tires as tightly
as possible. Retighten chains after driving
1/4 - 1/2 mile (0.5 - 1.0 km).
●Install tire chains following the instruc-
tions provided with the tire chains.
To enable the windshield wipers to be
lifted when heavy snow or icy condi-
tions are expected, change the rest
position of the windshield wipers from
the retracted position below the hood
to the service position using the wiper lever. (
P.167)
Regulations on the use of tire
chains (vehicles with 17-inch
tires)
NOTICE
■Fitting tire chains
The tire pressure warning valves and
transmitters may not function correctly
when tire chains are fitted.
Windshield wipers
F
Page 329 of 464

3296-3. Do-it-yourself maintenance
6
Maintenance and care
●Tire inflation pressure changes with tem-
perature. The displayed values may also
be different from the values measured
using a tire pressure gauge.
■Situations in which the tire pressure
warning system may not operate prop-
erly
●In the following cases, the tire pressure
warning system may not operate prop-
erly.
• If non-genuine Lexus wheels are used.
• A tire has been replaced with a tire that is
not an OE (Original Equipment) tire.
• A tire has been replaced with a tire that is
not of the specified size.
• Tire chains etc. are equipped.
• An auxiliary-supported run-flat tire is equipped.
• If a window tint that affects the radio wave signals is installed.
• If there is a lot of snow or ice on the vehi-
cle, particularly around the wheels or
wheel housings.
• If the tire inflation pressure is extremely
higher than the specified level.
• If wheel without tire pressure warning valves and transmitters are used.
• If the ID code on the tire pressure warn- ing valves and transmitters is not regis-
tered in the tire pressure warning
computer.
●Performance may be af fected in the fol-
lowing situations.
• Near a TV tower, electric power plant,
gas station, radio stat ion, large display,
airport or other fac ility that generates
strong radio waves or electrical noise
• When carrying a portable radio, cellular phone, cordless phone or other wireless
communication device
If tire position information is not correctly
displayed due to the radio wave conditions,
the display may be corrected by driving and
changing the radio wave conditions.
●When the vehicle is parked, the time
taken for the warning to start or go off
could be extended.
●When tire inflation pr essure declines rap-
idly for example when a tire has burst, the
warning may not function.
■Warning performance of the tire pres-
sure warning system
The warning of the tire pressure warning
system will change in accordance with driv-
ing conditions. For this reason, the system
may give a warning even if the tire pressure
does not reach a low enough level, or if the
pressure is higher than the pressure that
was adjusted to when the system was initial-
ized.
■Tire pressure warning system certification
For vehicles sold in the U.S.A., Hawaii, Guam and Puerto Rico
Page 382 of 464

3827-2. Steps to take in an emergency
come off.
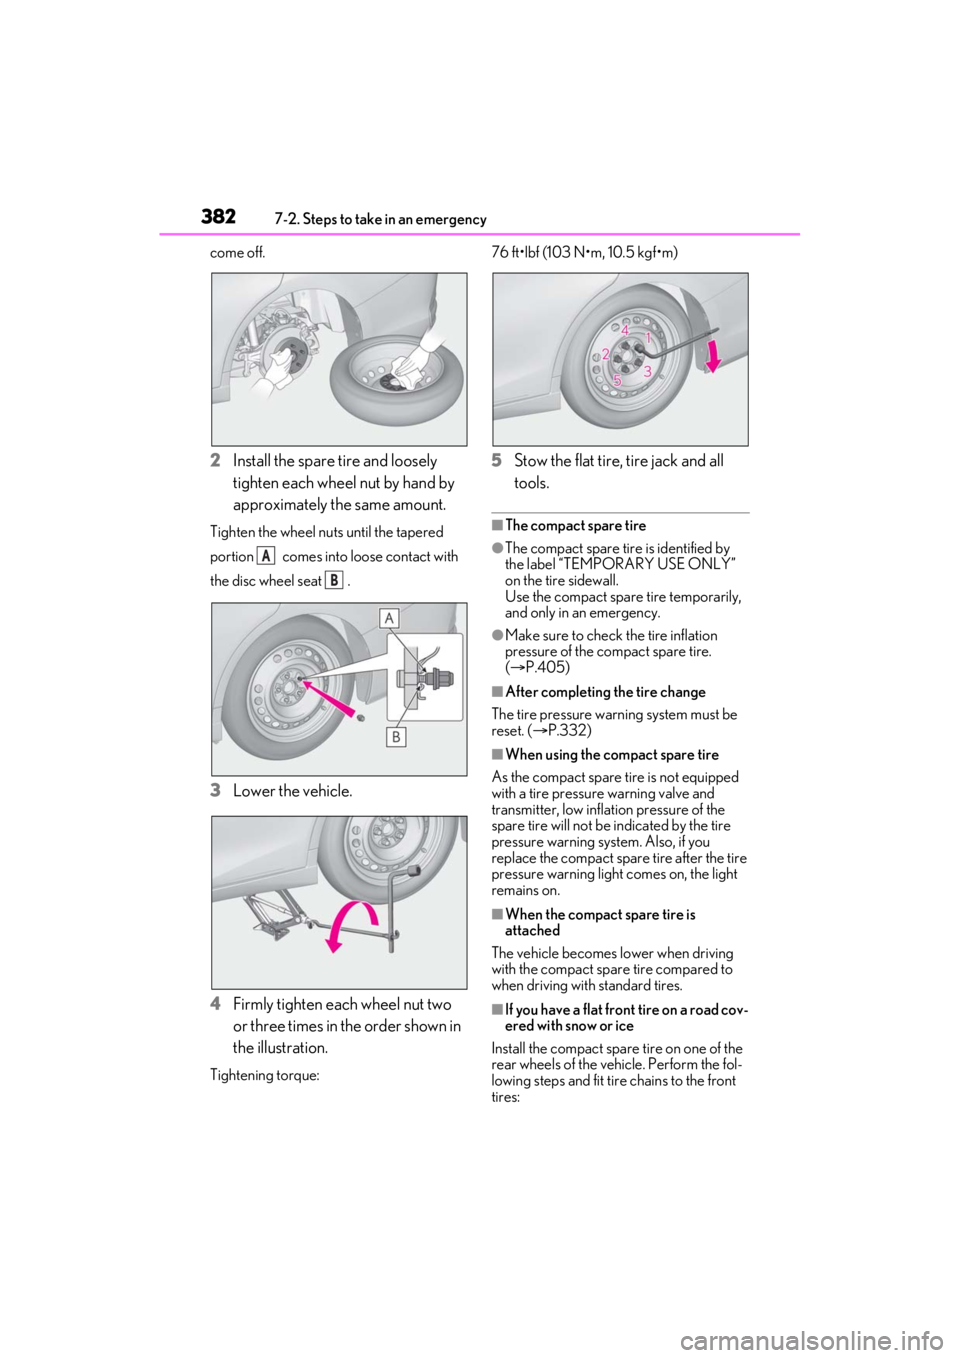
2Install the spare tire and loosely
tighten each wheel nut by hand by
approximately the same amount.
Tighten the wheel nuts until the tapered
portion comes into loose contact with
the disc wheel seat .
3Lower the vehicle.
4 Firmly tighten each wheel nut two
or three times in the order shown in
the illustration.
Tightening torque: 76 ft•lbf (103 N•m, 10.5 kgf•m)
5
Stow the flat tire, tire jack and all
tools.
■The compact spare tire
●The compact spare tire is identified by
the label “TEMPORARY USE ONLY”
on the tire sidewall.
Use the compact spar e tire temporarily,
and only in an emergency.
●Make sure to check the tire inflation
pressure of the compact spare tire.
( P.405)
■After completing the tire change
The tire pressure warn ing system must be
reset. ( P.332)
■When using the compact spare tire
As the compact spare tire is not equipped
with a tire pressure warning valve and
transmitter, low inflat ion pressure of the
spare tire will not be indicated by the tire
pressure warning system. Also, if you
replace the compact spare tire after the tire
pressure warning light comes on, the light
remains on.
■When the compact spare tire is
attached
The vehicle becomes lower when driving
with the compact spare tire compared to
when driving with standard tires.
■If you have a flat front tire on a road cov-
ered with snow or ice
Install the compact spare tire on one of the
rear wheels of the vehicle. Perform the fol-
lowing steps and fit tire chains to the front
tires:
A
B