Page 113 of 631
4 23
Features of your vehicle
Operating door locks from
outside the vehicle
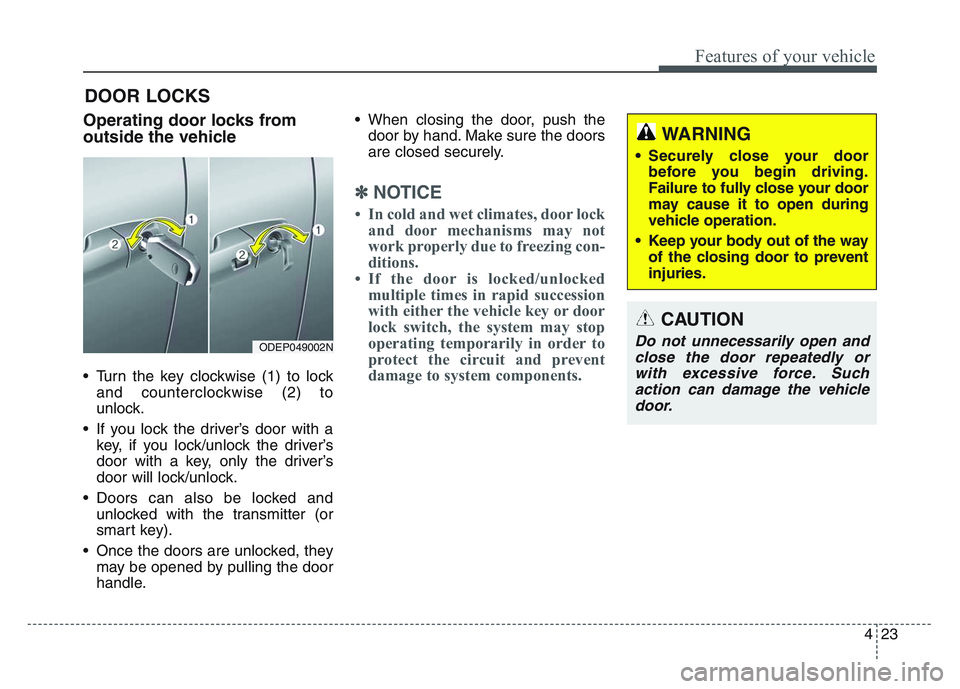
• Turn the key clockwise (1) to lockand counterclockwise (2) to
unlock.
• If you lock the driver’s door with a key, if you lock/unlock the driver’s
door with a key, only the driver’s
door will lock/unlock.
• Doors can also be locked and unlocked with the transmitter (or
smart key).
• Once the doors are unlocked, they may be opened by pulling the door
handle. • When closing the door, push the
door by hand. Make sure the doors
are closed securely.
✽NOTICE
• In cold and wet climates, door lockand door mechanisms may not
work properly due to freezing con-
ditions.
• If the door is locked/unlocked multiple times in rapid succession
with either the vehicle key or door
lock switch, the system may stop
operating temporarily in order to
protect the circuit and prevent
damage to system components.
DOOR LOCKS
ODEP049002N
WARNING
• Securely close your door
before you begin driving.
Failure to fully close your door
may cause it to open during
vehicle operation.
• Keep your body out of the way of the closing door to prevent
injuries.
CAUTION
Do not unnecessarily open andclose the door repeatedly orwith excessive force. Suchaction can damage the vehicledoor.
Page 118 of 631
Features of your vehicle
284
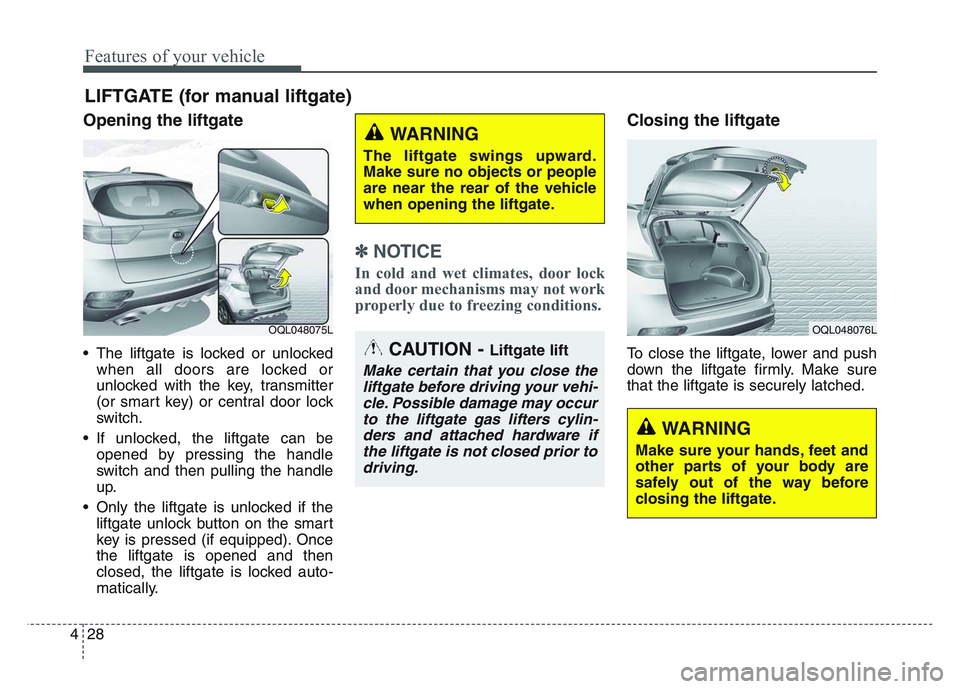
Opening the liftgate
• The liftgate is locked or unlockedwhen all doors are locked or
unlocked with the key, transmitter
(or smart key) or central door lock
switch.
• If unlocked, the liftgate can be opened by pressing the handle
switch and then pulling the handle
up.
• Only the liftgate is unlocked if the liftgate unlock button on the smart
key is pressed (if equipped). Once
the liftgate is opened and then
closed, the liftgate is locked auto-
matically.
✽NOTICE
In cold and wet climates, door lock
and door mechanisms may not work
properly due to freezing conditions.
Closing the liftgate
To close the liftgate, lower and push
down the liftgate firmly. Make sure
that the liftgate is securely latched.
LIFTGATE (for manual liftgate)
OQL048075LOQL048076L
CAUTION - Liftgate lift
Make certain that you close theliftgate before driving your vehi-cle. Possible damage may occurto the liftgate gas lifters cylin-ders and attached hardware ifthe liftgate is not closed prior todriving.
WARNING
The liftgate swings upward.
Make sure no objects or people
are near the rear of the vehicle
when opening the liftgate.
WARNING
Make sure your hands, feet and
other parts of your body are
safely out of the way before
closing the liftgate.
Page 137 of 631
4 47
Features of your vehicle
Hood open warning
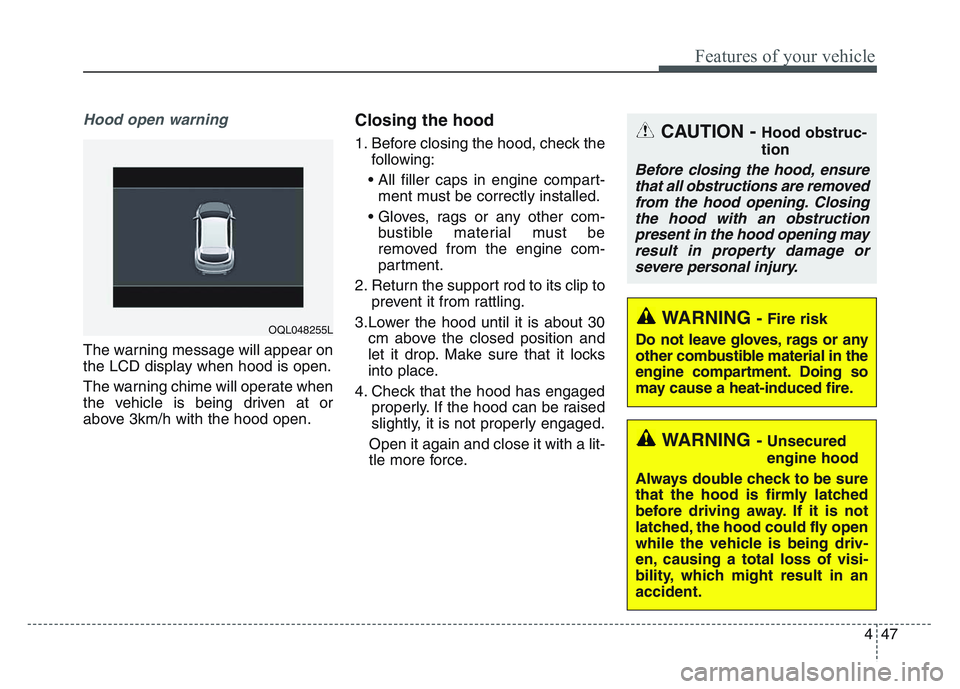
The warning message will appear on
the LCD display when hood is open.
The warning chime will operate when
the vehicle is being driven at or
above 3km/h with the hood open.
Closing the hood
1. Before closing the hood, check thefollowing:
• All filler caps in engine compart- ment must be correctly installed.
• Gloves, rags or any other com- bustible material must be
removed from the engine com-
partment.
2. Return the support rod to its clip to prevent it from rattling.
3.Lower the hood until it is about 30 cm above the closed position and
let it drop. Make sure that it locks
into place.
4. Check that the hood has engaged properly. If the hood can be raised
slightly, it is not properly engaged.
Open it again and close it with a lit-
tle more force.
WARNING - Fire risk
Do not leave gloves, rags or any
other combustible material in the
engine compartment. Doing so
may cause a heat-induced fire.
WARNING - Unsecured
engine hood
Always double check to be sure
that the hood is firmly latched
before driving away. If it is not
latched, the hood could fly open
while the vehicle is being driv-
en, causing a total loss of visi-
bility, which might result in an
accident.
CAUTION - Hood obstruc-
tion
Before closing the hood, ensure that all obstructions are removedfrom the hood opening. Closingthe hood with an obstructionpresent in the hood opening mayresult in property damage orsevere personal injury.
OQL048255L
Page 139 of 631
4 49
Features of your vehicle
Closing the fuel filler door
1. To install the cap, turn it clockwiseuntil it “clicks” once. This indicates
that the cap is securely tightened.
2. Close the fuel filler door and push it in lightly making sure that it is
securely closed.
✽NOTICE
There may be an intermittent noise
near the refueling hole while the
engine is idling if the fuel cap is not
closed securely. This occurs normal-
ly with the OBD system.
✽NOTICE
When refueling on unlevel ground,
the fuel gauge may not point to the F
position.
It is not a malfunction. If you move
your vehicle to a level ground, the fuel
gauge will move to the full position.
Always check that the fuel cap is
installed securely to prevent fuel
spillage in the event of an accident.
✽NOTICE
Tighten the cap until it clicks once,
otherwise the fuel cap open warning
indicator light will illuminate.
WARNING- Fire/explo-
sion risk
Read and follow all warnings
posted at the gas station facili-
ty. Failure to follow all warnings
may result in severe personal
injury, severe burns or death
due to fire or explosion.WARNING- Refueling
Always remove the fuel cap
carefully and slowly. If the cap
is venting fuel or if you hear a
hissing sound, wait until the
condition stops before com-
pletely removing the cap. If
pressurized fuel sprays out, it
can cover your clothes or skin
and subject you to the risk of
fire and burns.
Page 140 of 631
Features of your vehicle
504
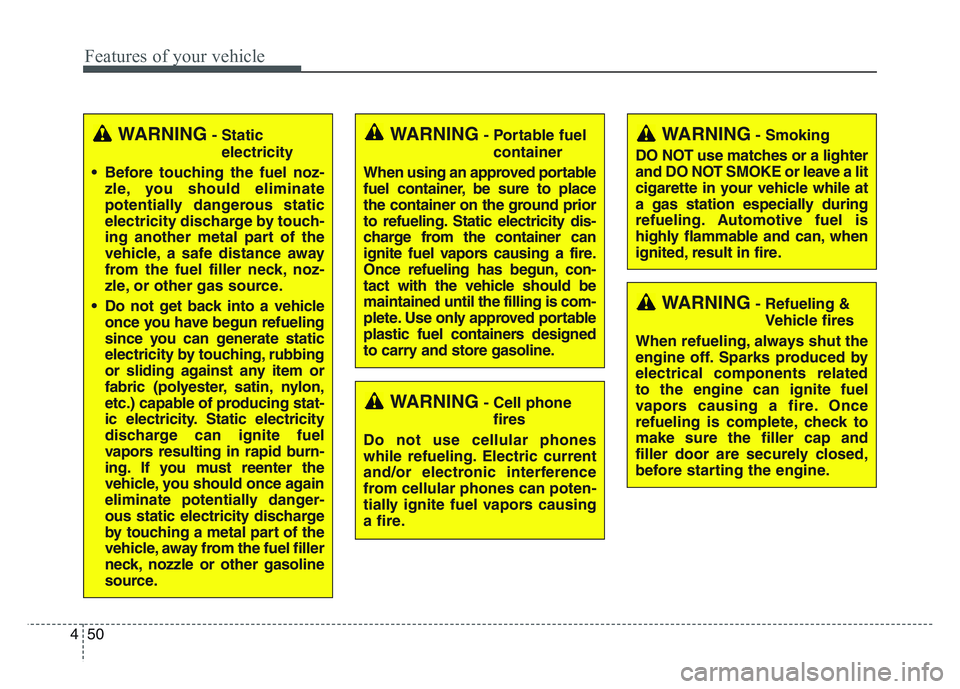
WARNING- Cell phonefires
Do not use cellular phones
while refueling. Electric current
and/or electronic interference
from cellular phones can poten-
tially ignite fuel vapors causing
a fire.
WARNING- Smoking
DO NOT use matches or a lighter
and DO NOT SMOKE or leave a lit
cigarette in your vehicle while at
a gas station especially during
refueling. Automotive fuel is
highly flammable and can, when
ignited, result in fire.
WARNING- Refueling & Vehicle fires
When refueling, always shut the
engine off. Sparks produced by
electrical components related
to the engine can ignite fuel
vapors causing a fire. Once
refueling is complete, check to
make sure the filler cap and
filler door are securely closed,
before starting the engine.
WARNING- Portable fuel container
When using an approved portable
fuel container, be sure to place
the container on the ground prior
to refueling. Static electricity dis-
charge from the container can
ignite fuel vapors causing a fire.
Once refueling has begun, con-
tact with the vehicle should be
maintained until the filling is com-
plete. Use only approved portable
plastic fuel containers designed
to carry and store gasoline.WARNING- Static electricity
• Before touching the fuel noz- zle, you should eliminate
potentially dangerous static
electricity discharge by touch-
ing another metal part of the
vehicle, a safe distance away
from the fuel filler neck, noz-
zle, or other gas source.
• Do not get back into a vehicle once you have begun refueling
since you can generate static
electricity by touching, rubbing
or sliding against any item or
fabric (polyester, satin, nylon,
etc.) capable of producing stat-
ic electricity. Static electricity
discharge can ignite fuel
vapors resulting in rapid burn-
ing. If you must reenter the
vehicle, you should once again
eliminate potentially danger-
ous static electricity discharge
by touching a metal part of the
vehicle, away from the fuel filler
neck, nozzle or other gasoline
source.
Page 143 of 631
4 53
Features of your vehicle
Sunroof open warning
(if equipped)
If the driver removes the ignition key
(smart key: turns off the engine)
when the sunroof is not fully closed,
the warning chime will sound for a
few seconds and a message will
appear on the LCD display or the
warning indicator will illuminate.
Close the sunroof securely when
leaving your vehicle.
Sunshade
To open the sunshade
Push the sunroof control lever back-
ward to the 1st detent position.
CAUTION
Make sure the sunroof is fullyclosed when leaving your vehi-cle. If the sunroof is opened, rainor snow may leak through thesunroof and wet the interior aswell as allow theft to occur.
OQL048264LOQL045029
WARNING
To avoid accidental injury, do
not let children operate the sun-
roof without adult supervision.
WARNING
Do not allow children to operate
the sunroof. This may result in
injury to the child.
Page 154 of 631
Features of your vehicle
644
Electrochromic mirror withHomeLink system (if equipped)
To operate the electric rearview mirror
Press the I button (1) to turn the
automatic- dimming function on. The
mirror indicator light will illuminate.
Press the O button (2) to turn the
automatic- dimming function off. The
mirror indicator light will turn off. HomeLink
®Wireless Control System
Your new mirror comes with an
integrated HomeLink Universal
Transceiver, which allows you to pro-
gram the mirror to activate your
garage door(s), estate gate, home
lighting, etc. The mirror actually
learns the codes from your various
existing transmitters. Retain the original transmitter for
future programming procedures (i.e.,
new vehicle purchase). It is also sug-
gested that upon the sale of the vehi-
cle, the programmed HomeLink but-
tons be erased for security purposes.
OQLA045068
OQLA045069
Glare detection
sensor
Indicator light
Homelink buttons
Page 157 of 631
4 67
Features of your vehicle
6. Return to the vehicle and firmlypress and release the pro-
grammed HomeLink button up to
three times. The rolling code
equipped device should now rec-
ognize the HomeLink signal and
activate when the HomeLink but-
ton is pressed. The remaining two
buttons may now be programmed
if this has not previously been
done. Refer to the “Programming”
portion of this text. Operating HomeLink
To operate, simply press the
programmed HomeLink button.
Activation will now occur for the
trained product (garage door, securi-
ty system, entry door lock, estate
gate, or home or office lighting). For
convenience, the hand-held trans-
mitter of the device may also be used
at any time. The HomeLink Wireless
Controls System (once programmed)
or the original hand-held transmitter
may be used to activate the device
(e.g. garage door, entry door lock,
etc.). In the event that there are still
programming difficulties, contact
HomeLink at 1-800-355-3515 or on
the internet at www.homelink.com. Erasing programmed HomeLink
buttons
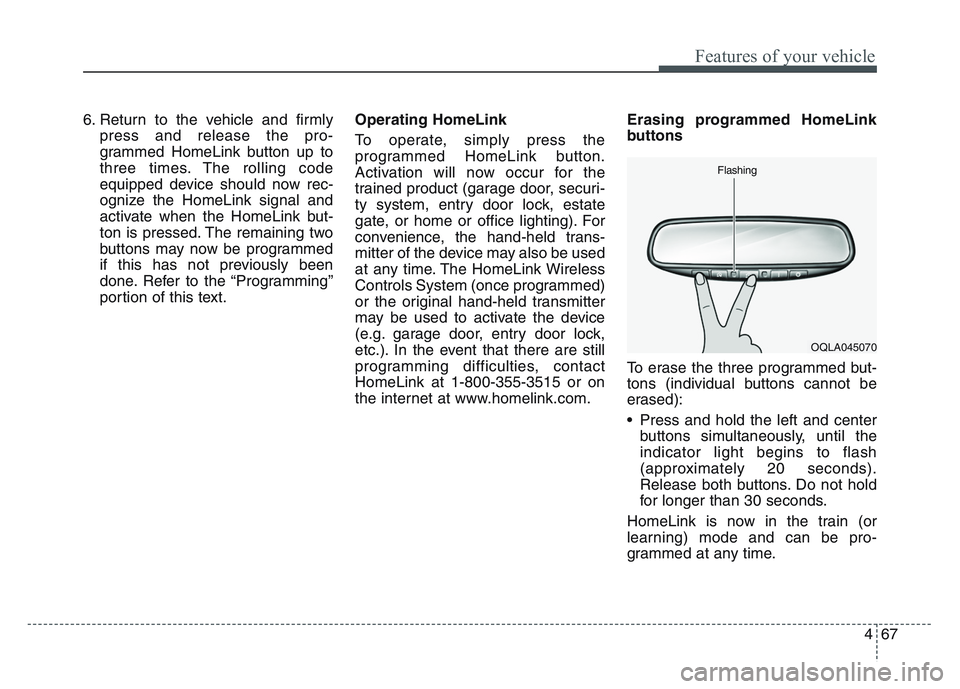
To erase the three programmed but-
tons (individual buttons cannot be
erased):
• Press and hold the left and center
buttons simultaneously, until the
indicator light begins to flash
(approximately 20 seconds).
Release both buttons. Do not hold
for longer than 30 seconds.
HomeLink is now in the train (or
learning) mode and can be pro-
grammed at any time.
OQLA045070
Flashing