Page 41 of 70

REMINDERS:
•
Pressing any button during AUTO ope")
ALWAYS CHECK THE OWNER’S MANUAL FOR COMPLETE OPER ATING INFORMATION AND SAFET Y WARNINGS. *IF EQUIPPED39
Automatic Climate Control* (continued)
REMINDERS:
•
Pressing any button during AUTO operation will deactivate the AUTO function and switch to manual mode, except for Temperature Control
•When in AUTO mode, Air Flow Mode and Fan Speed do not display on the Climate Control Display
•Warm air may flow in through the vents if the Recirculated Air button is not pressed ON (LED lit)
•
Continuous use of the climate control system in the recirculated air position may allow humidity to increase inside the vehicle which may fog the glass and obscure visibility and/or cause smell/odor
Your Automatic Climate Control system may differ from those in the illustrations. Refer to section 4 in the Owner’s Manual for more information.
For illustrative purposes only. Your actual display, buttons and/or features may vary.
Air Flow Modes
To select Air Flow Modes, press the mode button H to cycle through to
the desired mode:
Auto Defogging System (ADS)
Auto defogging is designed to reduce the
fogging up of the inside of the windshield
by automatically sensing the moisture of
the inside of the windshield. The system
will automatically change to defrost mode
when needed.
Auto Defogging is set ON by default. To
cancel Auto Defogging, press the Front
Defrost button for three seconds,
when the ignition is in on (ADS OFF icon
will illuminate). To turn Auto Defogging on
again, press the Front Defrost button
for three seconds.
Face-Level
Bi-Level
F lo o r- L evel
Floor/Defrost-Level
•Defrost Mode activates A /C and opens Fresh Air Vent to help dehumidify the air and improve Defroster performance
•During Auto Operation, the A /C indicator will NOT illuminate. The fan speed, air intake, air flow and air conditioning may automatically be engaged at any time to reach desired temperature and reduce humidity
•Keep inside glass as clean as possible to reduce window fogging
QUICK TIPS
Refer to the inside front cover for more information on QR codes.www.youtube.com/KiaFeatureVideos
QR CODES
Automatic Climate Control Operation Video
Auto Defogging System (ADS) Video
CENTER PANEL
CENTER PANEL
Page 42 of 70

Air Flow Modes
To selec")
*IF EQUIPPED40SORENTO FEATURES & FUNCTIONS GUIDE
REARA/C
MAXA/C
12
0 3
4
REMINDER: Warm air may flow in through vents if Recirculated Air button is not pressed ON (LED lit)
Air Flow Modes
To select Air Flow Modes, press the Mode
selection buttons:
Face-Level
Bi-Level
F lo o r- L evel
Floor/Defrost-Level
Manual Climate Control*
A Front fan speed control knob
B REAR window defroster button
C Air conditioning button
D MA X A /C button
E Mode selection knob
F Air intake control buttons
G Temperature control knob
3rd Row Climate Control*
I 3rd Row air conditioning ON/OFF button
J 3rd Row fan speed control knob
Defrost Outside and/or Inside Windshield:
1. Set Front Fan Speed A to the highest position
2. Set Temperature H to Hot
3. Press the Front Defrost button B
•
•
Defrost Mode activates A /C and opens Fresh Air Vent
•MA X A /C Mode automatically engages Recirculated Air
•Keep inside glass as clean as possible to reduce window fogging
QUICK TIPS
Your Manual Climate Control system may differ from those in the illustrations. Refer to section 4 in the Owner’s Manual for more information.
C
D
F
G
EA
B
REAR A/C
ON/OFF
I
(Rear climate control)
CENTER PANEL
CENTER PANEL
Page 43 of 70

ALWAYS CHECK THE OWNER’S MANUAL FOR COMPLETE OPER ATING INFORMATION AND SAFET Y WARNINGS. *IF EQUIPPED †LEGAL DISCL AIMERS ON BACK INSIDE COVER41
Automatic Gear Shift with Sportmatic®†2 2 Shifting
•Press the brake pedal and depress release button to move the gearshift from N to P, N to R or from P to any gear
•Manual mode downshifts are made automatically when the vehicle slows down. When the vehicle stops, 1st gear is automatically selected
QUICK TIPS
(Center Console)
P: Park – To shift into Park from any gear, press the Release button A on the gear shift
while the vehicle is stationary and the brake pedal is depressed, and shift
R: Reverse – To shift into Reverse, depress the brake pedal, press the Release button A,
and move the shift lever into Reverse.
N: Neutral
D: Drive
[+]: Manual Mode Upshift
[–]: Manual Mode Downshift
Manual Mode: To enter the Manual mode, move shift lever from D
to left gate. To shift while in Manual mode, move shift lever up [+]
to upshift or down [–] to downshift.
Dual Clutch Transmission (DCT)*
Some Kia vehicles are equipped with Dual Clutch Transmission (DCT ) for automatic transmissions.
The following are unique driving tips for the Dual Clutch Transmission:
• To hold the vehicle stationary on an incline, the service brake or parking brake MUST be used or the gear shift MUST be in
the (P) Park position. If the vehicle is held stationary by applying the accelerator pedal on a slope, the clutch/transmission
may overheat, resulting in damage
• Avoid aggressive launches on steep grades as this may result in an overheated clutch and transmission
• A slight time lag may be experienced at takeoff from standstill during aggressive acceleration maneuvers
If the clutch is overheating, an amber warning light* will be displayed in the instrument cluster.
Should this condition occur, pull over and place the vehicle in Park and idle the engine.
Refer to section 5 in the Owner’s Manual for additional information on Automatic Gear Shift or DCT operation or call Kia Consumer Affairs for additional information.
SPORT
SMARTLOCK
ECOCOMFORT
P
R
N D
SHIFT
LOCK
RELEASE
SNOW
OFF
•
•
•
•
+
•
–
P
R
N D •
•
•
•
+
•
–
OFF
SPORT
SMARTLOCK
ECOCOMFORT
P
R
N D
SHIFT
LOCK
RELEASE
SNOW
OFF
•
•
•
•
+
•
–
P
R
N D •
•
•
•
+
•
–
OFF
A
Refer to the inside front cover for more information on QR codes.www.youtube.com/KiaFeatureVideos
QR CODES
Sportmatic® Shifting Video
Dual Clutch Transmission (DCT) Driving Experience Video
CENTER PANEL
CENTER PANEL
Page 44 of 70

*IF EQUIPPED 42SORENTO FEATURES & FUNCTIONS GUIDE
CENTER PANEL
CENTER PANEL
When you select AWD Lock mode by pressing
the AWD LOCK button A, the AWD LOCK mode
increases the drive power when driving on wet
pavement, snow covered roads and/or off-road.
•This mode is used for climbing or descending
sharp grades, off-road driving, driving on
sandy and muddy roads, etc., to improve
traction
•This mode automatically shifts back to
AWD AUTO mode at speed above 19 mph.
If the vehicle decelerates to speeds below
approximate 25 mph, however, the transfer
mode is shifted into AWD LOCK mode again
When the AWD LOCK mode is deactivated, a
shock may be felt as the drive power is delivered
entirely to the front wheels. This shock is not a
mechanical failure.
AWD (All-Wheel Drive) Lock*Idle, Stop & Go (ISG) System
The ISG system is designed to reduce fuel
consumption by automatically shutting down
the engine when the vehicle is at a standstill.
When the ISG system is ON and the vehicle
is at a standstill, the engine will stop, and the
green AUTO STOP indicator B on the
instrument cluster will illuminate.
The engine will restart when the brake pedal
is released or the shift lever is moved from
D (Drive) to the R (Reverse) position or to
Manual Shift mode. When engine restarts,
the green AUTO STOP indicator on the
instrument cluster will turn off.
To deactivate the ISG System, press the
ISG OFF button C. If you press again, the
system will be activated.
REMINDERS:
•ISG is active by default at vehicle startup. When ignition is cycled, ISG will turn ON again
•
Under certain conditions, the engine will restart automatically even if the brake pedal is still depressed
•
If the AUTO STOP indicator is continuously blinking yellow and the ISG button LED is on, please contact an authorized Kia dealer
•If the AUTO STOP indicator A is solid yellow, the system is functional, but just has not met all its enabling criteria to activate ISG at that time.
•
The ISG system is disabled when:
•A seat belt is unfastened
•The hood or a door is opened
•Battery condition is poor
•
The front or rear defroster is turned on
•
Engine coolant temperature is low
•
The outside ambient temperature is too low/high
•
Emission control devices activate
•
The vehicle is on a steep slope
QUICK TIPS
Images are for illustrative purposes only and may not reflect actual feature or operation.
Refer to section 5 in the Owner’s Manual for more information.
(Button on center console below gear shift)
(LCD instrument panel Type B)
(Button on center console below gear shift)
SPORT
SMART
LOCK
ECOCOMFORT
P
R
N D
SHIFT
LOCK
RELEASE
SNOW
OFF
•
•
•
•
+
•
–
OFF
EPB
AUTO
0 6
CH
1 5
2
D
4
3x1
000 rpm
E F
MPH
km/h0 160
20
140
40
120
60
100
80
20
40 60
200
2 40
2 80
300
80
180
1
00 160
1
20 140
0
1 7
8
26
3 45
E
F CH
160
20
140
40
120
60
100
80
MPH
526mi miF°25.7MPG
x1 000 rpm
SPORT
SMARTLOCK
ECOCOMFORT
P
R
N D
SHIFT
LOCK
RELEASE
SNOW
OFF
•
•
•
•
+
•
–
OFF
B
A
See section 5 in the Owner’s Manual for more information.
Refer to the inside front cover for more information on QR codes.www.youtube.com/KiaFeatureVideos
QR CODES
ISG (Idle, Stop & Go) System Video
Page 45 of 70

ALWAYS CHECK THE OWNER’S MANUAL FOR COMPLETE OPER ATING INFORMATION AND SAFET Y WARNINGS. *IF EQUIPPED43
Image is for illustrative purposes only and may not reflect actual feature or operation.
The Electronic Parking Brake (EPB) system utilizes an
electric motor to engage the parking brake.
Applying the Parking Brake
Depress the brake pedal and pull up the EPB switch A.
Ensure that the indicator light is illuminated on the
instrument cluster.
Releasing the Parking Brake
The EPB will automatically release when the shifter is
placed in Reverse or Drive.
To release EPB manually, depress the brake pedal, then
press the EPB switch A, with the ignition switch in the
ON position. Ensure that the indicator light is OFF.
Auto Hold temporarily maintains the vehicle at a standstill even
though the brake pedal is not depressed after the driver brings the
vehicle to a complete stop by depressing the brake pedal. Auto
Hold can be turned On/Off using the AUTO HOLD button B on the
center panel below the gear shift. Before Auto Hold will operate,
the driver’s door, engine hood and liftgate must be closed, and the
driver’s seat belt must be fastened.
The AUTO HOLD indicator on the Instrument Cluster has four
states:
White: Standby – When vehicle is in Park and at a standstill, and
AUTO HOLD button B is pressed ON, the indicator will illuminate
white. While driving the vehicle (vehicle is not at a standstill), the
Auto Hold indicator will remain white.
Green: Engaged – When coming to a complete stop by depressing
the brake pedal, the Auto Hold indicator changes from white to
green.
Off (not illuminated) – The
indicator will turn Off when
the AUTO HOLD button B
is manually pressed Off or
when the EPB is manually
turned On.
Yellow: Malfunction –
When the indicator is
illuminated yellow, there may
be a system malfunction.
Take your vehicle to a local
Kia dealer.
•When leaving your keys with parking lot attendants or valet, make sure to inform them how to operate the EPB •If parked on a steep incline/decline, pull up the EPB switch for more than 3 seconds for a firmer EPB application •Pull up and hold EPB switch a second time to increase brake pressure if parked on a decline or incline
QUICK TIPS
Electronic Parking Brake (EPB)*
REMINDERS:
•
As a bulb check, the EPB malfunction indicator will illuminate for approximately 3 seconds when the ignition switch is turned ON
•
If the warning light does not illuminate temporarily, or continues to remain lit, take your vehicle to an authorized Kia dealer and have the system checked
•The EPB should not be operated while the vehicle is moving
•
A click or electric brake motor sound may be heard while operating or releasing the EPB, but these conditions are normal and indicate that the EPB is functioning properly
Auto Hold*
REMINDERS:
•
Auto Hold only operates when vehicle is in Drive or Neutral
•
To reduce the risk of an accident, do not activate Auto Hold while driving downhill, backing up or parking your vehicle
•
Do not solely rely on the Auto Hold system to keep the vehicle stopped. Always pay attention to traf fic and road conditions, and be prepared to depress the brakes
DRIVE
SPORT
SMART
ECO
MUD
SAND
SNOW
COMFORT
TERRAIN
P
R
D
N
AUTO
HOLD
B
A
(Button on center console below gear shift)
Refer to the inside front cover for more information on QR codes.www.youtube.com/KiaFeatureVideos
QR CODES
Electric Parking Brake Video
Refer to section 5 in the Owner’s Manual for more information. Refer to page 4 for location of Instrument Cluster indicators.
CENTER PANEL
Page 46 of 70

*IF EQUIPPED †LEGAL DISCL AIMERS ON BACK INSIDE COVER44SORENTO FEATURES & FUNCTIONS GUIDE
CENTER PANEL
CENTER PANEL
Heated Steering Wheel*
Press Heated Steering Wheel button A to turn the Steering
Wheel Heater on/off while the Engine Start /Stop button is
in the ON position. The Steering Wheel Heater will turn off
automatically in 30 minutes, or when button A is pressed
again to deactivate.
B Seat Warmers
•Press the button up once for high setting (3 LEDs lit)
•Press the button twice for medium setting (2 LEDs lit)
•Press a third time for low setting (1 LED lit) and again to turn OFF
C Ventilated Seats
•Press the button down once for high setting (3 LEDs lit)
•Press twice for medium setting (2 LEDs lit)
•Press a third time for low setting (1 LED lit) and again to turn OFF
Seat Warmers†2 0 / Ventilated Seats*
•With the seat warmer switch in the ON position, the heating system in the seat turns OFF or ON automatically depending on the seat temperature
•System is OFF by default
QUICK TIPS
•If ignition is turned OFF, then ON again within 30 minutes of the Steering Wheel Heater being turned ON, the system will return to its previous state
•The system returns to on when ignition is cycled. To turn off system, press the Heated Steering Wheel button A
•With the heated steering switch in the ON position, the heating system in the steering wheel turns OFF or ON automatically depending on the steering wheel temperature
QUICK TIPS
REMINDER: If the steering wheel becomes too warm, turn the system off. The heated steering wheel may cause burns even at low temperatures, especially if used for long periods of time.
REMINDER: Use extreme caution when using the seat warmers to avoid burns. Refer to the Owner’s Manual for more information.
(Located below gear shift knob)
(Buttons located on top sides of center console)
DRIVE
SPORTSMART
AUTO
HOLD
ECO
MUD
SAND SNOW
TERRAIN
COMFORT
Seat warmers / ventilation
Wireless charge center console, back seat
USB / Multimedia
USB
180W12V
A
Seat warmers / ventilationWireless charge center console, back seat
USB / Multimedia
USB
180W12V
Seat warmers / ventilationWireless charge center console, back seat
USB / Multimedia
USB
180W12V
C
B
Image is for illustrative purposes only and may not reflect actual feature or operation.
Refer to the inside front cover for more information on QR codes.www.youtube.com/KiaFeatureVideos
QR CODES
Heated and Ventilated Seats Video
Refer to section 4 in the Owner’s Manual for more information.
Page 47 of 70

ALWAYS CHECK THE OWNER’S MANUAL FOR COMPLETE OPER ATING INFORMATION AND SAFET Y WARNINGS. *IF EQUIPPED †LEGAL DISCL AIMERS ON BACK INSIDE COVER45
SEATING
SEATING
Front Seat Headrest Adjustment†1 0
Type A*
• To raise the headrest, pull headrest up A to the desired position
• To lower the headrest, press the button B, then press the headrest
down C
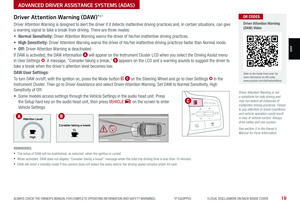
Driver Position Memory System*†1 8
The integrated system stores into memory the position of the Driver’s Seat
and the Outside Rearview Mirrors.
To store positions into memory, first place the Gear Shift into P (Park)
while the Engine Start /Stop button is in the ON position. Then:
1. Adjust the Driver’s Seat and the Outside Mirrors
2. Press the SET button B on the control panel. System will beep once
3. Press one of the memory buttons C within 5 seconds. The system will
beep twice when memory has been stored
SET
12
(Buttons located on Driver’s Door Panel) ( Type A )
REMINDER: Do not attempt to operate the driver position memory system while the vehicle is moving. This could result in loss of control of the vehicle.
For easy adjustments, hold a headrest post with one hand while using the other hand to pull the headrest from underneath.
QUICK TIP
REMINDERS:
•
The headrest only moves up and down as described above. It does not adjust forward or backward
•
Do not operate the vehicle with the headrests removed. Headrests can provide critical neck and head support in an accident
B
A
C
BC
Refer to section 3 in the Owner’s Manual for more information.
Refer to section 3 in the Owner’s Manual for more information.
Page 48 of 70

*IF EQUIPPED †LEGAL DISCL AIMERS ON BACK INSIDE COVER46SORENTO FEATURES & FUNCTIONS GUIDE
SEATING
SEATING
Power Adjustable Driver’s Seat*†1 8 /
Power Lumbar*†1 8
Move/Press the controls to adjust the Seat forward/backward,
the Seat Cushion height, the Seatback recline or the Lumbar
forward/backward.
SeatbackLumbarSeat Cushion ExtensionSeatSeat Cushion
Pull lever E up to slide the Seat forward/
backward.
Pull lever F up several times to raise the Seat
Height
Push lever F down several times to lower the
Seat Height
Pull lever G to adjust the Seatback recline.
Press H to adjust the Lumbar support.
Manual Adjustable Driver’s
Seat*†1 8
When adjusting the seat forward or backwards, ensure the seat clicks or locks into place before driving the vehicle
QUICK TIP
Refer to section 3 in the Owner’s Manual for more information.
Images are for illustrative purposes only and may not reflect actual feature or operation. Your seat controls may differ from those in the illustrations.
Do not attempt to adjust the seat while the vehicle is moving. This could result in loss of control of the vehicle.
Refer to section 3 in the Owner’s Manual for more information.
REMINDER: Do not attempt to adjust the seat while the vehicle is moving. This could result in loss of control of the vehicle.
C
C
D
DF
G
HE
A
AA
B
B
Refer to the inside front cover for more information on QR codes.www.youtube.com/KiaFeatureVideos
QR CODES
Manual Adjustable Driver’s Seat Video