Page 137 of 276

Possible Reasons The Engine Does Not
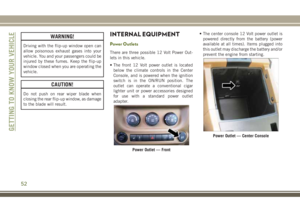
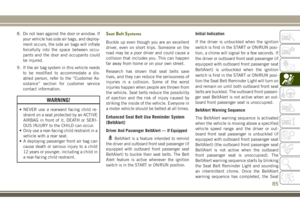
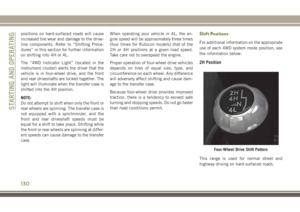
AUTO STOP
Prior to engine shut down, the system will
check many safety and comfort conditions to
see if they are fulfilled. In following situations
the engine will not stop:
• Driver’s seat belt is not buckled.
• Outside temperature is less than 1°F
(–17°C) or greater than 104°F (40°C).
• Actual cabin temperature is significantly
different than temperature set on Auto
HVAC.
• HVAC is set to full defrost mode.
• Engine has not reached normal operating
temperature.
• Battery discharged.
• When driving in REVERSE.
• Hood is open.
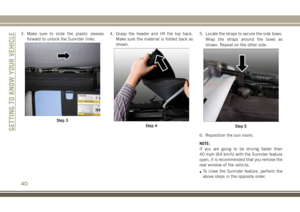
• Vehicle is in 4LO transfer case mode.It may be possible for the vehicle to be driven
several times without the STOP/START sys-
tem going into a STOP/START READY state
under more extreme conditions of the items
listed above.
To Start The Engine While In The STOP/
START AUTO STOP ACTIVE Mode
When the gear selector is in NEUTRAL, the
engine will start when the clutch pedal is
pressed. The vehicle will go into STOP/START
SYSTEM NOT READY mode until the vehicle
speed is greater than 3 mph (5 km/h).
Conditions that will cause the engine to start
automatically while in STOP/START AUTO STOP
ACTIVE mode
The Engine Will Start Automatically When:
• Actual cabin temperature is significantly
different than temperature set on Auto
HVAC.
• HVAC is set to full defrost mode.
• STOP/START AUTO STOP ACTIVE time ex-
ceeds 5 minutes.• Battery voltage drops too low.
• Low brake vacuum e.g. after several brake
pedal applications.
•
Vehicle is moving faster than 3 mph (5 km/h).
• STOP/START OFF switch is pressed.
• 4WD system is put into 4LO mode.
Conditions that force a manual key cycle
start while in STOP/START AUTO STOP AC-
TIVE mode:
The Engine Will Not Start Automatically If:
• The driver’s seatbelt was unbuckled
• The engine hood has been opened
• A STOP/START system error occurs
The engine may then only be restarted with
an ignition key cycle. The STOP/START KEY
START REQUIRED message will appear in
the instrument cluster under these condi-
tions. Refer to “Instrument Cluster Display”
in “Getting To Know Your Instrument Panel”
for further information.
135
Page 138 of 276

To Manually Turn Off The Start Stop System
1. Push the STOP/START Off switch (located
on the switch bank). The light on the
switch will illuminate.
2. The STOP/START OFF message will ap-
pear in the instrument cluster. Refer to
“Instrument Cluster Display” in “Getting
To Know Your Instrument Panel” for fur-
ther information.3. At the next vehicle stop (after turning off
the STOP/START system), the engine will
not be stopped.
4. If the STOP/START system is manually
turned off, the engine can only be started
and stopped by cycling the ignition switch
5. The STOP/START system will reset itself
back to an ON condition every time the
key is turned off and back on.
To Manually Turn On The Start Stop System
1. Push the STOP/START Off switch (located
on the switch bank).
2. The light on the switch will turn off.
System Malfunction
If there is a malfunction in the STOP/START
system, the system will not shut down the
engine. A “SERVICE STOP/START SYSTEM”
message will appear in the instrument cluster
display. Refer to “Warning Lights And Mes-
sages” in “Getting To Know Your Instrument
Panel” for further information.If the “SERVICE STOP/START SYSTEM”
message appears in the instrument cluster
display, have the system checked by your
authorized dealer.
SPEED CONTROL
When engaged, the Speed Control takes over
accelerator operations at speeds greater than
25 mph (40 km/h).
The Speed Control buttons are located on the
right side of the steering wheel.
STOP/START OFF Switch
STARTING AND OPERATING
136
Page 139 of 276

NOTE:
In order to ensure proper operation, the
Speed Control System has been designed toshut down if multiple Speed Control func-
tions are operated at the same time. If this
occurs, the Speed Control System can be
reactivated by pushing the Speed Control
ON/OFF button and resetting the desired ve-
hicle set speed.
WARNING!
Speed Control can be dangerous where the
system cannot maintain a constant speed.
Your vehicle could go too fast for the con-
ditions, and you could lose control and
have an accident. Do not use Speed Con-
trol in heavy traffic or on roads that are
winding, icy, snow-covered or slippery.
To Activate
Push the ON/OFF button. The Cruise Indica-
tor Light in the instrument cluster display will
illuminate. To turn the system off, push the
ON/OFF button a second time. The Cruise
Indicator Light will turn off. The system
should be turned off when not in use.
WARNING!
Leaving the Speed Control system on when
not in use is dangerous. You could acci-
dentally set the system or cause it to go
faster than you want. You could lose con-
trol and have an accident. Always leave the
system off when you are not using it.
To Set A Desired Speed
Turn the Speed Control on. When the vehicle
has reached the desired speed, push the SET
(-) button and release. Release the accelera-
tor and the vehicle will operate at the se-
lected speed.
NOTE:
The vehicle should be traveling at a steady
speed and on level ground before pushing the
SET (-) button.
To Vary The Speed Setting
To Increase Speed
When the Speed Control is set, you can in-
crease speed by pushing the RES (+) button.
Speed Control Buttons
1 — Push CANCEL
2 — Push ON/OFF
3 — Push RES +/Accel
4 — Push SET - /Decel
137
Page 140 of 276

The driver’s preferred units can be selected
through the instrument panel settings if
equipped. Refer to “Getting To Know Your
Instrument Panel” in the Owner’s Manual for
more information. The speed increment
shown is dependent on the chosen speed unit
of U.S. (mph) or Metric (km/h):
U.S. Speed (mph)
• Pushing the RES (+) button once will result
in a 1 mph increase in set speed. Each
subsequent tap of the button results in an
increase of 1 mph.
• If the button is continually pushed, the set
speed will continue to increase until the
button is released, then the new set speed
will be established.
Metric Speed (km/h)
• Pushing the RES (+) button once will result
in a 1 km/h increase in set speed. Each
subsequent tap of the button results in an
increase of 1 km/h.
• If the button is continually pushed, the set
speed will continue to increase until the
button is released, then the new set speed
will be established.To Decrease Speed
When the Speed Control is set, you can de-
crease speed by pushing the SET (-) button.
The driver’s preferred units can be selected
through the instrument panel settings if
equipped. Refer to “Getting To Know Your
Instrument Panel” in the Owner’s Manual for
more information. The speed increment
shown is dependent on the chosen speed unit
of U.S. (mph) or Metric (km/h):
U.S. Speed (mph)
• Pushing the SET (-) button once will result
in a 1 mph decrease in set speed. Each
subsequent tap of the button results in a
decrease of 1 mph.
• If the button is continually pushed, the set
speed will continue to decrease until the
button is released, then the new set speed
will be established.
Metric Speed (km/h)
• Pushing the SET (-) button once will result
in a 1 km/h decrease in set speed. Each
subsequent tap of the button results in a
decrease of 1 km/h.• If the button is continually pushed, the set
speed will continue to decrease until the
button is released, then the new set speed
will be established.
To Accelerate For Passing
Press the accelerator as you would normally.
When the pedal is released, the vehicle will
return to the set speed.
To Resume Speed
To resume a previously set speed, push the
RES (+) button and release. Resume can be
used at any speed above 20 mph (32 km/h).
To Deactivate
A soft tap on the brake pedal, pushing the
CANCEL button, or normal brake pressure
while slowing the vehicle will deactivate the
Speed Control without erasing the set speed
from memory.
Pushing the ON/OFF button or turning the
ignition switch OFF erases the set speed from
memory.
STARTING AND OPERATING
138
Page 141 of 276

Using Speed Control On Hills
The transmission may downshift on hills to
maintain the vehicle set speed.
NOTE:
The Speed Control system maintains speed
up and down hills. A slight speed change on
moderate hills is normal.
On steep hills, a greater speed loss or gain
may occur so it may be preferable to drive
without Speed Control.
WARNING!
Speed Control can be dangerous where the
system cannot maintain a constant speed.
Your vehicle could go too fast for the con-
ditions, and you could lose control and
have an accident. Do not use Speed Con-
trol in heavy traffic or on roads that are
winding, icy, snow-covered or slippery.
REFUELING THE VEHICLE
Fuel Filler Cap
The fuel filler cap is located on the driver's
side of the vehicle. If the fuel filler cap is lost
or damaged, be sure the replacement cap is
the correct one for this vehicle.
WARNING!
• Never have any smoking materials lit in
or near the vehicle when the gas cap is
removed or the tank is being filled.
• Never add fuel when the engine is run-
ning. This is in violation of most state
fire regulations and may cause the MIL
to turn on.
• A fire may result if gasoline is pumped
into a portable container that is inside of
a vehicle. You could be burned. Always
place gas containers on the ground while
filling.
CAUTION!
• Damage to the fuel system or emission
control system could result from using
an improper fuel filler cap. A poorly
fitting cap could let impurities into the
fuel system. Also, a poorly fitting after-
market cap can cause the “Malfunction
Indicator Light (MIL)” to illuminate, due
to fuel vapors escaping from the system.
Fuel Filler Cap
139
Page 142 of 276

CAUTION!
• To avoid fuel spillage and overfilling, do
not “top off” the fuel tank after filling.
NOTE:
• When the fuel nozzle “clicks” or shuts off,
the fuel tank is full.
• Tighten the fuel filler cap about 1/4 turn
until you hear one click. This is an indica-
tion that the cap is properly tightened.
• If the fuel filler cap is not tightened prop-
erly, the MIL will come on. Be sure the cap
is tightened every time the vehicle is
refueled.
Loose Fuel Filler Cap Message
After fuel has been added, the vehicle diag-
nostic system can determine if the fuel filler
cap is possibly loose, improperly installed, or
damaged. If the system detects a malfunc-
tion, the “gASCAP” message will display in
the odometer display. Tighten the gas cap
until a "clicking" sound is heard. This is an
indication that the gas cap is properly tight-
ened. Push the odometer reset button to turn
the message off. If the problem persists, the
message will appear the next time the vehicleis started. This might indicate a damaged
cap. If the problem is detected twice in a row,
the system will turn on the MIL. Resolving
the problem will turn the MIL off.
TRAILER TOWING
Trailer Towing Weights (Maximum Trailer
Weight Ratings)
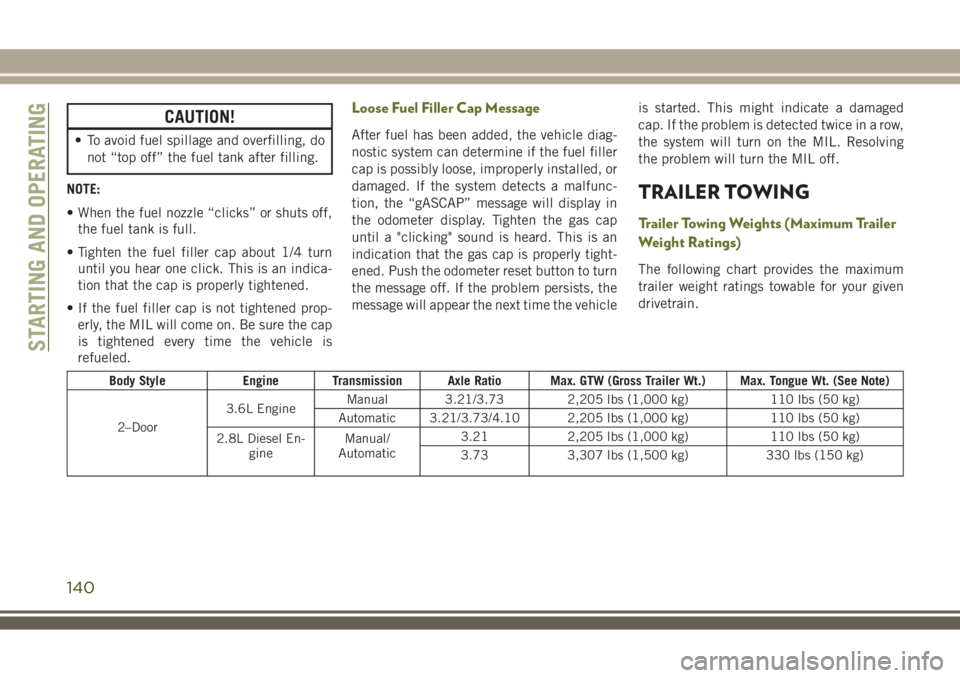
The following chart provides the maximum
trailer weight ratings towable for your given
drivetrain.
Body Style Engine Transmission Axle Ratio Max. GTW (Gross Trailer Wt.) Max. Tongue Wt. (See Note)
2–Door3.6L EngineManual 3.21/3.73 2,205 lbs (1,000 kg) 110 lbs (50 kg)
Automatic 3.21/3.73/4.10 2,205 lbs (1,000 kg) 110 lbs (50 kg)
2.8L Diesel En-
gineManual/
Automatic3.21 2,205 lbs (1,000 kg) 110 lbs (50 kg)
3.73 3,307 lbs (1,500 kg) 330 lbs (150 kg)
STARTING AND OPERATING
140
Page 143 of 276
Body Style Engine Transmission Axle Ratio Max. GTW (Gross Trailer Wt.) Max. Tongue Wt. (See Note)
4–Door3.6L EngineManual/
Automatic3.21 2,205 lbs (1,000 kg) 110 lbs (50 kg)
3.73 4,409 lbs (2,000 kg) 220 lbs (100 kg)
4.10 4,409 lbs (2,000 kg) 220 lbs (100 kg)
2.8L Diesel En-
gineAutomatic3.21 2,205 lbs (1,000 kg) 110 lbs (50 kg)
3.73 4,850 lbs (2,200 kg) 242 lbs (110 kg)
Manual3.21 2,205 lbs (1,000 kg) 110 lbs (50 kg)
3.73 5,512 lbs (2,500 kg) 220 lbs (100 kg)
When towing a trailer the technically permissible laden weight may be exceeded by not more than 220 lbs (100 kg), provided that the operating
speed is restricted to 62 mph (100 km/h) or less.
NOTE:
The trailer tongue weight must be considered
as part of the combined weight of occupants
and cargo, and should never exceed the
weight referenced on the Tire and Loading
Information placard. Refer to “Tires – General
Information” in “Servicing And Mainte-
nance” for further information.
141
Page 144 of 276

RECREATIONAL TOWING (BEHIND MOTORHOME, ETC.)
Towing This Vehicle Behind Another Vehicle
Towing Condition Wheels OFF the Ground Four-Wheel Drive Models
Flat Tow NONESee Instructions
•
Automatic transmission in PARK.
• Manual transmission in gear
(NOT in NEUTRAL [N]).
• Transfer case in NEUTRAL (N).
• Ignition in ACC position.
• Tow in forward direction.
Dolly TowFront NOT ALLOWED
Rear NOT ALLOWED
On Trailer ALL OK
NOTE:
• When towing your vehicle, always follow applicable state and provincial laws. Contact state and provincial Highway Safety offices for additional
details.
Recreational Towing — Four-Wheel Drive
Models
NOTE:
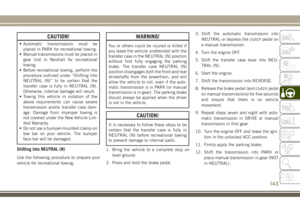
The transfer case must be shifted into NEU-
TRAL (N), automatic transmission must be in
PARK, and manual transmission must be in
gear (NOT in NEUTRAL) for recreational
towing.
CAUTION!
• DO NOT dolly tow any 4WD vehicle.
Towing with only one set of wheels on
the ground (front or rear) will cause
severe transmission and/or transfer case
damage. Tow with all four wheels either
CAUTION!
ON the ground, or OFF the ground (using
a vehicle trailer).
• Tow only in the forward direction. Towing
this vehicle backwards can cause severe
damage to the transfer case.
STARTING AND OPERATING
142