Page 231 of 630
Convenient features
5 -74
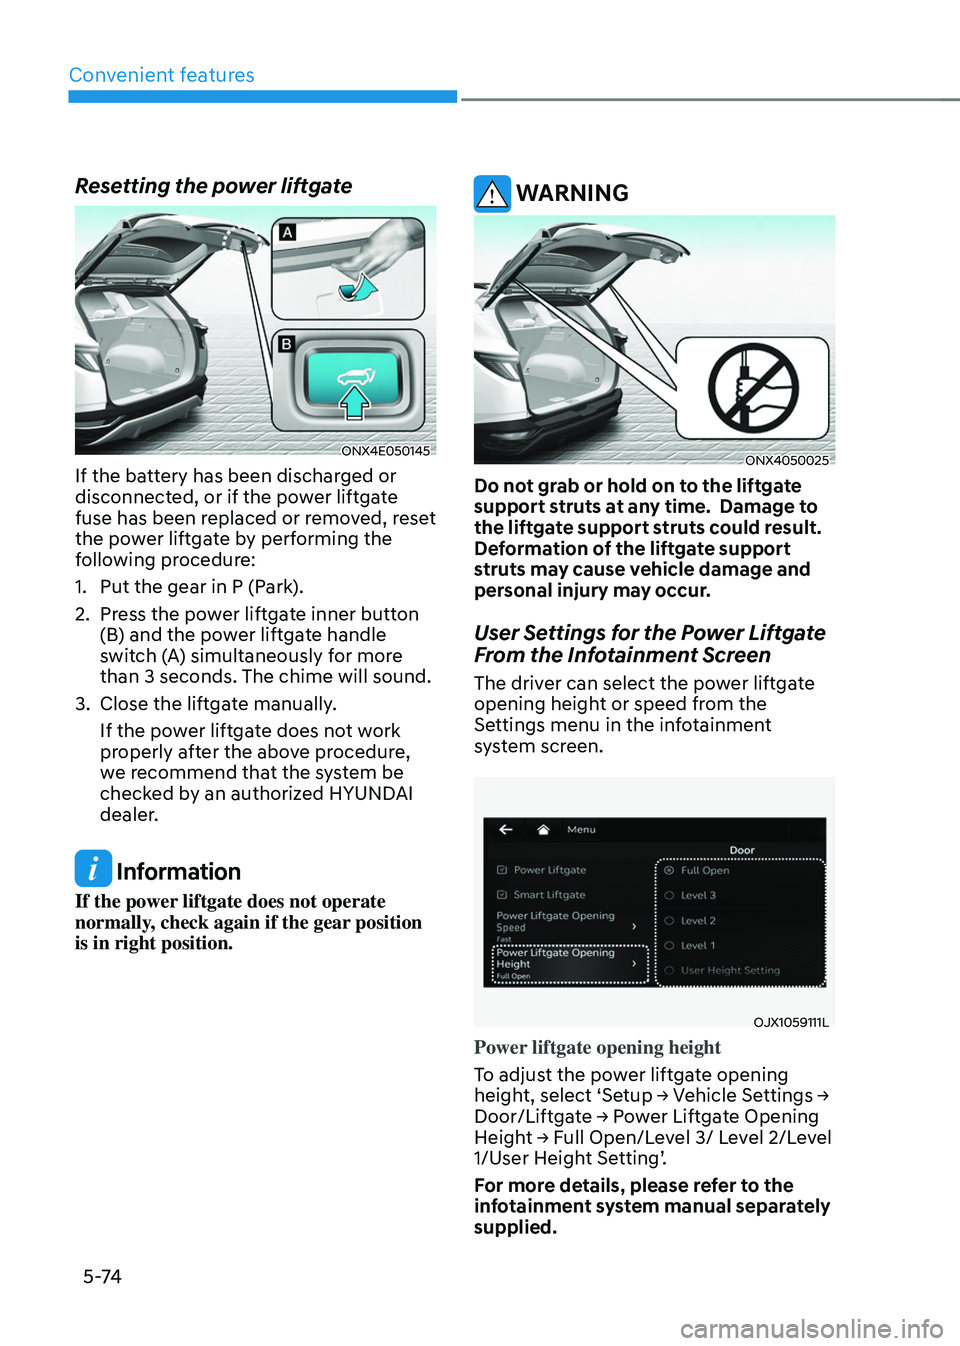
Resetting the power liftgate
ONX4E050145
If the battery has been discharged or
disconnected, or if the power liftgate
fuse has been replaced or removed, reset
the power liftgate by performing the
following procedure:
1.
Put the gear in P (Park
).
2.
Press the po
wer liftgate inner button
(B) and the power liftgate handle
switch (A) simultaneously for more
than 3 seconds. The chime will sound.
3.
Close the liftga
te manually.
If the power liftgate does not work
properly after the above procedure,
we recommend that the system be
checked by an authorized HYUNDAI
dealer.
Information
If the power liftgate does not operate
normally, check again if the gear position
is in right position.
WARNING
ONX4050025
Do not grab or hold on to the liftgate
support struts at any time. Damage to
the liftgate support struts could result.
Deformation of the liftgate support
struts may cause vehicle damage and
personal injury may occur.
User Settings for the Power Liftgate
From the Infotainment Screen
The driver can select the power liftgate
opening height or speed from the
Settings menu in the infotainment
system screen.
OJX1059111L
Power liftgate opening height
To adjust the power liftgate opening
height,
select ‘Se
tup
→ V
ehicle
Se
ttings
→ Door/Liftga
te
→ P
ower
Lift
gate
Opening Heigh
t
→ F
ull
Open/L
evel
3/ L
evel
2/L
evel
1/User H
eight Setting’.
For more details, please refer to the
infotainment system manual separately
supplied.
Page 240 of 630
05
5-83
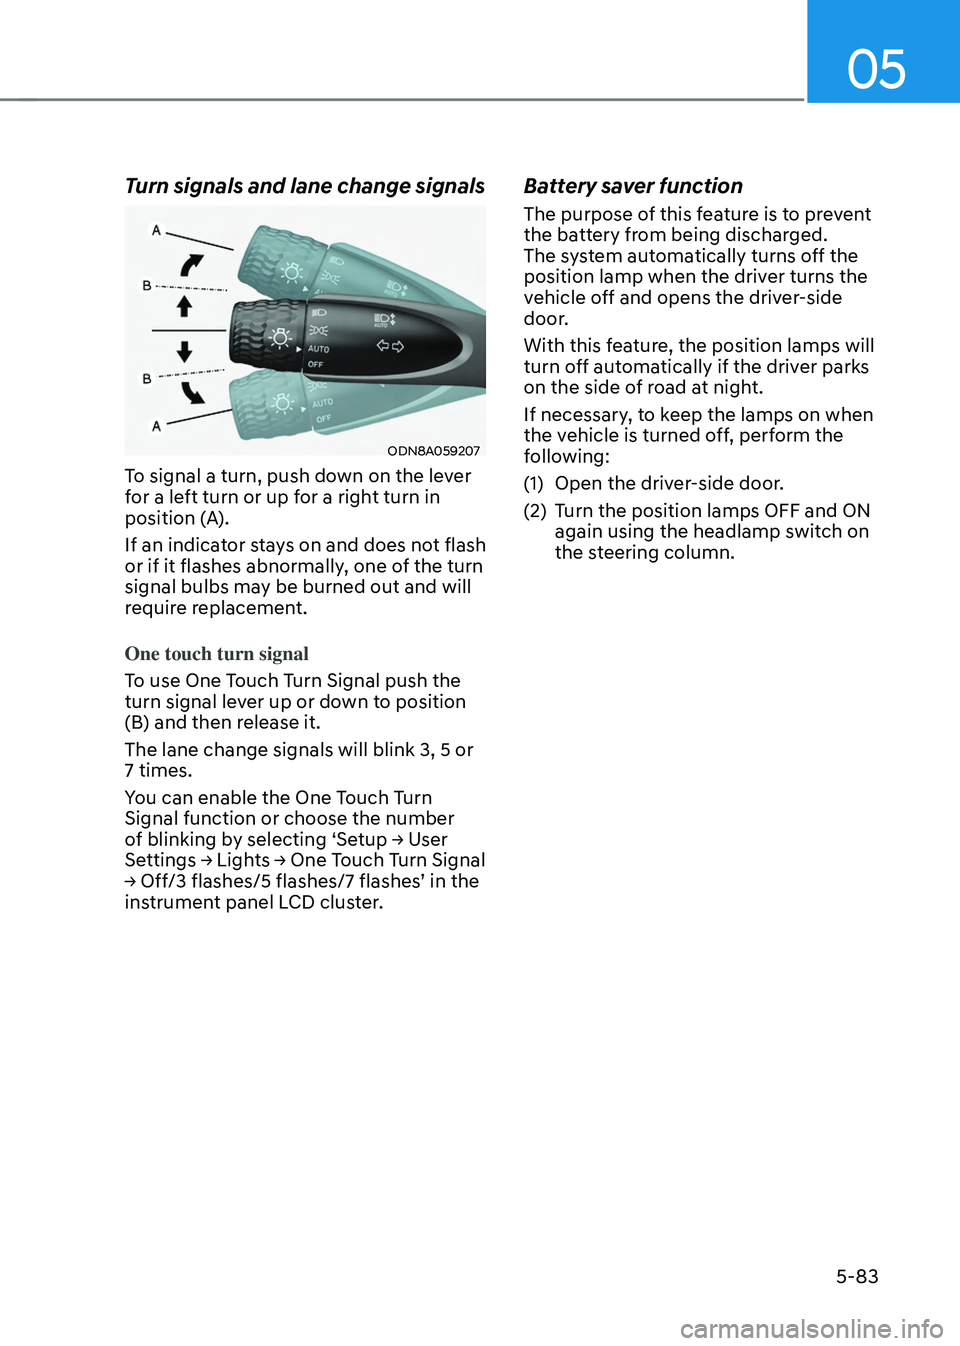
Turn signals and lane change signals
ODN8A059207
To signal a turn, push down on the lever
for a left turn or up for a right turn in
position (A).
If an indicator stays on and does not flash
or if it flashes abnormally, one of the turn
signal bulbs may be burned out and will
require replacement.
One touch turn signal
To use One Touch Turn Signal push the
turn signal lever up or down to position
(B) and then release it.
The lane change signals will blink 3, 5 or
7 times.
You can enable the One Touch Turn
Signal function or choose the number
of
blinking b
y
selecting ‘Se
tup
→ U
ser
Settings → Ligh
ts
→ One T
ouch
T
urn
Signal → Off/3 flashes/5 flashes/7 flashes
’
in the instrumen
t panel LCD cluster.
Battery saver function
The purpose of this feature is to prevent
the battery from being discharged.
The system automatically turns off the
position lamp when the driver turns the
vehicle off and opens the driver-side
door.
With this feature, the position lamps will
turn off automatically if the driver parks
on the side of road at night.
If necessary, to keep the lamps on when
the vehicle is turned off, perform the
following:
(1)
Open the driver
-side door.
(2)
Turn the position lamps OFF and ON
again using the headlamp s
witch on
the steering column.
Page 241 of 630
Convenient features
5-84
Headlamp delay function
If you place the ignition switch to the
ACC position or the OFF position with
the headlamps ON, the headlamps (and/
or position lamps) remain on for about
5 minutes. However, if the driver’s door
is opened and closed, the headlamps
are turned off after 15 seconds. Also,
with the vehicle off if the driver’s door is
opened and closed, the headlamps (and/
or position lamps) are turned off after 15
seconds.
The headlamps (and/or position lamps)
can be turned off by pressing the lock
button on the smart key twice or turning
the headlamp switch to the OFF or AUTO
position.
You can enable the headlamp delay
function
b
y
selecting ‘Se
tup
→ U
ser
Settings → Ligh
ts
→ H
eadlight
Dela
y.
NOTICE
If the driver exits the vehicle through
another door besides the driver
door, the battery saver function
does not operate and the headlamp
delay function does not turn OFF
automatically.
This may cause the battery to
discharge. To avoid battery discharge,
turn OFF the headlamps manually from
the headlamp switch before exiting the
vehicle.
Page 245 of 630

Convenient features
5-88
interior lights
WARNING
Do not use the interior lights when
driving in the dark. The interior lights
may obscure your view and cause an
accident.
NOTICE
Do not use the interior lights for
extended periods when the vehicle is
turned off or the battery will discharge.
Interior Lamp AUTO OFF
The interior lamps will automatically go
off approximately 10 minutes after the
vehicle is turned off and the doors are
closed. If a door is opened, the lamp
will go off 40 minutes after the vehicle
is turned off. If the doors are locked by
the smart key and the vehicle enters the
armed stage of the theft alarm system,
the lamps will go off five seconds later.
Front lamps
ONX4H050006N
Front room lamp (1) :
Press the button to turn ON the room
lamp for the front/rear seats.
Front Door Lamp (2) (
):
The front or rear room lamps come on
when the front or rear doors are opened
if the engine is running or not. When
doors are unlocked by the remote key or
smart key, the front and rear lamps come
on for approximately 30 seconds as long
as any door is not opened. The front and
rear room lamps go out gradually after
approximately 30 seconds when the door
is closed. However, if the ignition switch
is in the ON position or all doors are
locked, the front and rear lamps will turn
off. If a door is opened with the ignition
switch in the ACC position or the OFF
position, the front and rear lamps stay on
for about 20 minutes.
Front Map Lamp (3):
Press either lenses to turn the map lamp
on or off. This light produces a spot
beam for convenient use as a map lamp
at night or as a personal lamp for the
driver and the front passenger.
Page 259 of 630
Convenient features
5-102
Adjusting the driver and passenger side
temperature individually
• Press the SYNC button (indicator
light OFF) again to adjust the driver
and passenger side temperature
individually.
Temperature conversion
If the battery has been discharged or
disconnected, the temperature mode
display will reset to Fahrenheit.
To change the temperature unit from °C
to °F or °F to °C :
- Instrumen
t cluster or infotainment
system screen
Go
t
o
Se
tup
→ Unit → T
emperature
unit.
The t
emperature unit on both the cluster
LCD display and the climate control
screen will change.Air intake control
This is used to select the outside (fresh)
air position or recirculated air position.
To change the air intake control position,
push the control button.
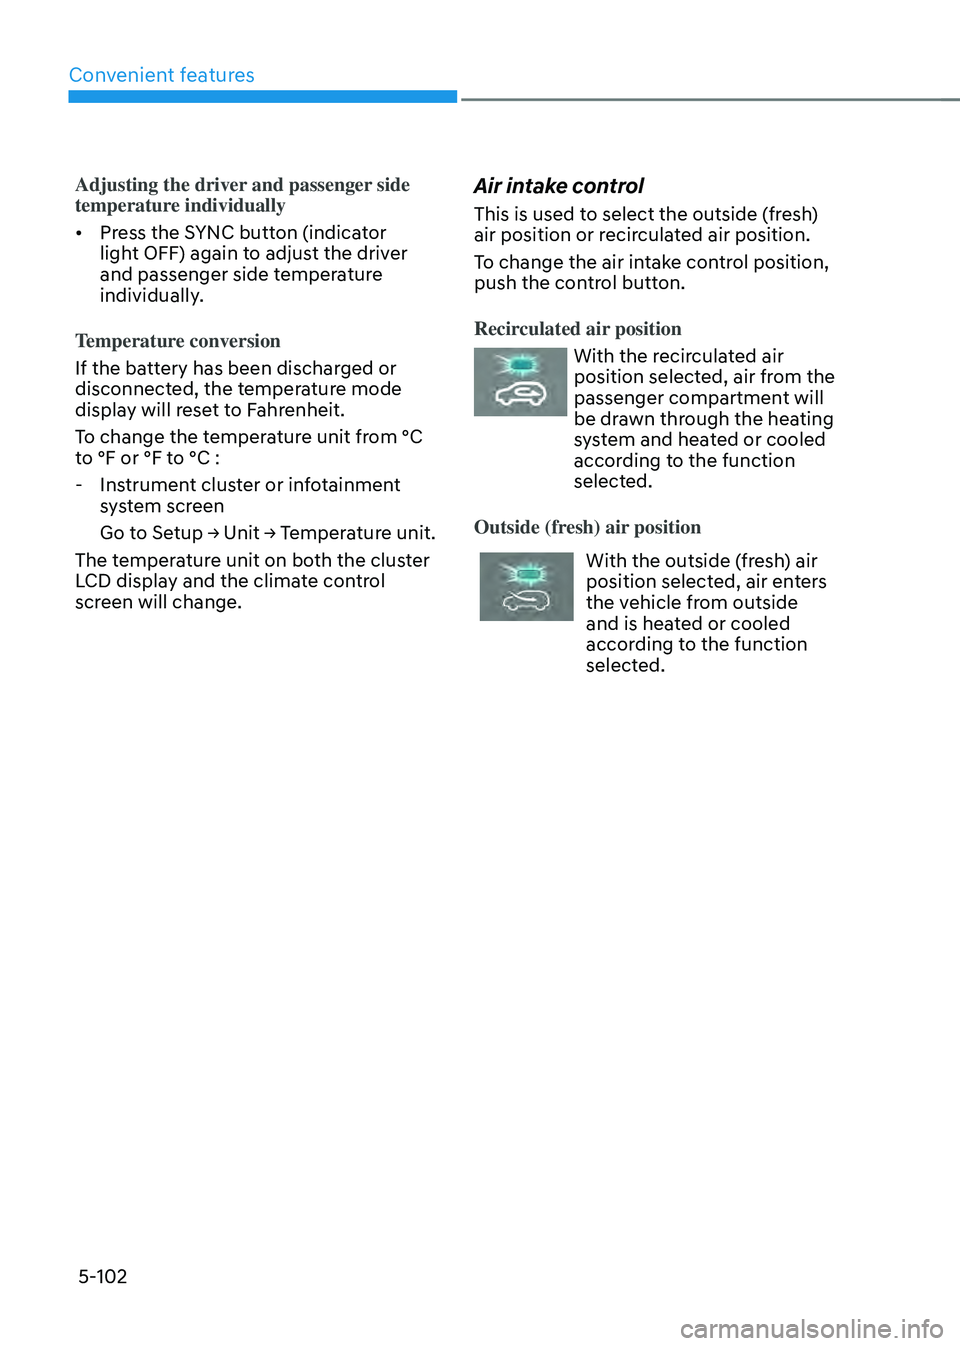
Recirculated air position
With the recirculated air
position selected, air from the
passenger compartment will
be drawn through the heating
system and heated or cooled
according to the function
selected.
Outside (fresh) air position
With the outside (fresh) air
position selected, air enters
the vehicle from outside
and is heated or cooled
according to the function
selected.
Page 260 of 630
05
5-103
Information
Using the system in the fresh air position is
recommended.
Prolonged operation of the heater in the
recirculated air position (without air
conditioning selected) can cause fogging of
the windshield and side windows and the
air within the passenger compartment will
become stale.
In addition, prolonged use of the air
conditioning with the recirculated air
position selected will result in excessively
dry air in the passenger compartment.
WARNING
• Continued climate control system
operation in the recirculated air
position may allow humidity to
increase inside the vehicle which
may fog the glass and obscure
visibility.
• Do not sleep in a vehicle with the air
conditioning or heating system on. It
may cause serious harm or death due
to a drop in the oxygen level and/or
body temperature.
• Continued climate control system
operation in the recirculated air
position can cause drowsiness
or sleepiness, and loss of vehicle
control. Set the air intake control
to the outside (fresh) air position as
much as possible while driving.
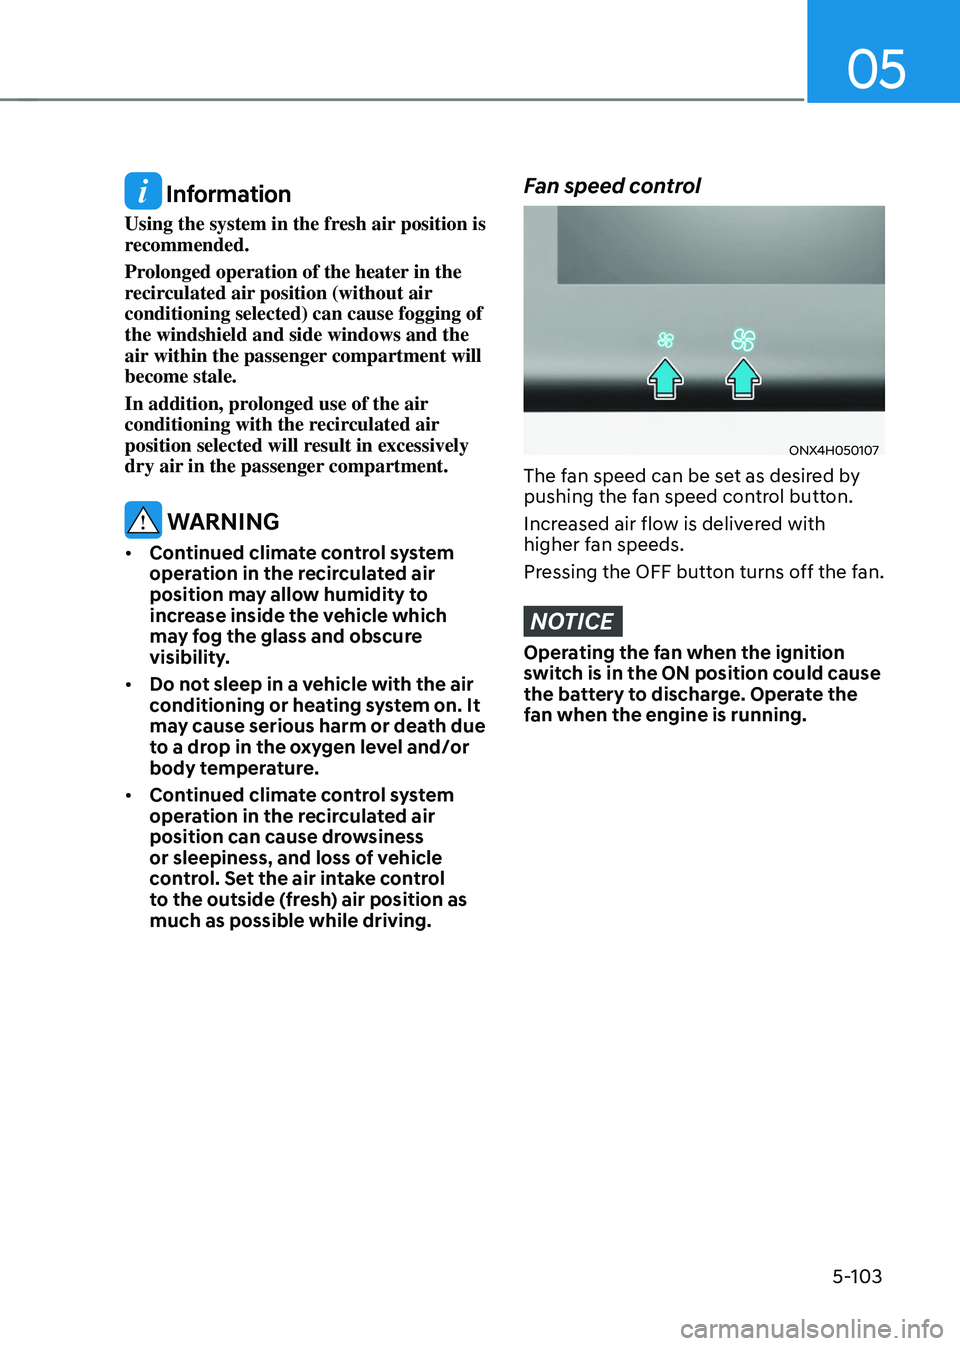
Fan speed control
ONX4H050107
The fan speed can be set as desired by
pushing the fan speed control button.
Increased air flow is delivered with
higher fan speeds.
Pressing the OFF button turns off the fan.
NOTICE
Operating the fan when the ignition
switch is in the ON position could cause
the battery to discharge. Operate the
fan when the engine is running.
Page 268 of 630
05
5-111
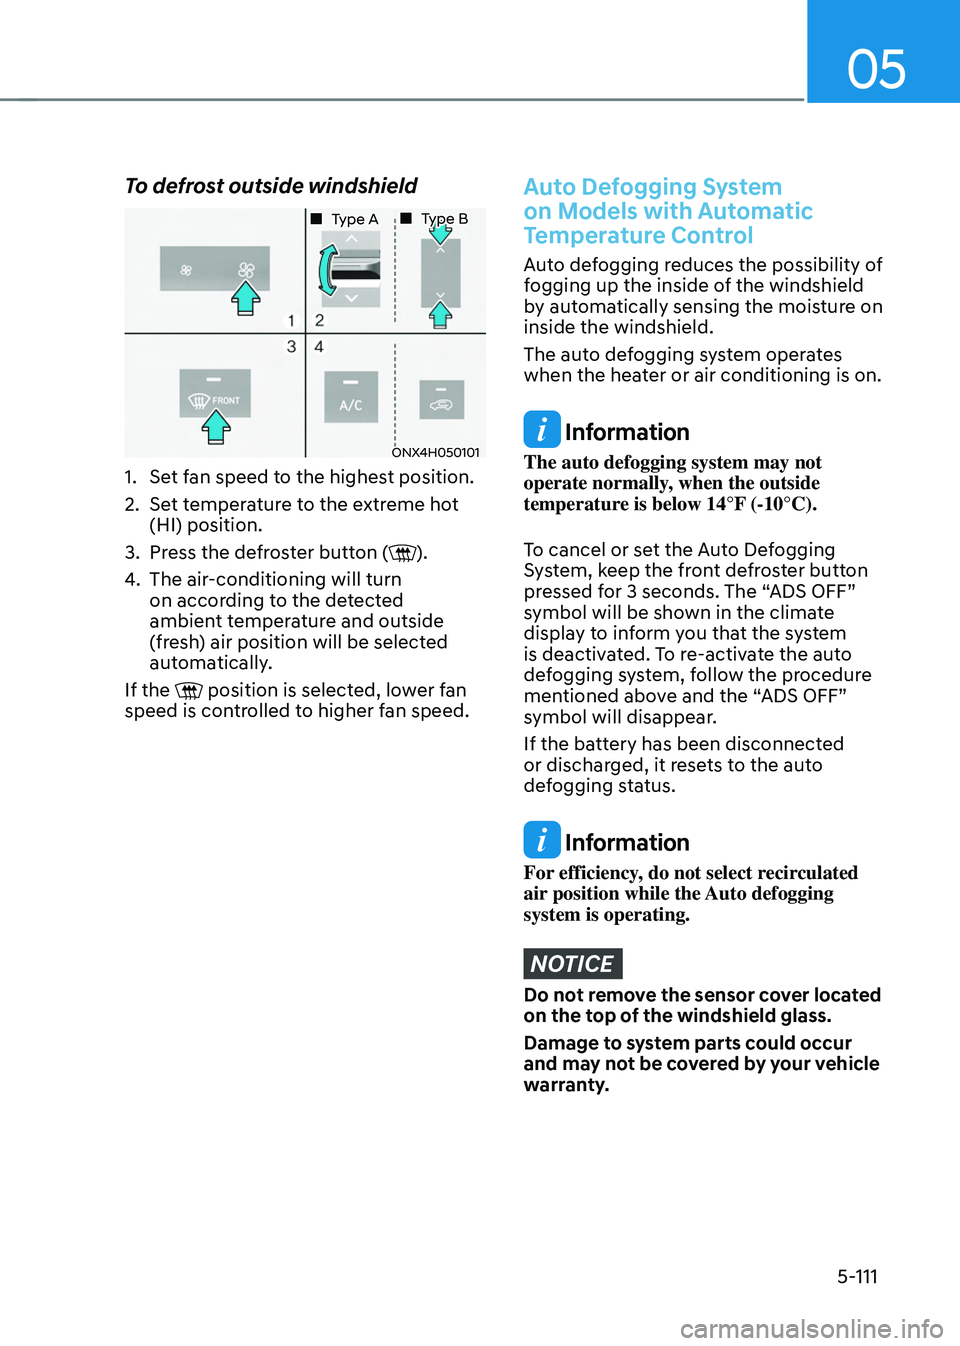
To defrost outside windshield
ONX4H050101
„„ Type A„„ Type B
1. Set fan speed to the highest position.
2.
Set t
emperature to the extreme hot
(HI) position.
3.
Press the de
froster button (
).
4.
The air-conditioning will turn
on accor
ding to the detected
ambient temperature and outside
(fresh) air position will be selected
automatically.
If the
position is selected, lower fan
speed is controlled to higher fan speed.
Auto Defogging System
on Models with Automatic
Temperature Control
Auto defogging reduces the possibility of
fogging up the inside of the windshield
by automatically sensing the moisture on
inside the windshield.
The auto defogging system operates
when the heater or air conditioning is on.
Information
The auto defogging system may not
operate normally, when the outside
temperature is below 14°F (-10°C).
To cancel or set the Auto Defogging
System, keep the front defroster button
pressed for 3 seconds. The “ADS OFF”
symbol will be shown in the climate
display to inform you that the system
is deactivated. To re-activate the auto
defogging system, follow the procedure
mentioned above and the “ADS OFF”
symbol will disappear.
If the battery has been disconnected
or discharged, it resets to the auto
defogging status.
Information
For efficiency, do not select recirculated
air position while the Auto defogging
system is operating.
NOTICE
Do not remove the sensor cover located
on the top of the windshield glass.
Damage to system parts could occur
and may not be covered by your vehicle
warranty.
Page 276 of 630
05
5-119
CAUTION
To prevent damage to the power
outlets:
• Use the power outlet only when the
engine is running and remove the
accessory plug after use. Using the
accessory plug for prolonged periods
of time with the engine off could
cause the battery to discharge.
• Only use 12 volts electric accessories
which are less than 180 watts in
electric capacity.
• Adjust the air-conditioner or heater
to the lowest operating level when
using the power outlet.
• Close the cover when not in use.
• Some electronic devices can
cause electronic interference
when plugged into a vehicle’s
power outlet. These devices may
cause excessive audio static and
malfunctions in other electronic
systems or devices used in your
vehicle.
• Push the plug in as far as it will go. If
good contact is not made, the plug
may overheat and the fuse may open.
• Plug in battery equipped electrical/
electronic devices with reverse
current protection. The current
from the battery may flow into the
vehicle’s electrical/electronic system
and cause system malfunction.
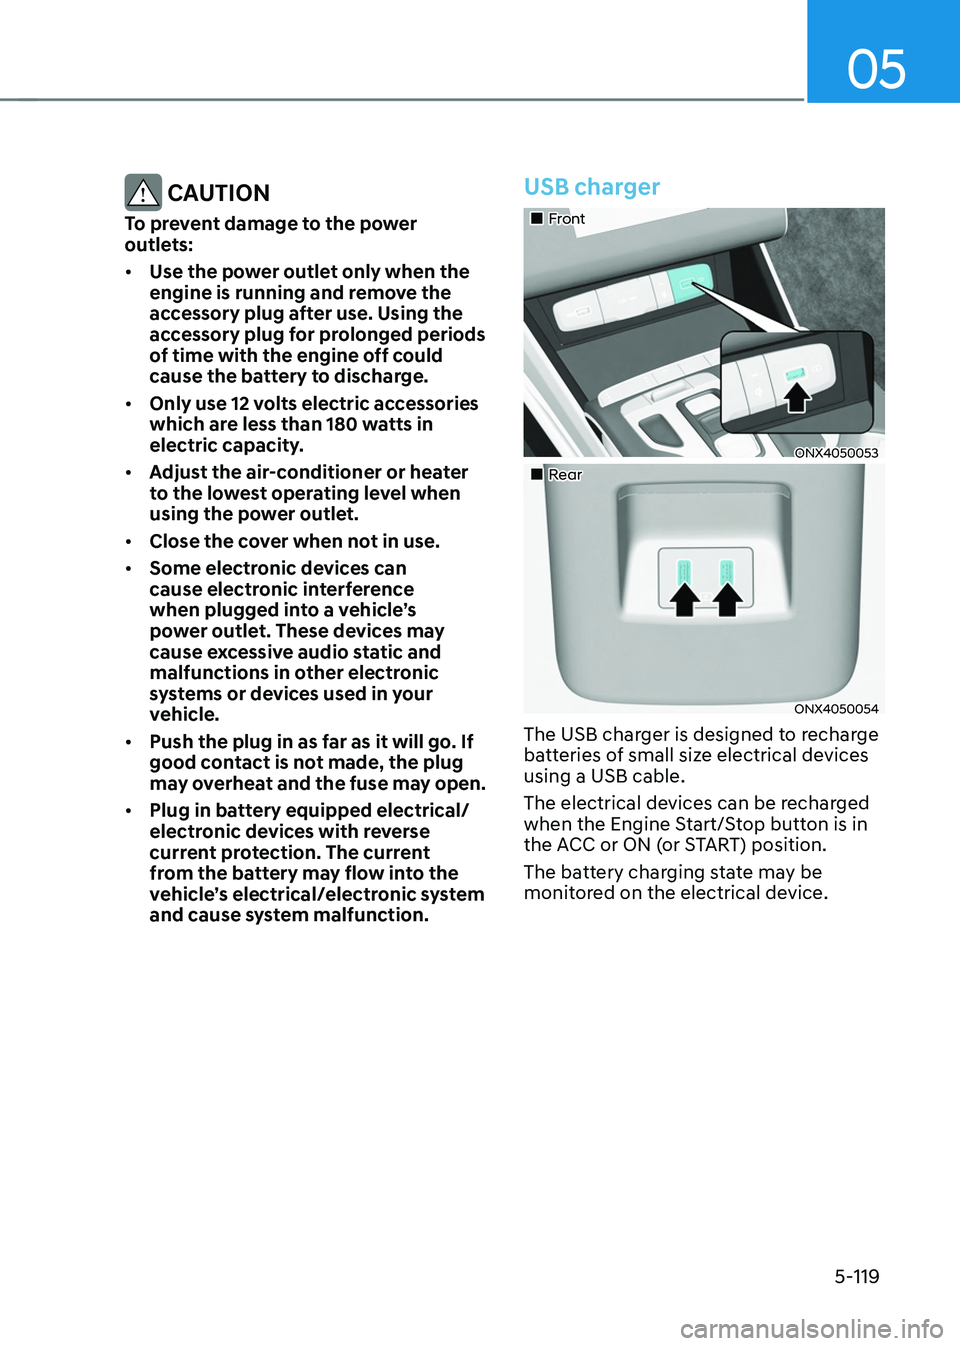
USB charger
„„Front
ONX4050053
„„Rear
ONX4050054
The USB charger is designed to recharge
batteries of small size electrical devices
using a USB cable.
The electrical devices can be recharged
when the Engine Start/Stop button is in
the ACC or ON (or START) position.
The battery charging state may be
monitored on the electrical device.