2021 HYUNDAI TUCSON HYBRID tow
[x] Cancel search: towPage 289 of 630
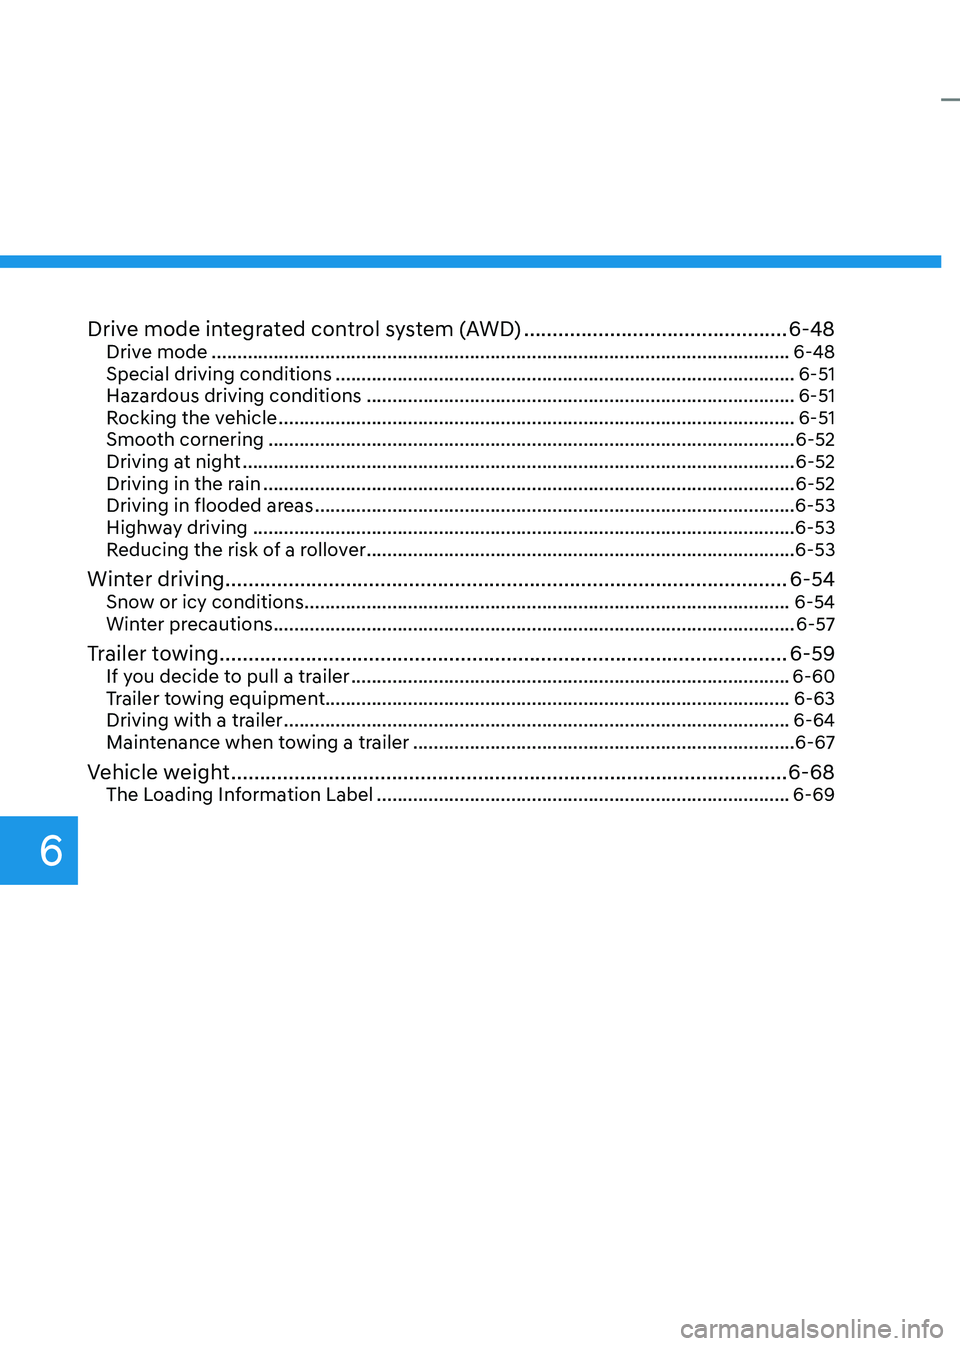
Drive mode integrated control system (AWD) ..............................................6-48Drive mode ........................................................................\
........................................ 6-48
Special driving conditions ........................................................................\
................. 6-51
Hazar
dous driving conditions
........................................................................\
........... 6-51
R
ocking the vehicle
........................................................................\
............................ 6-51
Smoo
th cornering
........................................................................\
.............................. 6-52
Driving a
t night
........................................................................\
................................... 6-52
Driving in the r
ain
........................................................................\
............................... 6-52
Driving in flooded ar
eas
........................................................................\
..................... 6-53
High
way driving
........................................................................\
................................. 6-53
R
educing the risk of a rollover
........................................................................\
........... 6-53
Winter driving ........................................................................\
.......................... 6-54Snow or icy conditions ........................................................................\
......................6-54
Wint er precautions ........................................................................\
............................. 6-57
Trailer towing ........................................................................\
...........................6-59If you decide to pull a trailer ........................................................................\
.............6-60
Tr ailer towing equipment........................................................................\
.................. 6-63
Driving with a trailer
........................................................................\
.......................... 6-64
Main
tenance when towing a trailer
........................................................................\
.. 6-67
Vehicle weight ........................................................................\
......................... 6-68The Loading Information Label ........................................................................\
........6-69
6
Page 293 of 630
Driving your vehicle
6-6
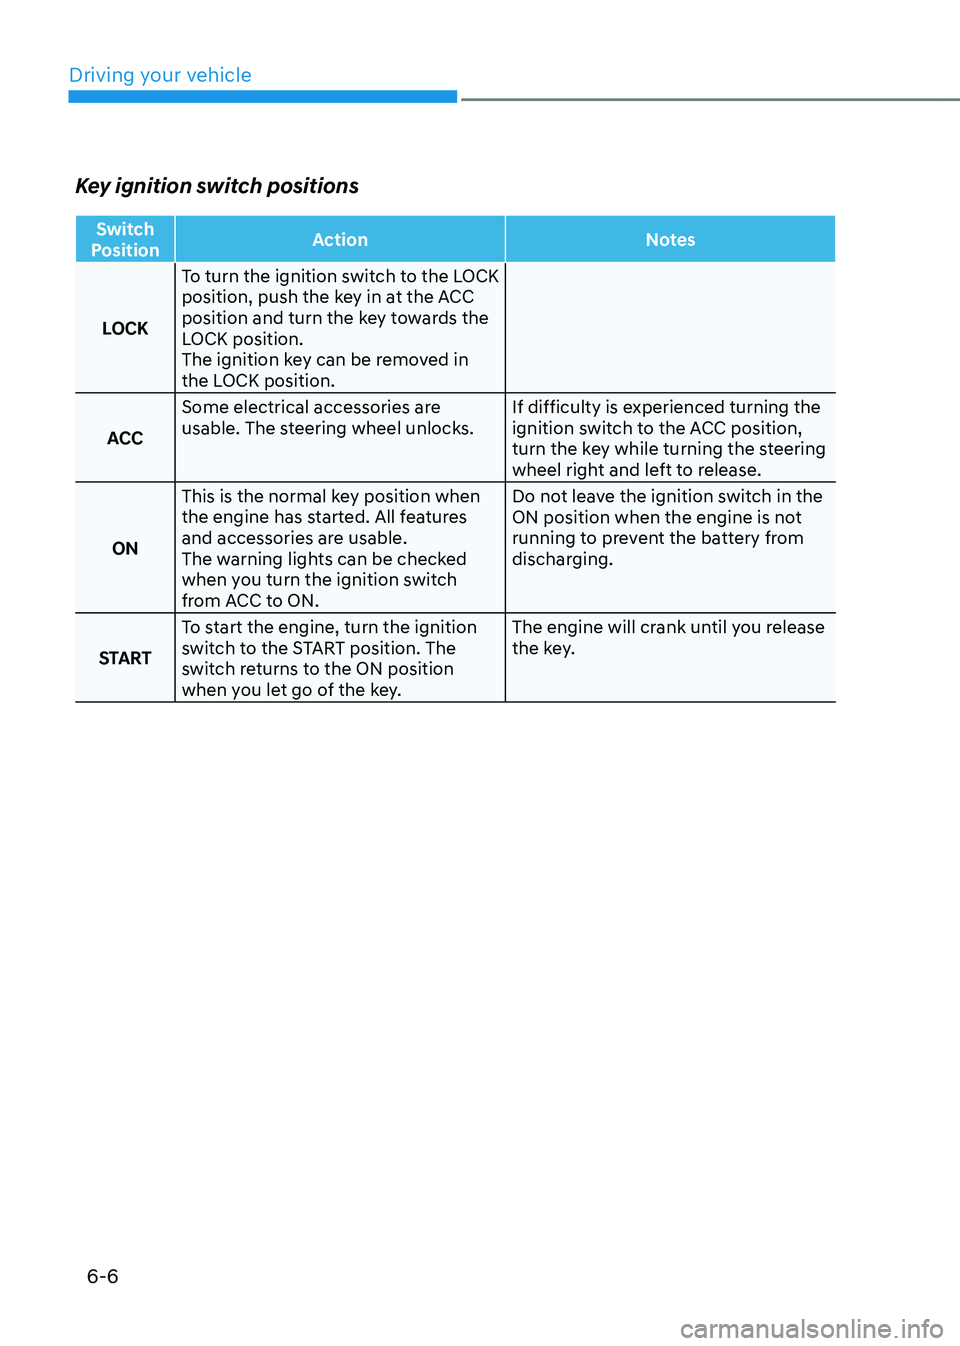
Key ignition switch positions
Switch
Position Action
Notes
LOCK To turn the ignition switch to the LOCK
position, push the key in at the ACC
position and turn the key towards the
LOCK position.
The ignition key can be removed in
the LOCK position.
ACC Some electrical accessories are
usable. The steering wheel unlocks.
If difficulty is experienced turning the
ignition switch to the ACC position,
turn the key while turning the steering
wheel right and left to release.
ON This is the normal key position when
the engine has started. All features
and accessories are usable.
The warning lights can be checked
when you turn the ignition switch
from ACC to ON. Do not leave the ignition switch in the
ON position when the engine is not
running to prevent the battery from
discharging.
START To start the engine, turn the ignition
switch to the START position. The
switch returns to the ON position
when you let go of the key. The engine will crank until you release
the key.
Page 294 of 630
06
6 -7
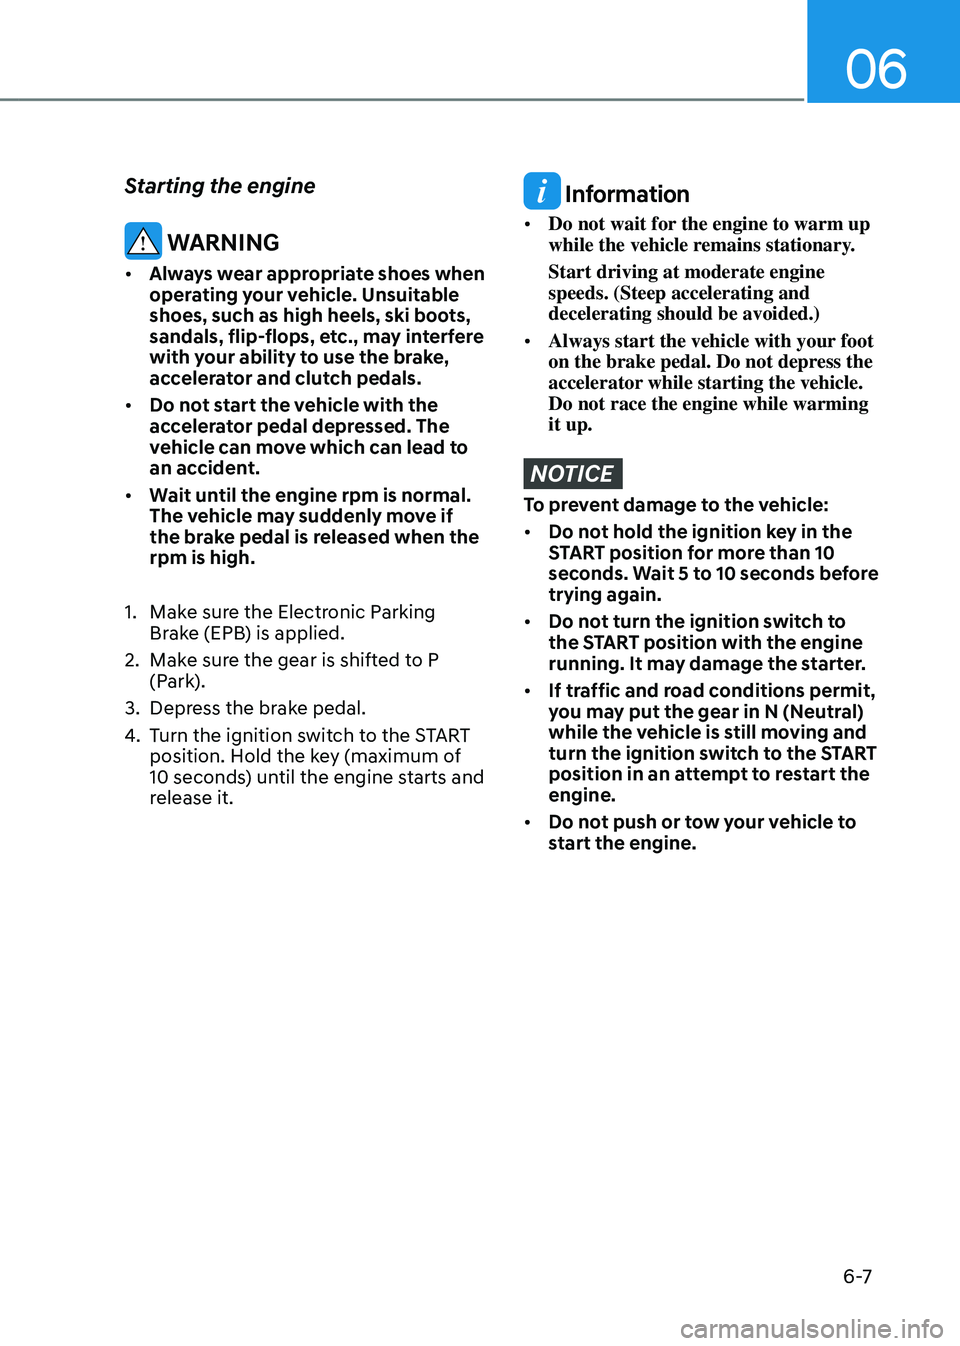
Starting the engine
WARNING
• Always wear appropriate shoes when
operating your vehicle. Unsuitable
shoes, such as high heels, ski boots,
sandals, flip-flops, etc., may interfere
with your ability to use the brake,
accelerator and clutch pedals.
• Do not start the vehicle with the
accelerator pedal depressed. The
vehicle can move which can lead to
an accident.
• Wait until the engine rpm is normal.
The vehicle may suddenly move if
the brake pedal is released when the
rpm is high.
1.
Make sur
e the Electronic Parking
Brake (EPB) is applied.
2.
Make sur
e the gear is shifted to P
(Park).
3.
Depress the br
ake pedal.
4.
Turn the ignition s
witch to the START
position. Hold the key (maximum of
10 seconds) until the engine starts and
release it.
Information
• Do not wait for the engine to warm up
while the vehicle remains stationary.
Start driving at moderate engine
speeds. (Steep accelerating and
decelerating should be avoided.)
• Always start the vehicle with your foot
on the brake pedal. Do not depress the
accelerator while starting the vehicle.
Do not race the engine while warming
it up.
NOTICE
To prevent damage to the vehicle:
• Do not hold the ignition key in the
START position for more than 10
seconds. Wait 5 to 10 seconds before
trying again.
• Do not turn the ignition switch to
the START position with the engine
running. It may damage the starter.
• If traffic and road conditions permit,
you may put the gear in N (Neutral)
while the vehicle is still moving and
turn the ignition switch to the START
position in an attempt to restart the
engine.
• Do not push or tow your vehicle to
start the engine.
Page 297 of 630
Driving your vehicle
6-10
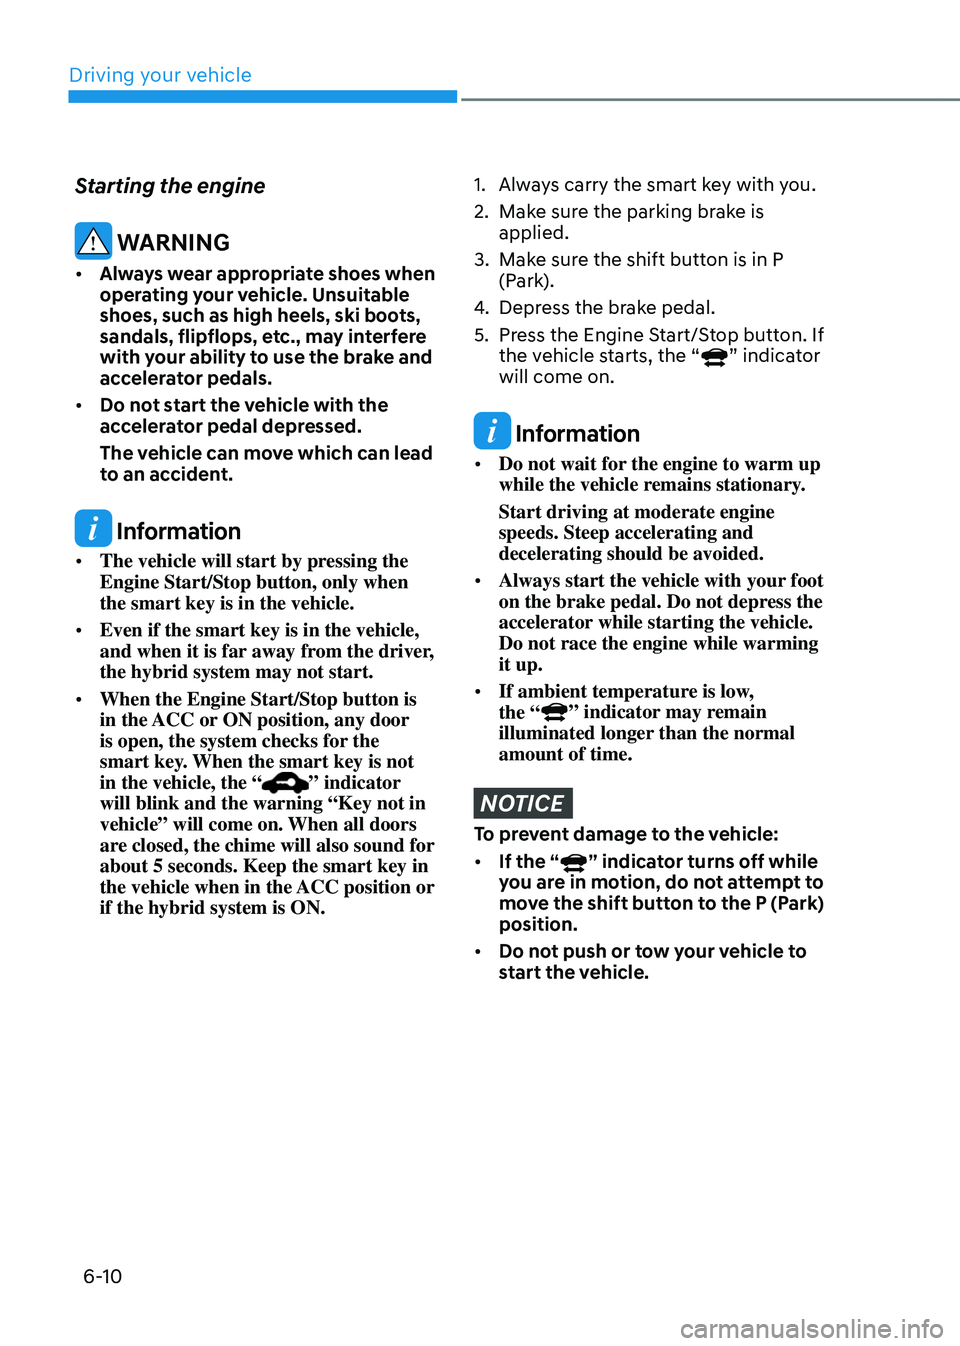
Starting the engine
WARNING
• Always wear appropriate shoes when
operating your vehicle. Unsuitable
shoes, such as high heels, ski boots,
sandals, flipflops, etc., may interfere
with your ability to use the brake and
accelerator pedals.
• Do not start the vehicle with the
accelerator pedal depressed.
The vehicle can move which can lead
to an accident.
Information
• The vehicle will start by pressing the
Engine Start/Stop button, only when
the smart key is in the vehicle.
• Even if the smart key is in the vehicle,
and when it is far away from the driver,
the hybrid system may not start.
• When the Engine Start/Stop button is
in the ACC or ON position, any door
is open, the system checks for the
smart key. When the smart key is not
in the vehicle, the “
” indicator
will blink and the warning “Key not in
vehicle” will come on. When all doors
are closed, the chime will also sound for
about 5 seconds. Keep the smart key in
the vehicle when in the ACC position or
if the hybrid system is ON.
1. Always carry the smart key with you.
2.
Make sur
e the parking brake is
applied.
3.
Make sur
e the shift button is in P
(Park).
4.
Depress the br
ake pedal.
5.
Press the E
ngine Start/Stop button. If
the vehicle starts, the “
” indicator
will come on.
Information
• Do not wait for the engine to warm up
while the vehicle remains stationary.
Start driving at moderate engine
speeds. Steep accelerating and
decelerating should be avoided.
• Always start the vehicle with your foot
on the brake pedal. Do not depress the
accelerator while starting the vehicle.
Do not race the engine while warming
it up.
• If ambient temperature is low,
the “
” indicator may remain
illuminated longer than the normal
amount of time.
NOTICE
To prevent damage to the vehicle:
• If the “
” indicator turns off while
you are in motion, do not attempt to
move the shift button to the P (Park)
position.
• Do not push or tow your vehicle to
start the vehicle.
Page 313 of 630
Driving your vehicle
6-26
Parking brake warning light
Check the Parking Brake
warning light by pressing the
Engine Stop/Start button to the
ON position (
indicator off).
This light will be illuminated when the
parking brake is applied with the Engine
Stop/Start button in the START or ON
position.
Before driving, be sure the parking brake
is released and the Brake Warning Light
is OFF.
If the Parking Brake Warning Light
remains on after the parking brake is
released while the vehicle is in the ready
(
) mode, there may be a malfunction
in the brake system. Immediate attention
is necessary.
If at all possible, cease driving the vehicle
immediately. If that is not possible,
use extreme caution while operating
the vehicle and only continue to drive
the vehicle until you can reach a safe
location.
Electronic Parking Brake (EPB)
Malfunction
If the Electronic Parking Brake (EPB) does
not release normally, DO NOT DRIVE THE
VEHICLE. Have your vehicle inspected at
an authorized HYUNDAI dealer.
It is recommended to have your vehicle
towed on a flatbed tow truck if the EPB
malfunction occurs.
Auto Hold
The Auto Hold maintains the vehicle in a
standstill even though the brake pedal is
not depressed after the driver brings the
vehicle to a complete stop by depressing
the brake pedal.
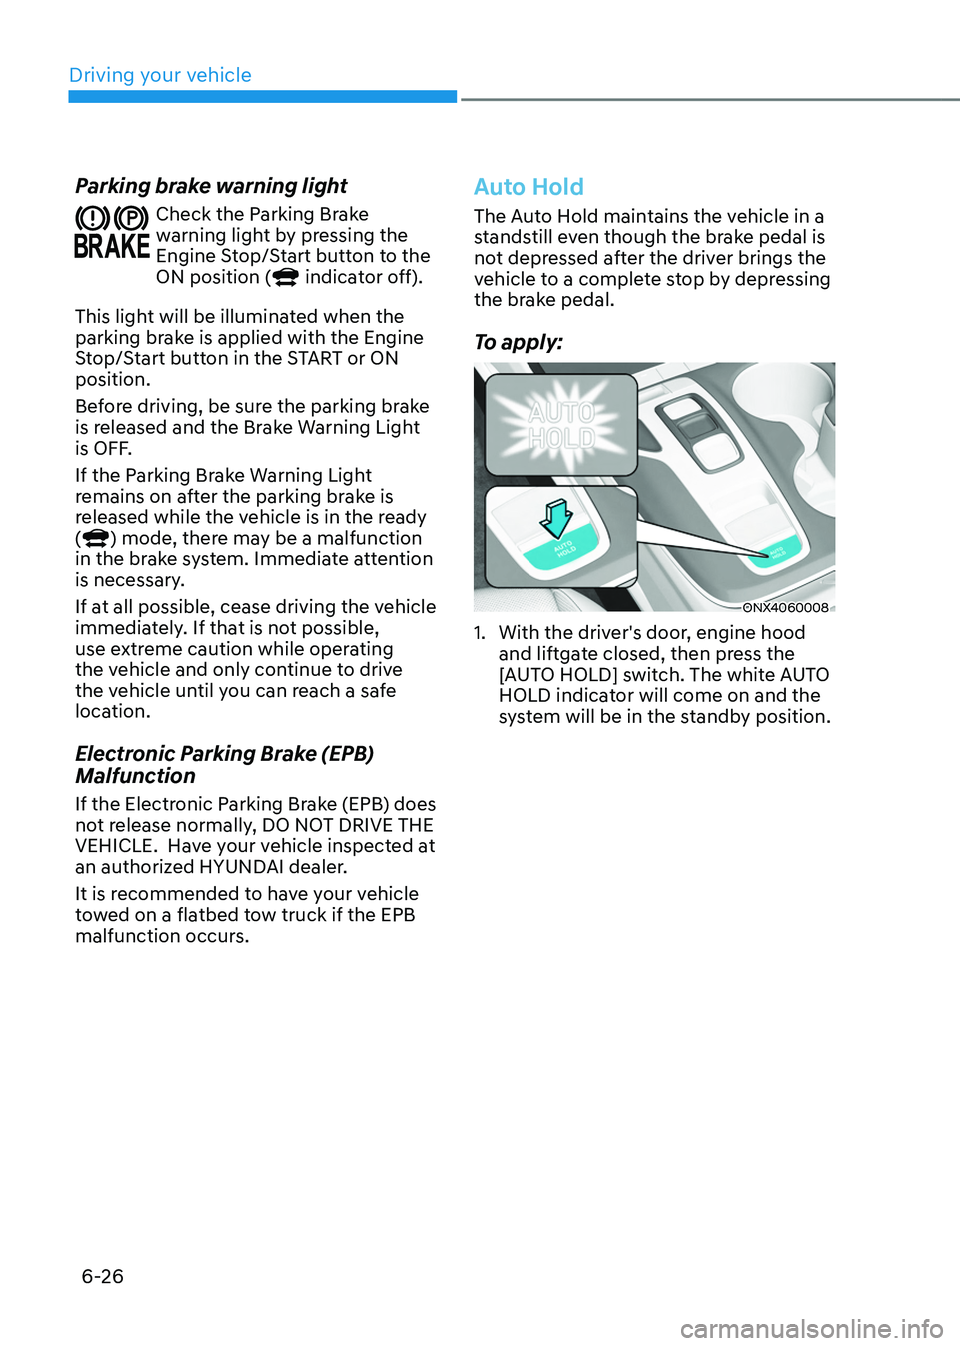
To apply:
ONX4060008
1. With the driver's door , engine hood
and liftgate closed, then press the
[AUTO HOLD] switch. The white AUTO
HOLD indicator will come on and the
system will be in the standby position.
Page 327 of 630
Driving your vehicle
6-40
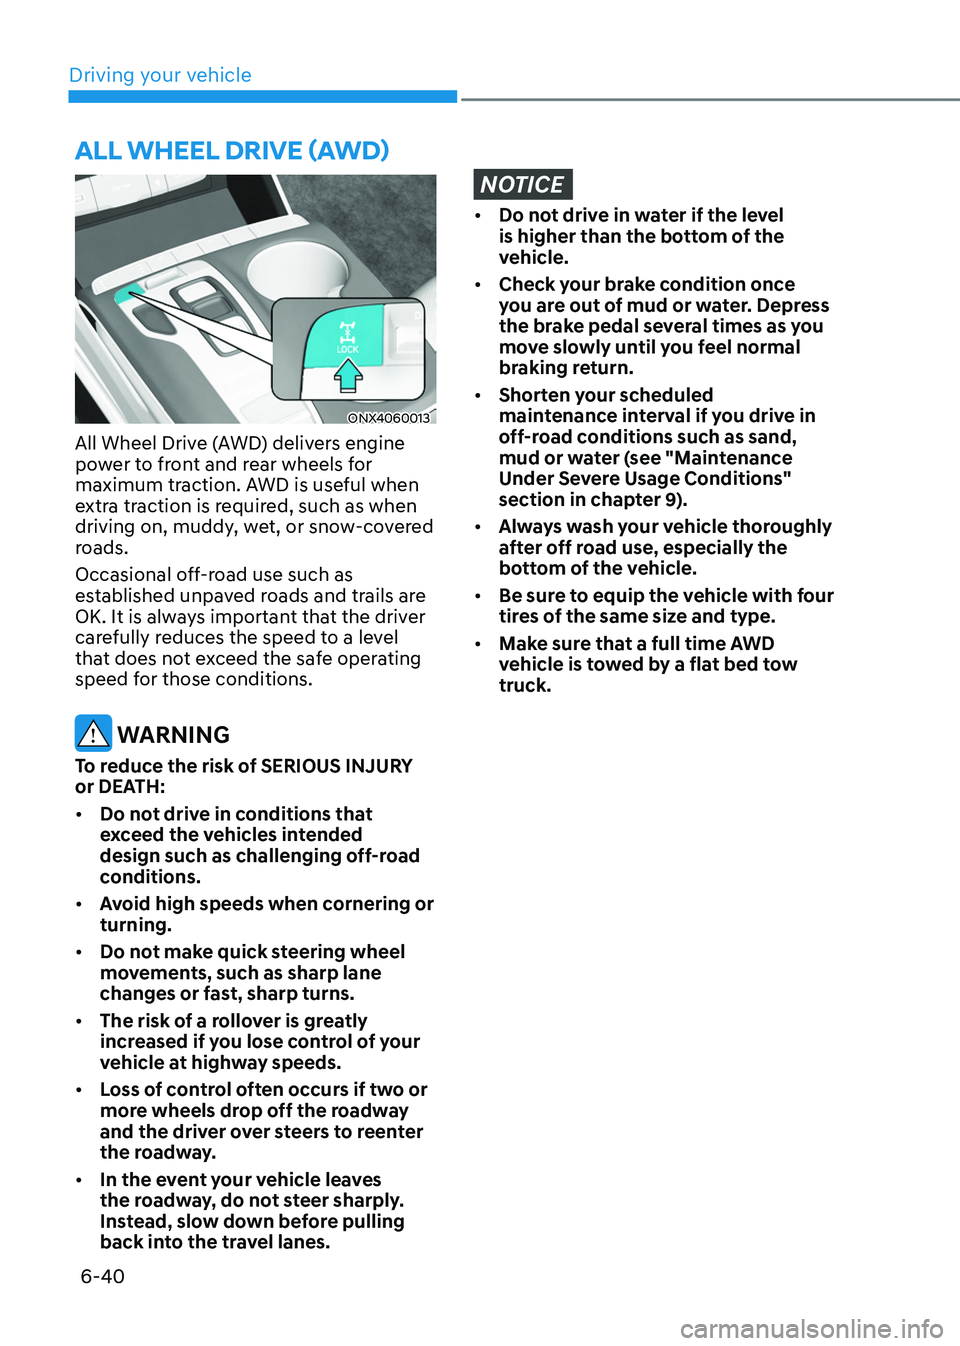
ONX4060013
All Wheel Drive (AWD) delivers engine
power to front and rear wheels for
maximum traction. AWD is useful when
extra traction is required, such as when
driving on, muddy, wet, or snow-covered
roads.
Occasional off-road use such as
established unpaved roads and trails are
OK. It is always important that the driver
carefully reduces the speed to a level
that does not exceed the safe operating
speed for those conditions.
WARNING
To reduce the risk of SERIOUS INJURY
or DEATH:
• Do not drive in conditions that
exceed the vehicles intended
design such as challenging off-road
conditions.
• Avoid high speeds when cornering or
turning.
• Do not make quick steering wheel
movements, such as sharp lane
changes or fast, sharp turns.
• The risk of a rollover is greatly
increased if you lose control of your
vehicle at highway speeds.
• Loss of control often occurs if two or
more wheels drop off the roadway
and the driver over steers to reenter
the roadway.
• In the event your vehicle leaves
the roadway, do not steer sharply.
Instead, slow down before pulling
back into the travel lanes.
NOTICE
• Do not drive in water if the level
is higher than the bottom of the
vehicle.
• Check your brake condition once
you are out of mud or water. Depress
the brake pedal several times as you
move slowly until you feel normal
braking return.
• Shorten your scheduled
maintenance interval if you drive in
off-road conditions such as sand,
mud or water (see "Maintenance
Under Severe Usage Conditions"
section in chapter 9).
• Always wash your vehicle thoroughly
after off road use, especially the
bottom of the vehicle.
• Be sure to equip the vehicle with four
tires of the same size and type.
• Make sure that a full time AWD
vehicle is towed by a flat bed tow
truck.
aLL WHeeL dRiVe (aWd)
Page 333 of 630
Driving your vehicle
6-46
Towing
AWD vehicles must be towed with
a wheel lift and dollies or flatbed
equipment with all the wheels off the
ground. For more details, refer to
"Towing" section in chapter 8.
Vehicle inspection
• If the vehicle needs to be operated on
a vehicle lift do not attempt to stop
any of the four wheels from turning.
This could damage the AWD system.
• Never engage the parking brake while
running the engine on a car lift. This
may damage the AWD system.
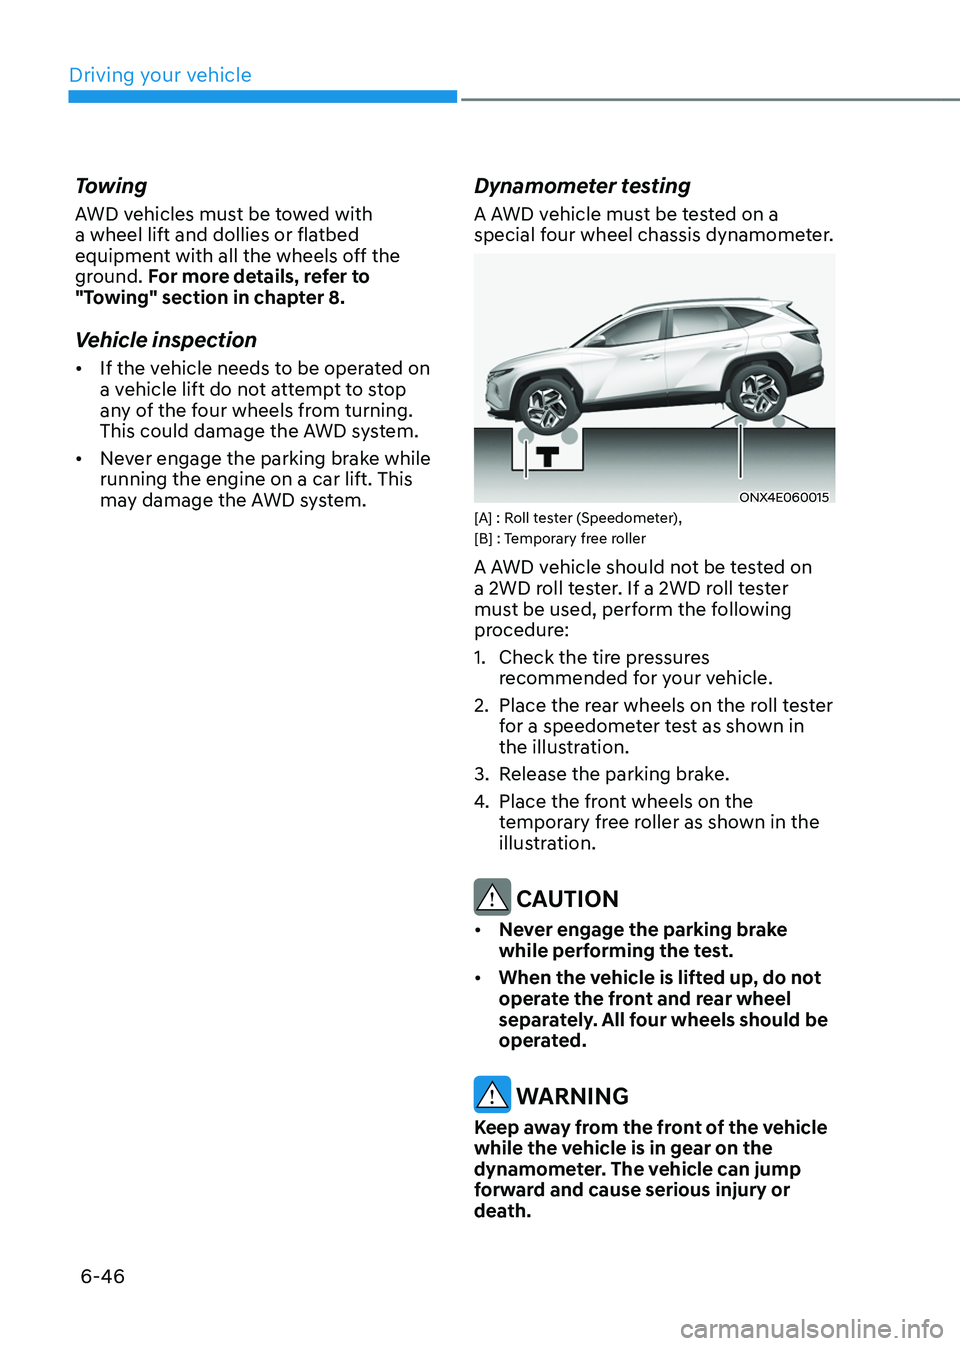
Dynamometer testing
A AWD vehicle must be tested on a
special four wheel chassis dynamometer.
ONX4E060015[A] : Roll tester (Speedometer),
[B] : Temporary free roller
A AWD vehicle should not be tested on
a 2WD roll tester. If a 2WD roll tester
must be used, perform the following
procedure:
1.
Check the tire pr
essures
recommended for your vehicle.
2.
Place the rear wheels on the r
oll tester
for a speedometer test as shown in
the illustration.
3.
Release the parking br
ake.
4.
Place the fron
t wheels on the
temporary free roller as shown in the
illustration.
CAUTION
• Never engage the parking brake
while performing the test.
• When the vehicle is lifted up, do not
operate the front and rear wheel
separately. All four wheels should be
operated.
WARNING
Keep away from the front of the vehicle
while the vehicle is in gear on the
dynamometer. The vehicle can jump
forward and cause serious injury or
death.
Page 339 of 630
Driving your vehicle
6-52
Information
The ESC system must be turned OFF
before rocking the vehicle.
NOTICE
If you are still stuck after rocking the
vehicle a few times, have the vehicle
pulled out by a tow vehicle to avoid
engine overheating, possible damage to
the transmission, and tire damage. See
“Towing” section in chapter 8.
Smooth cornering
Avoid braking or gear changing in
corners, especially when roads are wet.
Ideally, corners should always be taken
under gentle acceleration.
Driving at night
Night driving presents more hazards than
driving in the daylight. Here are some
important tips to remember:
• Slow down and keep more distance
between you and other vehicles, as it
may be more difficult to see at night,
especially in areas where there may
not be any street lights.
• Adjust your mirrors to reduce the glare
from other drivers’ headlamps.
• Keep your headlamps clean and
properly aimed. Dirty or improperly
aimed headlamps will make it much
more difficult to see at night.
• Avoid staring directly at the
headlamps of oncoming vehicles. You
could be temporarily blinded, and it
will take several seconds for your eyes
to readjust to the darkness.
Driving in the rain
Rain and wet roads can make driving
dangerous. Here are a few things to
consider when driving in the rain or on
slick pavement:
• Slow down and allow extra following
distance. A heavy rainfall makes
it harder to see and increases the
distance needed to stop your vehicle.
• Turn OFF your Cruise Control. (if
equipped)
• Replace your windshield wiper blades
when they show signs of streaking or
missing areas on the windshield.
• Be sure your tires have enough tread.
If your tires do not have enough tread,
making a quick stop on wet pavement
can cause a skid and possibly lead to
an accident. See “Tire Tread” section
in chapter 9.
• Turn on your headlamps to make it
easier for others to see you.
• Driving too fast through large puddles
can affect your brakes. If you must go
through puddles, try to drive through
them slowly.
• If you believe your brakes may be wet,
apply them lightly while driving until
normal braking operation returns.
Hydroplaning
If the road is wet enough and you are
going fast enough, your vehicle may
have little or no contact with the road
surface and actually ride on the water.
The best advice is SLOW DOWN when
the road is wet.
The risk of hydroplaning increases as
the depth of tire tread decreases, refer
to “Tire Tread” section in chapter 9.