Page 213 of 630
Convenient features
5-56
Adjusting the side view mirrors
ONX4050010
1. Move the lever (1) either to the L (left
side) or R (right side) to select the side
view mirror you would like to adjust.
2.
Use the mirr
or adjustment control (2)
to position the selected mirror up,
down, left or right.
3.
Aft
er adjustment, move the lever (1)
to the middle to prevent inadvertent
adjustment.
Folding the side view mirror
ONX4E050009
To fold the side view mirror, grasp the
housing of the mirror and then fold it
toward the rear of the vehicle.
Page 239 of 630
Convenient features
5-82
ODN8A059202
Position lamp position ()
The position lamp, license plate lamp
and instrument panel lamp are turned
ON.
ODN8A059203
Headlamp position ()
The headlamp, position lamp, license
plate lamp and instrument panel lamp
are turned ON.
Information
The ignition switch must be in the ON
position to turn on the headlamp.
High beam operation
ODN8A059205
To turn on the high beam headlamp,
push the lever away from you. The lever
will return to its original position.
The high beam indicator will light when
the headlamp high beams are switched
on.
To turn off the high beam headlamp, pull
the lever towards you. The low beams
will turn on.
ODN8A059204
To flash the high beam headlamp, pull
the lever towards you, then release the
lever. The high beams will remain ON as
long as you hold the lever towards you.
Page 243 of 630
Convenient features
5-86
System operation
Display and control
• After selecting ‘High Beam Assist’
in the Settings menu, High Beam
Assist will operate by following the
procedure below.
- Place the headlamp swit
ch in
the AUTO position and push
the headlamp lever towards the
instrument cluster. The High Beam
Assist (
) indicator light will
illuminate on the cluster and the
system will be enabled.
- When the sy
stem is enabled, high
beam will turn on when vehicle
speed is above 25 mph (40 km/h).
When vehicle speed is below 15
mph (25 km/h), high beam will not
turn on.
- The High Beam () indicator light
will illuminate on the cluster when
high beam is on.
• When High Beam Assist is operating, if
the headlamp lever or switch is used,
the system operates as follow:
- If the headlamp lev
er is pulled
towards you when the high beam
is off, the high beam will turn on
without High Beam Assist canceled.
When you let go of the headlamp
lever, the lever will move to the
middle and the high beam will turn
off.
- If the headlamp lev
er is pulled
towards you when the high beam is
on by High Beam Assist, low beam
will be on and the system will turn
off.
- If the headlamp swit
ch is placed
from AUTO to another position
(headlamp/position/off), High
Beam Assist will turn off and the
corresponding lamp will turn on. •
When High Beam Assist is operating,
high beam switches to low beam if
any of the following conditions occur:
- When the headlamp of an
oncoming v
ehicle is detected.
- When the tail lamp of a v
ehicle in
front is detected.
- When the headlamp or tail lamp of a mo
torcycle or a bicycle is detected.
- When the surrounding ambien
t light
is bright enough that high beams
are not required.
- When str
eetlights or other lights are
detected.
System malfunction and
limitations
System malfunction
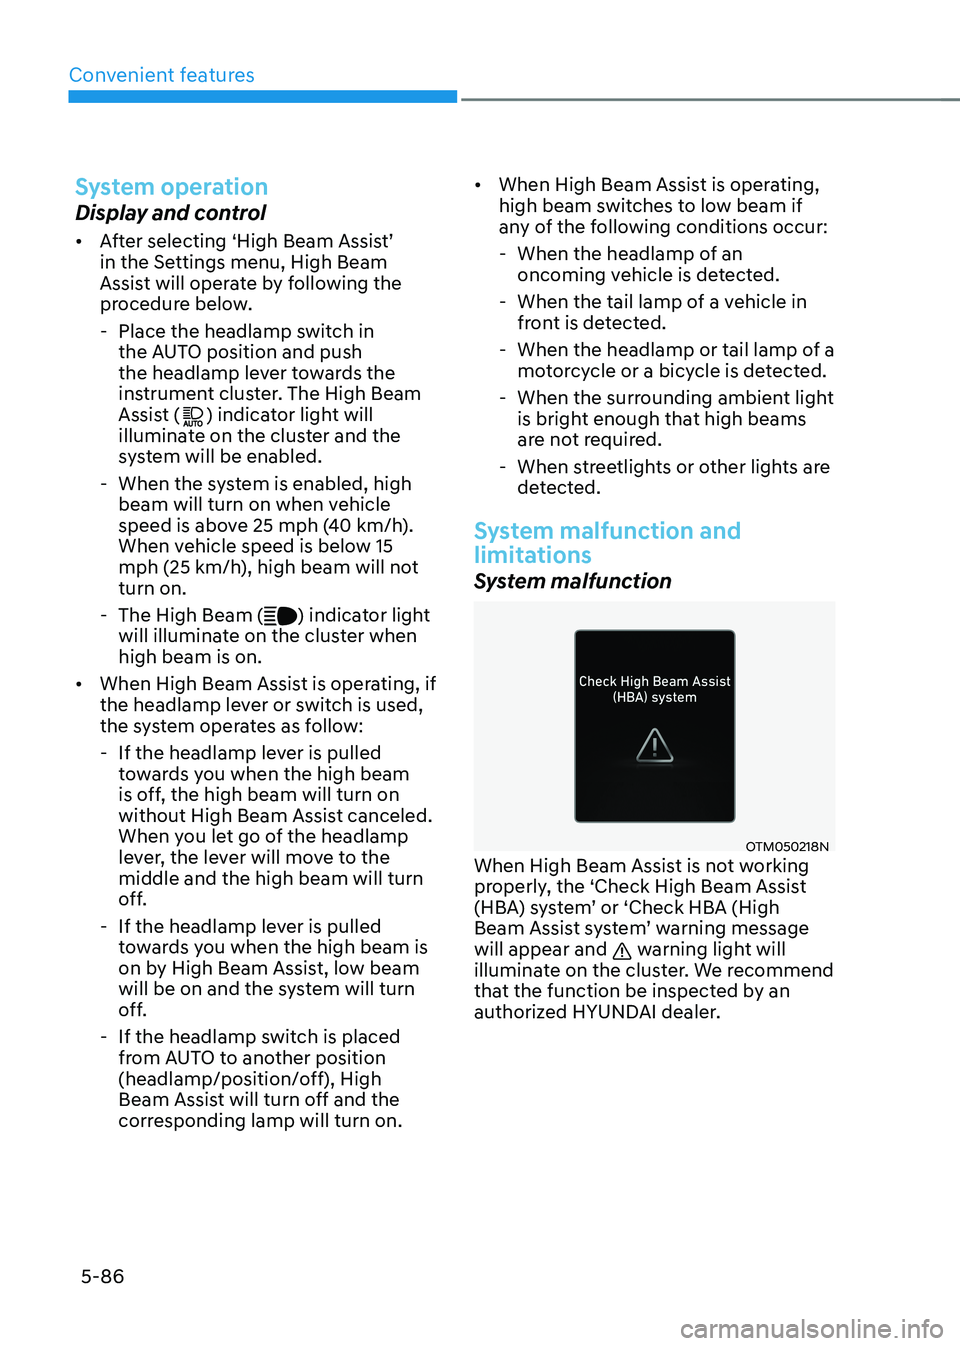
OTM050218NWhen High Beam Assist is not working
properly, the ‘Check High Beam Assist
(HBA) system’ or ‘Check HBA (High
Beam Assist system’ warning message
will appear and
warning light will
illuminate on the cluster. We recommend
that the function be inspected by an
authorized HYUNDAI dealer.
Page 244 of 630
05
5-87
Limitations of the system
High Beam Assist may not work properly
in the following situations:
• Light from a vehicle is not detected
because of lamp damage, or because
it is hidden from sight, etc.
• Headlamp of a vehicle is covered with
dust, snow or water.
• A vehicle’s headlamps are off but the
fog lamps are on and etc.
• There is a lamp that has a similar
shape as a vehicle’s lamp.
• Headlamps have been damaged or
not repaired properly.
• Headlamps are not aimed properly.
• Driving on a narrow curved road,
rough road, uphill or downhill.
• Vehicle in front is partially visible on a
crossroad or curved road.
• There is a traffic light, reflecting sign,
flashing sign or mirror ahead.
• There is a temporary reflector or flash
ahead (construction area).
• The road conditions are bad such as
being wet, iced or covered with snow.
• A vehicle suddenly appears from a
curve.
• The vehicle is tilted from a flat tire or
is being towed.
• Light from a vehicle is not detected
because of exhaust fume, smoke, fog,
snow, etc.
For more details on the limitations
of the front view camera, refer to
“Forward Collision-Avoidance Assist
(FCA)” section in chapter 7. WARNING
• At times, High Beam Assist may not
work properly. It is the responsibility
of the driver for safe driving
practices and always check the road
conditions for your safety.
• When High Beam Assist does
not operate normally, change
the headlamp position manually
between high beam and low beam.
Page 251 of 630
Convenient features
5-94
Front windshield washers
ONX4050044
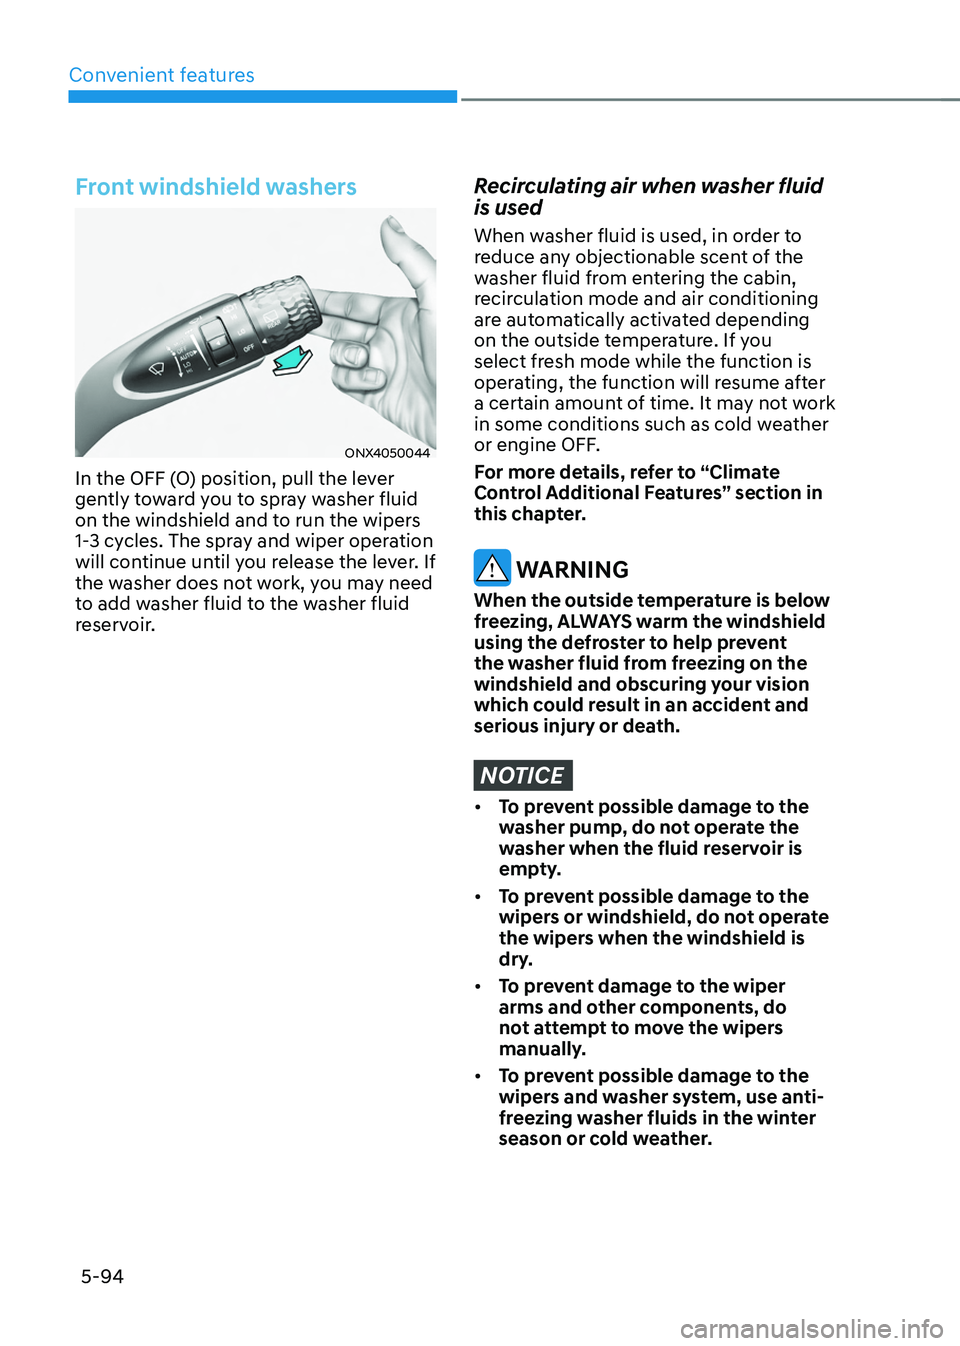
In the OFF (O) position, pull the lever
gently toward you to spray washer fluid
on the windshield and to run the wipers
1-3 cycles. The spray and wiper operation
will continue until you release the lever. If
the washer does not work, you may need
to add washer fluid to the washer fluid
reservoir.
Recirculating air when washer fluid
is used
When washer fluid is used, in order to
reduce any objectionable scent of the
washer fluid from entering the cabin,
recirculation mode and air conditioning
are automatically activated depending
on the outside temperature. If you
select fresh mode while the function is
operating, the function will resume after
a certain amount of time. It may not work
in some conditions such as cold weather
or engine OFF.
For more details, refer to “Climate
Control Additional Features” section in
this chapter.
WARNING
When the outside temperature is below
freezing, ALWAYS warm the windshield
using the defroster to help prevent
the washer fluid from freezing on the
windshield and obscuring your vision
which could result in an accident and
serious injury or death.
NOTICE
• To prevent possible damage to the
washer pump, do not operate the
washer when the fluid reservoir is
empty.
• To prevent possible damage to the
wipers or windshield, do not operate
the wipers when the windshield is
dry.
• To prevent damage to the wiper
arms and other components, do
not attempt to move the wipers
manually.
• To prevent possible damage to the
wipers and washer system, use anti-
freezing washer fluids in the winter
season or cold weather.
Page 257 of 630
Convenient features
5-100
ONX4050117
The mode selection button controls
the direction of the air flow through the
ventilation system.
The air flow outlet direction is cycled as
follows:
Face-Level (B, C, E)
Air flow is directed toward the upper
body and face. Additionally, each outlet
can be controlled to direct the air
discharged from the outlet.
Bi-Level (B, C, D, E, F)
Air flow is directed towards the face and
the floor.
Floor-Level (A, B, D, E, F)
Most of the air flow is directed to the
floor, with a small amount of the air
being directed to the windshield and side
window defrosters.
Floor/Defrost-Level
(A, B, D, E, F)
Most of the air flow is directed to the
floor and the windshield with a small
amount directed to the side window
defrosters.
Multi air mode (B, C, D, E, F, G)
Gentle breezes come out the outlet
vents.
Defrost-Level (A, B)
Most of the air flow is directed to the
windshield with a small amount of air
directed to the side window defrosters.
Page 275 of 630
Convenient features
5-118
Sunvisor
OTM048089
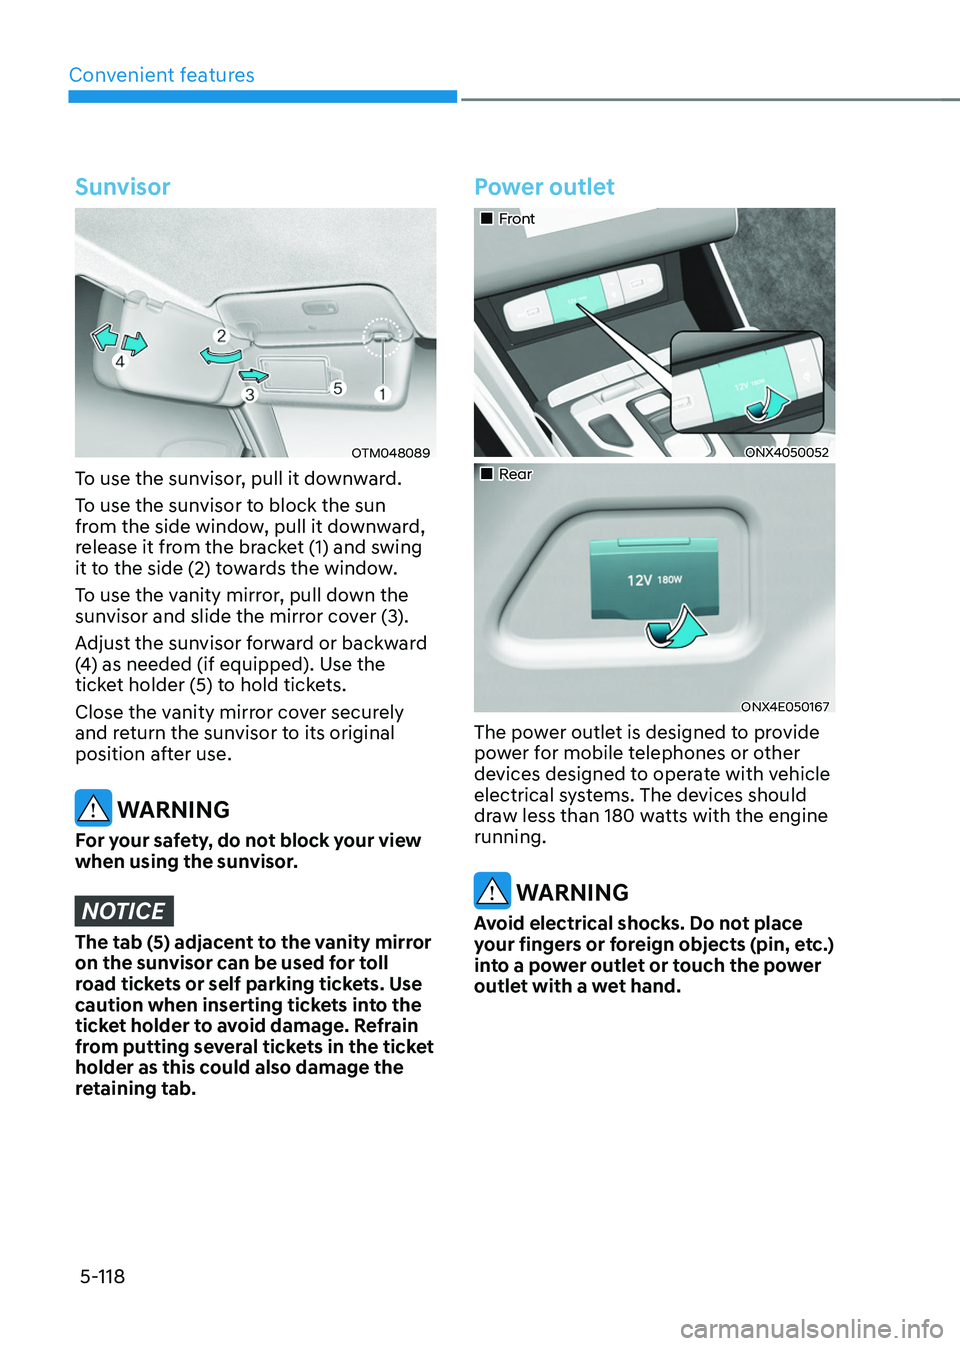
To use the sunvisor, pull it downward.
To use the sunvisor to block the sun
from the side window, pull it downward,
release it from the bracket (1) and swing
it to the side (2) towards the window.
To use the vanity mirror, pull down the
sunvisor and slide the mirror cover (3).
Adjust the sunvisor forward or backward
(4) as needed (if equipped). Use the
ticket holder (5) to hold tickets.
Close the vanity mirror cover securely
and return the sunvisor to its original
position after use.
WARNING
For your safety, do not block your view
when using the sunvisor.
NOTICE
The tab (5) adjacent to the vanity mirror
on the sunvisor can be used for toll
road tickets or self parking tickets. Use
caution when inserting tickets into the
ticket holder to avoid damage. Refrain
from putting several tickets in the ticket
holder as this could also damage the
retaining tab.
Power outlet
„„Front
ONX4050052
„„Rear
ONX4E050167
The power outlet is designed to provide
power for mobile telephones or other
devices designed to operate with vehicle
electrical systems. The devices should
draw less than 180 watts with the engine
running.
WARNING
Avoid electrical shocks. Do not place
your fingers or foreign objects (pin, etc.)
into a power outlet or touch the power
outlet with a wet hand.
Page 282 of 630
05
5-125
Cargo security screen (if
equipped)
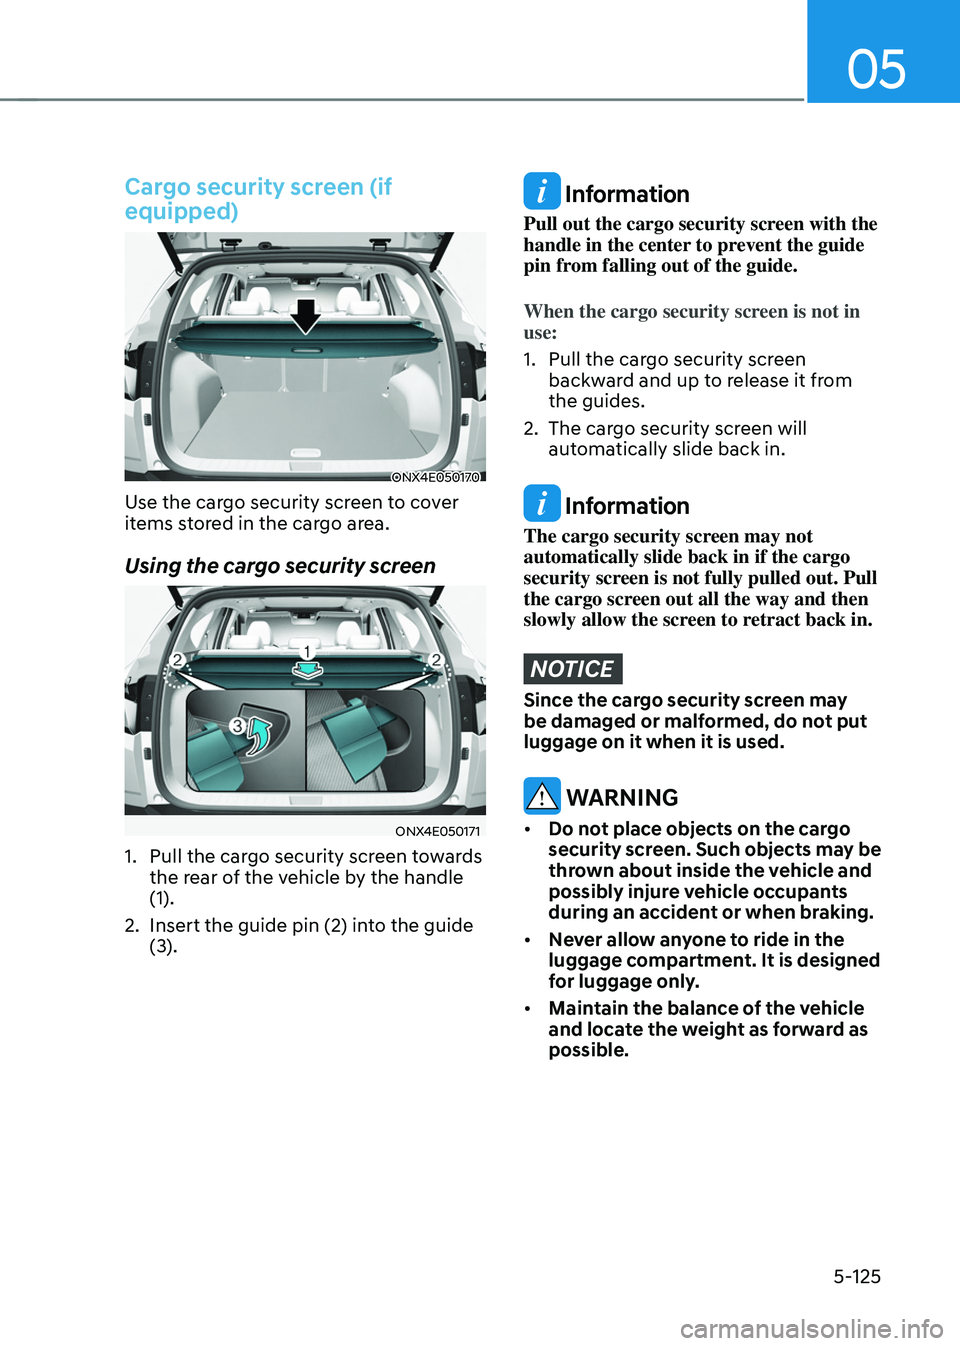
ONX4E050170
Use the cargo security screen to cover
items stored in the cargo area.
Using the cargo security screen
ONX4E050171
1. Pull the cargo security screen towards
the rear of the vehicle by the handle
(1).
2.
Insert the guide pin (2) int
o the guide
(3).
Information
Pull out the cargo security screen with the
handle in the center to prevent the guide
pin from falling out of the guide.
When the cargo security screen is not in
use:
1.
Pull the cargo security scr
een
backward and up to release it from
the guides.
2.
The cargo security scr
een will
automatically slide back in.
Information
The cargo security screen may not
automatically slide back in if the cargo
security screen is not fully pulled out. Pull
the cargo screen out all the way and then
slowly allow the screen to retract back in.
NOTICE
Since the cargo security screen may
be damaged or malformed, do not put
luggage on it when it is used.
WARNING
• Do not place objects on the cargo
security screen. Such objects may be
thrown about inside the vehicle and
possibly injure vehicle occupants
during an accident or when braking.
• Never allow anyone to ride in the
luggage compartment. It is designed
for luggage only.
• Maintain the balance of the vehicle
and locate the weight as forward as
possible.