2021 HYUNDAI TUCSON HYBRID engine oil
[x] Cancel search: engine oilPage 568 of 630
09
9-21
washEr fluid
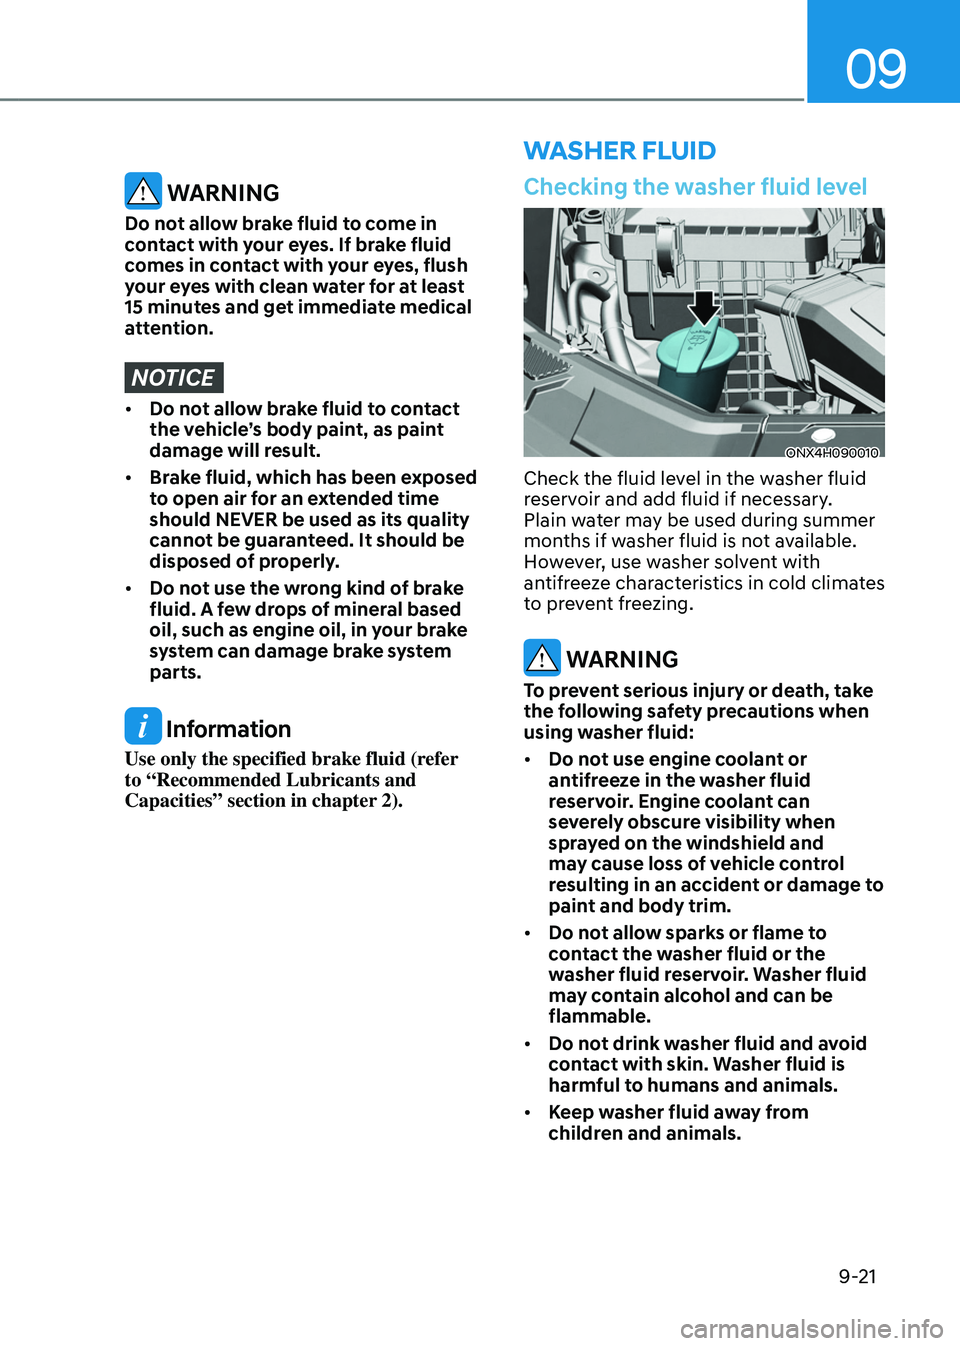
Checking the washer fluid level
ONX4H090010
Check the fluid level in the washer fluid
reservoir and add fluid if necessary.
Plain water may be used during summer
months if washer fluid is not available.
However, use washer solvent with
antifreeze characteristics in cold climates
to prevent freezing.
WARNING
To prevent serious injury or death, take
the following safety precautions when
using washer fluid:
• Do not use engine coolant or
antifreeze in the washer fluid
reservoir. Engine coolant can
severely obscure visibility when
sprayed on the windshield and
may cause loss of vehicle control
resulting in an accident or damage to
paint and body trim.
• Do not allow sparks or flame to
contact the washer fluid or the
washer fluid reservoir. Washer fluid
may contain alcohol and can be
flammable.
• Do not drink washer fluid and avoid
contact with skin. Washer fluid is
harmful to humans and animals.
• Keep washer fluid away from
children and animals.
WARNING
Do not allow brake fluid to come in
contact with your eyes. If brake fluid
comes in contact with your eyes, flush
your eyes with clean water for at least
15 minutes and get immediate medical
attention.
NOTICE
• Do not allow brake fluid to contact
the vehicle’s body paint, as paint
damage will result.
• Brake fluid, which has been exposed
to open air for an extended time
should NEVER be used as its quality
cannot be guaranteed. It should be
disposed of properly.
• Do not use the wrong kind of brake
fluid. A few drops of mineral based
oil, such as engine oil, in your brake
system can damage brake system
parts.
Information
Use only the specified brake fluid (refer
to “Recommended Lubricants and
Capacities” section in chapter 2).
Page 569 of 630
Maintenance
9-22
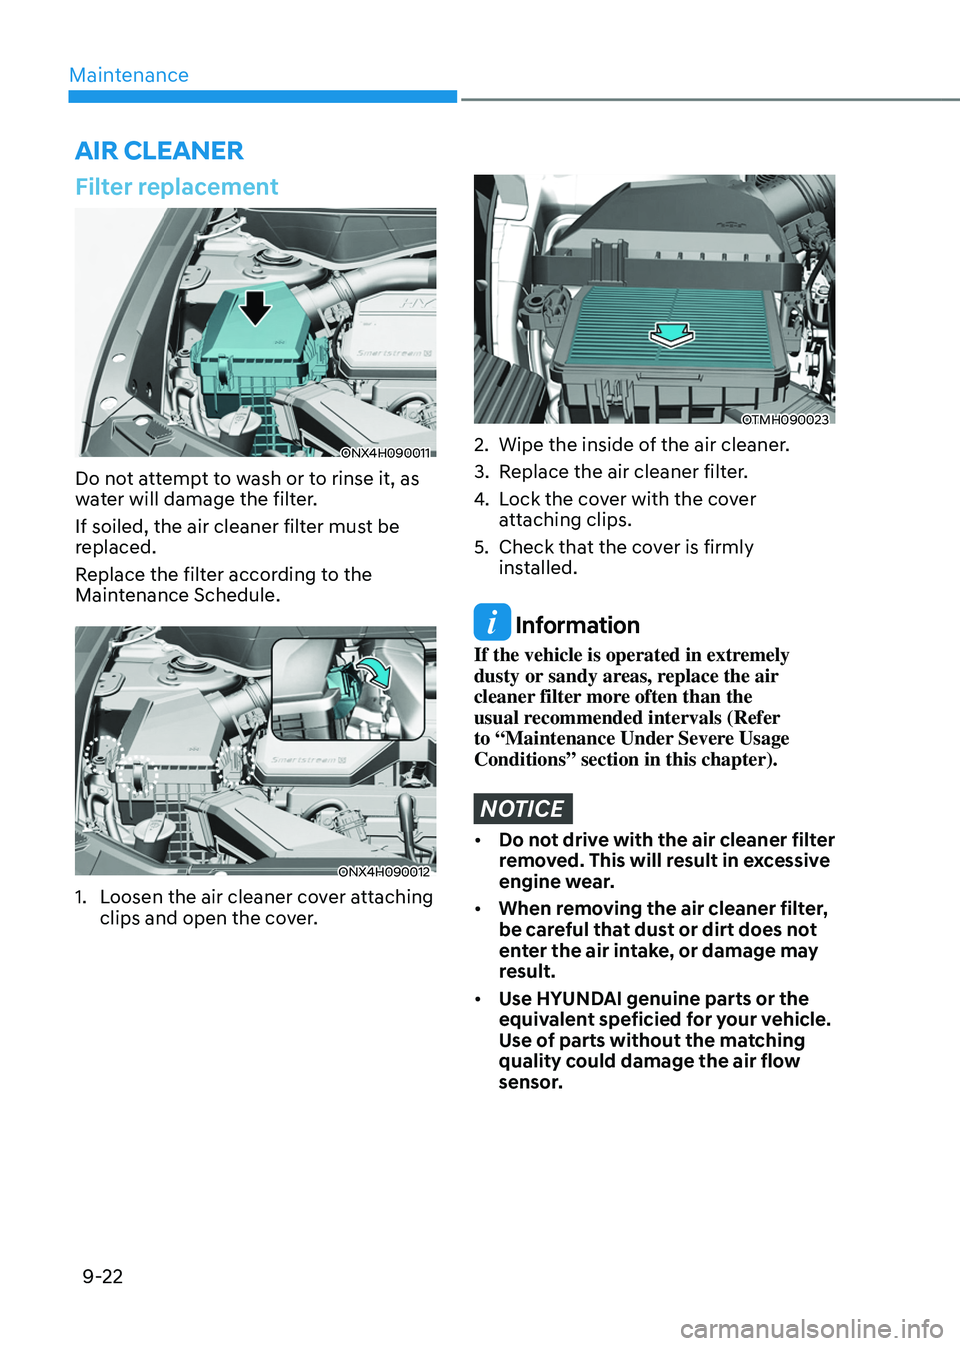
Filter replacement
ONX4H090011
Do not attempt to wash or to rinse it, as
water will damage the filter.
If soiled, the air cleaner filter must be
replaced.
Replace the filter according to the
Maintenance Schedule.
ONX4H090012
1. Loosen the air cleaner cover attaching
clips and open the cover.
OTMH090023
2. Wipe the inside of the air cleaner .
3.
Replace the air cleaner filt
er.
4.
Lock the co
ver with the cover
attaching clips.
5.
Check that the co
ver is firmly
installed.
Information
If the vehicle is operated in extremely
dusty or sandy areas, replace the air
cleaner filter more often than the
usual recommended intervals (Refer
to “Maintenance Under Severe Usage
Conditions” section in this chapter).
NOTICE
• Do not drive with the air cleaner filter
removed. This will result in excessive
engine wear.
• When removing the air cleaner filter,
be careful that dust or dirt does not
enter the air intake, or damage may
result.
• Use HYUNDAI genuine parts or the
equivalent speficied for your vehicle.
Use of parts without the matching
quality could damage the air flow
sensor.
air clEanEr
Page 576 of 630
09
9-29
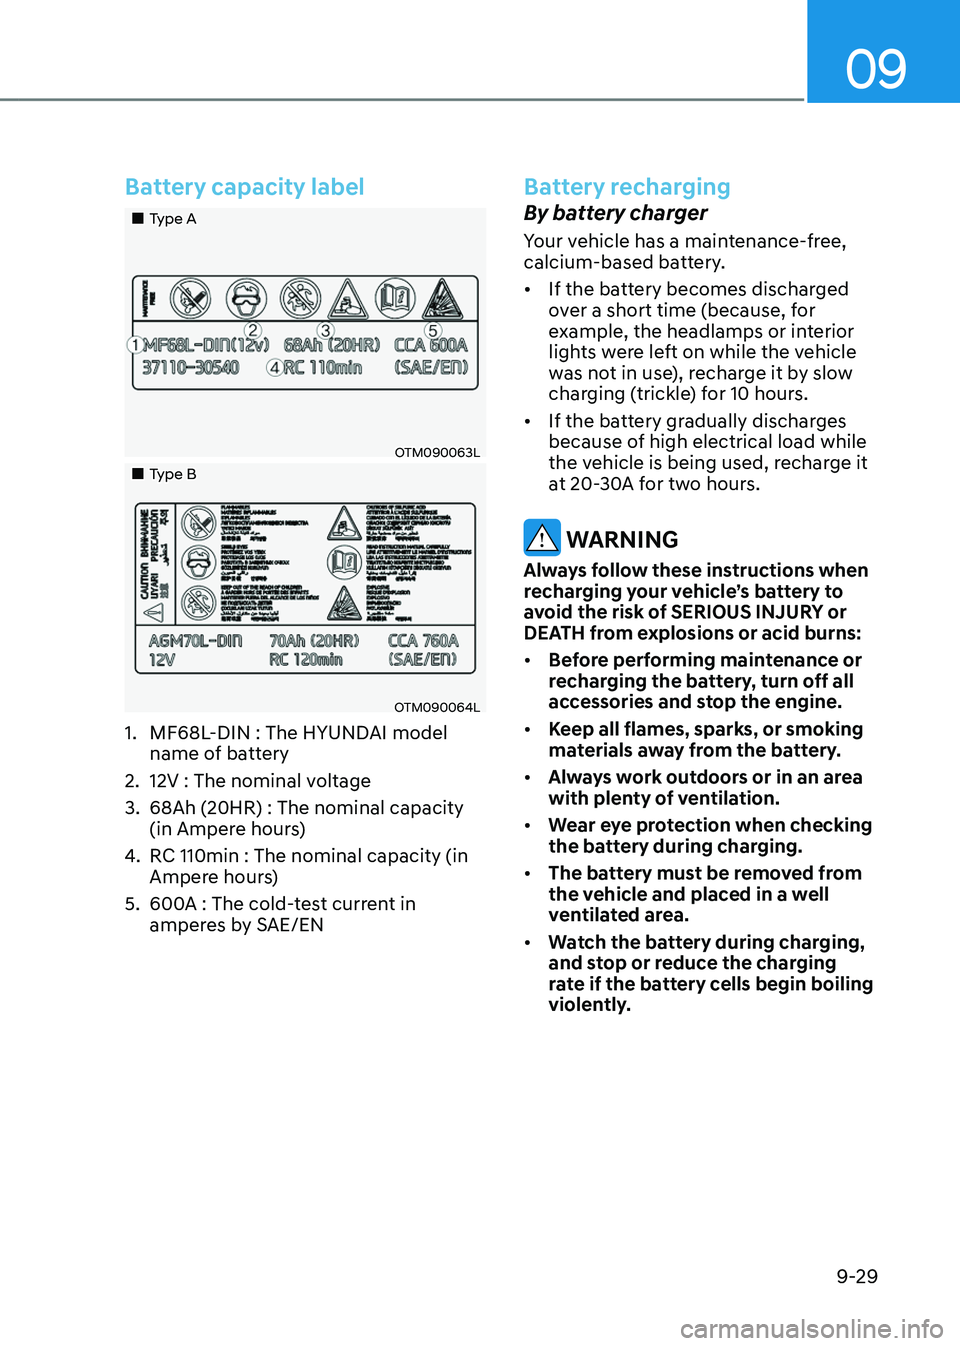
Battery capacity label
„„Type A
OTM090063L
„„Type B
OTM090064L
1. MF68L-DIN : The HYUNDAI model
name of battery
2.
12V : The nominal voltage
3.
68Ah (20HR) : The nominal capacity
(in Ampere hour
s)
4.
RC 110min : The nominal capacity (in
Amper
e hours)
5.
600A : The cold-
test current in
amperes by SAE/EN
Battery recharging
By battery charger
Your vehicle has a maintenance-free,
calcium-based battery.
• If the battery becomes discharged
over a short time (because, for
example, the headlamps or interior
lights were left on while the vehicle
was not in use), recharge it by slow
charging (trickle) for 10 hours.
• If the battery gradually discharges
because of high electrical load while
the vehicle is being used, recharge it
at 20-30A for two hours.
WARNING
Always follow these instructions when
recharging your vehicle’s battery to
avoid the risk of SERIOUS INJURY or
DEATH from explosions or acid burns:
• Before performing maintenance or
recharging the battery, turn off all
accessories and stop the engine.
• Keep all flames, sparks, or smoking
materials away from the battery.
• Always work outdoors or in an area
with plenty of ventilation.
• Wear eye protection when checking
the battery during charging.
• The battery must be removed from
the vehicle and placed in a well
ventilated area.
• Watch the battery during charging,
and stop or reduce the charging
rate if the battery cells begin boiling
violently.
Page 588 of 630
09
9-41
WARNING
NEVER replace a fuse with anything but
another fuse of the same rating.
• A higher capacity fuse could cause
damage and possibly cause a fire.
• Do not install a wire or aluminum
foil instead of the proper fuse -
even as a temporary repair. It may
cause extensive wiring damage and
possibly a fire.
NOTICE
Do not use a screwdriver or any other
metal object to remove fuses because
it may cause a short circuit and damage
the system.
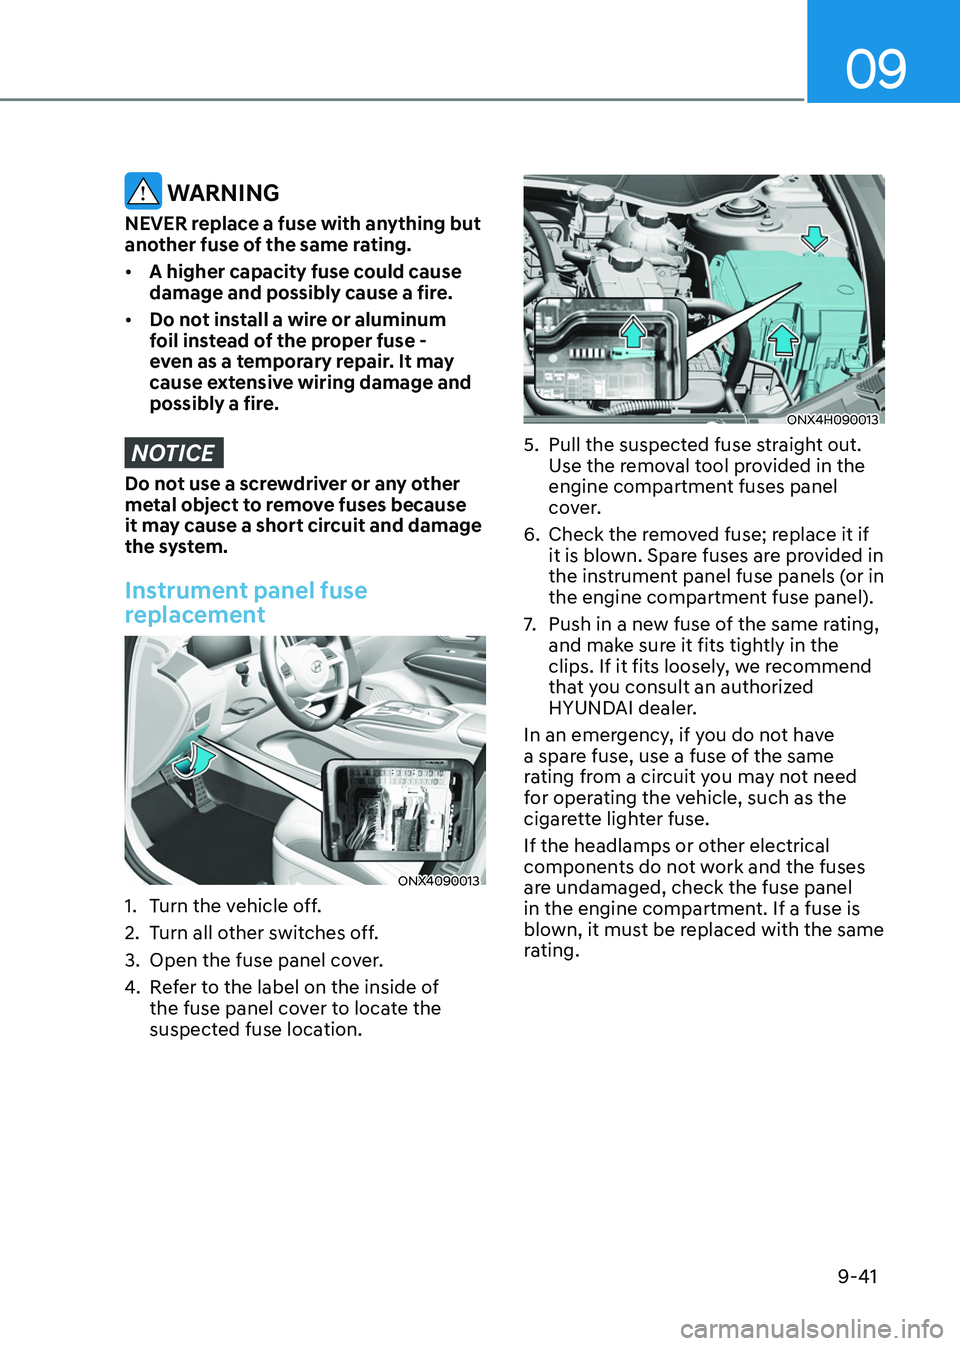
Instrument panel fuse
replacement
ONX4090013
1. Turn the vehicle off.
2.
Turn all o
ther switches off.
3.
Open the fuse panel cov
er.
4.
Re
fer to the label on the inside of
the fuse panel cover to locate the
suspected fuse location.
ONX4H090013
5. Pull the suspected fuse s traight out.
Use the removal tool provided in the
engine compartment fuses panel
cover.
6.
Check the remo
ved fuse; replace it if
it is blown. Spare fuses are provided in
the instrument panel fuse panels (or in
the engine compartment fuse panel).
7.
Push in a new fuse o
f the same rating,
and make sure it fits tightly in the
clips. If it fits loosely, we recommend
that you consult an authorized
HYUNDAI dealer.
In an emergency, if you do not have
a spare fuse, use a fuse of the same
rating from a circuit you may not need
for operating the vehicle, such as the
cigarette lighter fuse.
If the headlamps or other electrical
components do not work and the fuses
are undamaged, check the fuse panel
in the engine compartment. If a fuse is
blown, it must be replaced with the same
rating.
Page 596 of 630

09
9-49
Fuse Name Fuse ratingCircuit Protected
OPCU 20AOPU
BATT C/FAN 15A E/R Junction Block (RLY.2) E-Shifter2 10ASCU, Electronic Shift Switch (SBW)
HPCU1 10AHPCU
Trailer2 20ATrailer Connector Unit
RR HTD 10ADriver Power Outside Mirror, Passenger Power Outside
Mirror
IG1 30APCB Block (PDM(IG1) Relay)
IG2 30APCB Block (PDM(IG2) Relay)
ECU3 10ACVVD Actuator, ECM
TCU2 15A TCM, OPU
IEB4 10AIEB Unit
Module 7.5A Electronic Water Pump (Engine) AEB 10AFront Radar
HPCU2 10AHCPU
Sensor1 20AIgnition Coil #1~#4
Sensor2 15A Oxygen Sensor (Up/Down) ECU1 20AECM
Sensor4 10AE/R Junction Block (RLY.7)
Sensor3 10AOil Control Valve #1~#2, Purge Control Solenoid Valve,
RCV Control Solenoid Valve, Variable Oil Pump, Cooling
Fan Motor
B/Horn 15A PCB Block (Burglar Alarm Horn Relay)
Page 607 of 630
Maintenance
9-60
NOTICE
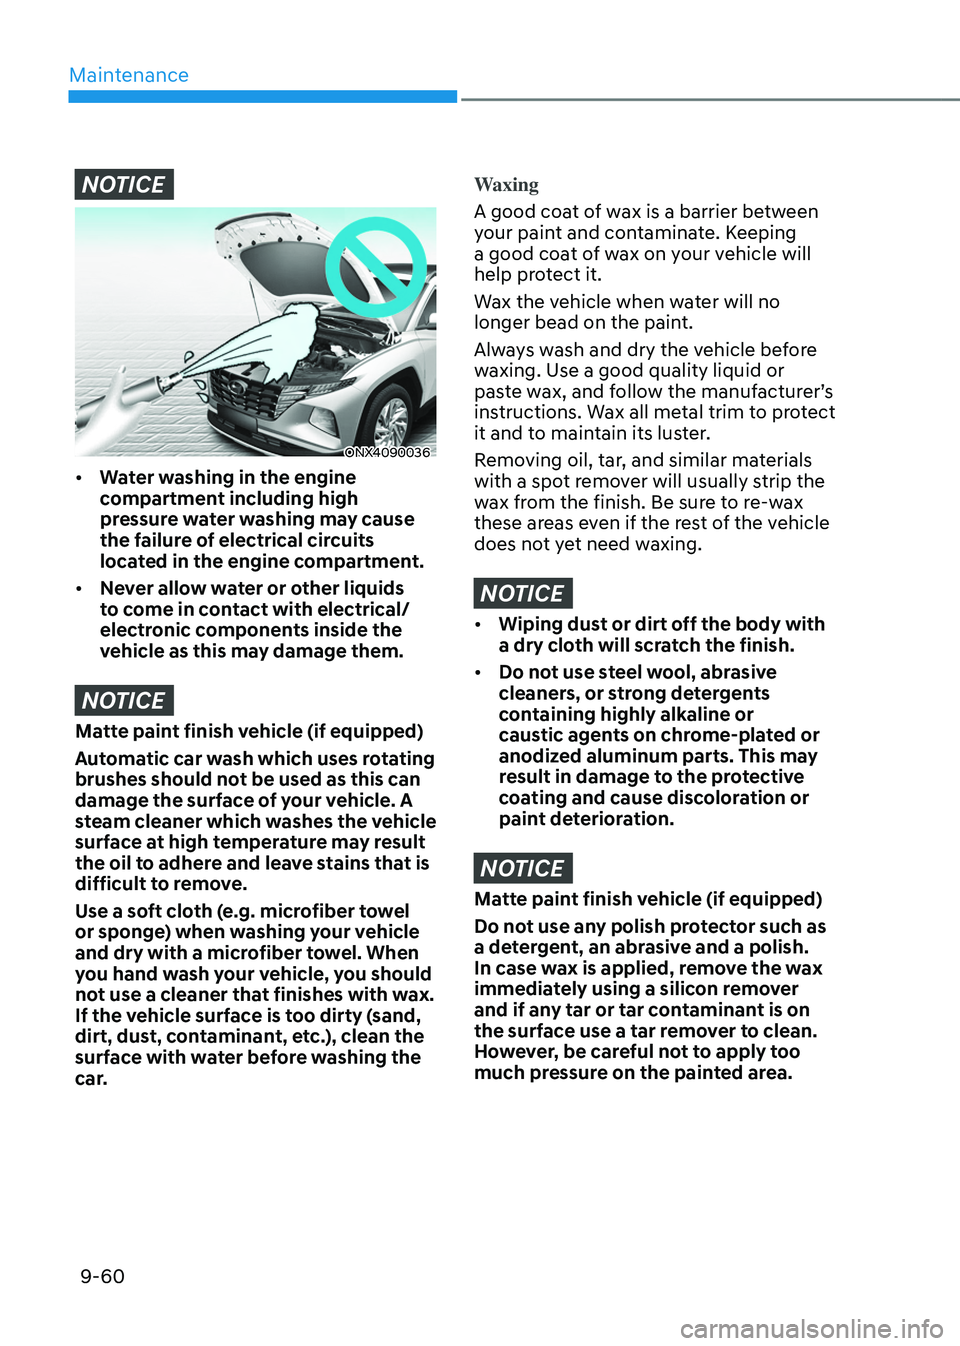
ONX4090036
• Water washing in the engine
compartment including high
pressure water washing may cause
the failure of electrical circuits
located in the engine compartment.
• Never allow water or other liquids
to come in contact with electrical/
electronic components inside the
vehicle as this may damage them.
NOTICE
Matte paint finish vehicle (if equipped)
Automatic car wash which uses rotating
brushes should not be used as this can
damage the surface of your vehicle. A
steam cleaner which washes the vehicle
surface at high temperature may result
the oil to adhere and leave stains that is
difficult to remove.
Use a soft cloth (e.g. microfiber towel
or sponge) when washing your vehicle
and dry with a microfiber towel. When
you hand wash your vehicle, you should
not use a cleaner that finishes with wax.
If the vehicle surface is too dirty (sand,
dirt, dust, contaminant, etc.), clean the
surface with water before washing the
car.
Waxing
A good coat of wax is a barrier between
your paint and contaminate. Keeping
a good coat of wax on your vehicle will
help protect it.
Wax the vehicle when water will no
longer bead on the paint.
Always wash and dry the vehicle before
waxing. Use a good quality liquid or
paste wax, and follow the manufacturer’s
instructions. Wax all metal trim to protect
it and to maintain its luster.
Removing oil, tar, and similar materials
with a spot remover will usually strip the
wax from the finish. Be sure to re-wax
these areas even if the rest of the vehicle
does not yet need waxing.
NOTICE
• Wiping dust or dirt off the body with
a dry cloth will scratch the finish.
• Do not use steel wool, abrasive
cleaners, or strong detergents
containing highly alkaline or
caustic agents on chrome-plated or
anodized aluminum parts. This may
result in damage to the protective
coating and cause discoloration or
paint deterioration.
NOTICE
Matte paint finish vehicle (if equipped)
Do not use any polish protector such as
a detergent, an abrasive and a polish.
In case wax is applied, remove the wax
immediately using a silicon remover
and if any tar or tar contaminant is on
the surface use a tar remover to clean.
However, be careful not to apply too
much pressure on the painted area.
Page 622 of 630
I
I-5
Reducing the risk of a rollover ........................................................................\
.6-53
Rocking the vehicle ........................................................................\
..................6-51
Smooth cornering ........................................................................\
.....................6-52
Special driving conditions ........................................................................\
........6-51
Driver Attention Warning (DAW)
......................................................................7-57
System malfunction and limitations .................................................................7-60
System operation ........................................................................\
......................7-58
System settings ........................................................................\
........................7-57
E
Emergency / Roadside assistance accessories
....................................................8-27
Fire extinguisher ........................................................................\
.......................8-27
First aid kit ........................................................................\
...............................8-27
Tire pressure gauge ........................................................................\
.................8-27
Triangle reflector ........................................................................\
......................8-27
Emission control system
........................................................................\
..............9-66
Engine
........................................................................\
............................................2-8
Engine compartment
........................................................................\
..............2-7, 9-3
Engine coolant/inverter coolant
........................................................................\
...9-17
Changing coolant ........................................................................\
......................9-19
Checking the coolant level ........................................................................\
.......9-17
Engine number
........................................................................\
.............................2-15
Engine oil
........................................................................\
.....................................9-15
Checking the engine oil level ........................................................................\
...9-15
Checking the engine oil and filter ....................................................................9-16
Explanation of scheduled maintenance items
......................................................9-13
Exterior features ........................................................................\
........................... 5-67
Fuel filler door ........................................................................\
..........................5-78
Hood ........................................................................\
.........................................5-67
Liftgate ........................................................................\
.....................................5-68
Power liftgate ........................................................................\
...........................5-70
Smart liftgate ........................................................................\
............................5-76
Exterior features ........................................................................\
......................... 5-127
Roof side rails ........................................................................\
.........................5-127
Exterior overview (I)
........................................................................\
.....................2-2
Exterior overview (II)
........................................................................\
....................2-3