2021 HYUNDAI TUCSON HYBRID set clock
[x] Cancel search: set clockPage 236 of 630

05
5-79
Closing the fuel filler door
1. To install the fuel tank cap, turn it
clockwise until it “clicks” one time.
2.
Close the fuel filler door until it is
la
tched securely.
Information
To lock the fuel filler door, make sure the
fuel filler door is completely closed. Press
the LOCK button on the remote key or
smart key to lock your vehicle. The fuel
filler door will also lock.
Note that if the fuel filler door is not
completely closed when the vehicle is
locked, the fuel filler door will not be
locked.
CAUTION
Make sure the fuel filler door is
completely closed before driving
through a car wash or operating a high
pressure spray washer.
WARNING
Automotive fuel is highly flammable
and explosive. Failure to follow these
guidelines may result in SERIOUS
INJURY or DEATH:
• Read and follow all warnings posted
at the gas station.
• Before refueling, note the location
of the Emergency Fuel Shut-Off, if
available, at the gas station.
• Before touching the fuel nozzle, you
should eliminate the potential build-
up of static electricity by touching
a metal part of the vehicle, a safe
distance away from the fuel filler
neck, nozzle, or other gas source,
with your bare hand.
• Do not use mobile phones while
refueling. Electric current and/or
electronic interference from cellular
phones can potentially ignite fuel
vapors and cause a fire. •
Do not get back into a vehicle
once you have begun refueling.
You can generate a buildup of
static electricity by touching,
rubbing or sliding against any item
or fabric capable of producing
static electricity. Static electricity
discharge can ignite fuel vapors
causing a fire. If you must re-enter
the vehicle, you should once again
eliminate potentially dangerous
static electricity discharge by
touching a metal part of the vehicle,
away from the fuel filler neck, nozzle
or other fuel source, with your bare
hand.
• When using an approved portable
fuel container, be sure to place the
container on the ground prior to
refueling. Static electricity discharge
from the container can ignite fuel
vapors causing a fire.
Once refueling has begun, contact
between your bare hand and the
vehicle should be maintained until
the filling is complete.
• Use only approved portable plastic
fuel containers designed to carry and
store fuel.
• When refueling, always shift the
gear to the P (Park) position, set
the parking brake, and press the
Engine Start/Stop button to the
OFF position. Sparks produced by
electrical components related to the
engine can ignite fuel vapors causing
a fire.
• Do not use matches or a lighter and
do not smoke or leave a lit cigarette
in your vehicle while at a gas station,
especially during refueling.
• Do not over-fill or top-off your
vehicle tank, which can cause fuel
spillage.
Page 280 of 630

05
5-123
Information
If the Ignition switch is in the OFF
position, the charging also stops.
Information
This device complies with part 15 of the
FCC Rules.
Operation is subject to the following two
conditions:
1.
This device may not cause harmful
interference, and
2.
This device must accept any
interference r
eceived, including
interference that may cause undesired
operation.
Clock
The clock can be set from the
infotainment system.
For detailed information, refer to the
separately supplied infotainment
system manual.
WARNING
Do not attempt to adjust the clock
while driving. Doing so may result in
distracted driving which may lead to
an accident involving personal injury or
death.
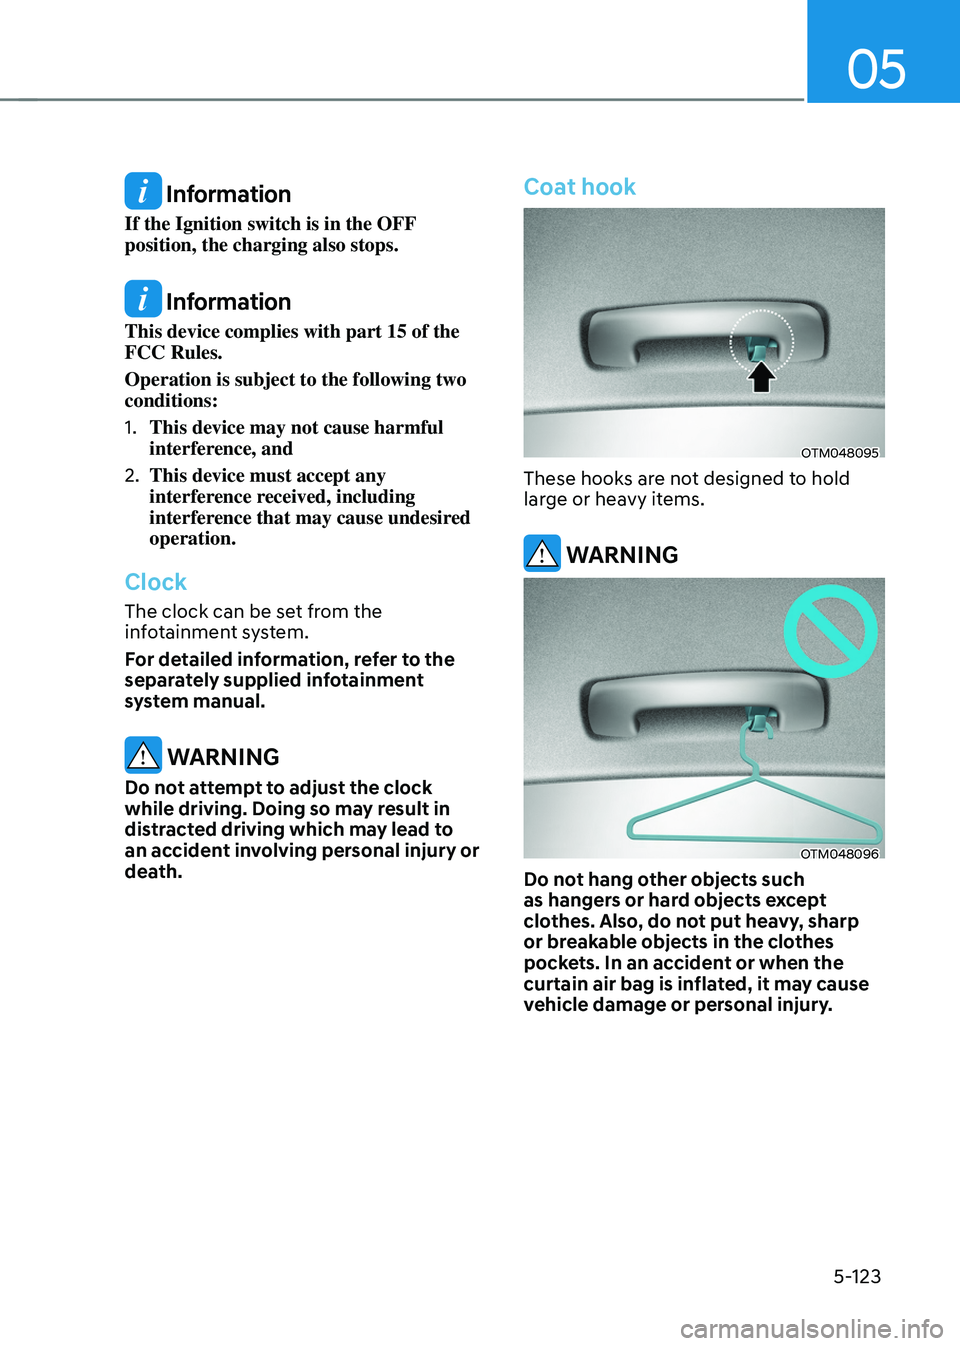
Coat hook
OTM048095
These hooks are not designed to hold
large or heavy items.
WARNING
OTM048096
Do not hang other objects such
as hangers or hard objects except
clothes. Also, do not put heavy, sharp
or breakable objects in the clothes
pockets. In an accident or when the
curtain air bag is inflated, it may cause
vehicle damage or personal injury.
Page 525 of 630

08
8-5
if tHe 12 volt Battery is discHar ged
Before Jump Starting
This vehicle does not have a regular 12V
battery that needs periodic replacement.
It is lithium ion polymer type integrated
into the HEV high voltage battery. The
vehicle has a 12V battery protection
system that cuts 12V battery from vehicle
draw to prevent full discharge.
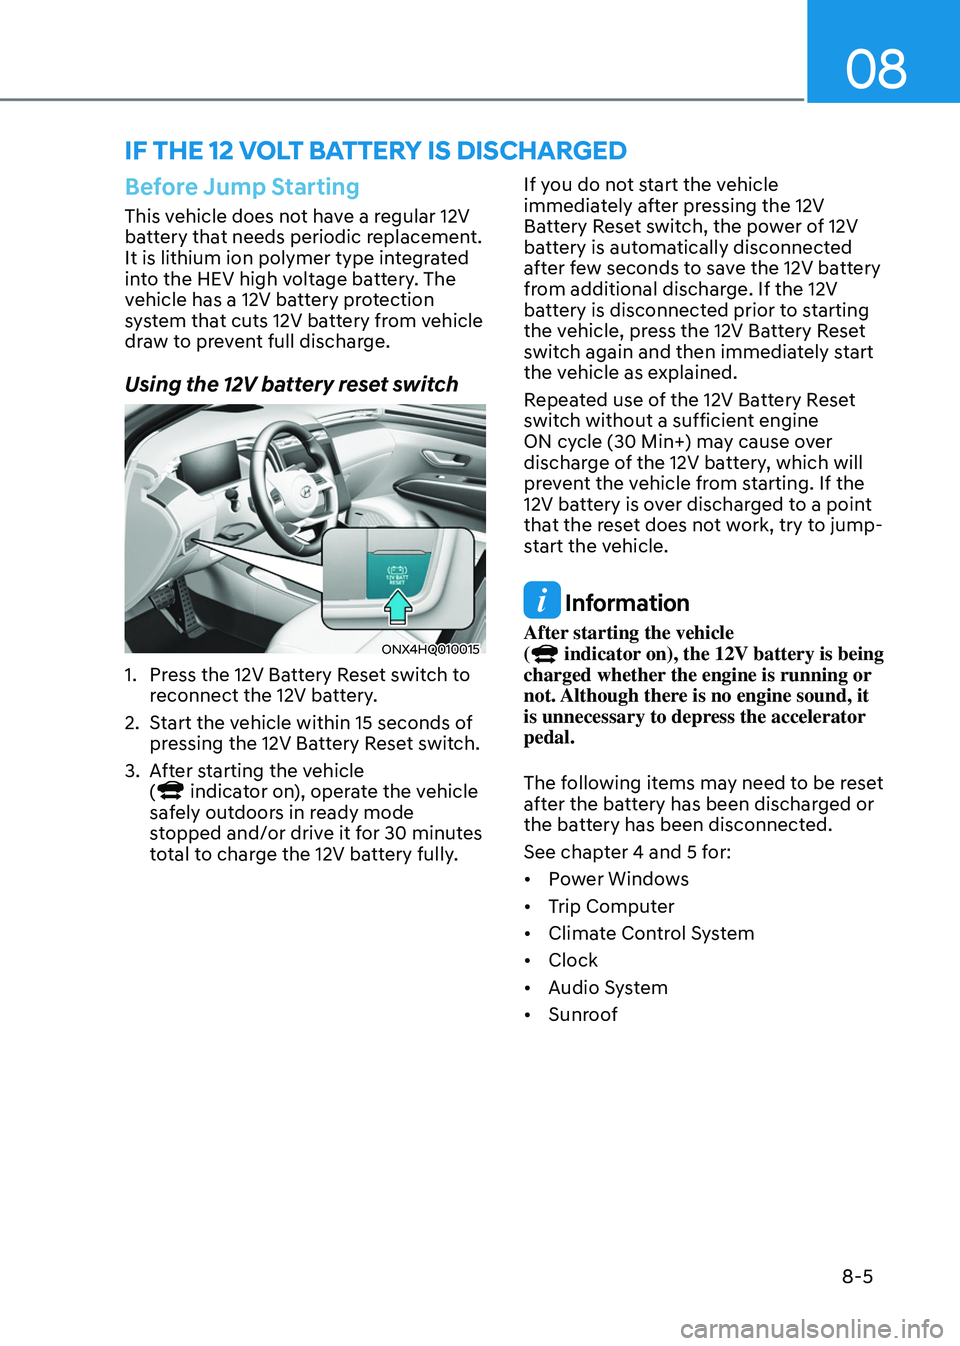
Using the 12V battery reset switch
ONX4HQ010015
1. Press the 12V Battery Reset switch to
r
econnect the 12V battery.
2.
Start the v
ehicle within 15 seconds of
pressing the 12V Battery Reset switch.
3.
Aft
er starting the vehicle
(
indicator on), operate the vehicle
safely outdoors in ready mode
stopped and/or drive it for 30 minutes
total to charge the 12V battery fully. If you do not start the vehicle
immediately after pressing the 12V
Battery Reset switch, the power of 12V
battery is automatically disconnected
after few seconds to save the 12V battery
from additional discharge. If the 12V
battery is disconnected prior to starting
the vehicle, press the 12V Battery Reset
switch again and then immediately start
the vehicle as explained.
Repeated use of the 12V Battery Reset
switch without a sufficient engine
ON cycle (30 Min+) may cause over
discharge of the 12V battery, which will
prevent the vehicle from starting. If the
12V battery is over discharged to a point
that the reset does not work, try to jump-
start the vehicle.
Information
After starting the vehicle
( indicator on), the 12V battery is being
charged whether the engine is running or
not. Although there is no engine sound, it
is unnecessary to depress the accelerator
pedal.
The following items may need to be reset
after the battery has been discharged or
the battery has been disconnected.
See chapter 4 and 5 for:
• Power Windows
• Trip Computer
• Climate Control System
• Clock
• Audio System
• Sunroof
Page 577 of 630

Maintenance
9-30
• The negative battery cable must
be removed first and installed last
when the battery is disconnected.
Disconnect the battery charger in the
following order:
1.
Turn o
ff the battery charger main
switch.
2.
Unhook the nega
tive clamp from
the negative battery terminal.
3.
Unhook the positiv
e clamp from
the positive battery terminal.
• We recommend that you use
batteries for replacement from an
authorized HYUNDAI dealer.
NOTICE
AGM battery (if equipped)
• Absorbent Glass Matt (AGM)
batteries are maintenance-free
and we recommend that the AGM
battery be serviced by an authorized
HYUNDAI dealer. For charging
your AGM battery, use only fully
automatic battery chargers that
are specially developed for AGM
batteries.
• When replacing the AGM battery,
we recommend that you use parts
for replacement from an authorized
HYUNDAI dealer.
• Do not open or remove the cap on
top of the battery. This may cause
leaks of internal electrolyte that
could result in severe injury.
By jump starting
After a jump start from a good battery,
drive the vehicle for 20-30 minutes
before it is shutoff. The vehicle may
not restart if you shut it off before the
battery had a chance to adequately
recharge. See “Jump Starting” in chapter
9 for more information on jump starting
procedures.
Information
An inappropriately disposed
battery can be harmful to the
environment and human health.
Dispose of the battery according
to your local law(s) or regulation.
Reset items
The following items may need to be reset
after the battery has been discharged or
the battery has been disconnected.
• Auto up/down window (see chapter 5)
• Sunroof (see chapter 5)
• Trip computer (see chapter 5)
• Climate control system (see chapter 5)
• Driver position memory system (see
chapter 5)
• Clock (see chapter 5)
• Infotainment system (see
infotainment system manual)
Page 625 of 630

Index
I-8
Instrument cluster ........................................................................\
..........................4-4
Instrument cluster control ........................................................................\
...........4-5
Gauges and meters ........................................................................\
.....................4-5
Transmission shift indicator ........................................................................\
.......4-9
Warning and indicator lights ........................................................................\
....4-10
LCD display messages ........................................................................\
.............4-22
Instrument panel overview (I)
........................................................................\
......2-5
Instrument panel overview (II)
........................................................................\
.....2-6
Integrated memory system
........................................................................\
...........5-38
Recalling memory positions ........................................................................\
.....5-39
Resetting the system ........................................................................\
.................5-39
Seat Easy Access Operation ........................................................................\
.....5-40
Storing memory positions ........................................................................\
........5-38
Intelligent Speed Limit Assist (ISLA)
.................................................................7-52
System malfunction and limitations .................................................................7-55
System operation ........................................................................\
......................7-53
System settings ........................................................................\
.........................7-52
Interior features
........................................................................\
..........................5-117
Cargo security screen ........................................................................\
.............5-125
Clock ........................................................................\
......................................5-123
Coat hook ........................................................................\
...............................5-123
Cup holder ........................................................................\
..............................5-117
Floor mat anchor(s) ........................................................................\
................5-124
Luggage net holder ........................................................................\
.................5-124
Power outlet ........................................................................\
............................5-118
Sunvisor ........................................................................\
..................................5-118
USB charger ........................................................................\
...........................5-119
Wireless smart phone charging system ..........................................................5-120
Interior lights
........................................................................\
...............................5-88
Front lamps ........................................................................\
...............................5-88
Glove box lamp ........................................................................\
........................5-90
Interior Lamp AUT O OFF ........................................................................\
.......5-88
Luggage compartment lamp ........................................................................\
.....5-90
Rear lamps ........................................................................\
................................5-89
Vanity mirror lamp ........................................................................\
...................5-89
Welcome system ........................................................................\
.......................5-91
Interior overview
........................................................................\
..........................2-4