2021 HYUNDAI TUCSON HYBRID change time
[x] Cancel search: change timePage 180 of 630
05
5-23
Smartphone change/App deletion
If you change your smartphone or delete
the Hyundai Digital Key App, please refer
to the following to set up your Digital
Key:
Smartphone Change/ Reset
If you change or reset the smartphone,
the registered digital key in your previous
smartphone may not be used. Please
refer to following procedure to use the
digital key.
1.
Install the digital k
ey application and
log in.
2.
If you ar
e the owner, retry the Digital
key save process.
3.
If you ar
e the sharer, need to re-share
the key from owner.
App delete & reinstall/ Delete App data
You can re-download the digital key
from server in these cases as follow
procedure.
1.
Reins
tall the application and log in.
2.
Input the PIN number for user
v
erification.
3.
If PIN is correct, digital k
ey data
will be re-downloaded to your
smartphone and you can use it
without any further registration or
sharing.
Smartphone operability with Digital Key
The digital key application may not
be available to old type smartphones.
Please check the available smartphone
models with your dealer. NFC antenna
position on the smartphone can be
confirmed on each smartphone’s manual
or contact to customer service center of
the smartphone manufacture. CAUTION
• Do not leave the registered digital
key (smartphone) and card key in
your vehicle. Please carry around
your keys all the times.
• If you happen to lose your digital
key (smartphone) or card key
registered as a main user’s key, you
should immediately delete the key
on the vehicle’s key menu. For more
information, refer to the Digital Key
Deletion in this chapter.
• If you registered your digital key
(smartphone) or card key in the
vehicle, a message appears on the
instrument cluster and let you know
the key is registered.
(Message: Digital key(s) active.)
• If you buy a used vehicle, you should
confirm the message and delete the
registered smartphone key and card
key. In this case, you should carry
your smart key.
• If you keep place the NFC card
of the digital key on the interior
authentication pad (wireless
charger) while driving, it may cause a
malfunction of the NFC card.
• You should remove your NFC card
of the digital key on the interior
authentication pad after turning on
the engine.
• Hyundai digital key app may not
work properly when the NFC or
Bluetooth communication between
smartphone and car is not good.
• If the remote control operation
is executed where the mobile
connection is weak, Bluetooth
connection is poor due to lots of
Bluetooth devices or there is an
object such as metal or concrete, it
might be delayed or the operable
distance might decrease. Especially,
you should not cover the smartphone
with your hand or place other
devices which can cause frequency
interference. It may result in poor
performance.
Page 205 of 630
Convenient features
5-48
ODN8H050339N
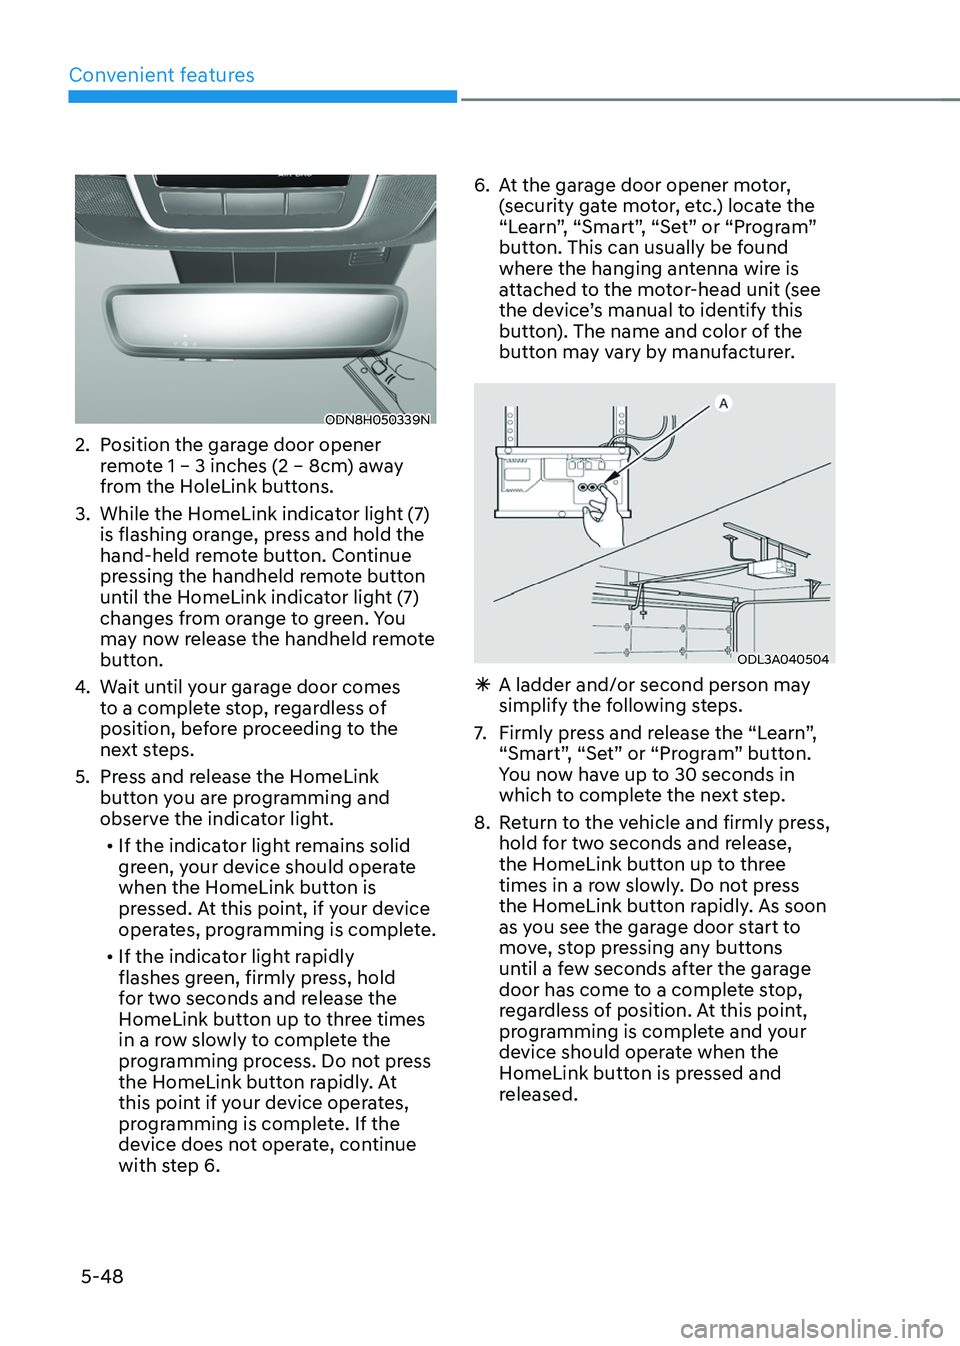
2. Position the garage door opener
remote 1 – 3 inches (2 – 8cm) away
from the HoleLink buttons.
3.
While the HomeLink indica
tor light (7)
is flashing orange, press and hold the
hand-held remote button. Continue
pressing the handheld remote button
until the HomeLink indicator light (7)
changes from orange to green. You
may now release the handheld remote
button.
4.
Wait un
til your garage door comes
to a complete stop, regardless of
position, before proceeding to the
next steps.
5.
Press and r
elease the HomeLink
button you are programming and
observe the indicator light.
• If the indicator light remains solid
green, your device should operate
when the HomeLink button is
pressed. At this point, if your device
operates, programming is complete.
• If the indicator light rapidly
flashes green, firmly press, hold
for two seconds and release the
HomeLink button up to three times
in a row slowly to complete the
programming process. Do not press
the HomeLink button rapidly. At
this point if your device operates,
programming is complete. If the
device does not operate, continue
with step 6. 6.
At the gar
age door opener motor,
(security gate motor, etc.) locate the
“Learn”, “Smart”, “Set” or “Program”
button. This can usually be found
where the hanging antenna wire is
attached to the motor-head unit (see
the device’s manual to identify this
button). The name and color of the
button may vary by manufacturer.
ODL3A040504
à A ladder and/or second person ma y
simplify the following steps.
7.
Firmly press and r
elease the “Learn”,
“Smart”, “Set” or “Program” button.
You now have up to 30 seconds in
which to complete the next step.
8.
Re
turn to the vehicle and firmly press,
hold for two seconds and release,
the HomeLink button up to three
times in a row slowly. Do not press
the HomeLink button rapidly. As soon
as you see the garage door start to
move, stop pressing any buttons
until a few seconds after the garage
door has come to a complete stop,
regardless of position. At this point,
programming is complete and your
device should operate when the
HomeLink button is pressed and
released.
Page 207 of 630
Convenient features
5-50
4) Canadian Programming
Canadian radio-frequency laws require
transmitter remote signals to “time-
out” (or quit) after a couple seconds of
transmission, which may not be long
enough for HomeLink to pick up the signal
during programming.
If you live in Canada or you are having
difficulties programming a gate operator
or garage door opener by using the
programming procedures, replace
“Programming a New HomeLink Button”
step 3 with the following:
While the HomeLink indicator light (7) is
flashing orange, press and release (“cycle”)
your device’s handheld remote every two
seconds until the HomeLink indicator light
(7) changes from orange to green. You may
now release the hand-held remote button.
Then proceed with “Programming a New
HomeLink Button” step 4.2. Operating HomeLink®
1) Operating HomeLink®
ODN8H050136N
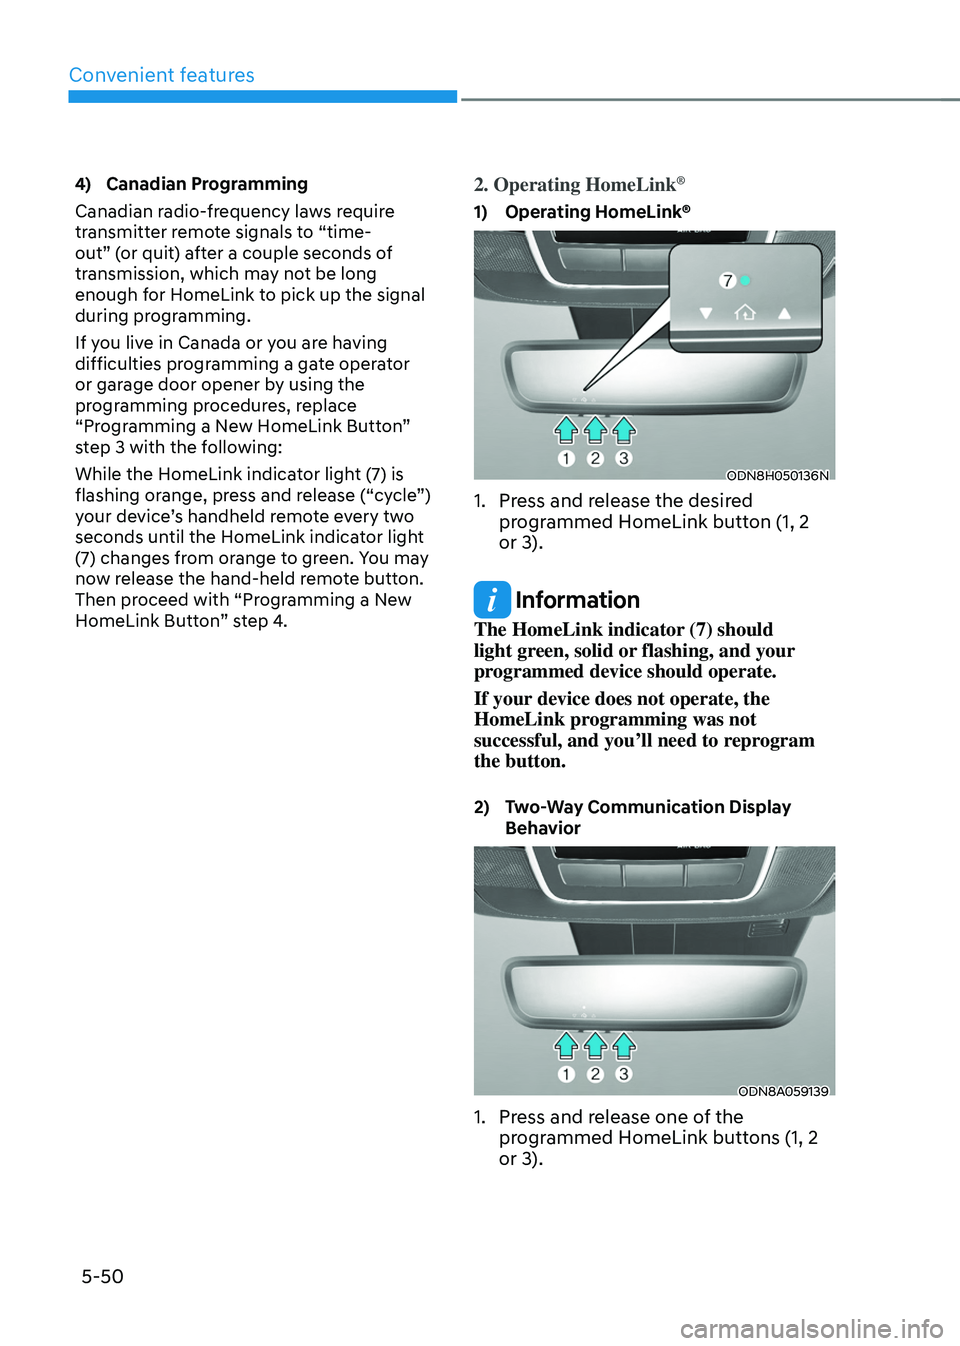
1. Press and release the desired
pr ogrammed HomeLink button (1, 2
or 3).
Information
The HomeLink indicator (7) should
light green, solid or flashing, and your
programmed device should operate.
If your device does not operate, the
HomeLink programming was not
successful, and you’ll need to reprogram
the button.
2) Two-Way Communication Display
Beha
vior
ODN8A059139
1. Press and release one of the
programmed HomeLink buttons (1, 2
or 3).
Page 230 of 630
05
5-73
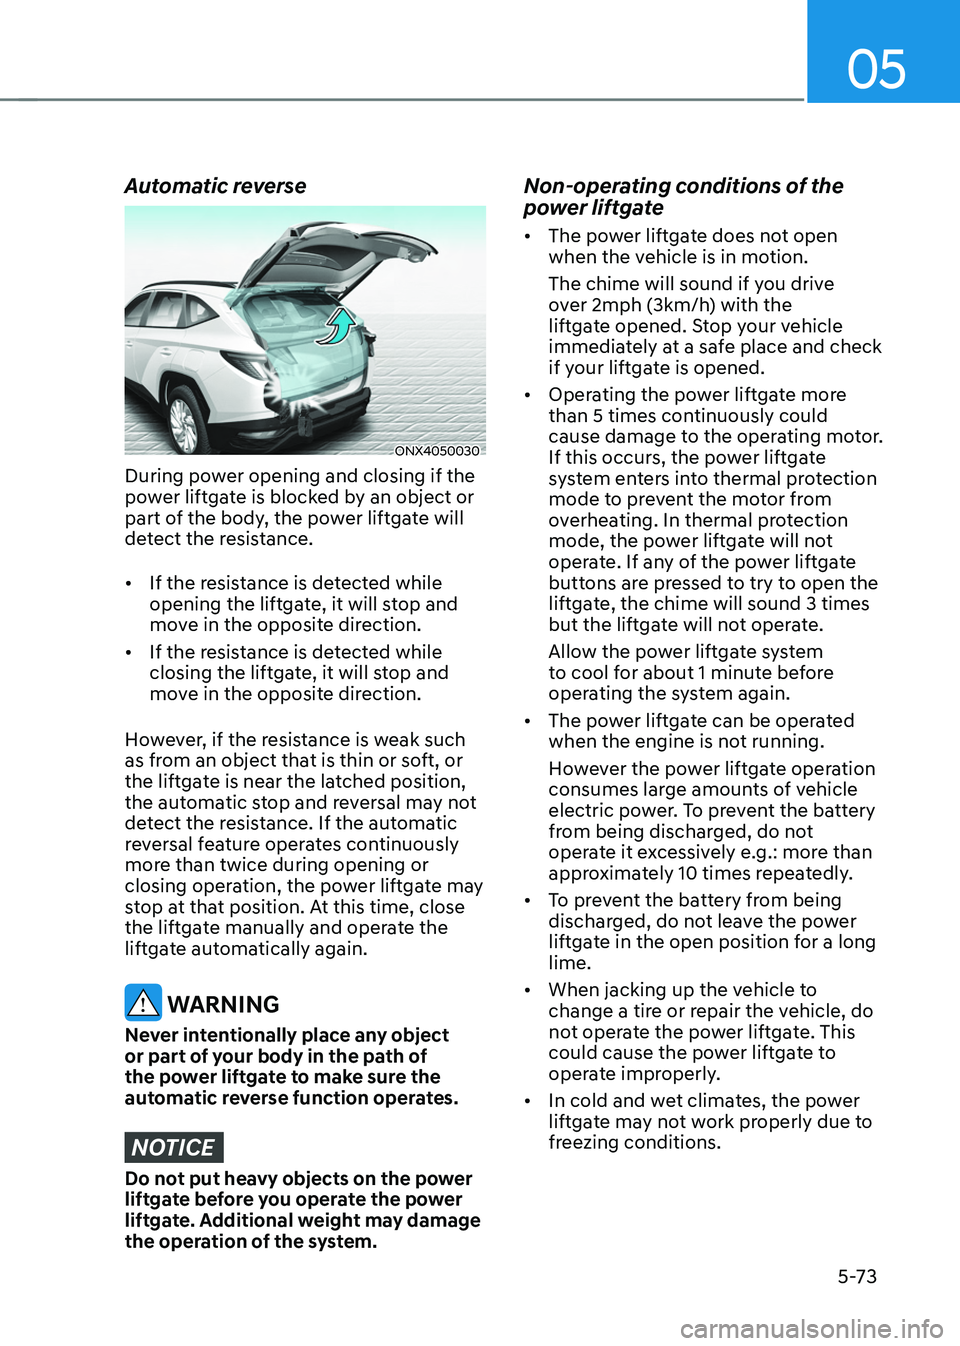
Automatic reverse
ONX4050030
During power opening and closing if the
power liftgate is blocked by an object or
part of the body, the power liftgate will
detect the resistance.
• If the resistance is detected while
opening the liftgate, it will stop and
move in the opposite direction.
• If the resistance is detected while
closing the liftgate, it will stop and
move in the opposite direction.
However, if the resistance is weak such
as from an object that is thin or soft, or
the liftgate is near the latched position,
the automatic stop and reversal may not
detect the resistance. If the automatic
reversal feature operates continuously
more than twice during opening or
closing operation, the power liftgate may
stop at that position. At this time, close
the liftgate manually and operate the
liftgate automatically again.
WARNING
Never intentionally place any object
or part of your body in the path of
the power liftgate to make sure the
automatic reverse function operates.
NOTICE
Do not put heavy objects on the power
liftgate before you operate the power
liftgate. Additional weight may damage
the operation of the system.
Non-operating conditions of the
power liftgate
• The power liftgate does not open
when the vehicle is in motion.
The chime will sound if you drive
over 2mph (3km/h) with the
liftgate opened. Stop your vehicle
immediately at a safe place and check
if your liftgate is opened.
• Operating the power liftgate more
than 5 times continuously could
cause damage to the operating motor.
If this occurs, the power liftgate
system enters into thermal protection
mode to prevent the motor from
overheating. In thermal protection
mode, the power liftgate will not
operate. If any of the power liftgate
buttons are pressed to try to open the
liftgate, the chime will sound 3 times
but the liftgate will not operate.
Allow the power liftgate system
to cool for about 1 minute before
operating the system again.
• The power liftgate can be operated
when the engine is not running.
However the power liftgate operation
consumes large amounts of vehicle
electric power. To prevent the battery
from being discharged, do not
operate it excessively e.g.: more than
approximately 10 times repeatedly.
• To prevent the battery from being
discharged, do not leave the power
liftgate in the open position for a long
lime.
• When jacking up the vehicle to
change a tire or repair the vehicle, do
not operate the power liftgate. This
could cause the power liftgate to
operate improperly.
• In cold and wet climates, the power
liftgate may not work properly due to
freezing conditions.
Page 240 of 630
05
5-83
Turn signals and lane change signals
ODN8A059207
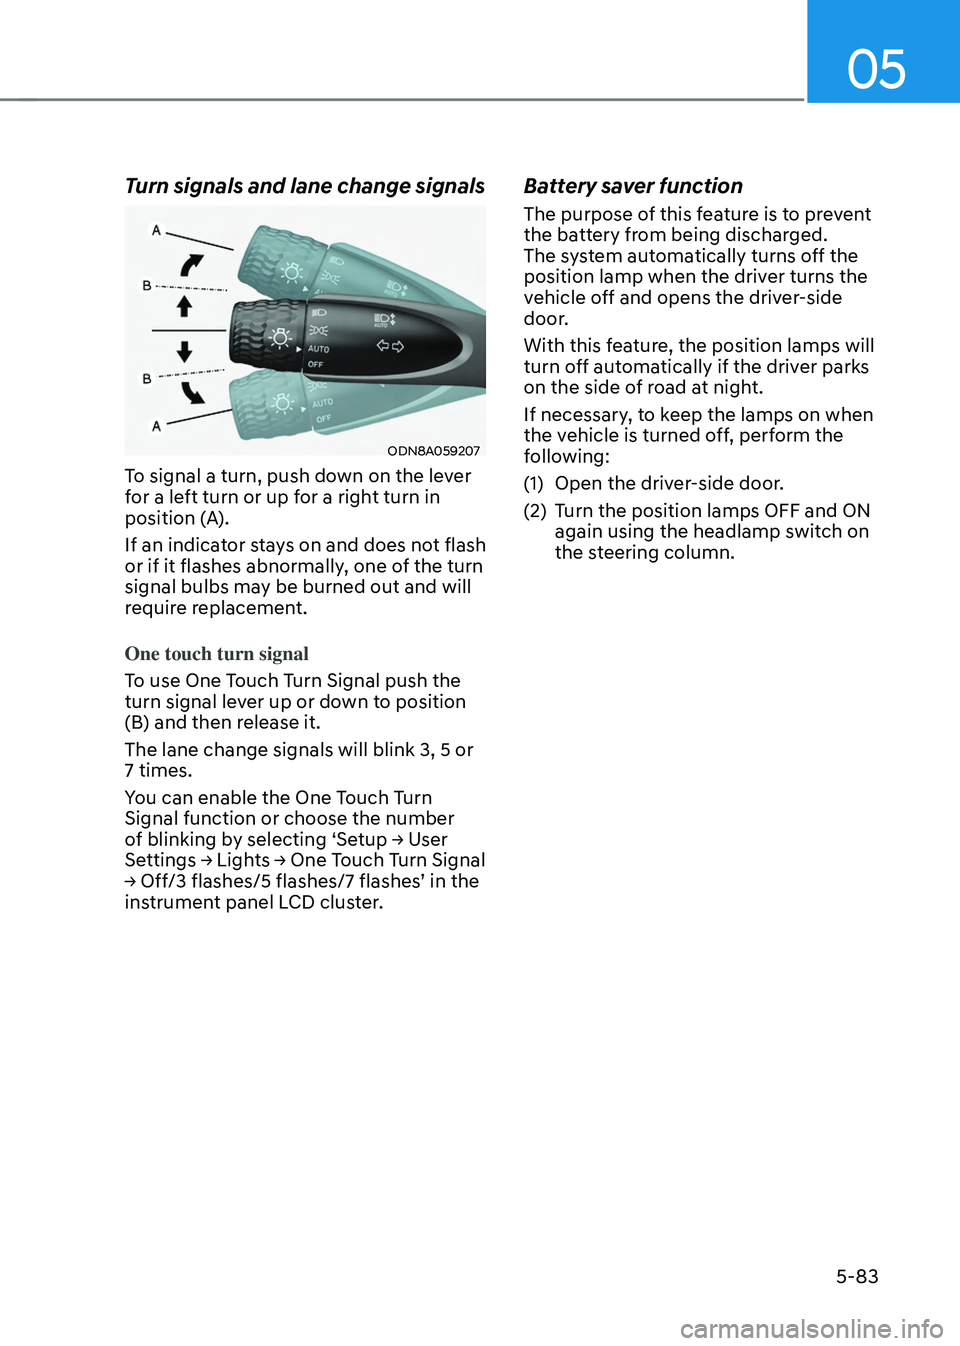
To signal a turn, push down on the lever
for a left turn or up for a right turn in
position (A).
If an indicator stays on and does not flash
or if it flashes abnormally, one of the turn
signal bulbs may be burned out and will
require replacement.
One touch turn signal
To use One Touch Turn Signal push the
turn signal lever up or down to position
(B) and then release it.
The lane change signals will blink 3, 5 or
7 times.
You can enable the One Touch Turn
Signal function or choose the number
of
blinking b
y
selecting ‘Se
tup
→ U
ser
Settings → Ligh
ts
→ One T
ouch
T
urn
Signal → Off/3 flashes/5 flashes/7 flashes
’
in the instrumen
t panel LCD cluster.
Battery saver function
The purpose of this feature is to prevent
the battery from being discharged.
The system automatically turns off the
position lamp when the driver turns the
vehicle off and opens the driver-side
door.
With this feature, the position lamps will
turn off automatically if the driver parks
on the side of road at night.
If necessary, to keep the lamps on when
the vehicle is turned off, perform the
following:
(1)
Open the driver
-side door.
(2)
Turn the position lamps OFF and ON
again using the headlamp s
witch on
the steering column.
Page 244 of 630
05
5-87
Limitations of the system
High Beam Assist may not work properly
in the following situations:
• Light from a vehicle is not detected
because of lamp damage, or because
it is hidden from sight, etc.
• Headlamp of a vehicle is covered with
dust, snow or water.
• A vehicle’s headlamps are off but the
fog lamps are on and etc.
• There is a lamp that has a similar
shape as a vehicle’s lamp.
• Headlamps have been damaged or
not repaired properly.
• Headlamps are not aimed properly.
• Driving on a narrow curved road,
rough road, uphill or downhill.
• Vehicle in front is partially visible on a
crossroad or curved road.
• There is a traffic light, reflecting sign,
flashing sign or mirror ahead.
• There is a temporary reflector or flash
ahead (construction area).
• The road conditions are bad such as
being wet, iced or covered with snow.
• A vehicle suddenly appears from a
curve.
• The vehicle is tilted from a flat tire or
is being towed.
• Light from a vehicle is not detected
because of exhaust fume, smoke, fog,
snow, etc.
For more details on the limitations
of the front view camera, refer to
“Forward Collision-Avoidance Assist
(FCA)” section in chapter 7. WARNING
• At times, High Beam Assist may not
work properly. It is the responsibility
of the driver for safe driving
practices and always check the road
conditions for your safety.
• When High Beam Assist does
not operate normally, change
the headlamp position manually
between high beam and low beam.
Page 250 of 630

05
5-93
AUTO Wiper Control (if equipped)
ONX4EH050002
The rain sensor located on the upper
end of the windshield glass senses
the amount of rainfall and controls the
wiping cycle for the proper interval.
The wiper operation time will be
automatically controlled depends on
rainfall.
When the rain stops, the wiper stops.
To vary the sensitivity setting, turn the
sensitivity control knob.
If the wiper switch is set in AUTO mode
when the Engine Start/Stop button is in
the ON position, the wiper will operate
once to perform a self-check of the
system. Set the wiper to the OFF position
when the wiper is not in use.
WARNING
To avoid personal injury from the
windshield wipers, when the engine
is running and the windshield wiper
switch is placed in the AUTO mode:
• Do not touch the upper end of the
windshield glass facing the rain
sensor.
• Do not wipe the upper end of the
windshield glass with a damp or wet
cloth.
• Do not put pressure on the
windshield glass.
NOTICE
• When washing the vehicle, set the
wiper switch in the OFF position to
stop the auto wiper operation. The
wiper may operate and be damaged
if the switch is set in the AUTO mode
while washing the vehicle.
• Do not remove the sensor cover
located on the upper end of the
passenger side windshield glass.
Damage to system components
could occur and may not be covered
by your vehicle warranty.
• Because of using a photo sensor,
temporary malfunction could occur
according to sudden ambient light
change made by stone and dust
while driving.
Page 265 of 630
Convenient features
5-108
Air conditioning system operation tips
• If the vehicle has been parked in
direct sunlight during hot weather,
open the windows for a short time
to let the hot air inside the vehicle
escape.
• After sufficient cooling has been
achieved, switch back from the
recirculated air to the fresh outside air
position.
• To help reduce moisture inside of
the windows on rainy or humid
days, decrease the humidity inside
the vehicle by operating the air
conditioning system with the windows
and sunroof closed.
• Use the air conditioning system every
month for a few minutes to ensure
maximum system performance.
• If you operate the air conditioner
excessively, the difference between
the temperature of the outside air and
that of the windshield could cause
the outer surface of the windshield to
fog up, causing loss of visibility. In this
case, set the mode selection button to
the
position and set the fan speed
control knob to the lowest speed
setting.
System maintenance
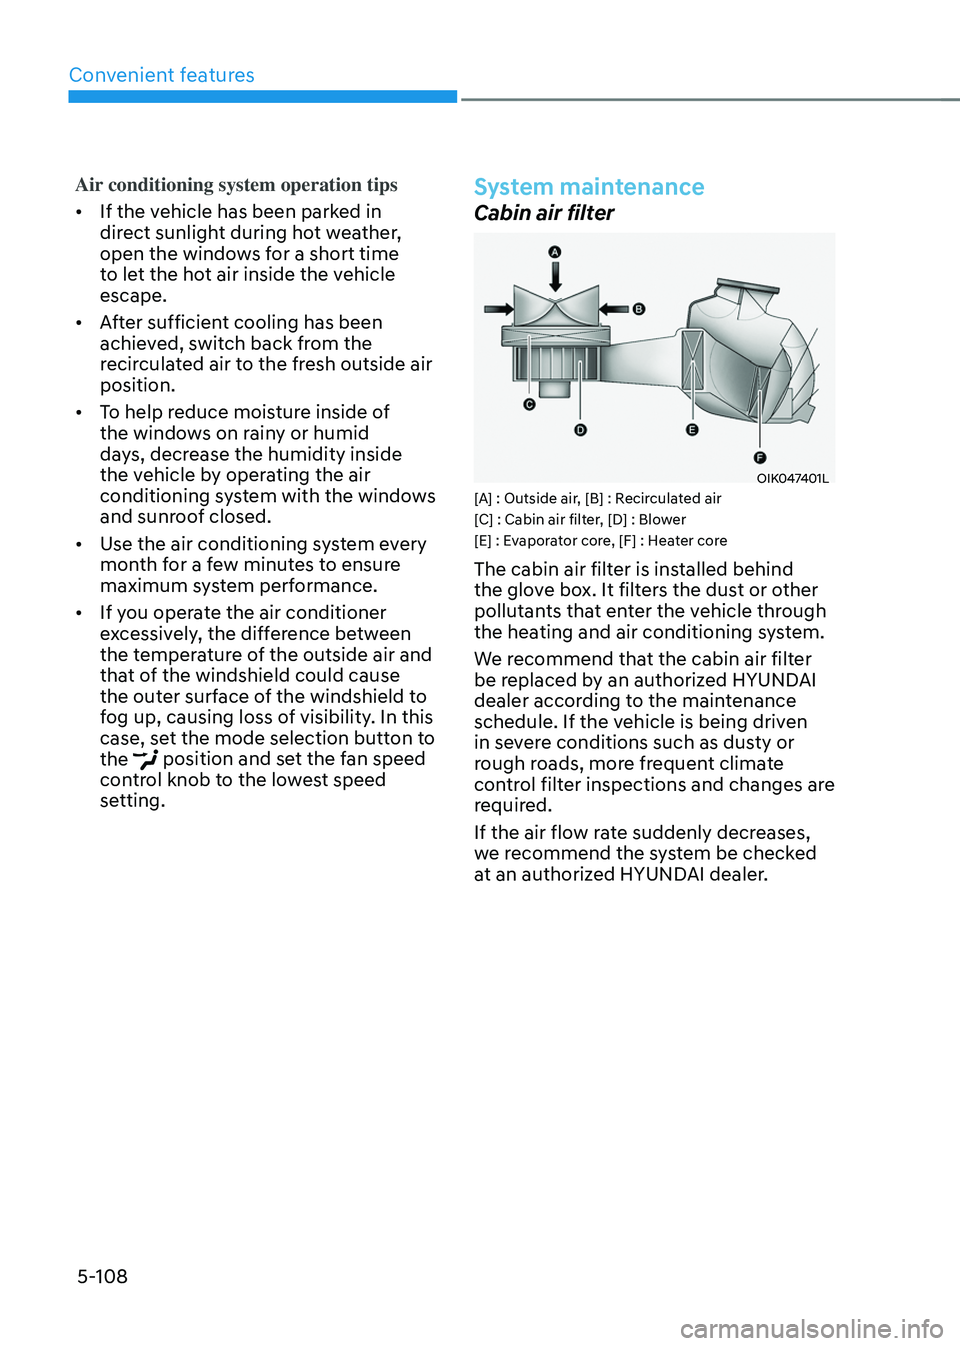
Cabin air filter
OIK047401L[A] : Outside air, [B] : Recirculated air
[C] : Cabin air filter, [D] : Blower
[E] : Evaporator core, [F] : Heater core
The cabin air filter is installed behind
the glove box. It filters the dust or other
pollutants that enter the vehicle through
the heating and air conditioning system.
We recommend that the cabin air filter
be replaced by an authorized HYUNDAI
dealer according to the maintenance
schedule. If the vehicle is being driven
in severe conditions such as dusty or
rough roads, more frequent climate
control filter inspections and changes are
required.
If the air flow rate suddenly decreases,
we recommend the system be checked
at an authorized HYUNDAI dealer.