2021 HYUNDAI SONATA HYBRID fuel type
[x] Cancel search: fuel typePage 113 of 527
04
4-9
Information
• If the vehicle is not on level ground or
the battery power has been interrupted,
the range function may not operate
correctly.
• The range may differ from the actual
driving distance as it is only an estimate
of the available driving range for the
vehicle and driving conditions.
• The trip computer may not register
additional fuel if less than 1.6 gallon (6
liters) of fuel are added to the vehicle.
• The range may vary significantly based
on driving conditions, driving habits,
and condition of the vehicle.
Transmission Shift Indicator
(if equipped)
Automatic transmission shift
indicator
„„Type A, B
OIG046112
„„Type C
ODN8A049009
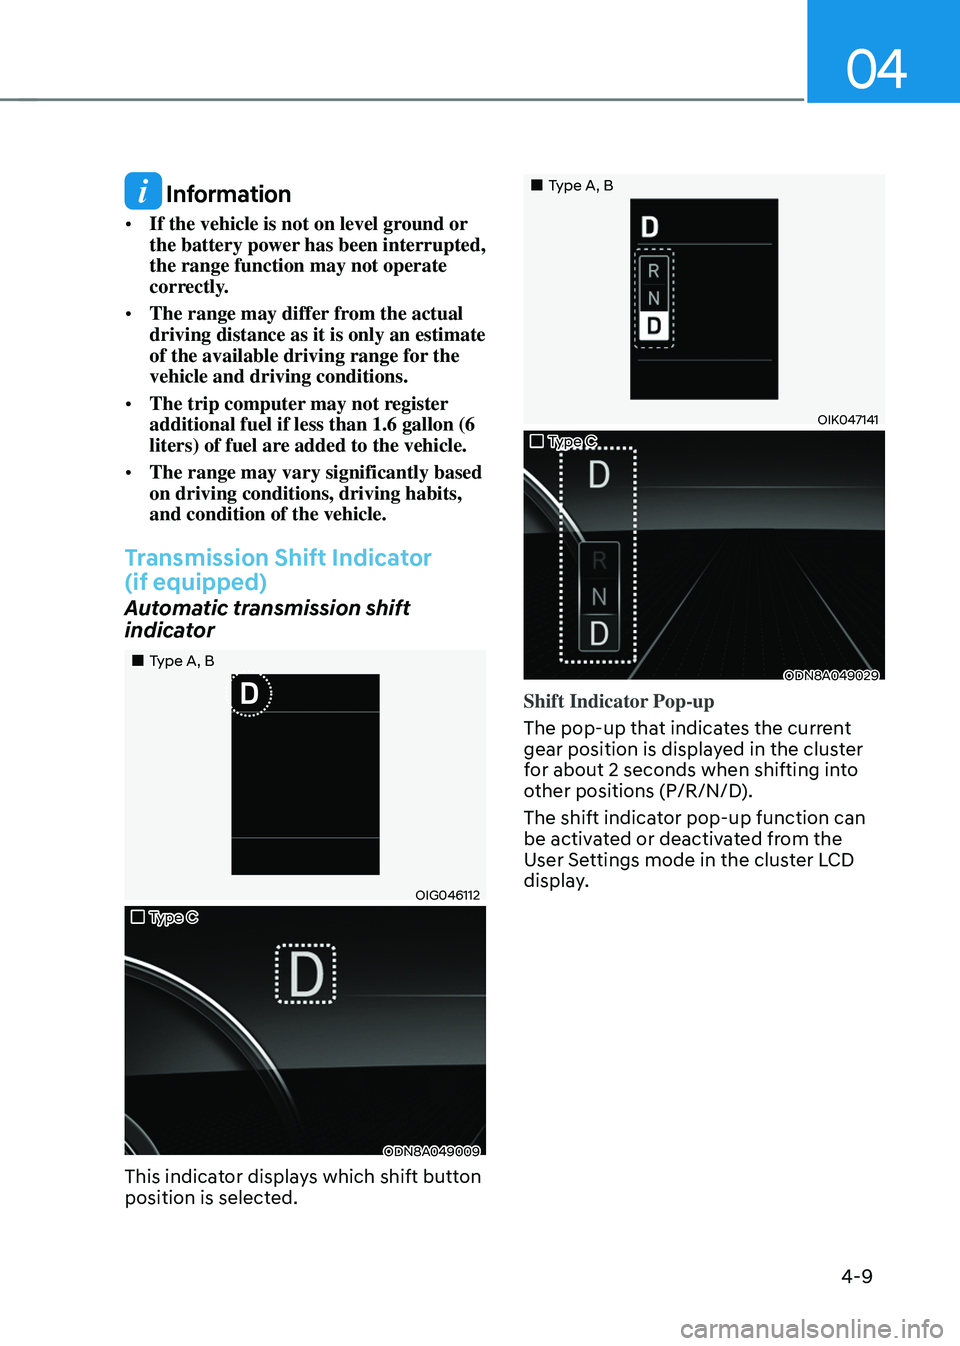
This indicator displays which shift button
position is selected.
„„Type A, B
OIK047141
„„Type C
ODN8A049029
Shift Indicator Pop-up
The pop-up that indicates the current
gear position is displayed in the cluster
for about 2 seconds when shifting into
other positions (P/R/N/D).
The shift indicator pop-up function can
be activated or deactivated from the
User Settings mode in the cluster LCD
display.
Page 159 of 527
05
5-11
Battery Type: CR2032
To replace the battery:
1. Remove the mechanical key.
2. Use a slim tool to pry open the rear
cover of the smart key.
3. Remove the old battery and insert the
new battery. Make sure the battery
position is correct.
4. Reinstall the rear cover of the smart
key.
If you suspect your smart key might have
sustained some damage, or you feel
your smart key is not working correctly,
contact an authorized HYUNDAI dealer.
Information
An inappropriately disposed battery can be harmful to the
environment and human health.
Dispose of the battery according
to your local law(s) or regulation.
Immobilizer System
The immobilizer system protects your
vehicle from theft. If an improperly
coded key (or other device) is used, the
engine’s fuel system is disabled.
When the ignition switch is placed in
the ON position, the immobilizer system
indicator should come on briefly, then
go off. If the indicator starts to blink, the
system does not recognize the coding of
the key.
Turn the ignition switch to the LOCK/OFF
position, then turn the ignition switch to
the ON position again.
In some circumstances, the vehicle may
not recognize your smart key if another
smart key device is nearby or a metal
object such as a key chain is causing
interference with the smart key.
If this occurs, your vehicle may not
start. Remove any metal objects or
additional keys near the smart key before
attempting to start the vehicle again.
If the system repeatedly does not
recognize the coding of the key, it is
recommended that you contact your
HYUNDAI dealer.
Do not attempt to alter this system
or add other devices to it. Electrical
problems could result that may make
your vehicle inoperable.
Page 217 of 527
05
5-69
• Do not get back into a vehicle
once you have begun refueling.
You can generate a buildup of
static electricity by touching,
rubbing or sliding against any item
or fabric capable of producing
static electricity. Static electricity
discharge can ignite fuel vapors
causing a fire. If you must re-enter
the vehicle, you should once again
eliminate potentially dangerous
static electricity discharge by
touching a metal part of the vehicle,
away from the fuel filler neck, nozzle
or other gasoline source, with your
bare hand.
• When using an approved portable
fuel container, be sure to place the
container on the ground prior to
refueling. Static electricity discharge
from the container can ignite fuel
vapors causing a fire.
Once refueling has begun, contact
between your bare hand and the
vehicle should be maintained until
the filling is complete.
• Use only approved portable plastic
fuel containers designed to carry and
store gasoline.
• When refueling, always move the
shift button to the P (Park) position,
set the parking brake, and place
the ignition switch to the LOCK/
OFF position. Sparks produced by
electrical components related to the
engine can ignite fuel vapors causing
a fire.
• Do not use matches or a lighter and
do not smoke or leave a lit cigarette
in your vehicle while at a gas station,
especially during refueling.
• Do not over-fill or top-off your
vehicle tank, which can cause
gasoline spillage.• If a fire breaks out during refueling,
leave the vicinity of the vehicle, and
immediately contact the manager
of the gas station and then contact
the local fire department. Follow any
safety instructions they provide.
• If pressurized fuel sprays out, it can
cover your clothes or skin and thus
subject you to the risk of fire and
burns. Always remove the fuel cap
carefully and slowly. If the cap is
venting fuel or if you hear a hissing
sound, wait until the condition stops
before completely removing the cap.
• Always check that the fuel cap is
installed securely to prevent fuel
spillage in the event of an accident.
Information
Make sure to refuel your vehicle according
to the “Fuel Requirements” suggested in
the Introduction chapter.
NOTICE
• Do not spill fuel on the exterior
surfaces of the vehicle. Any type of
fuel spilled on painted surfaces may
damage the paint.
• If the fuel filler cap requires
replacement, use only a genuine
HYUNDAI cap or the equivalent
specified for your vehicle. An
incorrect fuel filler cap can result
in a serious malfunction of the fuel
system or emission control system.
Page 415 of 527
06
6-139
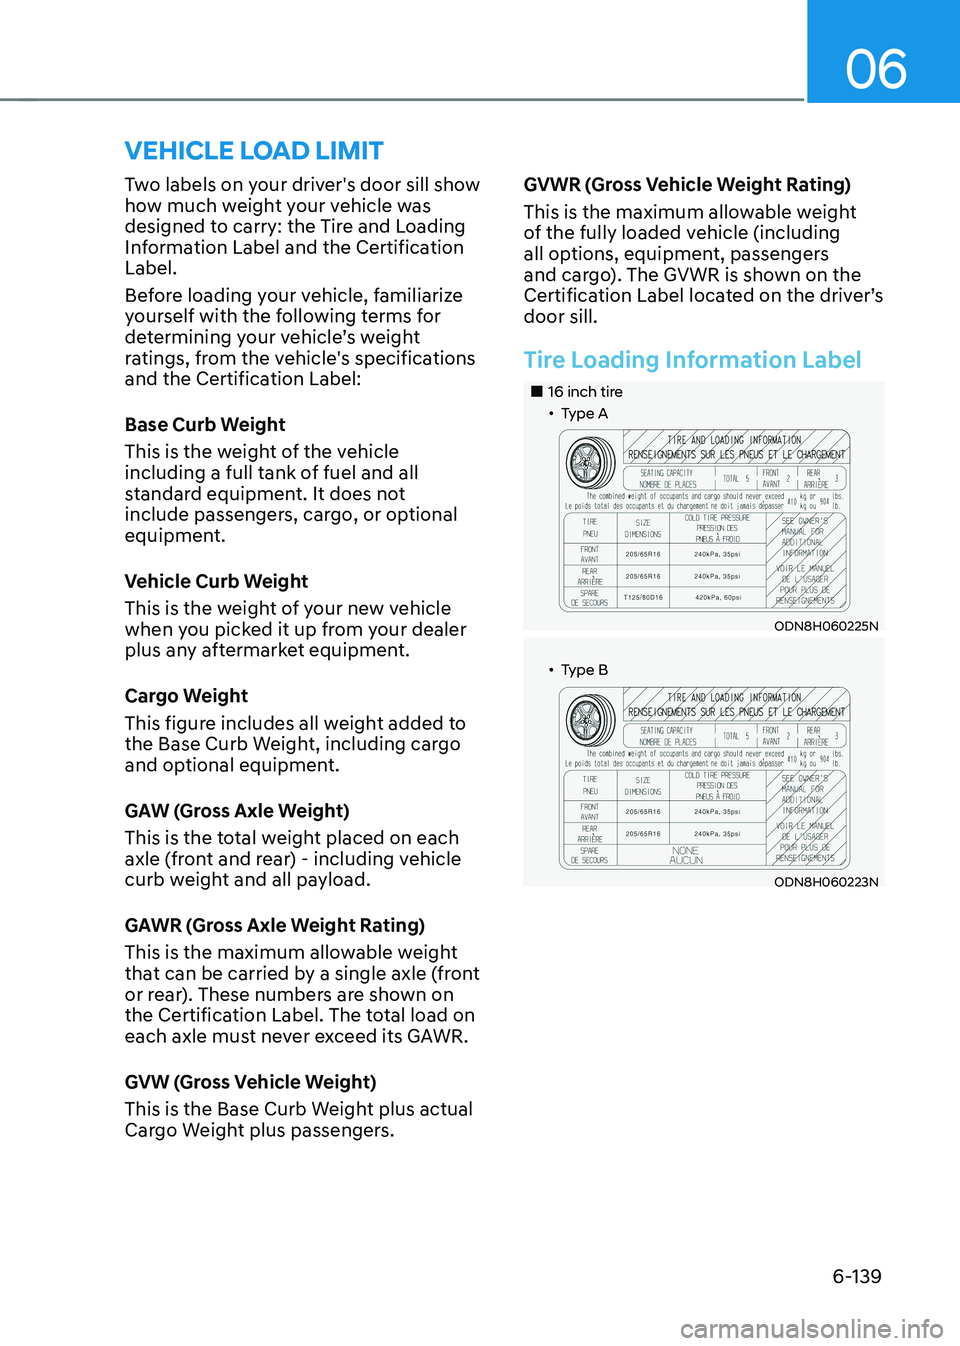
Two labels on your driver's door sill show
how much weight your vehicle was
designed to carry: the Tire and Loading
Information Label and the Certification
Label.
Before loading your vehicle, familiarize
yourself with the following terms for
determining your vehicle’s weight
ratings, from the vehicle's specifications
and the Certification Label:
Base Curb Weight
This is the weight of the vehicle
including a full tank of fuel and all
standard equipment. It does not
include passengers, cargo, or optional
equipment.
Vehicle Curb Weight
This is the weight of your new vehicle
when you picked it up from your dealer
plus any aftermarket equipment.
Cargo Weight
This figure includes all weight added to
the Base Curb Weight, including cargo
and optional equipment.
GAW (Gross Axle Weight)
This is the total weight placed on each
axle (front and rear) - including vehicle
curb weight and all payload.
GAWR (Gross Axle Weight Rating)
This is the maximum allowable weight
that can be carried by a single axle (front
or rear). These numbers are shown on
the Certification Label. The total load on
each axle must never exceed its GAWR.
GVW (Gross Vehicle Weight)
This is the Base Curb Weight plus actual
Cargo Weight plus passengers.GVWR (Gross Vehicle Weight Rating)
This is the maximum allowable weight
of the fully loaded vehicle (including
all options, equipment, passengers
and cargo). The GVWR is shown on the
Certification Label located on the driver’s
door sill.
Tire Loading Information Label
„„16 inch tire„ǴType A
ODN8H060225N
„ǴType B
ODN8H060223N
VEHICLE LOAD LIMIT
Page 423 of 527
07
7-3
If You Have a Flat Tire While
Driving
If a tire goes flat while you are driving:
• Take your foot off the accelerator
pedal and let the vehicle slow down
while driving straight ahead. Do not
apply the brakes immediately or
attempt to pull off the road as this
may cause loss of vehicle control
resulting in an accident. When the
vehicle has slowed to such a speed
that it is safe to do so, brake carefully
and pull off the road. Drive off the
road as far as possible and park on
firm, level ground. If you are on a
divided highway, do not park in the
median area between the two traffic
lanes.
• When the vehicle is stopped, press the
hazard warning flasher button, shift
the gear to P (Park), apply the parking
brake, and press the Engine Start/Stop
button to the OFF position.
• Have all passengers get out of the
vehicle. Be sure they all get out on the
side of the vehicle that is away from
traffic.
• When changing a flat tire, follow the
instructions provided later in this
chapter.
IF THE ENGINE WILL NOT
S TA RT
• Be sure to shift the gear to P (Park).
The vehicle starts only when the gear
is in P (Park).
• This vehicle does not have a regular
12V battery that needs periodic
replacement. It is lithium ion polymer
type integrated into the HEV high
voltage battery. The vehicle has a
12V battery protection system that
cuts 12V battery from vehicle draw
to prevent full discharge. If vehicle
will not start, first try pressing the
12V Battery Reset switch (left side of
the steering wheel near the fuel door
open switch) to reconnect the 12V
battery, but you must start vehicle
within 15 seconds of pressing the 12V
Battery Reset switch. After starting
the vehicle (
indicator ON ),
operate the vehicle safely outdoors in
ready mode stopped and/or drive it
for 30 minutes total to charge the 12V
battery fully.
• Check the fuel level and add fuel if
necessary.
If the vehicle still does not start, call
an authorized HYUNDAI dealer for
assistance.
NOTICE
Push or pull starting the vehicle may
cause the catalytic converter to
overload which can lead to damage to
the emission control system.
Page 519 of 527
I
I-11
LCD display (Type C) ........................................................................\
................4-39
LCD display control
........................................................................\
...............4-39
View modes
........................................................................\
............................4-40
Utility view mode
........................................................................\
...................4-41
Option menu
........................................................................\
...........................4-43
User settings mode
........................................................................\
.................4-44
LCD display messages
........................................................................\
................4-19
Shift to P to start engine
........................................................................\
..........4-19
Shift to P
........................................................................\
.................................4-19
Low key battery ........................................................................\
....................... 4-19
Press brake pedal to start engine
....................................................................4-19
Key not in vehicle
........................................................................\
..................4-19
Key not detected
........................................................................\
.....................4-19
Press START button again
........................................................................\
.....4-19
12V bettery discharging due to additional electrical devices
..........................4-19
Press START button with key
........................................................................\
4-20
Check BRAKE SWITCH fuse
.......................................................................4-20
Door, Hood, Trunk open indicator
.................................................................4-20
Sunroof open indicator
........................................................................\
...........4-20
Press START button while turning wheel
.......................................................4-20
Check steering wheel lock system
..................................................................4-20
Lights mode
........................................................................\
............................4-21
Wiper mode
........................................................................\
............................4-21
Low pressure
........................................................................\
..........................4-21
Low washer fluid ........................................................................\
..................... 4-21
Low fuel
........................................................................\
..................................4-21
Engine has overheated ........................................................................\
............. 4-21
Check exhaust system
........................................................................\
.............4-22
Check headlight
........................................................................\
.......................4-22
Check turn signal ........................................................................\
..................... 4-22
Check brake light
........................................................................\
....................4-22
Check headlamp LED
........................................................................\
.............4-22
Check Active Air Flap system
........................................................................\
.4-22