2021 HYUNDAI SANTA FE CALLIGRAPHY battery
[x] Cancel search: batteryPage 186 of 636
Convenient features
5-42
Electric Power Steering (EPS)
The system assists you with steering the
vehicle. If the vehicle is turned off or
if the power steering system becomes
inoperative, you may still steer the
vehicle, but it will require increased
steering effort.
Should you notice any change in the
effort required to steer during normal
vehicle operation, we recommend that
you have the system checked by an
authorized HYUNDAI dealer.
CAUTION
If Electric Power Steering does not
operate normally, the warning light
and the message ‘Check motor driven
power steering’ will illuminate on the
instrument cluster. You may steer the
vehicle, but it will require increased
steering efforts. We recommend that
you take your vehicle to an authorized
HYUNDAI dealer or to a service station
and have the system checked as soon as
possible.
Information
The following symptoms may occur during
normal vehicle operation:
• The steering effort may be high
immediately after pressing the Engine
Start/Stop button to the ON position.
This happens as the system performs
the EPS system diagnostics. When the
diagnostics are completed, the steering
wheel effort will return to its normal
condition.
• When the battery voltage is low, you
might have to put more steering effort.
However, it is a temporary condition so
that it will return to normal condition
after charging the battery.
• A click noise may be heard from the
EPS relay after the Engine Start/Stop
button is in the ON or OFF position.
• Motor noise may be heard when the
vehicle is at a stop or at a low driving
speed.
• When you operate the steering wheel
in low temperatures, abnormal noise
may occur. If the temperature rises, the
noise will disappear. This is a normal
condition.
• When an error is detected from EPS,
the steering effort assist function will
not be activated in order to prevent
fatal accidents. Instrument cluster
warning lights may be on or the
steering effort may be high. If these
symptoms occur, drive the vehicle
to a safe area as soon as it is safe to
do so. We recommend that you have
the system checked by an authorized
HYUNDAI dealer as soon as possible.
STEERING WHEEL
Page 191 of 636
05
5-47
Integrated HomeLink® Wireless Control
System
The HomeLink® Wireless Control System
provides a convenient way to replace
up to three hand held radio-frequency
transmitters used to activate compatible
devices such as gate operators, garage
door openers, entry door locks, security
systems, and home lighting.
NOTICE
HomeLink® operates while the ignition
switch is in the ACC or ON position
for safety reasons. It is to prevent
unintentional security problems from
happening when the vehicle is parked
outside the garage.
WARNING
Before programming HomeLink® to a
garage door opener or gate operator,
make sure people and objects are out
of the way of the device to prevent
potential harm or damage. Do not
use the HomeLink® with any garage
door opener that lacks the safety
stop and reverse features required
by U.S. federal safety standards (this
includes any garage door opener model
manufactured before April 1, 1982).
A garage door that cannot detect an
object - signaling the door to stop and
reverse - does not meet current U.S.
federal safety standards. Using a garage
door opener without these features
increases the risk of serious injury or
death.
For more information, contact
HomeLink® at www.homelink.com, or
call Home-Link customer support at
1-800-355-3515.
It is also recommended that a new
battery be replaced in the handheld
transmitter of the device being trained
to HomeLink® for quicker training and
accurate transmission of the radio
frequency. 1. Programming HomeLink
®
The following steps show how to
program HomeLink. If you have any
questions or are having difficulty
programming your HomeLink buttons,
refer to the HomeLink website or call the
HomeLink customer support toll-free
number. Do this before going back to the
dealer who sold you the car.
•
Visit the HomeLink website at: www.
homelink.com. Then at the top of the
page, choose your vehicle make. Then
watch the You Tube video, and/or
access additional website information.
• If you choose to access the website
via your cell phone, scan the QR code.
• Or call HomeLink customer support
at 1-800-355-3515 (Please have the
vehicle make/model and the opener
device make/model readily available.)
Page 192 of 636
Convenient features
5-48
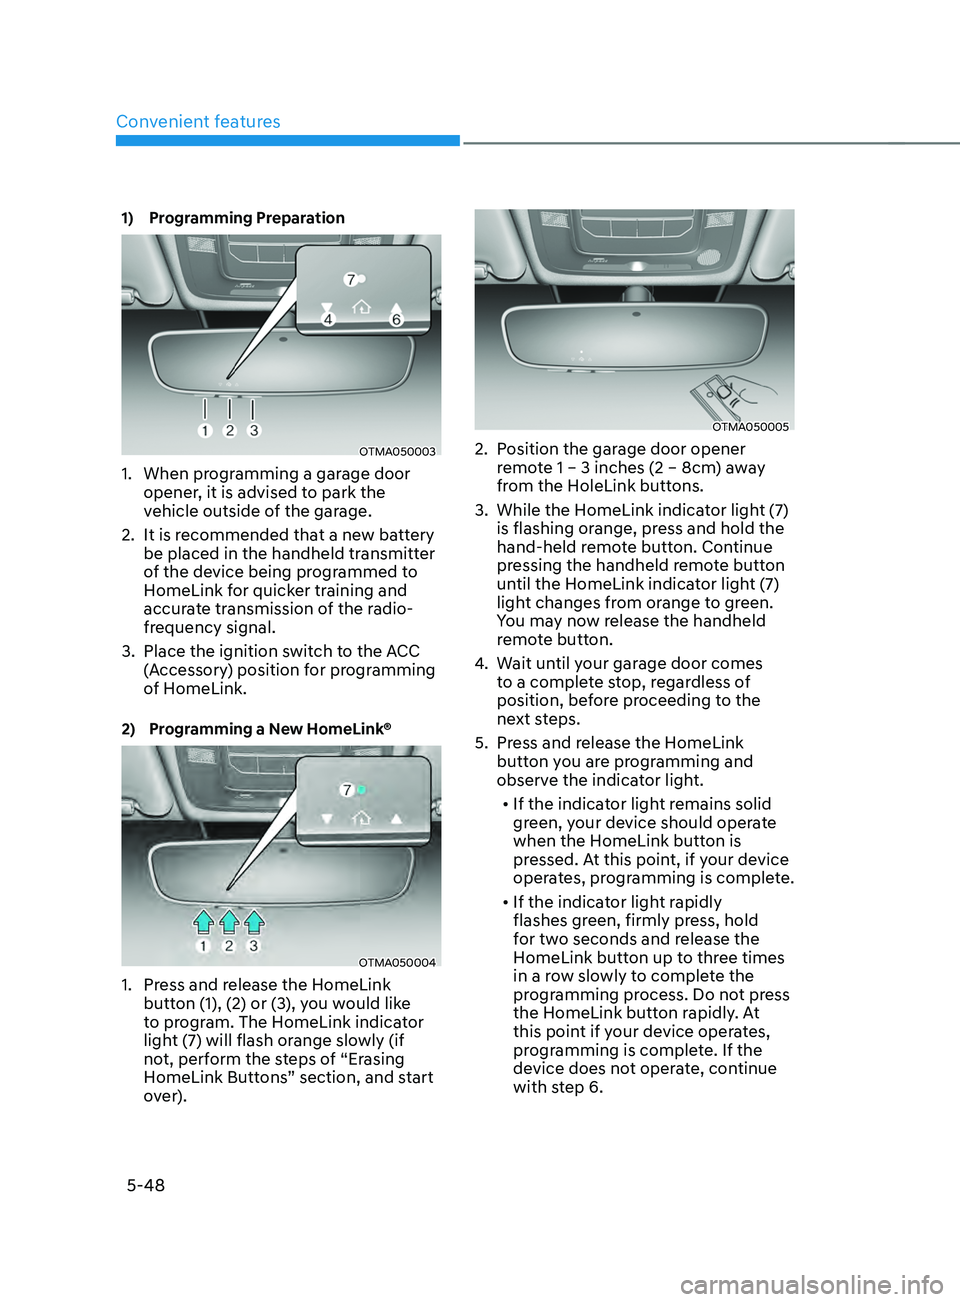
1) Programming Preparation
OTMA050003
1. When programming a garage door
opener, it is advised to park the
vehicle outside of the garage.
2.
It is recommended tha
t a new battery
be placed in the handheld transmitter
of the device being programmed to
HomeLink for quicker training and
accurate transmission of the radio-
frequency signal.
3.
Place the ignition swit
ch to the ACC
(Accessory) position for programming
of HomeLink.
2) Programming a New HomeLink®
OTMA050004
1. Press and release the HomeLink
butt on (1), (2) or (3), you would like
to program. The HomeLink indicator
light (7) will flash orange slowly (if
not, perform the steps of “Erasing
HomeLink Buttons” section, and start
over).
OTMA050005
2. Position the garage door opener
r emote 1 – 3 inches (2 – 8cm) away
from the HoleLink buttons.
3.
While the HomeLink indica
tor light (7)
is flashing orange, press and hold the
hand-held remote button. Continue
pressing the handheld remote button
until the HomeLink indicator light (7)
light changes from orange to green.
You may now release the handheld
remote button.
4.
Wait un
til your garage door comes
to a complete stop, regardless of
position, before proceeding to the
next steps.
5.
Press and r
elease the HomeLink
button you are programming and
observe the indicator light.
• If the indicator light remains solid
green, your device should operate
when the HomeLink button is
pressed. At this point, if your device
operates, programming is complete.
• If the indicator light rapidly
flashes green, firmly press, hold
for two seconds and release the
HomeLink button up to three times
in a row slowly to complete the
programming process. Do not press
the HomeLink button rapidly. At
this point if your device operates,
programming is complete. If the
device does not operate, continue
with step 6.
Page 201 of 636
05
5-57
• If ‘Convenience → Welcome mirr or/
light → On door unlock’ is select ed in the User Se
ttings mode on the LCD
display, the outside mirror will fold or
unfold automatically as follows:
- The mirror will f
old or unfold when
the door is locked or unlocked by
the smart key.
- The mirror will f
old or unfold when
the door is locked or unlocked by
the button on the outside door
handle.
• If
‘Con
venience
→ W
elcome
mirror/ligh
t
→ On door unlock’ and ‘Conv
enience
→ W
elcome
mirr
or/light
→ On driv
er
appr
oach’
is select
ed
in the User Se
ttings mode on the LCD
display, the outside mirror will unfold
automatically when you approach the
vehicle (all doors closed and locked)
with a smart key in possession.
NOTICE
The electric type side view mirror
operates even though the ignition
switch is in the OFF position. However,
to prevent unnecessary battery
discharge, do not adjust the mirrors
longer than necessary while the engine
is not running.
NOTICE
Do not fold the electric type side view
mirror by hand. It could cause motor
failure.
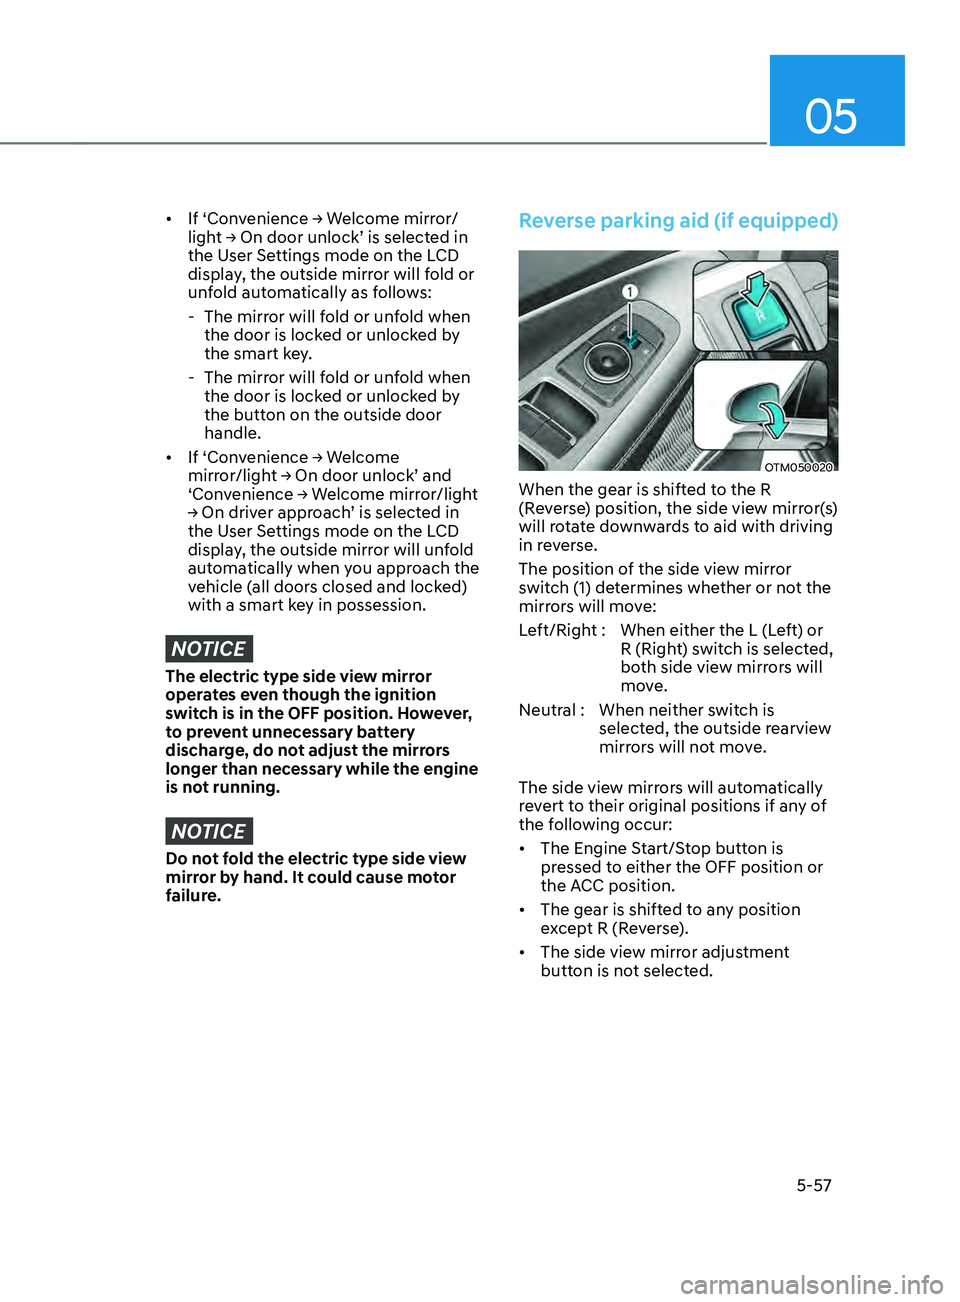
Reverse parking aid (if equipped)
OTM050020
When the gear is shifted to the R
(Reverse) position, the side view mirror(s)
will rotate downwards to aid with driving
in reverse.
The position of the side view mirror
switch (1) determines whether or not the
mirrors will move:
Left/Right : When either the L (Left) or R (Right) switch is selected,
both side view mirrors will
move.
Neutral : When neither switch is selected, the outside rearview
mirrors will not move.
The side view mirrors will automatically
revert to their original positions if any of
the following occur:
• The Engine Start/Stop button is
pressed to either the OFF position or
the ACC position.
• The gear is shifted to any position
except R (Reverse).
• The side view mirror adjustment
button is not selected.
Page 210 of 636
Convenient features
5-66
6. Within 3 seconds, push and hold
the control switch forward until the
sunshade and sunroof operates as
follows:
Sunshade
Open → Glass Open → Glass Close → Sunshade Close
Do no
t release the switch until the
operation is completed.
If you release the control switch during
operation, start the procedure again from
step 2.
7.
Release the sunr
oof control switch
after all steps have completed. The
sunroof system has been reset.
Information
If the sunroof is not reset when the vehicle
battery is disconnected or discharged, or
the sunroof fuse is blown, the sunroof may
not operate normally.
For more detailed information, we
recommend that you contact an
authorized HYUNDAI dealer.
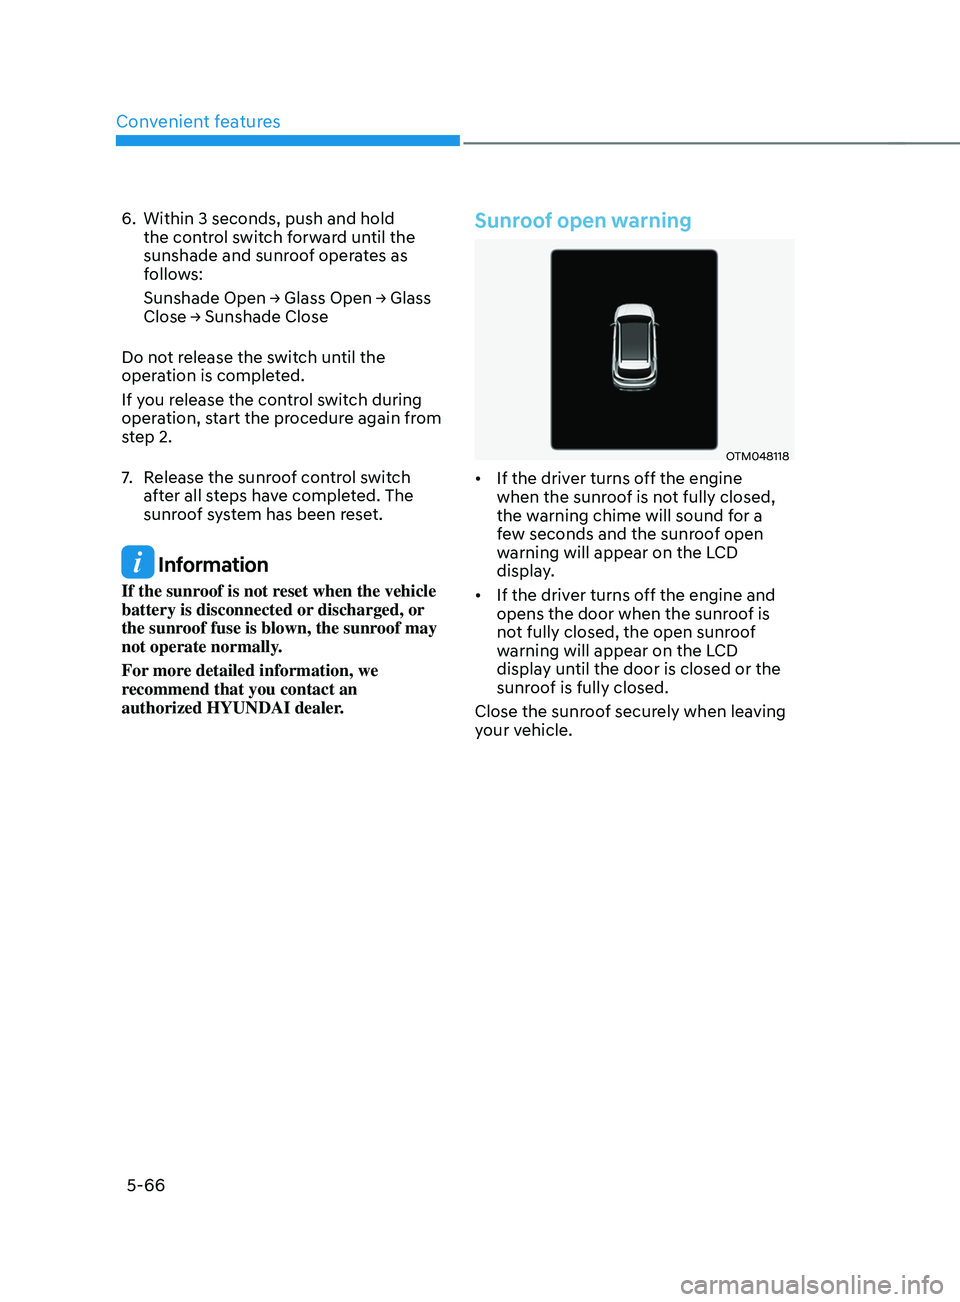
Sunroof open warning
OTM048118
• If the driver turns off the engine
when the sunroof is not fully closed,
the warning chime will sound for a
few seconds and the sunroof open
warning will appear on the LCD
display.
• If the driver turns off the engine and
opens the door when the sunroof is
not fully closed, the open sunroof
warning will appear on the LCD
display until the door is closed or the
sunroof is fully closed.
Close the sunroof securely when leaving
your vehicle.
Page 214 of 636
Convenient features
5-70
Power liftgate (if equipped)
The power liftgate open/close button
automatically opens and closes the
liftgate.
Before using the power liftgate
The power liftgate operates when the
gear is in P (Park) with the Engine Start/
Stop button in the ON position. However,
the liftgate will operate regardless of the
gear position when the engine is off.
For safety, before attempting to open or
close the liftgate, make sure the vehicle
is in P (Park).
WARNING
• Never leave children unattended
in your vehicle. Children might
operate the power liftgate. Doing so
could result in injury to themselves
or others, and could damage the
vehicle.
• Make sure there are no people or
objects around the liftgate before
operating the power liftgate. Wait
until the liftgate is opened fully and
stopped before loading or unloading
cargo or passengers from the
vehicle.
NOTICE
Do not close or open the power
liftgate manually. This may cause
damage to the power liftgate. If it is
necessary to close or open the power
liftgate manually when the battery is
discharged or disconnected, do not
apply excessive force.
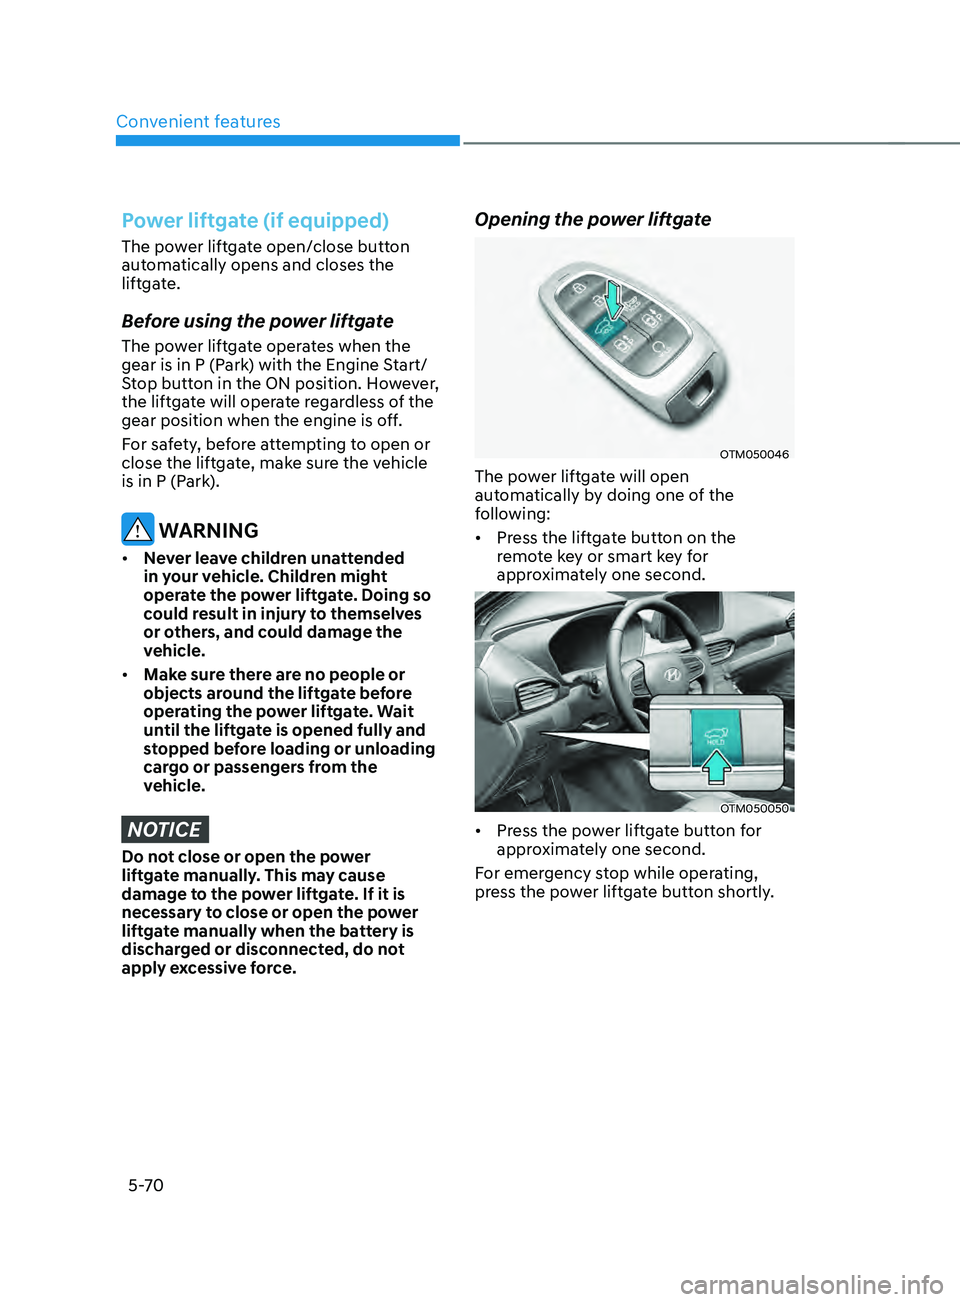
Opening the power liftgate
OTM050046
The power liftgate will open
automatically by doing one of the
following:
• Press the liftgate button on the
remote key or smart key for
approximately one second.
OTM050050
• Press the power liftgate button for
approximately one second.
For emergency stop while operating,
press the power liftgate button shortly.
Page 217 of 636
05
5-73
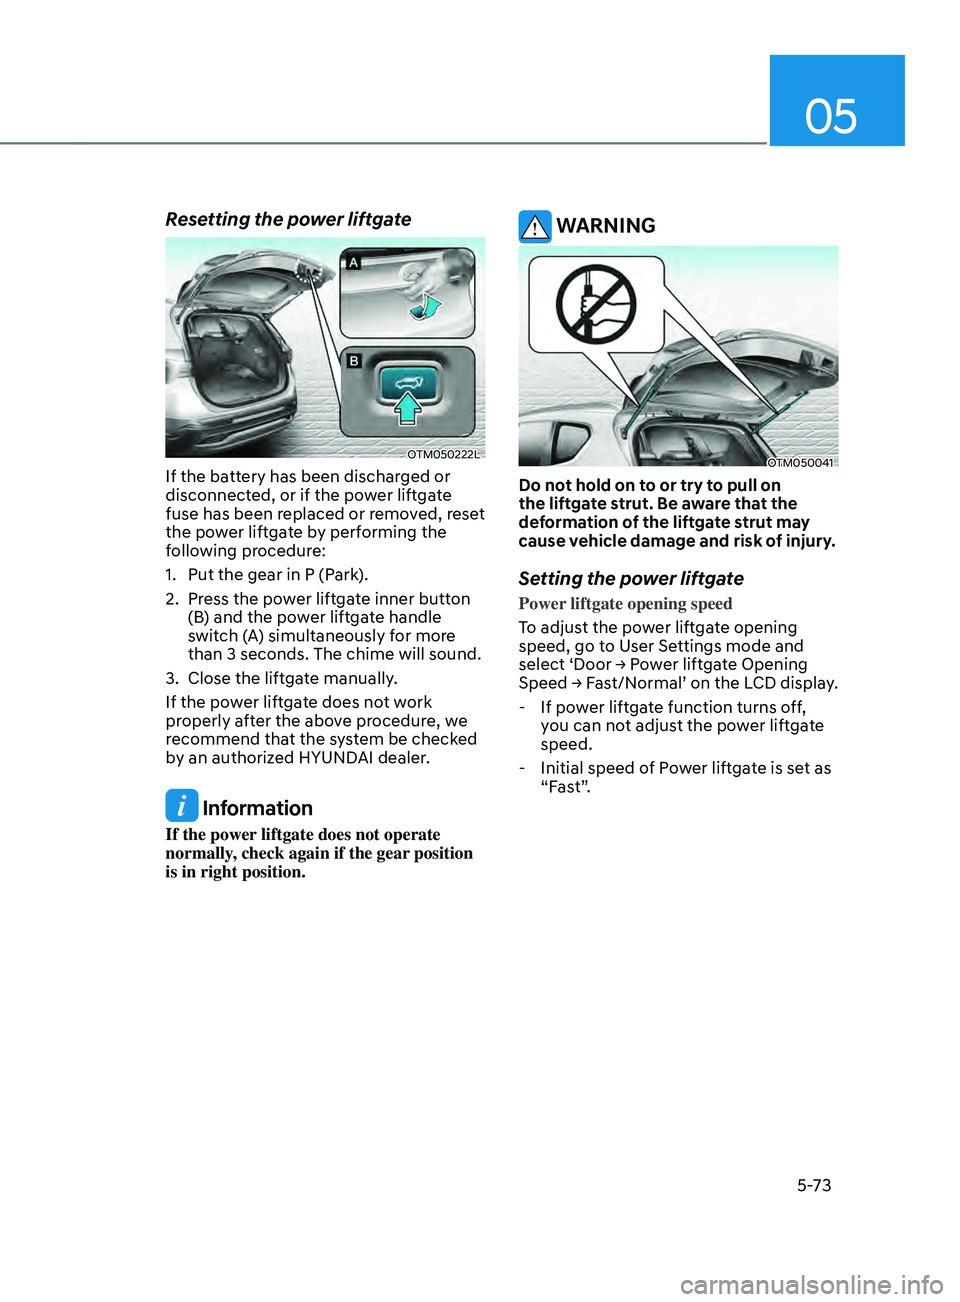
Resetting the power liftgate
OTM050222L
If the battery has been discharged or
disconnected, or if the power liftgate
fuse has been replaced or removed, reset
the power liftgate by performing the
following procedure:
1.
Put the gear in P (Park
).
2.
Press the po
wer liftgate inner button
(B) and the power liftgate handle
switch (A) simultaneously for more
than 3 seconds. The chime will sound.
3.
Close the liftga
te manually.
If the power liftgate does not work
properly after the above procedure, we
recommend that the system be checked
by an authorized HYUNDAI dealer.
Information
If the power liftgate does not operate
normally, check again if the gear position
is in right position.
WARNING
OTM050041
Do not hold on to or try to pull on
the liftgate strut. Be aware that the
deformation of the liftgate strut may
cause vehicle damage and risk of injury.
Setting the power liftgate
Power liftgate opening speed
To adjust the power liftgate opening
speed, go to User Settings mode and
select
‘Door → P
ower
lift
gate
Opening Speed → Fas
t/Normal’
on the LCD display
.
- If pow
er liftgate function turns off,
you can not adjust the power liftgate
speed.
- Initial speed of P
ower liftgate is set as
“Fast”.
Page 228 of 636
Convenient features
5-84
Turn signals and lane change signals
OIG046417
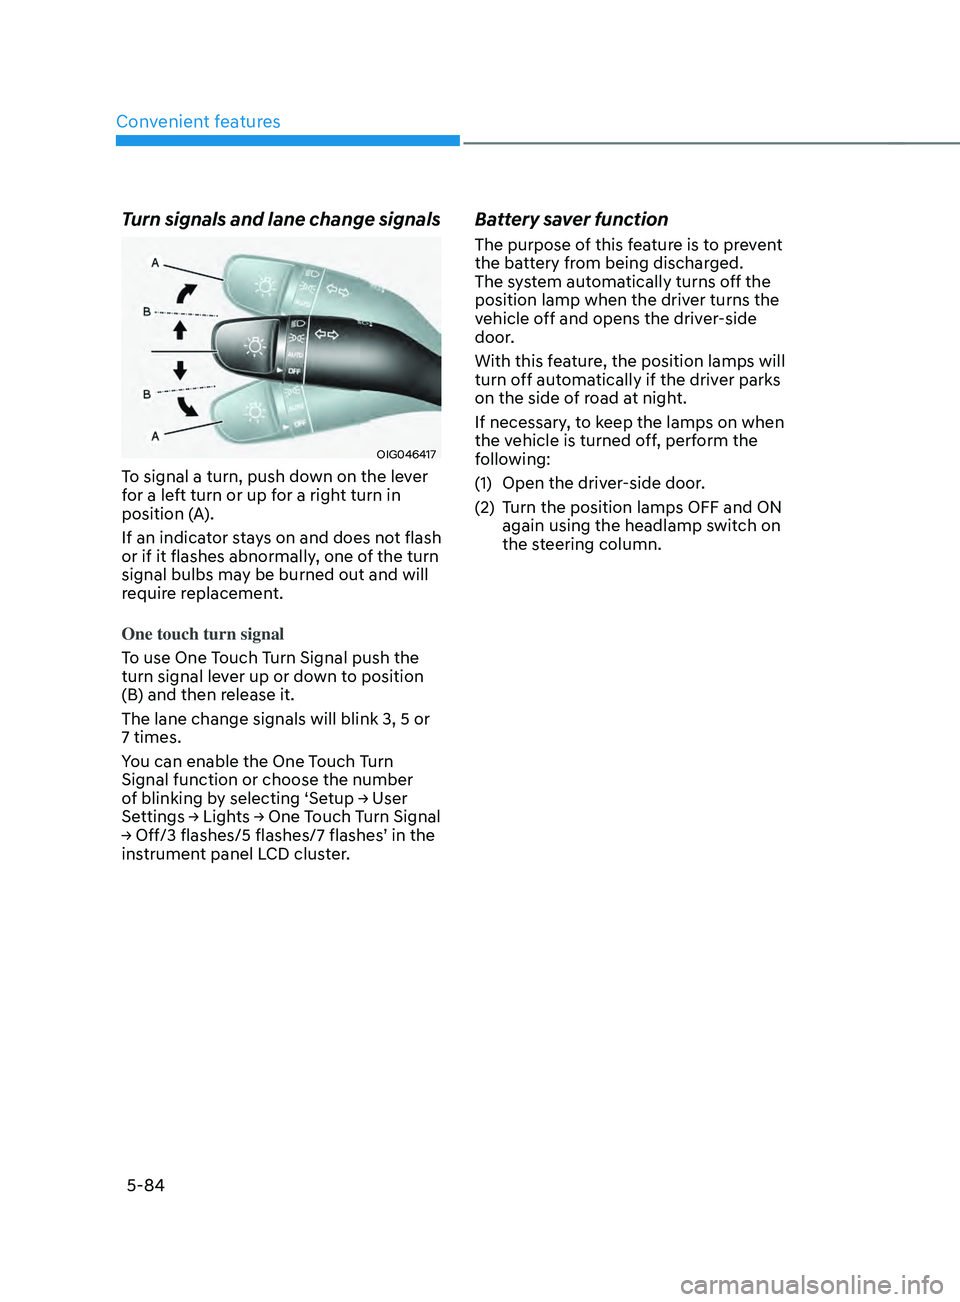
To signal a turn, push down on the lever
for a left turn or up for a right turn in
position (A).
If an indicator stays on and does not flash
or if it flashes abnormally, one of the turn
signal bulbs may be burned out and will
require replacement.
One touch turn signal
To use One Touch Turn Signal push the
turn signal lever up or down to position
(B) and then release it.
The lane change signals will blink 3, 5 or
7 times.
You can enable the One Touch Turn
Signal function or choose the number
of
blinking b
y
selecting ‘Se
tup
→ U
ser
Settings → Ligh
ts
→ One T
ouch
T
urn
Signal → Off/3 flashes/5 flashes/7 flashes
’
in the instrumen
t panel LCD cluster.
Battery saver function
The purpose of this feature is to prevent
the battery from being discharged.
The system automatically turns off the
position lamp when the driver turns the
vehicle off and opens the driver-side
door.
With this feature, the position lamps will
turn off automatically if the driver parks
on the side of road at night.
If necessary, to keep the lamps on when
the vehicle is turned off, perform the
following:
(1)
Open the driver
-side door.
(2)
Turn the position lamps OFF and ON
again using the headlamp s
witch on
the steering column.