2021 HYUNDAI SANTA FE CALLIGRAPHY engine
[x] Cancel search: enginePage 188 of 636
Convenient features
5-44
• Auto Comfort Control (for driver’s
seat) (if equipped)
- The heat
ed steering wheel
automatically controls the steering
wheel temperature depending on
the ambient temperature and the
set climate control temperature
when the engine is running. If the
heated steering wheel switch is
pushed, the heated steering wheel
will have to be controlled manually.
To use this function, it must be
activated from the Settings menu in
the AVN system screen.
- The heat
ed steering wheel defaults
to the OFF position whenever the
ignition switch is ON. However, if
the Auto Comfort Control function
is ON, the heated steering wheel
will turn on and off depending on
the ambient temperature and the
set climate control temperature.
For more details, we recommend that
you contact an authorized HYUNDAI
dealer.
Information
The heated steering wheel will turn off
automatically approximately 30 minutes
after the heated steering wheel is turned
on.
NOTICE
Do not install any cover or accessory
on the steering wheel. This cover or
accessory could cause damage to the
heated steering wheel system.
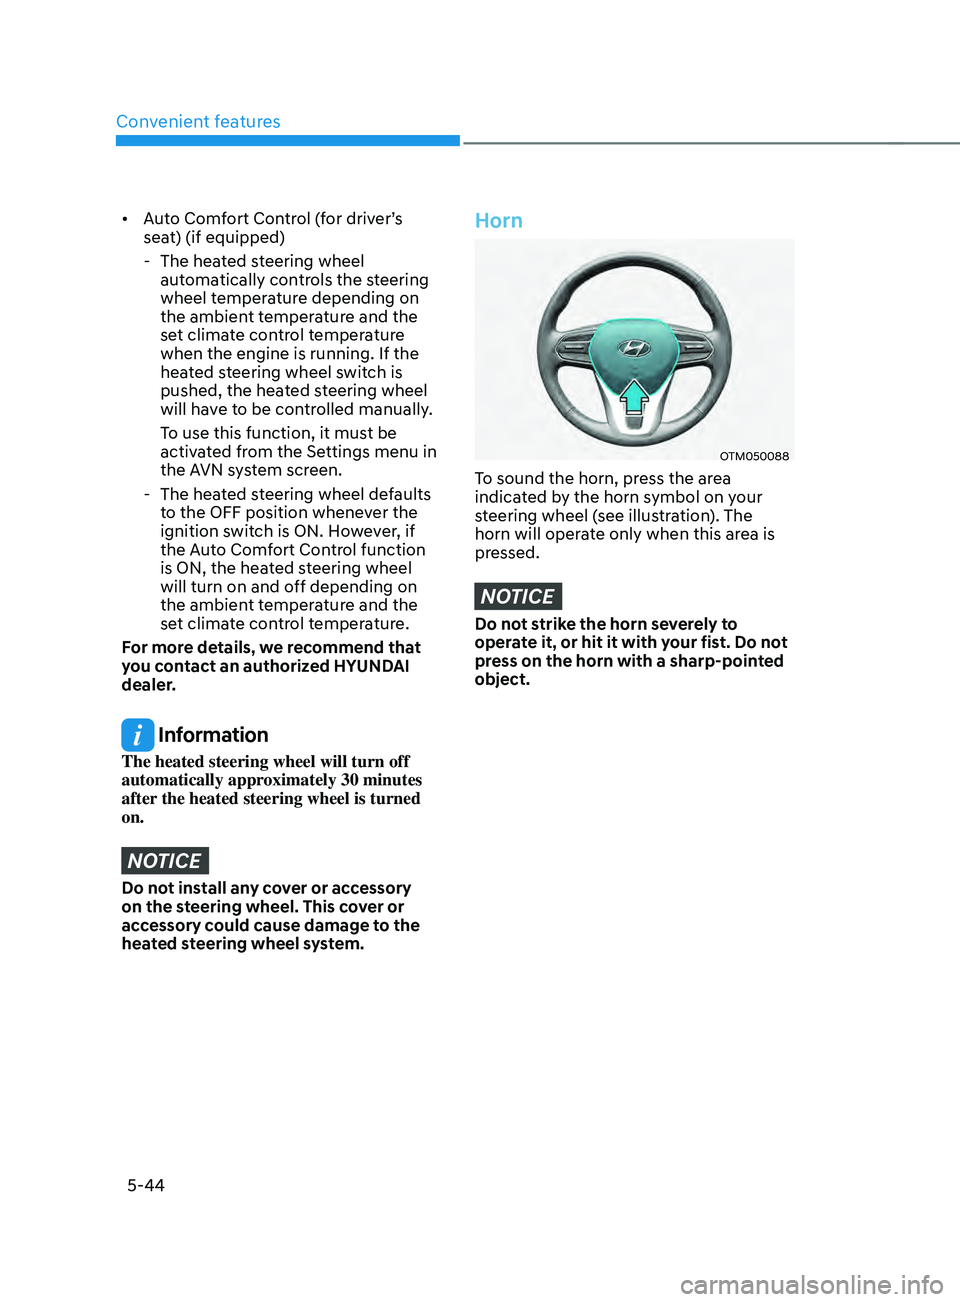
Horn
OTM050088
To sound the horn, press the area
indicated by the horn symbol on your
steering wheel (see illustration). The
horn will operate only when this area is
pressed.
NOTICE
Do not strike the horn severely to
operate it, or hit it with your fist. Do not
press on the horn with a sharp-pointed
object.
Page 189 of 636
05
5-45
Inside rearview mirror
Before driving your vehicle, check to
see that your inside rearview mirror is
properly positioned. Adjust the rearview
mirror so that the view through the rear
window is properly centered.
WARNING
Make sure your line of sight is not
obstructed. Do not place objects in the
rear seat, cargo area, or behind the rear
headrests which could interfere with
your vision through the rear window.
WARNING
To prevent serious injury during an
accident or deployment of the air bag,
do not modify the rearview mirror and
do not install a wide mirror.
WARNING
NEVER adjust the mirror while driving.
This may cause loss of vehicle control
resulting in an accident.
NOTICE
When cleaning the mirror, use a paper
towel or similar material dampened
with glass cleaner. Do not spray glass
cleaner directly on the mirror as this
may cause the liquid cleaner to enter
the mirror housing.
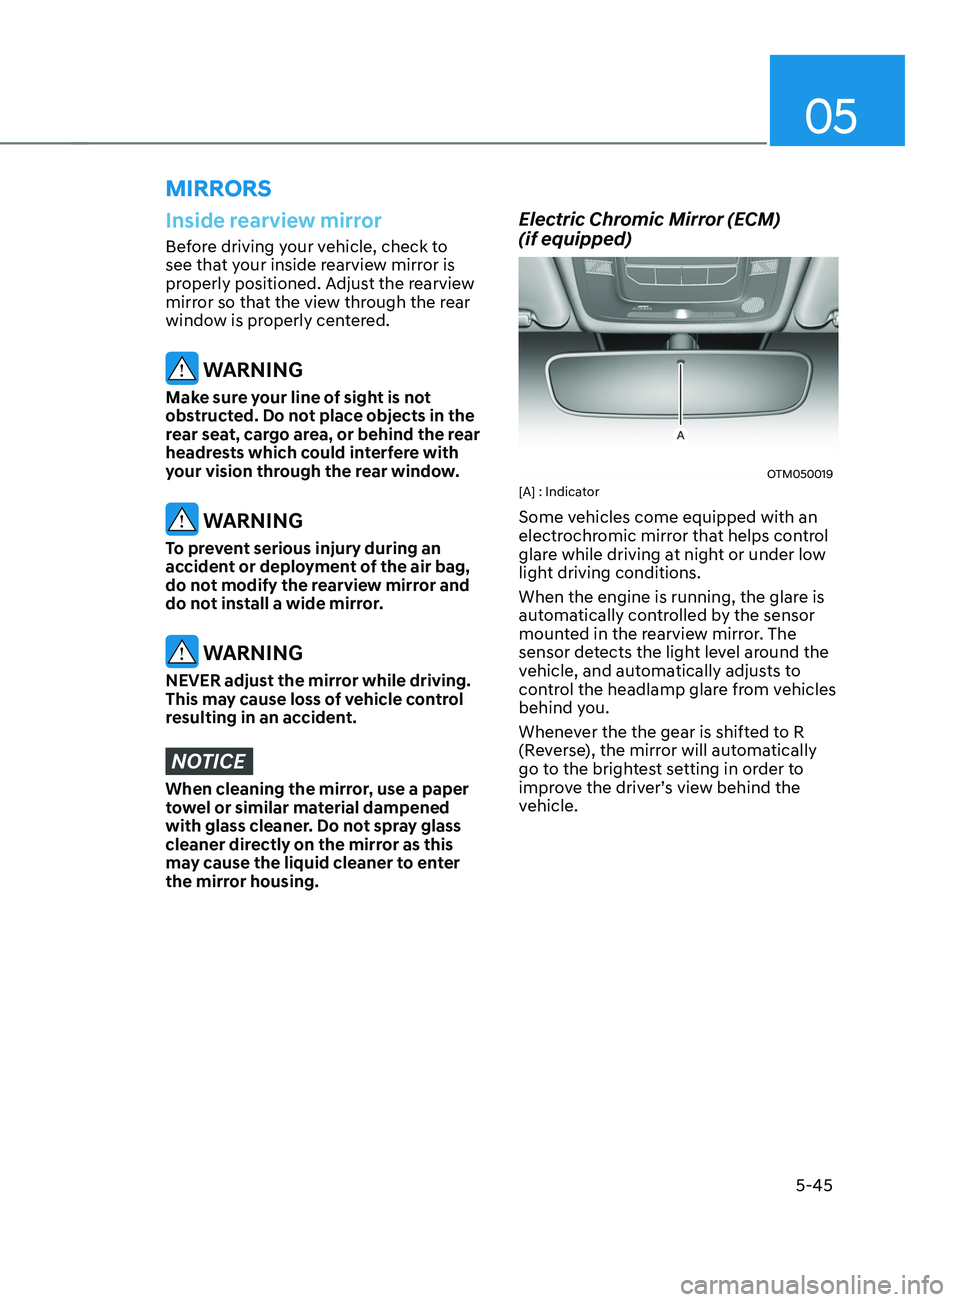
Electric Chromic Mirror (ECM)
(if equipped)
OTM050019[A] : Indicator
Some vehicles come equipped with an
electrochromic mirror that helps control
glare while driving at night or under low
light driving conditions.
When the engine is running, the glare is
automatically controlled by the sensor
mounted in the rearview mirror. The
sensor detects the light level around the
vehicle, and automatically adjusts to
control the headlamp glare from vehicles
behind you.
Whenever the the gear is shifted to R
(Reverse), the mirror will automatically
go to the brightest setting in order to
improve the driver’s view behind the
vehicle.
MIRRORS
Page 201 of 636
05
5-57
• If ‘Convenience → Welcome mirr or/
light → On door unlock’ is select ed in the User Se
ttings mode on the LCD
display, the outside mirror will fold or
unfold automatically as follows:
- The mirror will f
old or unfold when
the door is locked or unlocked by
the smart key.
- The mirror will f
old or unfold when
the door is locked or unlocked by
the button on the outside door
handle.
• If
‘Con
venience
→ W
elcome
mirror/ligh
t
→ On door unlock’ and ‘Conv
enience
→ W
elcome
mirr
or/light
→ On driv
er
appr
oach’
is select
ed
in the User Se
ttings mode on the LCD
display, the outside mirror will unfold
automatically when you approach the
vehicle (all doors closed and locked)
with a smart key in possession.
NOTICE
The electric type side view mirror
operates even though the ignition
switch is in the OFF position. However,
to prevent unnecessary battery
discharge, do not adjust the mirrors
longer than necessary while the engine
is not running.
NOTICE
Do not fold the electric type side view
mirror by hand. It could cause motor
failure.
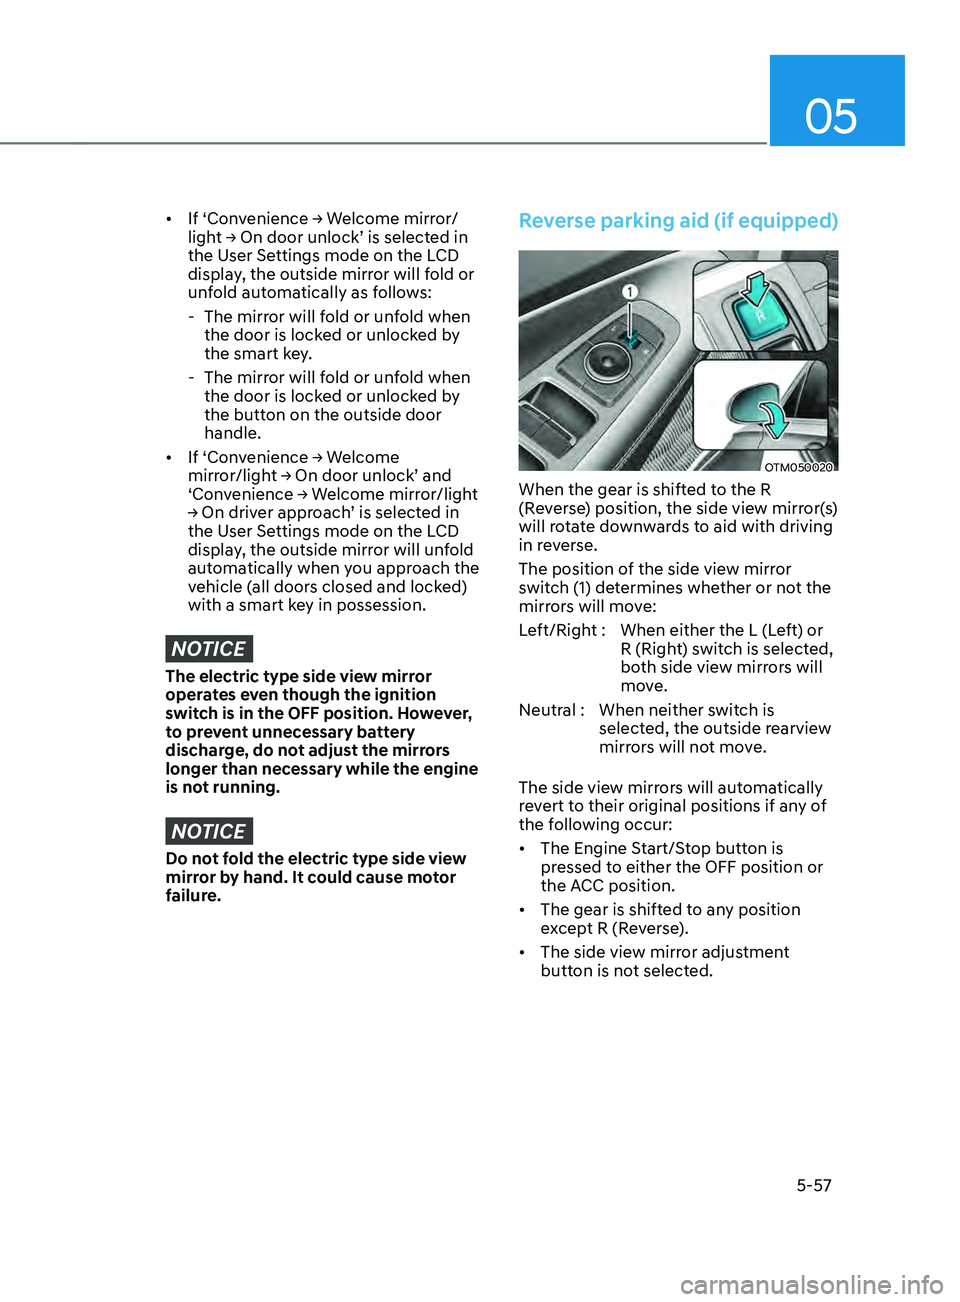
Reverse parking aid (if equipped)
OTM050020
When the gear is shifted to the R
(Reverse) position, the side view mirror(s)
will rotate downwards to aid with driving
in reverse.
The position of the side view mirror
switch (1) determines whether or not the
mirrors will move:
Left/Right : When either the L (Left) or R (Right) switch is selected,
both side view mirrors will
move.
Neutral : When neither switch is selected, the outside rearview
mirrors will not move.
The side view mirrors will automatically
revert to their original positions if any of
the following occur:
• The Engine Start/Stop button is
pressed to either the OFF position or
the ACC position.
• The gear is shifted to any position
except R (Reverse).
• The side view mirror adjustment
button is not selected.
Page 206 of 636
Convenient features
5-62
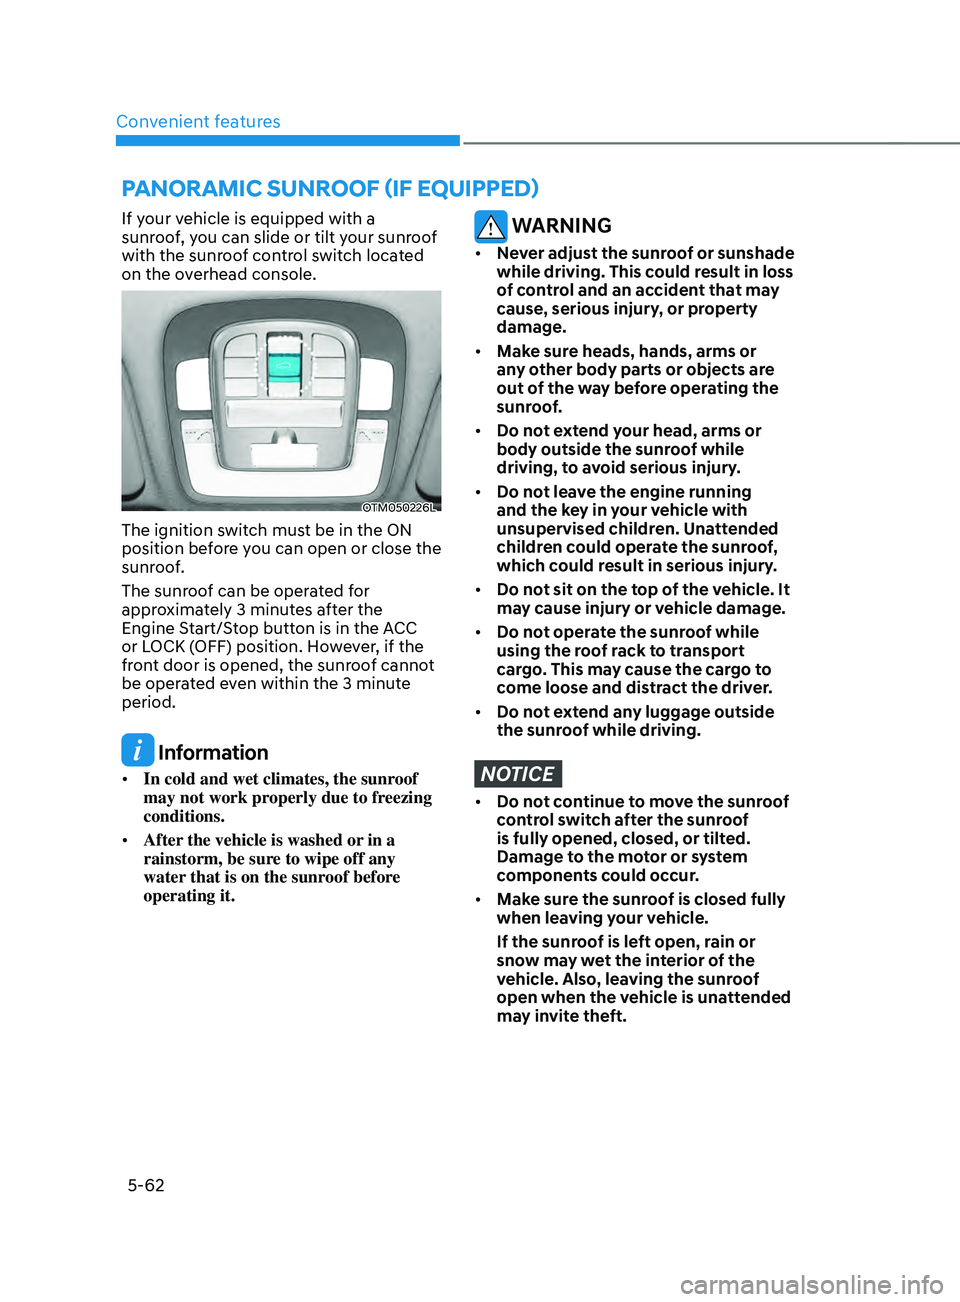
If your vehicle is equipped with a
sunroof, you can slide or tilt your sunroof
with the sunroof control switch located
on the overhead console.
OTM050226L
The ignition switch must be in the ON
position before you can open or close the
sunroof.
The sunroof can be operated for
approximately 3 minutes after the
Engine Start/Stop button is in the ACC
or LOCK (OFF) position. However, if the
front door is opened, the sunroof cannot
be operated even within the 3 minute
period.
Information
• In cold and wet climates, the sunroof
may not work properly due to freezing
conditions.
• After the vehicle is washed or in a
rainstorm, be sure to wipe off any
water that is on the sunroof before
operating it.
WARNING
• Never adjust the sunroof or sunshade
while driving. This could result in loss
of control and an accident that may
cause, serious injury, or property
damage.
• Make sure heads, hands, arms or
any other body parts or objects are
out of the way before operating the
sunroof.
• Do not extend your head, arms or
body outside the sunroof while
driving, to avoid serious injury.
• Do not leave the engine running
and the key in your vehicle with
unsupervised children. Unattended
children could operate the sunroof,
which could result in serious injury.
• Do not sit on the top of the vehicle. It
may cause injury or vehicle damage.
• Do not operate the sunroof while
using the roof rack to transport
cargo. This may cause the cargo to
come loose and distract the driver.
• Do not extend any luggage outside
the sunroof while driving.
NOTICE
• Do not continue to move the sunroof
control switch after the sunroof
is fully opened, closed, or tilted.
Damage to the motor or system
components could occur.
• Make sure the sunroof is closed fully
when leaving your vehicle.
If the sunroof is left open, rain or
snow may wet the interior of the
vehicle. Also, leaving the sunroof
open when the vehicle is unattended
may invite theft.
pAnORAmIC sUnR OOF (IF E QUIppED)
Page 209 of 636
05
5-65
Automatic reverse
ODH043039
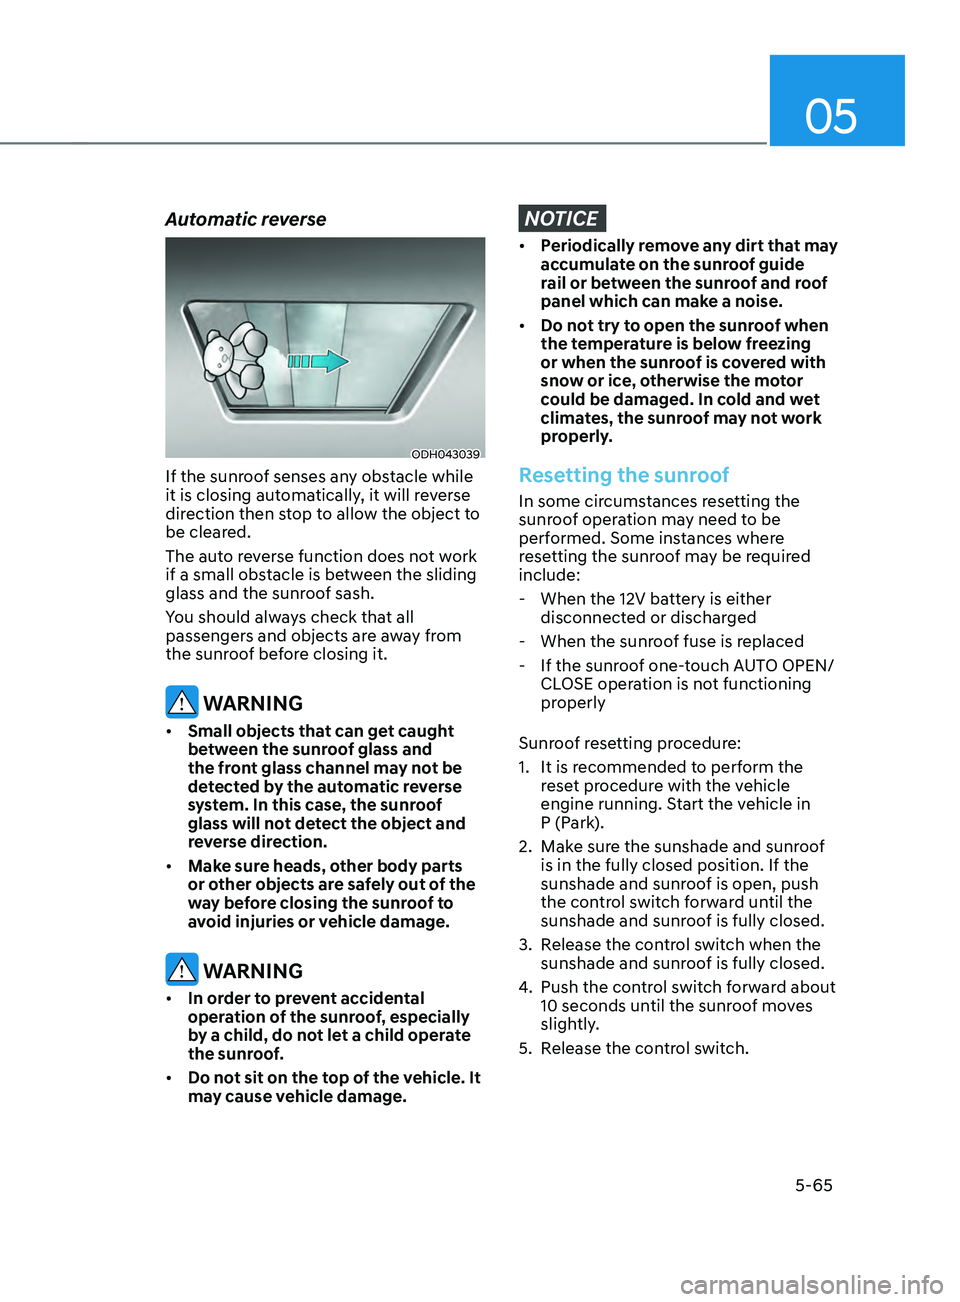
If the sunroof senses any obstacle while
it is closing automatically, it will reverse
direction then stop to allow the object to
be cleared.
The auto reverse function does not work
if a small obstacle is between the sliding
glass and the sunroof sash.
You should always check that all
passengers and objects are away from
the sunroof before closing it.
WARNING
• Small objects that can get caught
between the sunroof glass and
the front glass channel may not be
detected by the automatic reverse
system. In this case, the sunroof
glass will not detect the object and
reverse direction.
• Make sure heads, other body parts
or other objects are safely out of the
way before closing the sunroof to
avoid injuries or vehicle damage.
WARNING
• In order to prevent accidental
operation of the sunroof, especially
by a child, do not let a child operate
the sunroof.
• Do not sit on the top of the vehicle. It
may cause vehicle damage.
NOTICE
• Periodically remove any dirt that may
accumulate on the sunroof guide
rail or between the sunroof and roof
panel which can make a noise.
• Do not try to open the sunroof when
the temperature is below freezing
or when the sunroof is covered with
snow or ice, otherwise the motor
could be damaged. In cold and wet
climates, the sunroof may not work
properly.
Resetting the sunroof
In some circumstances resetting the
sunroof operation may need to be
performed. Some instances where
resetting the sunroof may be required
include:
- When the 12V batt
ery is either
disconnected or discharged
- When the sunroo
f fuse is replaced
- If the sunroo
f one-touch AUTO OPEN/
CLOSE operation is not functioning
properly
Sunroof resetting procedure:
1.
It is recommended t
o perform the
reset procedure with the vehicle
engine running. Start the vehicle in
P (Park).
2.
Make sur
e the sunshade and sunroof
is in the fully closed position. If the
sunshade and sunroof is open, push
the control switch forward until the
sunshade and sunroof is fully closed.
3.
Release the con
trol switch when the
sunshade and sunroof is fully closed.
4.
Push the contr
ol switch forward about
10 seconds until the sunroof moves
slightly.
5.
Release the con
trol switch.
Page 210 of 636
Convenient features
5-66
6. Within 3 seconds, push and hold
the control switch forward until the
sunshade and sunroof operates as
follows:
Sunshade
Open → Glass Open → Glass Close → Sunshade Close
Do no
t release the switch until the
operation is completed.
If you release the control switch during
operation, start the procedure again from
step 2.
7.
Release the sunr
oof control switch
after all steps have completed. The
sunroof system has been reset.
Information
If the sunroof is not reset when the vehicle
battery is disconnected or discharged, or
the sunroof fuse is blown, the sunroof may
not operate normally.
For more detailed information, we
recommend that you contact an
authorized HYUNDAI dealer.
Sunroof open warning
OTM048118
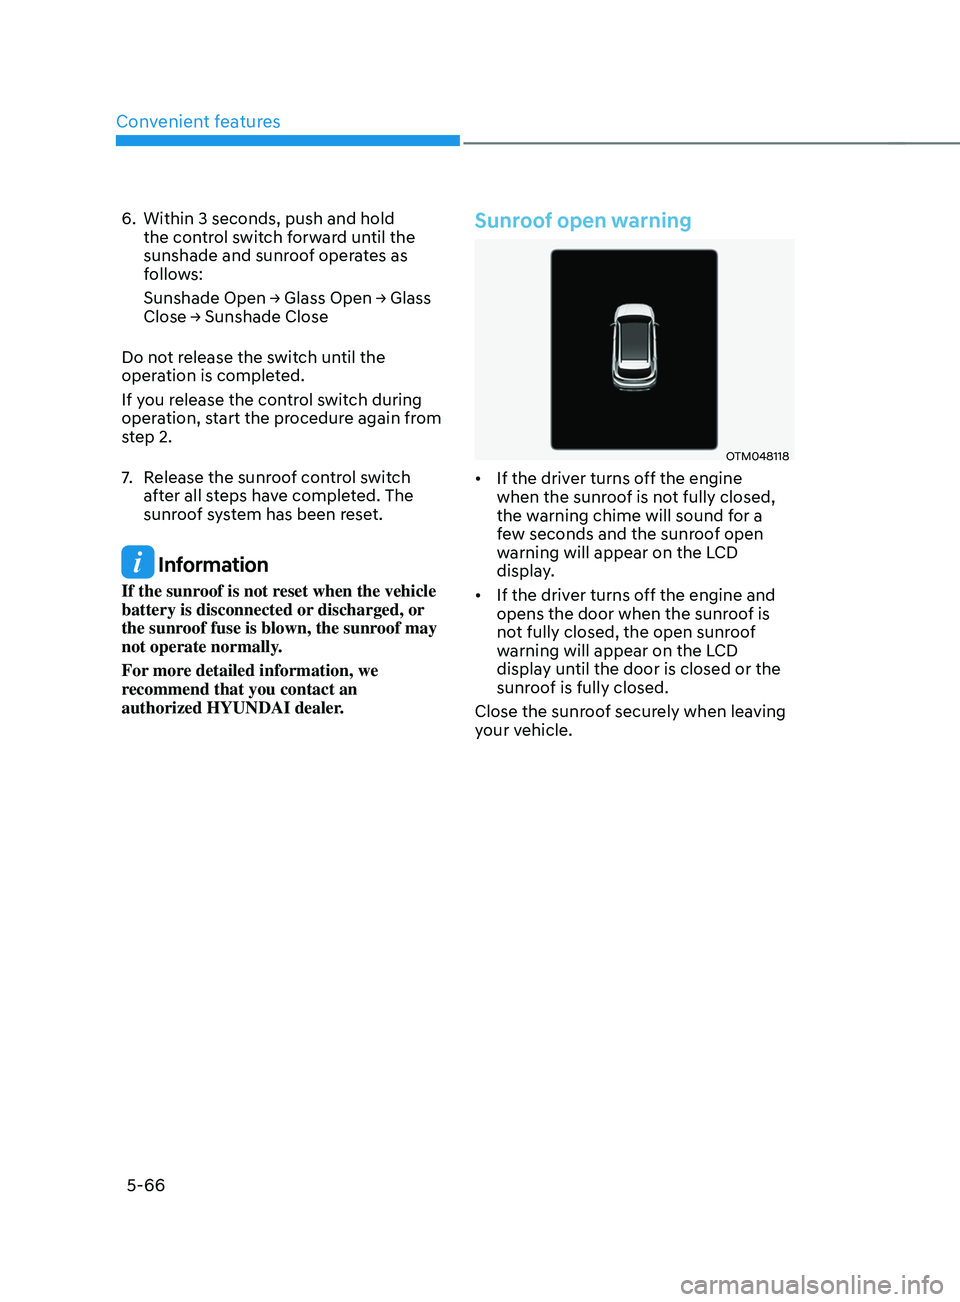
• If the driver turns off the engine
when the sunroof is not fully closed,
the warning chime will sound for a
few seconds and the sunroof open
warning will appear on the LCD
display.
• If the driver turns off the engine and
opens the door when the sunroof is
not fully closed, the open sunroof
warning will appear on the LCD
display until the door is closed or the
sunroof is fully closed.
Close the sunroof securely when leaving
your vehicle.
Page 211 of 636
05
5-67
Hood
Opening the hood
OTM050032
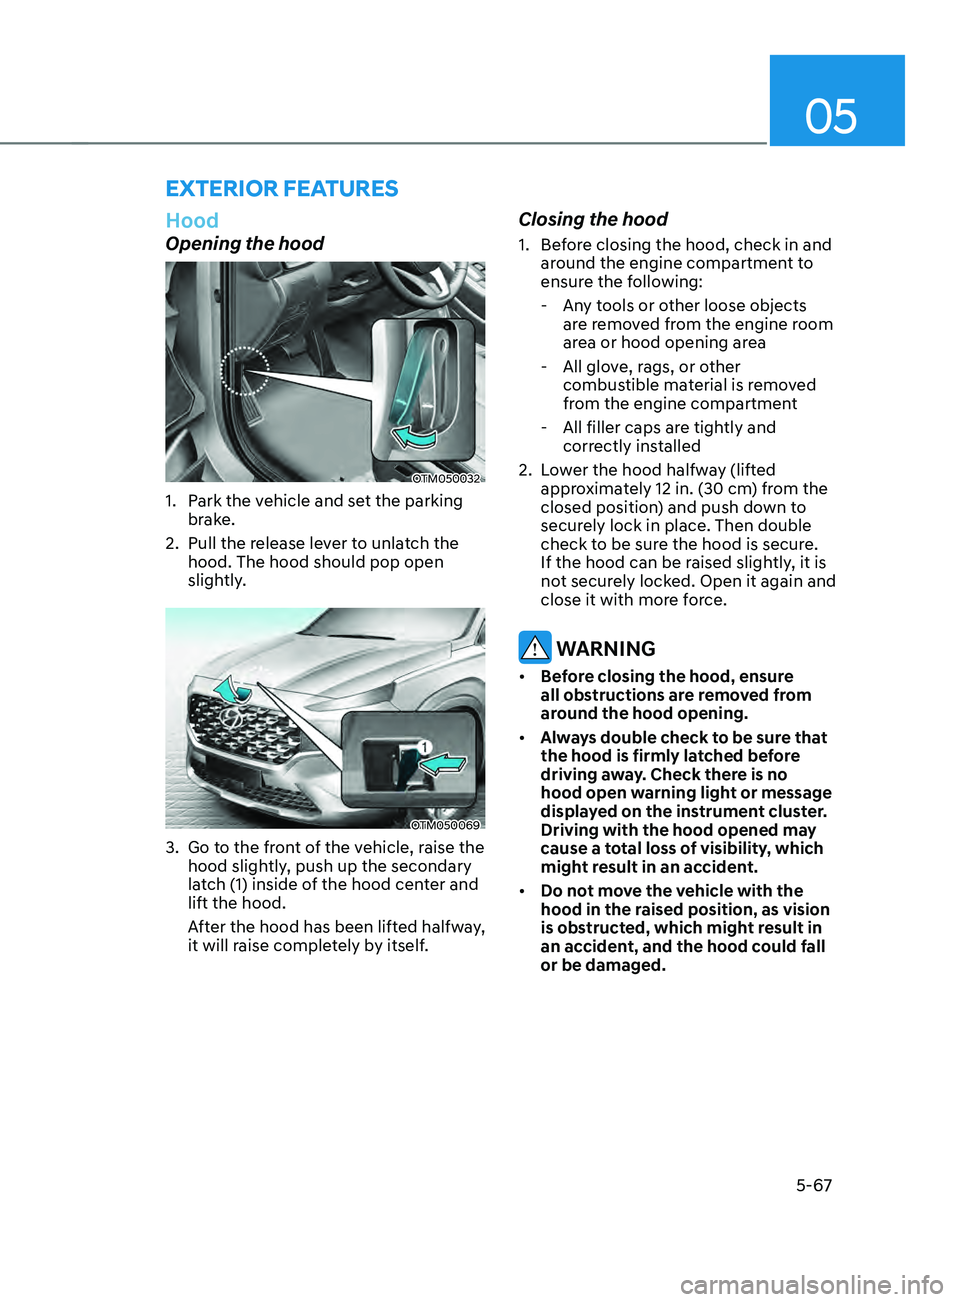
1. Park the vehicle and set the parking
brake.
2.
Pull the release le
ver to unlatch the
hood. The hood should pop open
slightly.
OTM050069
3. Go to the front of the vehicle, raise the
hood sligh tly, push up the secondary
latch (1) inside of the hood center and
lift the hood.
After the hood has been lifted halfway,
it will raise completely by itself.
Closing the hood
1. Before closing the hood, check in and
ar ound the engine compartment to
ensure the following:
- Any t
ools or other loose objects
are removed from the engine room
area or hood opening area
- All glov
e, rags, or other
combustible material is removed
from the engine compartment
- All filler caps are tigh
tly and
correctly installed
2.
Lo
wer the hood halfway (lifted
approximately 12 in. (30 cm) from the
closed position) and push down to
securely lock in place. Then double
check to be sure the hood is secure.
If the hood can be raised slightly, it is
not securely locked. Open it again and
close it with more force.
WARNING
• Before closing the hood, ensure
all obstructions are removed from
around the hood opening.
• Always double check to be sure that
the hood is firmly latched before
driving away. Check there is no
hood open warning light or message
displayed on the instrument cluster.
Driving with the hood opened may
cause a total loss of visibility, which
might result in an accident.
• Do not move the vehicle with the
hood in the raised position, as vision
is obstructed, which might result in
an accident, and the hood could fall
or be damaged.
ExTERIOR FEATURES
Page 214 of 636
Convenient features
5-70
Power liftgate (if equipped)
The power liftgate open/close button
automatically opens and closes the
liftgate.
Before using the power liftgate
The power liftgate operates when the
gear is in P (Park) with the Engine Start/
Stop button in the ON position. However,
the liftgate will operate regardless of the
gear position when the engine is off.
For safety, before attempting to open or
close the liftgate, make sure the vehicle
is in P (Park).
WARNING
• Never leave children unattended
in your vehicle. Children might
operate the power liftgate. Doing so
could result in injury to themselves
or others, and could damage the
vehicle.
• Make sure there are no people or
objects around the liftgate before
operating the power liftgate. Wait
until the liftgate is opened fully and
stopped before loading or unloading
cargo or passengers from the
vehicle.
NOTICE
Do not close or open the power
liftgate manually. This may cause
damage to the power liftgate. If it is
necessary to close or open the power
liftgate manually when the battery is
discharged or disconnected, do not
apply excessive force.
Opening the power liftgate
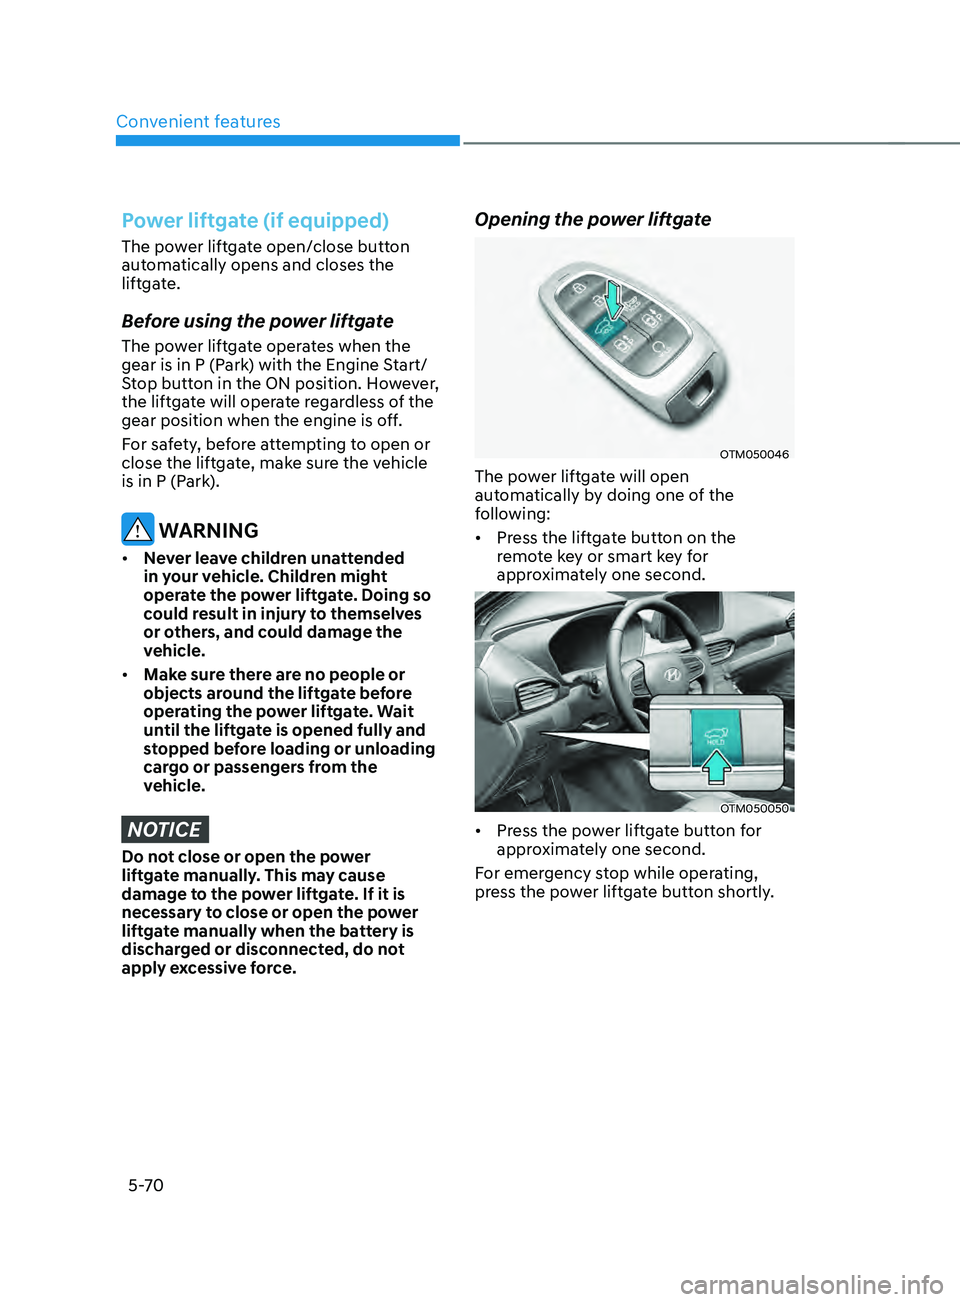
OTM050046
The power liftgate will open
automatically by doing one of the
following:
• Press the liftgate button on the
remote key or smart key for
approximately one second.
OTM050050
• Press the power liftgate button for
approximately one second.
For emergency stop while operating,
press the power liftgate button shortly.