2021 HYUNDAI ELANTRA HYBRID stop start
[x] Cancel search: stop startPage 434 of 555
![HYUNDAI ELANTRA HYBRID 2021 Owners Manual 07
7-113
Reverse Parking Distance Warning can
warn the driver if an obstacle is detected
when the vehicle is moving forward or
backward at low speeds.
Detecting sensor
OCN7H070023
[1] : Rear ultras HYUNDAI ELANTRA HYBRID 2021 Owners Manual 07
7-113
Reverse Parking Distance Warning can
warn the driver if an obstacle is detected
when the vehicle is moving forward or
backward at low speeds.
Detecting sensor
OCN7H070023
[1] : Rear ultras](/manual-img/35/56094/w960_56094-433.png)
07
7-113
Reverse Parking Distance Warning can
warn the driver if an obstacle is detected
when the vehicle is moving forward or
backward at low speeds.
Detecting sensor
OCN7H070023
[1] : Rear ultrasonic sensors
Refer to the picture above for the
detailed location of the detecting
sensors.
System settings
Warning Volume
With the Engine Start/Stop button in the
ON position, select ‘Driver Assistance → Warning Volume’ from the Settings menu to change the Warning Volume to ‘High’, ‘Medium’ or ‘Low’ for Reverse Parking Distance Warning.
If you change the Warning Volume,
the Warning Volume of other Driver
Assistance systems may change.
REVERSE PARKING DISTANCE WARNING (PDW)
(IF EQUIPPED)
Page 438 of 555

07
7-117
CAUTION
Take the following precautions to
maintain optimal performance of the
detecting sensors:
• Always keep the rear view camera
and rear ultrasonic sensors clean.
• Do not use any cleanser containing
acid or alkaline detergents when
cleaning the rear view camera lens.
Use only a mild soap or neutral
detergent, and rinse thoroughly with
water.
• Never disassemble or strike the rear
view camera or the rear ultrasonic
sensors components.
• Do not apply unnecessary force on
the rear view camera or the rear
ultrasonic sensors. The system may
not operate properly if the rear
view camera or the rear ultrasonic
sensor(s) is forcibly moved out of
proper alignment. We recommend
that the vehicle be inspected by an
authorized HYUNDAI dealer.
• Do not spray the rear view camera or
the rear ultrasonic sensors or their
surrounding area directly with a
high pressure washer. It may cause
the rear view camera or the rear
ultrasonic sensors to malfunction.
• The function may not work properly
if the bumper has been damaged,
replaced or repaired.
• Do not apply objects, such as a
bumper sticker or a bumper guard,
near the rear view camera or rear
ultrasonic sensors or apply paint to
the bumper. Doing so may adversely
affect the performance of the
function.
• Reverse Parking Collision-Avoidance
Assist may not operate normally if
interfered by strong electromagnetic
waves.
Function settings
Setting
OCN7070110N
Parking Safety
With the Engine Start/Stop button in the
ON position, select or deselect ‘Driver
Assistance → Parking Safety’ from the Settings menu to set whether or not to
use each function.
-If ‘Rear Active Assist’ is selected, the function will warn the driver and assist
with braking when a collision with a
pedestrian or an object is imminent.
-If ‘Rear Warning Only’ is selected, the function will warn the driver when
a collision with a pedestrian or an
object is imminent. Braking will not be
assisted.
-If ‘Off’ is selected, the function will turn off.
Page 439 of 555
Driver assistance system
7-118
OTM070140N
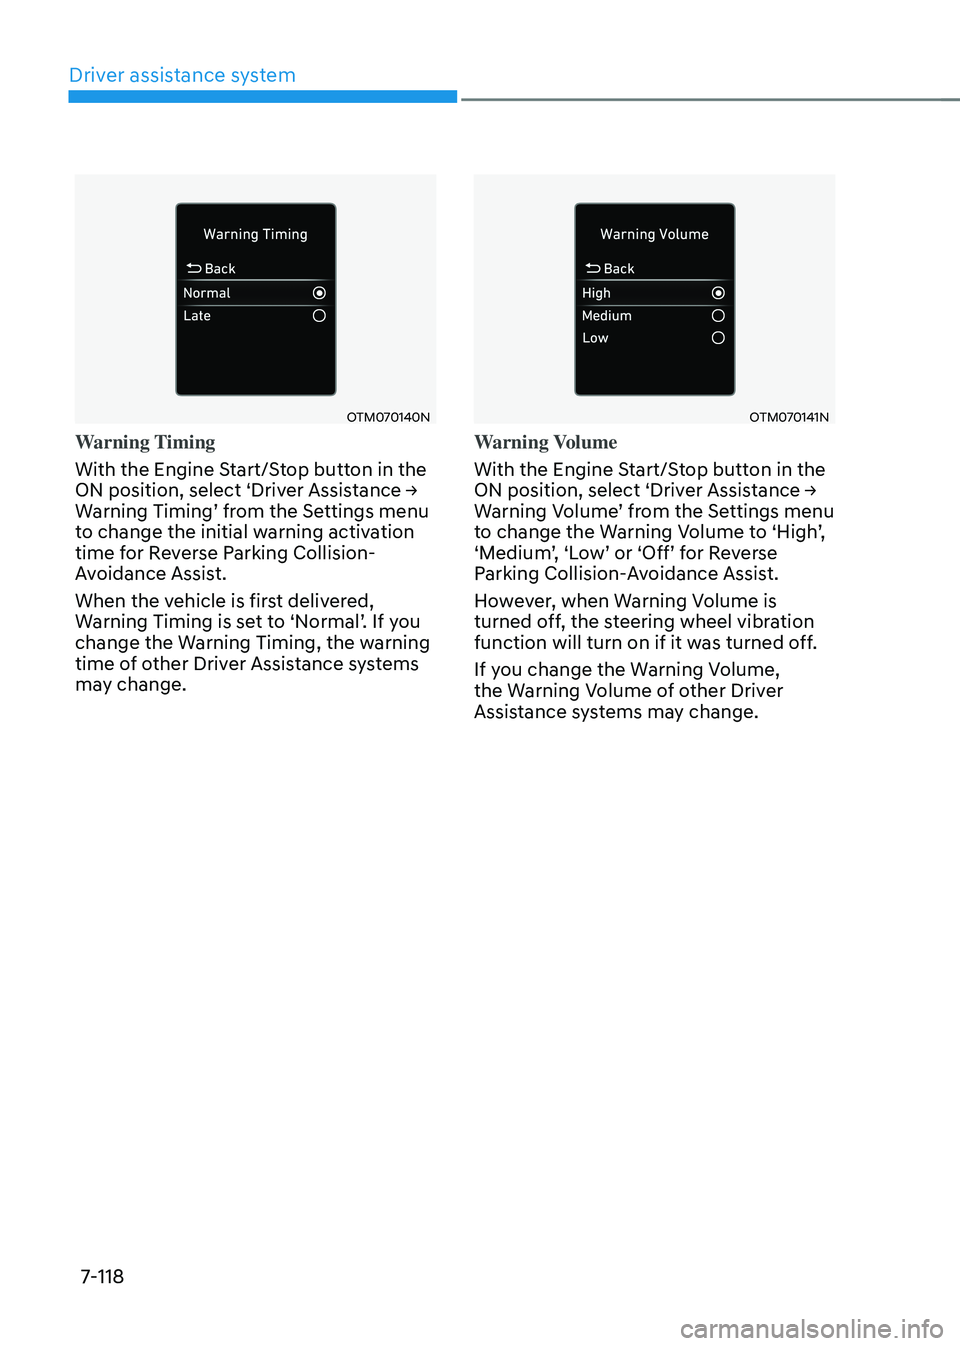
Warning Timing
With the Engine Start/Stop button in the
ON position, select ‘Driver Assistance → Warning Timing’ from the Settings menu to change the initial warning activation
time for Reverse Parking Collision-
Avoidance Assist.
When the vehicle is first delivered,
Warning Timing is set to ‘Normal’. If you change the Warning Timing, the warning
time of other Driver Assistance systems
may change.
OTM070141N
Warning Volume
With the Engine Start/Stop button in the
ON position, select ‘Driver Assistance → Warning Volume’ from the Settings menu to change the Warning Volume to ‘High’, ‘Medium’, ‘Low’ or ‘Off’ for Reverse Parking Collision-Avoidance Assist.
However, when Warning Volume is
turned off, the steering wheel vibration
function will turn on if it was turned off.
If you change the Warning Volume,
the Warning Volume of other Driver
Assistance systems may change.
Page 447 of 555
Emergency Situations
8-2
If the Engine Stalls While Driving
• Reduce your speed gradually, keeping
a straight line. Move cautiously off the
road to a safe place.
• Turn on your hazard warning flasher.
• Try to start the engine again. If your
vehicle will not start, contact an
authorized HYUNDAI dealer or seek
other qualified assistance.
If the Engine Stalls at a Crossroad
or Crossing
If the engine stalls at a crossroads or
crossing, if safe to do so, move the shift
button to the N (Neutral) position and
then push the vehicle to a safe location.
IN CASE OF AN EMERGENCY
WHILE DRIVING
OCN7070001
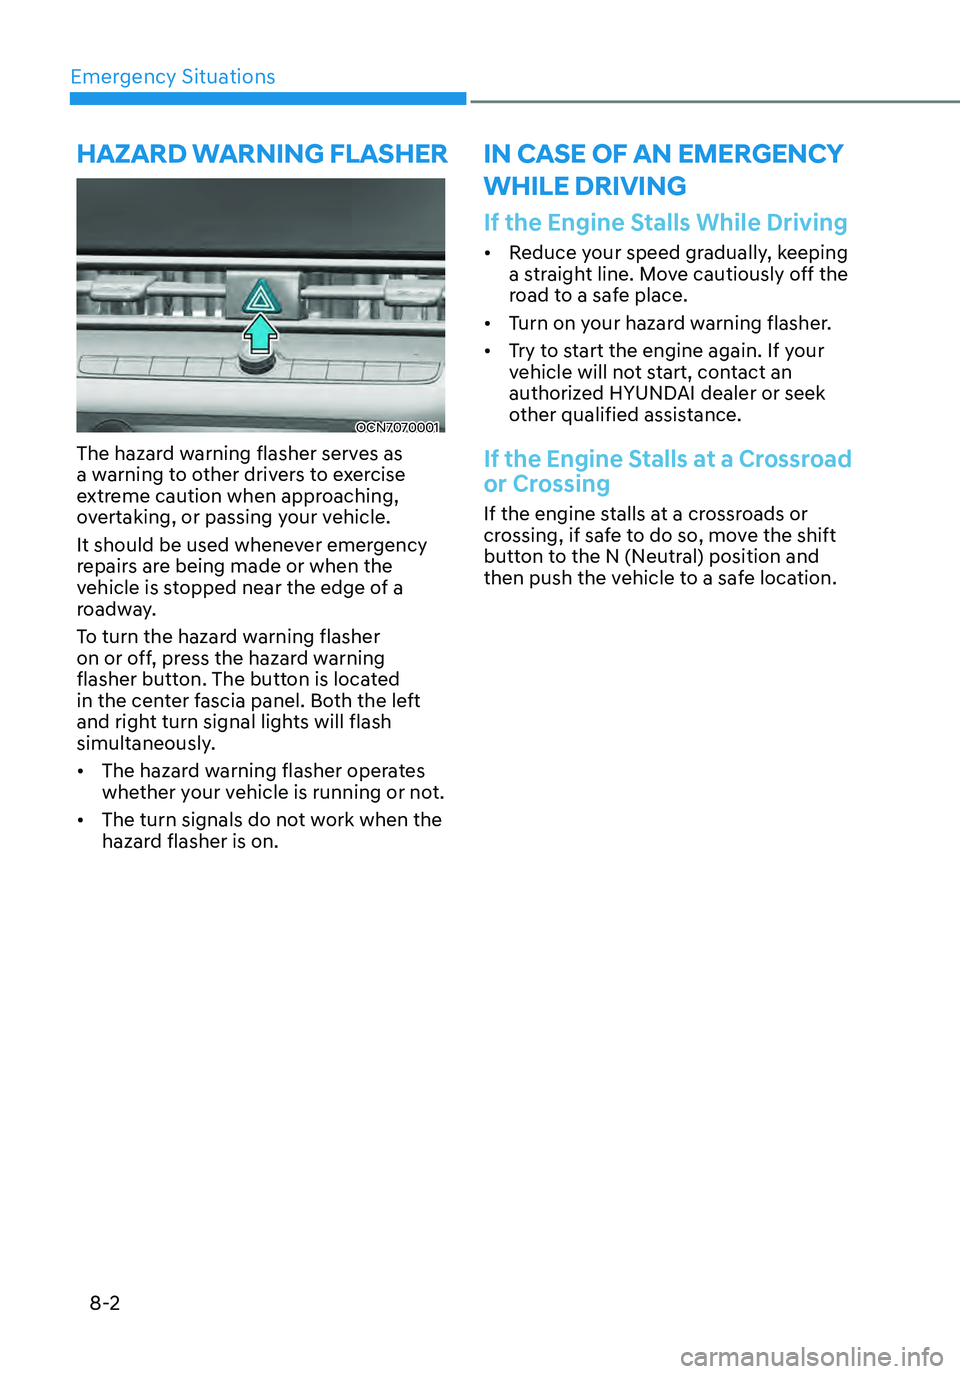
The hazard warning flasher serves as
a warning to other drivers to exercise
extreme caution when approaching,
overtaking, or passing your vehicle.
It should be used whenever emergency
repairs are being made or when the
vehicle is stopped near the edge of a
roadway.
To turn the hazard warning flasher
on or off, press the hazard warning
flasher button. The button is located
in the center fascia panel. Both the left
and right turn signal lights will flash
simultaneously.
• The hazard warning flasher operates
whether your vehicle is running or not.
• The turn signals do not work when the
hazard flasher is on.
HAZARD WARNING FLASHER
Page 448 of 555
08
8-3
If you Have a Flat Tire While
Driving
If a tire goes flat while you are driving:
• Take your foot off the accelerator
pedal and let the vehicle slow down
while driving straight ahead. Do not
apply the brakes immediately or
attempt to pull off the road as this
may cause loss of vehicle control
resulting in an accident. When the
vehicle has slowed to such a speed
that it is safe to do so, brake carefully
and pull off the road. Drive off the
road as far as possible and park on
firm, level ground. If you are on a
divided highway, do not park in the
median area between the two traffic
lanes.
• When the vehicle is stopped, press the
hazard warning flasher button, move
the shift button into P (Park), and
apply the parking brake, and place
the ignition switch in the LOCK/OFF
position.
• Have all passengers get out of the
vehicle. Be sure they all get out on the
side of the vehicle that is away from
traffic.
• When changing a flat tire, follow the
instructions provided later in this
chapter.• Be sure to shift the gear to P (Park).
The vehicle starts only when the gear
is in P (Park).
• This vehicle does not have a regular
12V battery that needs periodic
replacement. It is lithium ion polymer
type integrated into the HEV high
voltage battery. The vehicle has a
12V battery protection system that
cuts 12V battery from vehicle draw
to prevent full discharge. If vehicle
will not start, first try pressing the
12V Battery Reset switch (left side of
the steering wheel near the fuel door
open switch) to reconnect the 12V
battery, but you must start vehicle
within 15 seconds of pressing the 12V
Battery Reset switch. After starting
the vehicle (
indicator ON ), operate the vehicle safely outdoors in
ready mode stopped and/or drive it
for 30 minutes total to charge the 12V
battery fully.
• Check the fuel level and add fuel if
necessary.
If the vehicle still does not start, call
an authorized HYUNDAI dealer for
assistance.
NOTICE
Push or pull starting the vehicle may
cause the catalytic converter to
overload which can lead to damage to
the emission control system.
IF THE ENGINE WILL NOT
S TA RT
Page 449 of 555
Emergency Situations
8-4
Before Jump Starting
This vehicle does not have a regular 12V
battery that needs periodic replacement.
It is lithium ion polymer type integrated
into the HEV high voltage battery. The
vehicle has a 12V battery protection
system that cuts 12V battery from vehicle
draw to prevent full discharge.
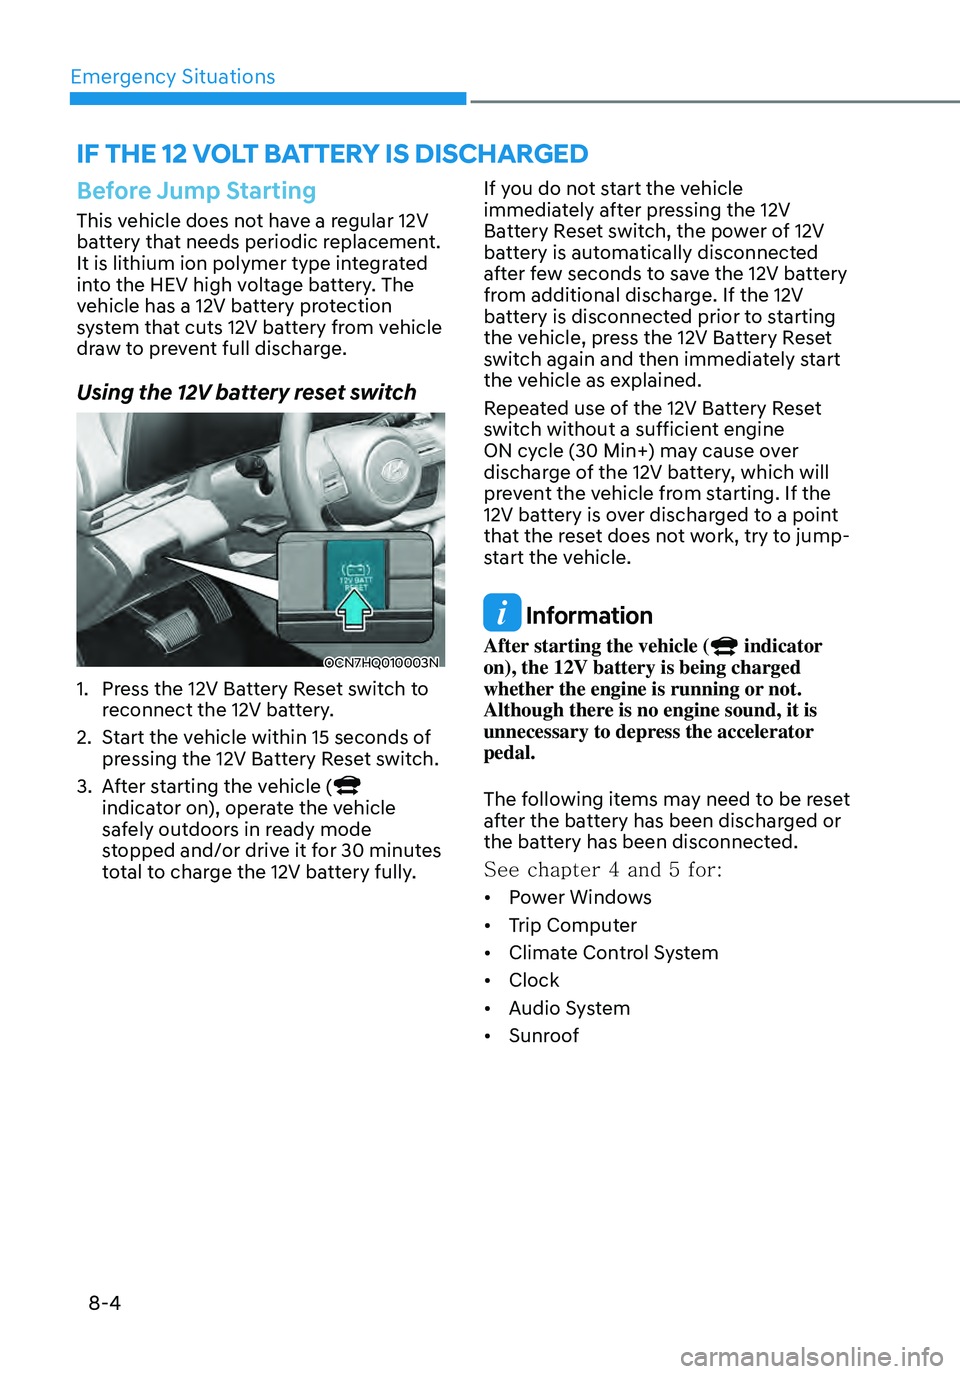
Using the 12V battery reset switch
OCN7HQ010003N
1. Press the 12V Battery Reset switch to
reconnect the 12V battery.
2. Start the vehicle within 15 seconds of
pressing the 12V Battery Reset switch.
3. After starting the vehicle ( indicator on), operate the vehicle
safely outdoors in ready mode
stopped and/or drive it for 30 minutes
total to charge the 12V battery fully.If you do not start the vehicle
immediately after pressing the 12V
Battery Reset switch, the power of 12V
battery is automatically disconnected
after few seconds to save the 12V battery
from additional discharge. If the 12V
battery is disconnected prior to starting
the vehicle, press the 12V Battery Reset
switch again and then immediately start
the vehicle as explained.
Repeated use of the 12V Battery Reset
switch without a sufficient engine
ON cycle (30 Min+) may cause over
discharge of the 12V battery, which will
prevent the vehicle from starting. If the
12V battery is over discharged to a point
that the reset does not work, try to jump-
start the vehicle.
Information
After starting the vehicle ( indicator on), the 12V battery is being charged
whether the engine is running or not.
Although there is no engine sound, it is
unnecessary to depress the accelerator
pedal.
The following items may need to be reset
after the battery has been discharged or
the battery has been disconnected.
See chapter 4 and 5 for:
•
Power Windows
• Trip Computer
• Climate Control System
• Clock
• Audio System
• Sunroof
IF THE 12 VOLT BATTERY IS DISCHARGED
Page 451 of 555
Emergency Situations
8-6
OCN7HQ010003N
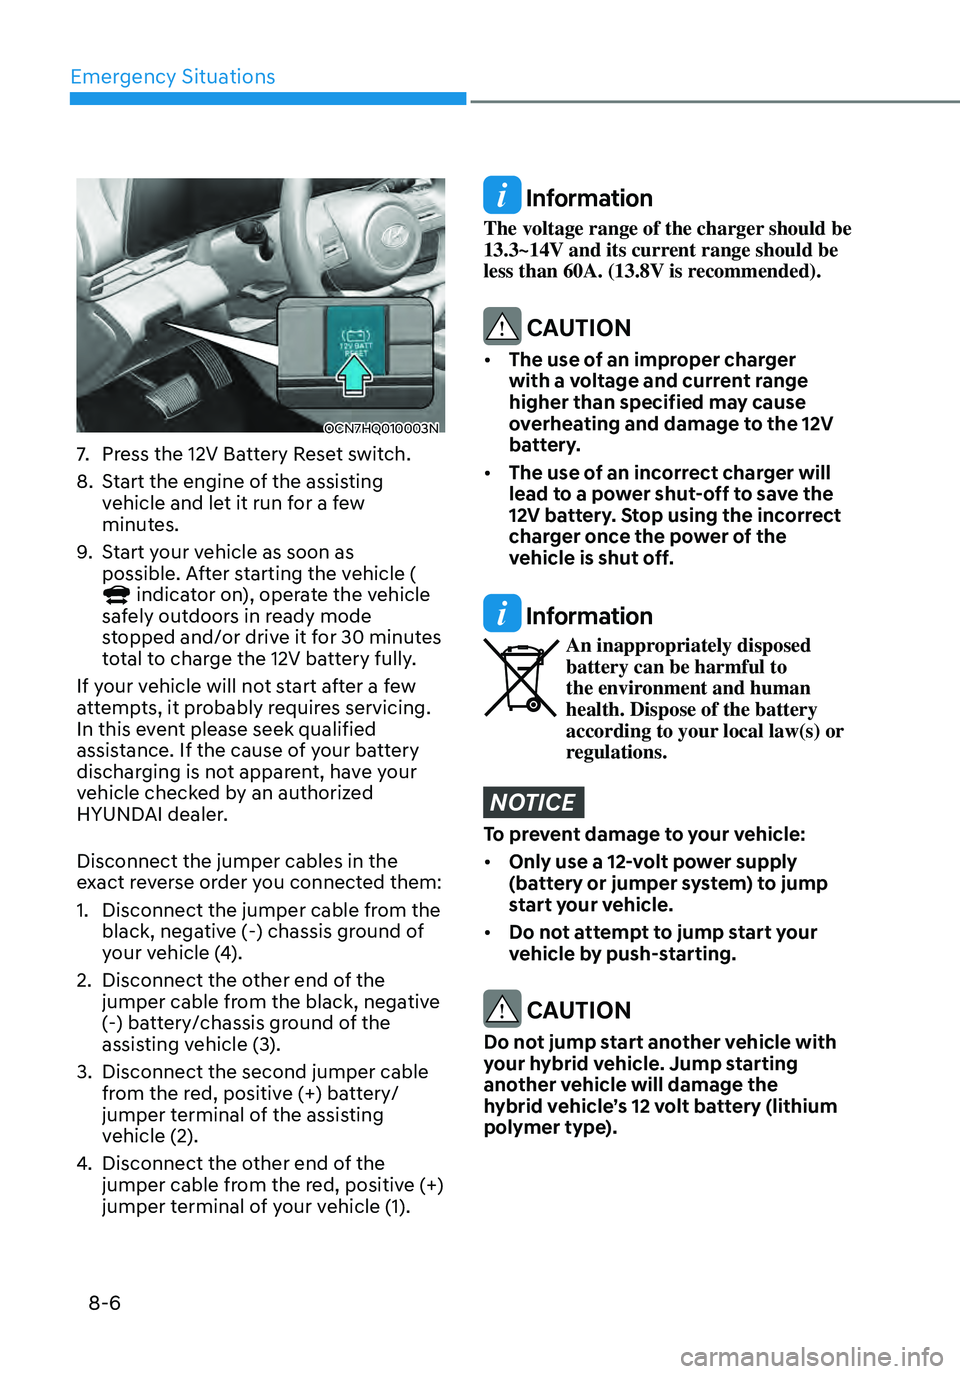
7. Press the 12V Battery Reset switch.
8. Start the engine of the assisting
vehicle and let it run for a few
minutes.
9. Start your vehicle as soon as
possible. After starting the vehicle (
indicator on), operate the vehicle safely outdoors in ready mode
stopped and/or drive it for 30 minutes
total to charge the 12V battery fully.
If your vehicle will not start after a few
attempts, it probably requires servicing.
In this event please seek qualified
assistance. If the cause of your battery
discharging is not apparent, have your
vehicle checked by an authorized
HYUNDAI dealer.
Disconnect the jumper cables in the
exact reverse order you connected them:
1. Disconnect the jumper cable from the
black, negative (-) chassis ground of
your vehicle (4).
2. Disconnect the other end of the
jumper cable from the black, negative
(-) battery/chassis ground of the
assisting vehicle (3).
3. Disconnect the second jumper cable
from the red, positive (+) battery/
jumper terminal of the assisting
vehicle (2).
4. Disconnect the other end of the
jumper cable from the red, positive (+)
jumper terminal of your vehicle (1).
Information
The voltage range of the charger should be
13.3~14V and its current range should be
less than 60A. (13.8V is recommended).
CAUTION
• The use of an improper charger
with a voltage and current range
higher than specified may cause
overheating and damage to the 12V
battery.
• The use of an incorrect charger will
lead to a power shut-off to save the
12V battery. Stop using the incorrect
charger once the power of the
vehicle is shut off.
Information
An inappropriately disposed battery can be harmful to
the environment and human
health. Dispose of the battery
according to your local law(s) or
regulations.
NOTICE
To prevent damage to your vehicle:
• Only use a 12-volt power supply
(battery or jumper system) to jump
start your vehicle.
• Do not attempt to jump start your
vehicle by push-starting.
CAUTION
Do not jump start another vehicle with
your hybrid vehicle. Jump starting
another vehicle will damage the
hybrid vehicle’s 12 volt battery (lithium
polymer type).
Page 454 of 555
08
8-9
TIRE PRESSURE MONITORING SYSTEM (TPMS)
OCN7070020
OCN7080055L
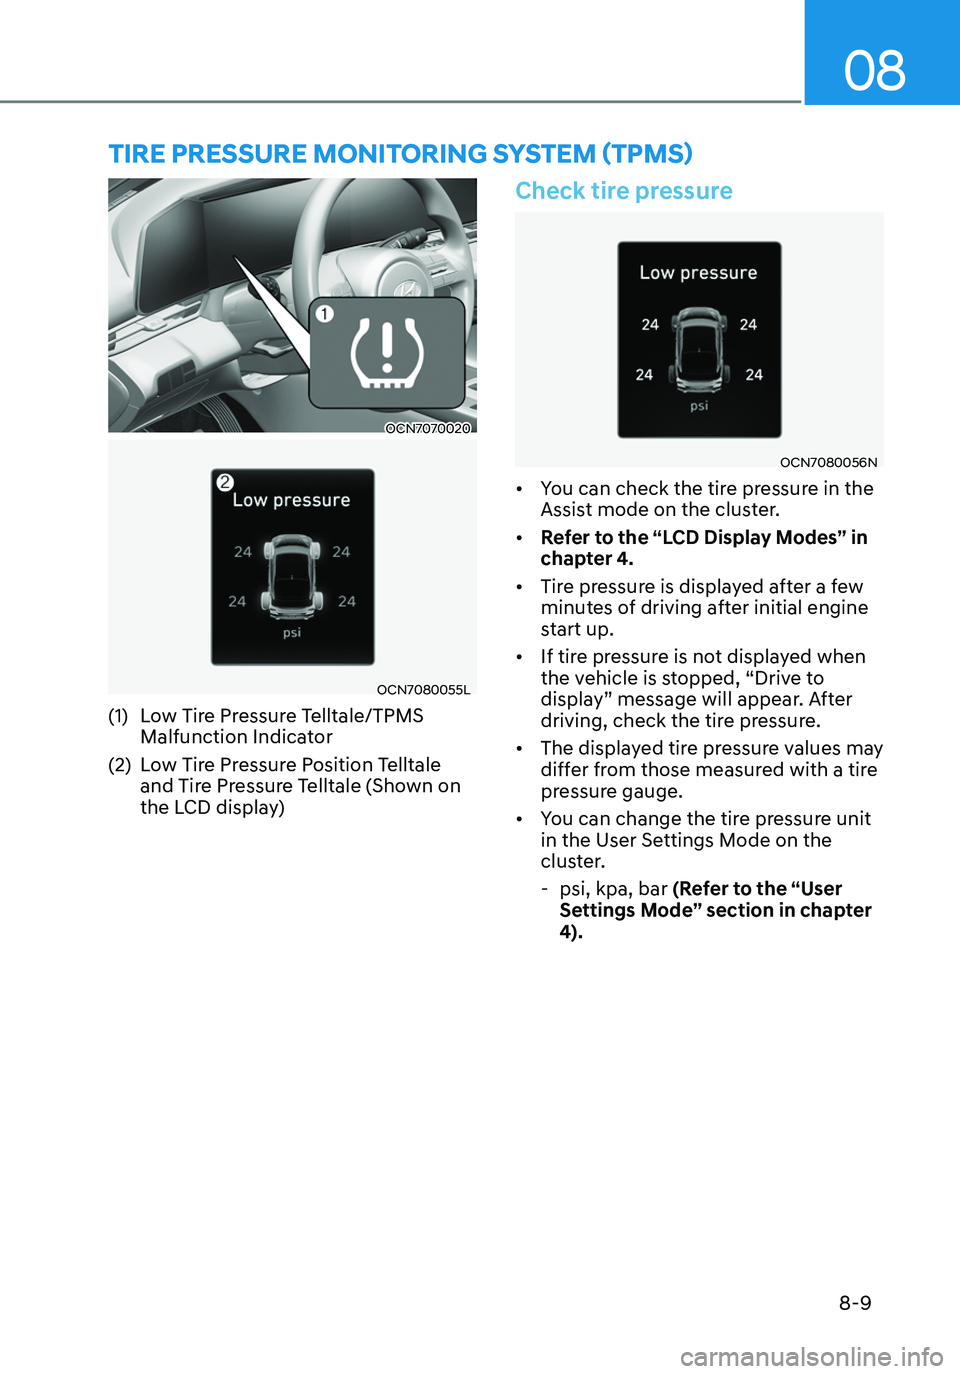
(1) Low Tire Pressure Telltale/TPMS
Malfunction Indicator
(2) Low Tire Pressure Position Telltale
and Tire Pressure Telltale (Shown on
the LCD display)
Check tire pressure
OCN7080056N
• You can check the tire pressure in the
Assist mode on the cluster.
• Refer to the “LCD Display Modes” in
chapter 4.
• Tire pressure is displayed after a few
minutes of driving after initial engine
start up.
• If tire pressure is not displayed when
the vehicle is stopped, “Drive to
display” message will appear. After
driving, check the tire pressure.
• The displayed tire pressure values may
differ from those measured with a tire
pressure gauge.
• You can change the tire pressure unit
in the User Settings Mode on the
cluster.
-psi, kpa, bar (Refer to the “User
Settings Mode” section in chapter
4).