2021 GENESIS G70 display
[x] Cancel search: displayPage 193 of 516

3-108
Convenient features of your vehicle
Turn signals and lane change
signals
To signal a turn, push down on the
lever for a left turn or up for a right
turn in position (A). To signal a lane
change, move the turn signal lever
slightly and hold it in position (B). The
lever will return to the OFF position
when released or when the turn is
completed.
If an indicator stays on and does not
flash or if it flashes abnormally, one of
the turn signal bulbs may be burned
out and will require replacement.
Onetouch turn signal function
To activate an One Touch Turn Signal
function, move the turn signal lever
slightly and then release it. The lane
change signals will blink 3, 5 or 7
times.
You can activate or deactivate the
One Touch Turn Signal function or
choose the number of blinking (3, 5,
or 7) from the User Settings mode in
the cluster LCD display.
For more details, refer to "LCD
Display" in this chapter.•Do not place objects on the
crash pad that reflect light
such as mirrors, white paper,
etc. The system may malfunc-
tion if sunlight is reflected.
•At times, the High Beam
Assist (HBA) may not work
properly. The system is for
your convenience only. It is
the responsibility of the driver
for safe driving practices and
always check the road condi-
tions for your safety.
•When the system does not
operate normally, change the
lamp position manually
between the high beam and
low beam.OIG046417
Page 194 of 516

3-109
Convenient features of your vehicle
3
Battery saver function
The purpose of this feature is to help
prevent the battery from being dis-
charged. The system automatically
turns off the parking lamp when the
driver turns the engine off and opens
the driver-side door.
With this feature, the parking lamps
will turn off automatically if the driver
parks on the side of road at night.
If necessary, to keep the lamps on
when the engine is turned off, perform
the following:
1) Open the driver-side door.
2) Turn the parking lamps OFF and
ON again using the light switch on
the steering column.
Headlamp delay function
(if equipped)
If you place the Engine Start/Stop
button to the ACC or OFF position
with the headlamps ON, the head-
lamps (and/or parking lamps) remain
on for about 5 minutes. However,
with the engine off if the driver’s door
is opened and closed, the head-
lamps (and/or parking lamps) are
turned off after 15 seconds.
The headlamps (and/or parking
lamps) can be turned off by pressing
the lock button on the smart key
twice or turning the light switch to the
OFF or AUTO position. However, if
you turn the light switch to the AUTO
position when it is dark outside, the
headlamps will not be turned off.
You can activate or deactivate the
Headlamp Delay function from the
User Settings mode in the cluster
LCD display.
For more details, refer to "LCD
Display" in this chapter.
Information
If the driver exits the vehicle through
another door besides the driver door,
the battery saver function does not
operate and the headlamp delay func-
tion does not turn OFF automatically.
i
Page 196 of 516

3-111
Convenient features of your vehicle
3
Headlamp leveling device
(if equipped)
It automatically adjusts the head-
lamp beam level according to the
number of passengers and loading
weight in the luggage area. It also
adjusts to the appropriate headlamp
beam level for various situations.
Welcome System (if equipped)
Welcome light
Puddle lamp (if equipped) and door
handle lamp
With all the doors (and trunk) closed
and locked, the puddle lamp and
door handle lamp will come on for
about 15 seconds if any of the below
is performed.
1. If 'Convenience →
Welcome mir-
ror/light →
On door unlock' is
selected in the User Settings
mode in the cluster LCD display,
• the lamps will turn on when the
door unlock button is pressed on
the smart key.• the lamps will turn on when the
button of the outside door handle
is pressed with the smart key in
possession.
2. If both 'Convenience →
Welcome
mirror/light →
On door unlock' and
'Convenience →
Welcome
mirror/light →
On driver approach'
is selected in the User Settings
mode in the cluster LCD display,
the lamps will turn on when the
vehicle is approached with the
smart key in possession.
You can activate or deactivate
Welcome Light function from the
User Settings mode in the cluster
LCD display.
For more details, refer to "LCD
Display" in this chapter.
OIK047054N
If the function does not work
properly, have the system be
inspected by an authorized
retailer of Genesis Branded
products. Do not attempt to
inspect or replace the wiring
yourself.
WARNING
Page 218 of 516

3-133
Convenient features of your vehicle
3
Automatic Heating and Air
Conditioning
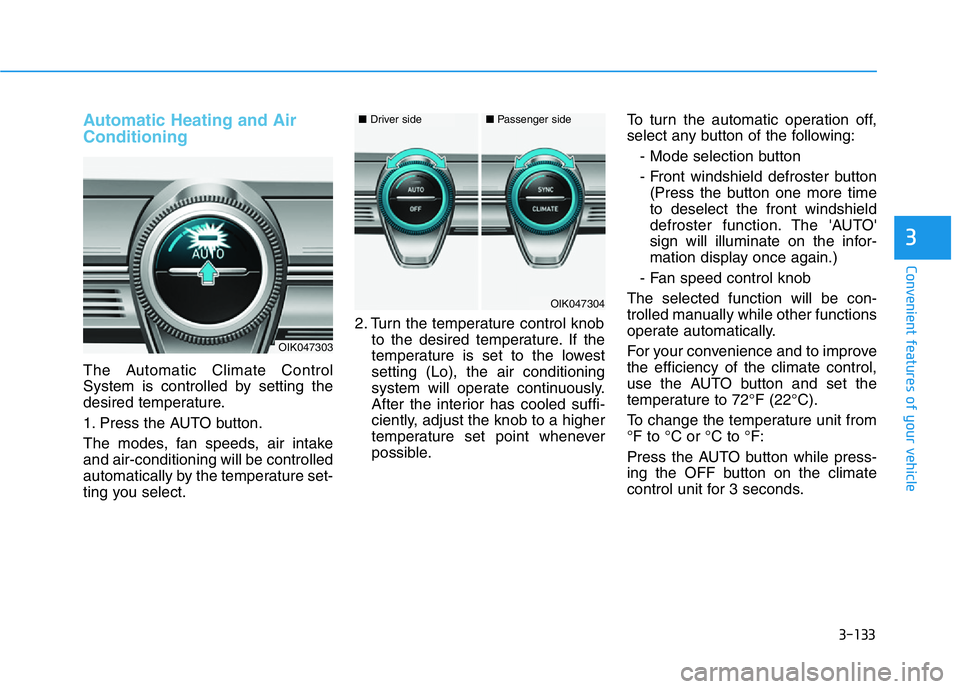
The Automatic Climate Control
System is controlled by setting the
desired temperature.
1. Press the AUTO button.
The modes, fan speeds, air intake
and air-conditioning will be controlled
automatically by the temperature set-
ting you select.2. Turn the temperature control knob
to the desired temperature. If the
temperature is set to the lowest
setting (Lo), the air conditioning
system will operate continuously.
After the interior has cooled suffi-
ciently, adjust the knob to a higher
temperature set point whenever
possible.To turn the automatic operation off,
select any button of the following:
- Mode selection button
- Front windshield defroster button
(Press the button one more time
to deselect the front windshield
defroster function. The 'AUTO'
sign will illuminate on the infor-
mation display once again.)
- Fan speed control knob
The selected function will be con-
trolled manually while other functions
operate automatically.
For your convenience and to improve
the efficiency of the climate control,
use the AUTO button and set the
temperature to 72°F (22°C).
To change the temperature unit from
°F to °C or °C to °F:
Press the AUTO button while press-
ing the OFF button on the climate
control unit for 3 seconds.
OIK047303
OIK047304
■Driver side■Passenger side
Page 222 of 516

3-137
Convenient features of your vehicle
3
Adjusting the driver and passenger
side temperature equally
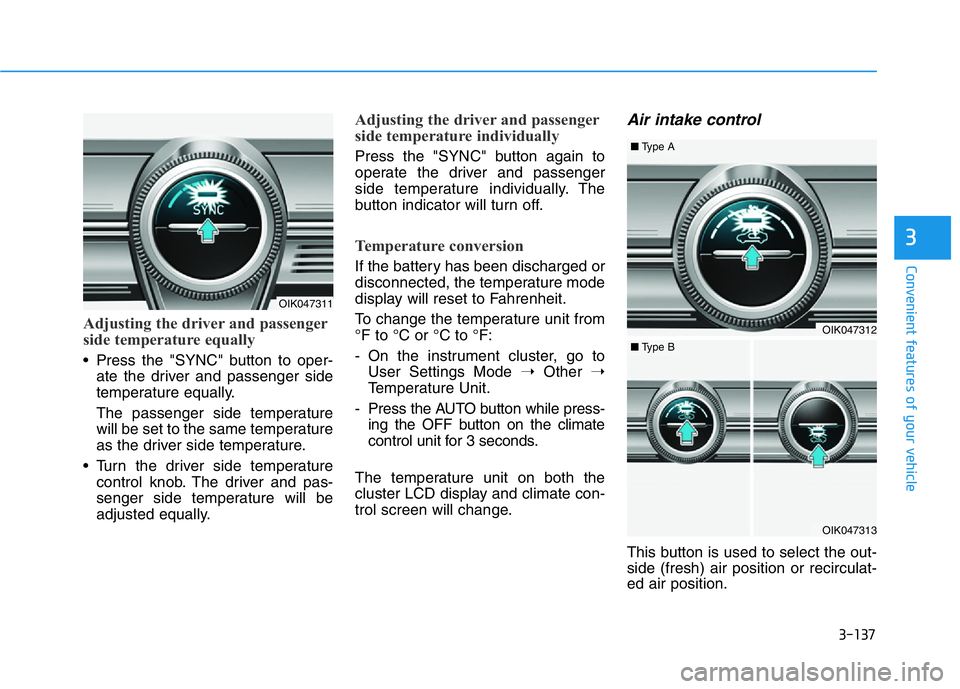
• Press the "SYNC" button to oper-
ate the driver and passenger side
temperature equally.
The passenger side temperature
will be set to the same temperature
as the driver side temperature.
• Turn the driver side temperature
control knob. The driver and pas-
senger side temperature will be
adjusted equally.
Adjusting the driver and passenger
side temperature individually
Press the "SYNC" button again to
operate the driver and passenger
side temperature individually. The
button indicator will turn off.
Temperature conversion
If the battery has been discharged or
disconnected, the temperature mode
display will reset to Fahrenheit.
To change the temperature unit from
°F to °C or °C to °F:
- On the instrument cluster, go to
User Settings Mode ➝Other ➝
Temperature Unit.
- Press the AUTO button while press-
ing the OFF button on the climate
control unit for 3 seconds.
The temperature unit on both the
cluster LCD display and climate con-
trol screen will change.
Air intake control
This button is used to select the out-
side (fresh) air position or recirculat-
ed air position.
OIK047311
OIK047312
■Type A
OIK047313
■Type B
Page 225 of 516

3-140
Convenient features of your vehicle
OFF mode
Push the OFF button to turn the cli-
mate control system off. You can still
operate the mode and air intake but-
tons as long as the Engine
Start/Stop button is in the ON posi-
tion.
Climate control information
screen selection button
Press the climate control information
screen selection button to display cli-
mate control information on infotain-
ment system screen.
System Operation
Ventilation
1. Select the Face Level mode.
2. Set the air intake control to the
outside (fresh) air position.
3. Set the temperature control to the
desired position.
4. Set the fan speed control to the
desired speed.
Heating
1. Select the Floor Level mode.
2. Set the air intake control to the
outside (fresh) air position.
3. Set the temperature control to the
desired position.
4. Set the fan speed control to the
desired speed.
5. If dehumidified heating is desired,
turn the air conditioning system on.
If the windshield fogs up, select the
Floor & Defrost mode or press
the Front Defrost mode.OIK047316
OIK047317
Page 242 of 516

3-157
Convenient features of your vehicle
3
Wireless Cellular Phone
Charging System (if equipped)
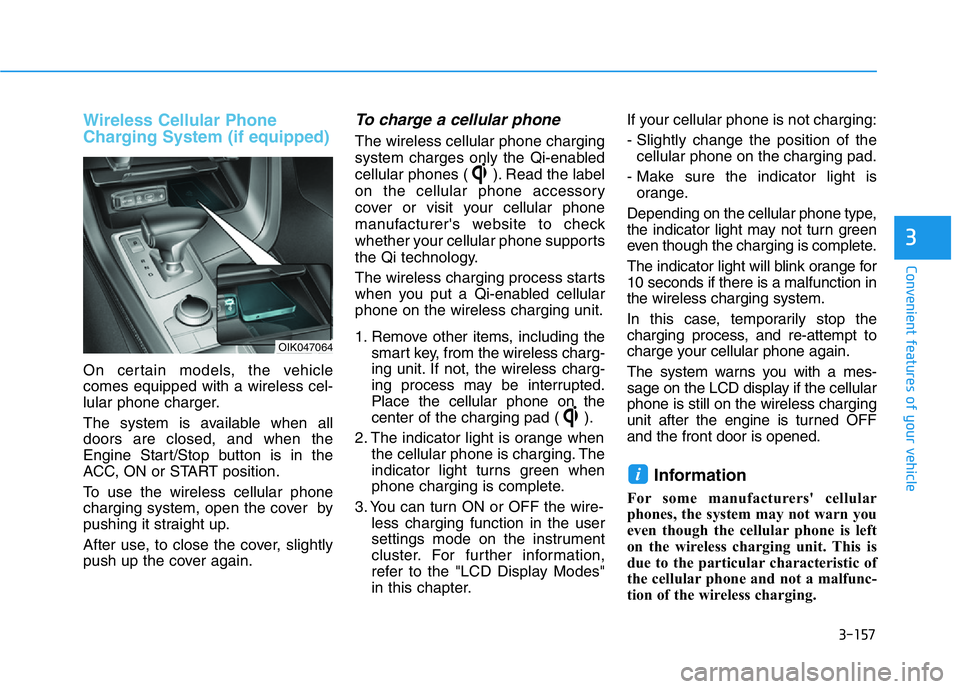
On certain models, the vehicle
comes equipped with a wireless cel-
lular phone charger.
The system is available when all
doors are closed, and when the
Engine Start/Stop button is in the
ACC, ON or START position.
To use the wireless cellular phone
charging system, open the cover by
pushing it straight up.
After use, to close the cover, slightly
push up the cover again.
To charge a cellular phone
The wireless cellular phone charging
system charges only the Qi-enabled
cellular phones ( ). Read the label
on the cellular phone accessory
cover or visit your cellular phone
manufacturer's website to check
whether your cellular phone supports
the Qi technology.
The wireless charging process starts
when you put a Qi-enabled cellular
phone on the wireless charging unit.
1. Remove other items, including the
smart key, from the wireless charg-
ing unit. If not, the wireless charg-
ing process may be interrupted.
Place the cellular phone on the
center of the charging pad ( ).
2. The indicator light is orange when
the cellular phone is charging. The
indicator light turns green when
phone charging is complete.
3. You can turn ON or OFF the wire-
less charging function in the user
settings mode on the instrument
cluster. For further information,
refer to the "LCD Display Modes"
in this chapter.If your cellular phone is not charging:
- Slightly change the position of the
cellular phone on the charging pad.
- Make sure the indicator light is
orange.
Depending on the cellular phone type,
the indicator light may not turn green
even though the charging is complete.
The indicator light will blink orange for
10 seconds if there is a malfunction in
the wireless charging system.
In this case, temporarily stop the
charging process, and re-attempt to
charge your cellular phone again.
The system warns you with a mes-
sage on the LCD display if the cellular
phone is still on the wireless charging
unit after the engine is turned OFF
and the front door is opened.
Information
For some manufacturers' cellular
phones, the system may not warn you
even though the cellular phone is left
on the wireless charging unit. This is
due to the particular characteristic of
the cellular phone and not a malfunc-
tion of the wireless charging.
i
OIK047064
Page 244 of 516
![GENESIS G70 2021 Owners Manual 3-159
Convenient features of your vehicle
3
Clock
Vehicles with Audio system
Select the [SETUP]button on the
audio system ➟Select [Date/Time].
• Set time: Set the time displayed on
the audio scree GENESIS G70 2021 Owners Manual 3-159
Convenient features of your vehicle
3
Clock
Vehicles with Audio system
Select the [SETUP]button on the
audio system ➟Select [Date/Time].
• Set time: Set the time displayed on
the audio scree](/manual-img/46/35609/w960_35609-243.png)
3-159
Convenient features of your vehicle
3
Clock
Vehicles with Audio system
Select the [SETUP]button on the
audio system ➟Select [Date/Time].
• Set time: Set the time displayed on
the audio screen.
• Time format: Choose between 12-
hour and 24-hour time formats.
Vehicles with Navigation system
Select the Settings menu on the
Navigation system➟Select
[Date/Time].
• GPS time: Displays time according
to the received GNSS time.
• 24-hour: Switches to 12 hour or 24
hour.
Coat Hook (if equipped)
These hangers are not designed to
hold large or heavy items.Do not hang other objects such
as hangers or hard objects
except clothes. Also, do not put
heavy, sharp or breakable
objects in the clothe pockets. In
an accident or when the curtain
air bag is inflated, it may cause
vehicle damage or personal
injury.
WARNING
OIK047085OIK047068
■Type A
OIK047069
■Type B
Do not attempt to adjust the
clock while driving. Doing so
may result in distracted driving
which may lead to an accident
involving personal injury or
death.
WARNING