2021 FORD POLICE INTERCEPTOR ECO mode
[x] Cancel search: ECO modePage 39 of 412

How to Disengage the Automatic
Locking Mode
Unbuckle the combination lap and
shoulder belt and allow it to retract
completely to disengage the automatic
locking mode and turn on the vehicle
sensitive (emergency) locking mode.
SEATBELT HEIGHT
ADJUSTMENT
WARNING: Position the seatbelt
height adjuster so that the seatbelt rests
across the middle of your shoulder.
Failure to adjust the seatbelt correctly
could reduce its effectiveness and
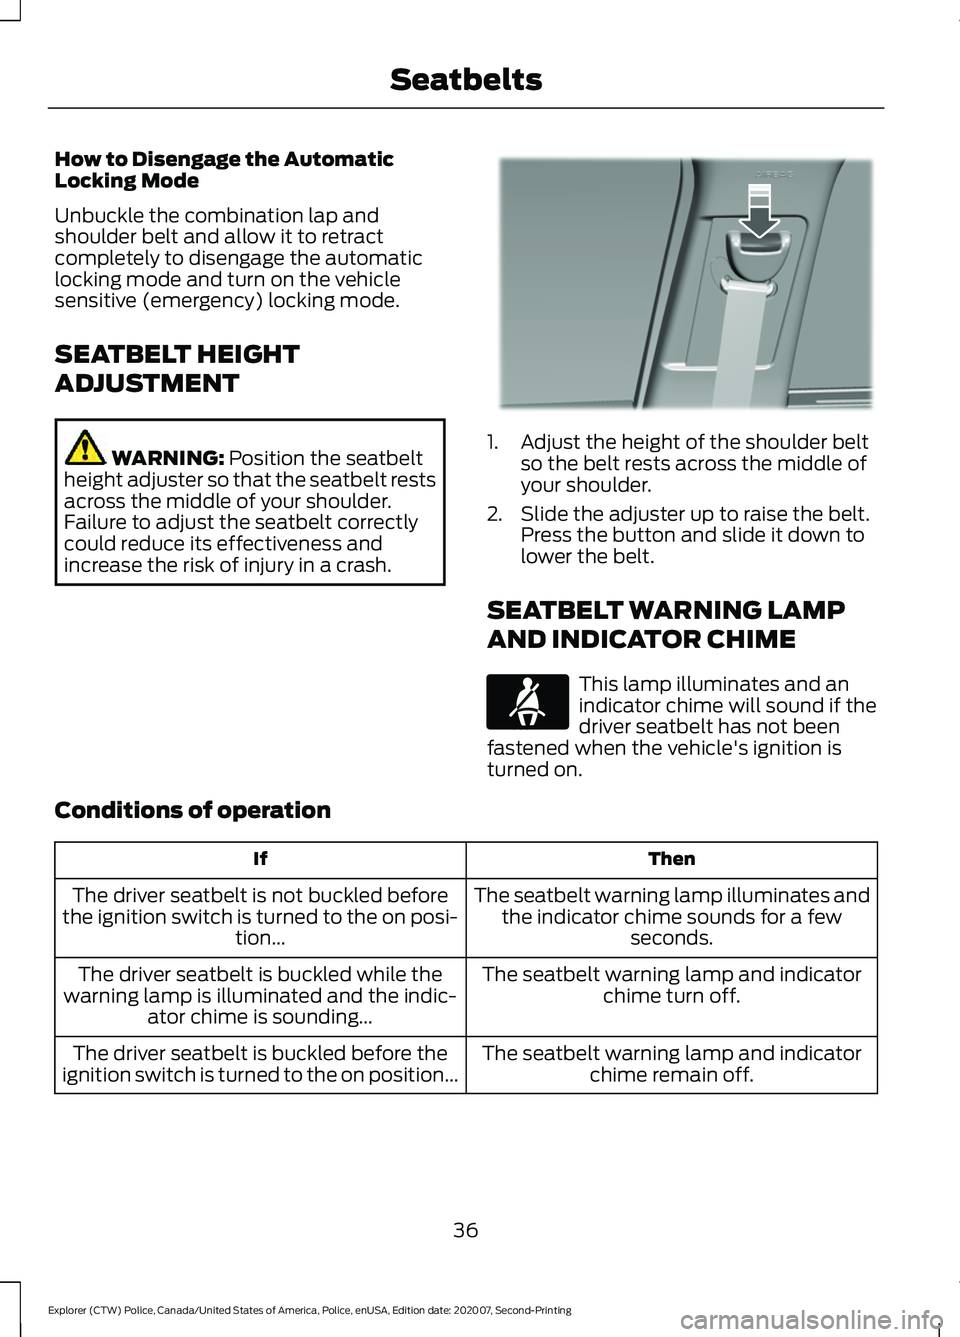
increase the risk of injury in a crash. 1. Adjust the height of the shoulder belt
so the belt rests across the middle of
your shoulder.
2. Slide the adjuster up to raise the belt. Press the button and slide it down to
lower the belt.
SEATBELT WARNING LAMP
AND INDICATOR CHIME This lamp illuminates and an
indicator chime will sound if the
driver seatbelt has not been
fastened when the vehicle's ignition is
turned on.
Conditions of operation Then
If
The seatbelt warning lamp illuminates andthe indicator chime sounds for a few seconds.
The driver seatbelt is not buckled before
the ignition switch is turned to the on posi- tion...
The seatbelt warning lamp and indicatorchime turn off.
The driver seatbelt is buckled while the
warning lamp is illuminated and the indic- ator chime is sounding...
The seatbelt warning lamp and indicatorchime remain off.
The driver seatbelt is buckled before the
ignition switch is turned to the on position...
36
Explorer (CTW) Police, Canada/United States of America, Police, enUSA, Edition date: 202007, Second-Printing SeatbeltsE201573 E71880
Page 41 of 412

Deactivating and Activating the
Seatbelt Reminder (Front Seats Only)
WARNING: While the system
allows you to deactivate it, this system
is designed to improve your chances of
being safely belted and surviving an
accident. We recommend you leave the
system activated for yourself and others
who may use the vehicle.
Note: The driver and front passenger
warnings switch on and off independently.
When you perform this procedure for one
seating position, do not buckle the other
position as this terminates the process.
Read Steps 1 - 4 before starting the
procedure.
Make sure that:
• You set the parking brake.
• The transmission is in park (P).
• The ignition is off.
• You close all vehicle doors.
• You unbuckle the driver and front
passenger seatbelts.
1. Switch the ignition on. Do not start the
engine.
2. Wait until the seatbelt warning lamp turns off (about one minute). After
Step 2, wait an additional five seconds
before proceeding with Step 3. Once
you start Step 3, you must complete
the procedure within 60 seconds.
3. For the seating position you are switching off, buckle then unbuckle the
seatbelt three times at a moderate
speed, ending in the unbuckled state.
After Step 3, the seatbelt warning lamp
turns on.
4. When the seatbelt warning lamp is on,
buckle then unbuckle the seatbelt.
After Step 4, the seatbelt warning lamp
flashes for confirmation. •
This switches the feature off if it is
currently on.
• This switches the feature on if it is
currently off.
CHILD RESTRAINT AND
SEATBELT MAINTENANCE
Inspect the vehicle seatbelts and child
safety seat systems periodically to make
sure they work properly and are not
damaged. Inspect the vehicle and child
restraint seatbelts to make sure there are
no nicks, tears or cuts. Replace if
necessary. All vehicle seatbelt assemblies,
including retractors, buckles, front seatbelt
buckle assemblies, buckle support
assemblies (slide bar-if equipped),
shoulder belt height adjusters (if
equipped), shoulder belt guide on seat
backrest (if equipped), child safety seat
LATCH and tether anchors, and attaching
hardware, should be inspected after a
crash. Read the child restraint
manufacturer's instructions for additional
inspection and maintenance information
specific to the child restraint.
We recommend that all seatbelt
assemblies in use in vehicles involved in a
crash be replaced. However, if the crash
was minor and an authorized dealer finds
that the belts do not show damage and
continue to operate properly, they do not
need to be replaced. Seatbelt assemblies
not in use during a crash should also be
inspected and replaced if either damage
or improper operation is noted.
Properly care for seatbelts. See
Vehicle
Care (page 238).
38
Explorer (CTW) Police, Canada/United States of America, Police, enUSA, Edition date: 202007, Second-Printing Seatbelts
Page 42 of 412

SEATBELT EXTENSIONS
WARNING: Persons who fit into
the vehicle's seatbelt should not use an
extension. Unnecessary use could result
in serious personal injury in the event of
a crash. WARNING:
Only use extensions
provided free of charge by our dealers.
The dealer will provide an extension
designed specifically for this vehicle,
model year and seating position. The use
of an extension intended for another
vehicle, model year or seating position
may not offer you the full protection of
your vehicle's seatbelt restraint system. WARNING:
Never use seatbelt
extensions to install child restraints. WARNING:
Do not use a seatbelt
extension with an inflatable seatbelt. WARNING:
Do not use extensions
to change the way the seatbelt fits
across the torso, over the lap or to make
the seatbelt buckle easier to reach.
If, because of body size or driving position,
it is not possible to properly fasten the
seatbelt over your lap and shoulder, an
extension that is compatible with the
seatbelts is available free of charge from
our dealers. Only use our seatbelt
extensions made by the original equipment
seatbelt manufacturer with our seatbelts.
Ask your authorized dealer if your extension
is compatible with your vehicle restraint
system.
39
Explorer (CTW) Police, Canada/United States of America, Police, enUSA, Edition date: 202007, Second-Printing Seatbelts
Page 62 of 412

Remote Control (If Equipped)
You can use the remote control at any
time.
Unlocking the Doors Press the button to unlock the
driver door.
Press the button again within three
seconds to unlock all doors.
Press and hold both the lock and unlock
buttons on the remote control for three
seconds to change between driver door or
all doors unlock mode. Driver door mode
only unlocks the driver door when you
press the unlock button once. The
unlocking mode applies to the remote
control.
Locking the Doors Press the button to lock all
doors.
Independent Liftgate Unlocking
Feature
(If Equipped)
This feature allows you to unlock the
liftgate independent of the other doors.
Unlocking
The liftgate unlocks when you press the
liftgate release button on the overhead
console with the ignition on.
Liftgate Timed Release (If Equipped)
Switch the ignition to the run, start or
accessory position. Press the liftgate release button
on the overhead console.
Note: Only the liftgate unlocks. All other
passenger doors remain in the previous
locking state. A warning lamp illuminates in the
instrument cluster for 45 seconds.
See
Warning Lamps and Indicators (page
79). You can then open the liftgate using
the exterior liftgate release button.
Once the 45 second timer expires, the
lamp turns off and the liftgate no longer
opens. Press the liftgate release button on
the overhead console again to restart the
timer.
Note: The liftgate does not unlock when
you electronically unlock all the doors using
the remote control or power door lock
control, if your vehicle has this feature.
Note: You can also unlock the liftgate by
inserting the key blade into the liftgate lock
cylinder, or by pressing the liftgate release
button on the remote control, if your vehicle
has this feature.
Locking
The liftgate locks when any of the
following occur:
• You open and close the liftgate after
you press the liftgate release button
on the overhead console.
• The 45 second timer expires.
Global Lock and Unlock
Global lock and unlock coordinates the
liftgate lock state with the four doors.
When switching the doors to an unlock
state, open the liftgate using the exterior
liftgate release button. When you switch
the doors to the locked state, this locks the
liftgate.
Note: You can also unlock the liftgate by
inserting the key blade into the liftgate lock
cylinder.
Illuminated Entry
(If Equipped)
The interior lamps and some exterior
lamps illuminate when you unlock the
doors with the remote control.
59
Explorer (CTW) Police, Canada/United States of America, Police, enUSA, Edition date: 202007, Second-Printing Doors and LocksE138629 E138623
Page 67 of 412

While the vehicle is running and in Park (P),
press and release the button located on
the center of the instrument panel.
Activating the feature will turn on the
Police Perimeter Alert System display in
the instrument cluster.
Note:
When the feature is active an icon
will display on the instrument cluster.
Police Perimeter Alert Settings
Note: When the Police Idle feature is active,
windows will not automatically roll up.
Note: When window or door locking is
active, corresponding icons will display in
the instrument cluster.
Note: When Low mode is active, window
or door locking setting is not available.
The Police Perimeter Alert system has
three range settings Low, Medium or High
via the menu in the instrument cluster
display. Use the steering wheel controls to
adjust the settings when active.
Object Detection
Note: A pedestrian near large obstructions
such as vehicles or walls may not be
detected until the person moves away from
the obstruction.
Note: Sensor reflections from stationary
objects may cause false objects to briefly
appear on the Police Perimeter Alert System
display.
Note: Sensor obstructions such as; dirt,
mud, precipitation, repair compound,
stickers, graphics, bumper guards, trailers,
or bicycle/cargo racks - in front of the
sensors can cause system sensing
degradation.
The Police Perimeter Alert system uses
sensors located behind the rear bumper
on both sides of your vehicle. The sensors
will perform best if the vehicle is parked in
an open area without large obstructions
or walls nearby. System Error
If the system senses a Police Perimeter
Alert System fault, a warning message will
appear in the information display. See
General Information (page 84).
System Configuration
See your authorized dealer for system
configurations.
64
Explorer (CTW) Police, Canada/United States of America, Police, enUSA, Edition date: 202007, Second-Printing SecurityE298030
Page 68 of 412

ADJUSTING THE STEERING
WHEEL
WARNING: Do not adjust the
steering wheel when your vehicle is
moving.
Note: Make sure that you are sitting in the
correct position. See Sitting in the Correct
Position
(page 107). 1. Unlock the steering column.
2.
Adjust the steering wheel to the desired
position. 3. Lock the steering column.
AUDIO CONTROL
You can operate the following
functions with the control:
Press to access phone mode or
to answer a phone call.
Press to end a phone call.
Press to access the previous
media selection.
65
Explorer (CTW) Police, Canada/United States of America, Police, enUSA, Edition date: 202007, Second-Printing Steering WheelE279960 E279962 E280795 E265040 E265045
Page 73 of 412

Switching High Beam Headlamps
On and Off
Push the lever away from you to
switch the high beam on.
Push the lever forward again or pull the
lever toward you to switch the high beams
off.
Flashing High Beam Headlamps Pull the lever toward you and release it to
flash the high beam headlamps. AUTOLAMPS WARNING: The system does not
relieve you of your responsibility to drive
with due care and attention. You may
need to override the system if it does not
turn the headlamps on in low visibility
conditions, for example daytime fog.
Autolamps turn the headlamps on in low
light situations or when the wipers operate. Switch the lighting control to the
autolamps position.
The headlamps remain on for a period of
time after you switch the ignition off. Use
the information display controls to adjust
the period of time that the headlamps
remain on.
Note: If you switch the autolamps on, you
cannot switch the high beams on until the
system turns the low beams on.
Windshield Wiper Activated
Headlamps
When you switch the autolamps on, the
headlamps turn on within 10 seconds of
switching the wipers on. They turn off
approximately 60 seconds after you switch
the windshield wipers off.
The headlamps do not turn on with the
wipers:
• During a single wipe.
• When using the windshield washers.
• If the wipers are in intermittent mode.
Note: If you switch the autolamps and the
autowipers on, the headlamps turn on when
the windshield wipers continuously operate.
70
Explorer (CTW) Police, Canada/United States of America, Police, enUSA, Edition date: 202007, Second-Printing LightingE167827 E163268 E281240
Page 78 of 412

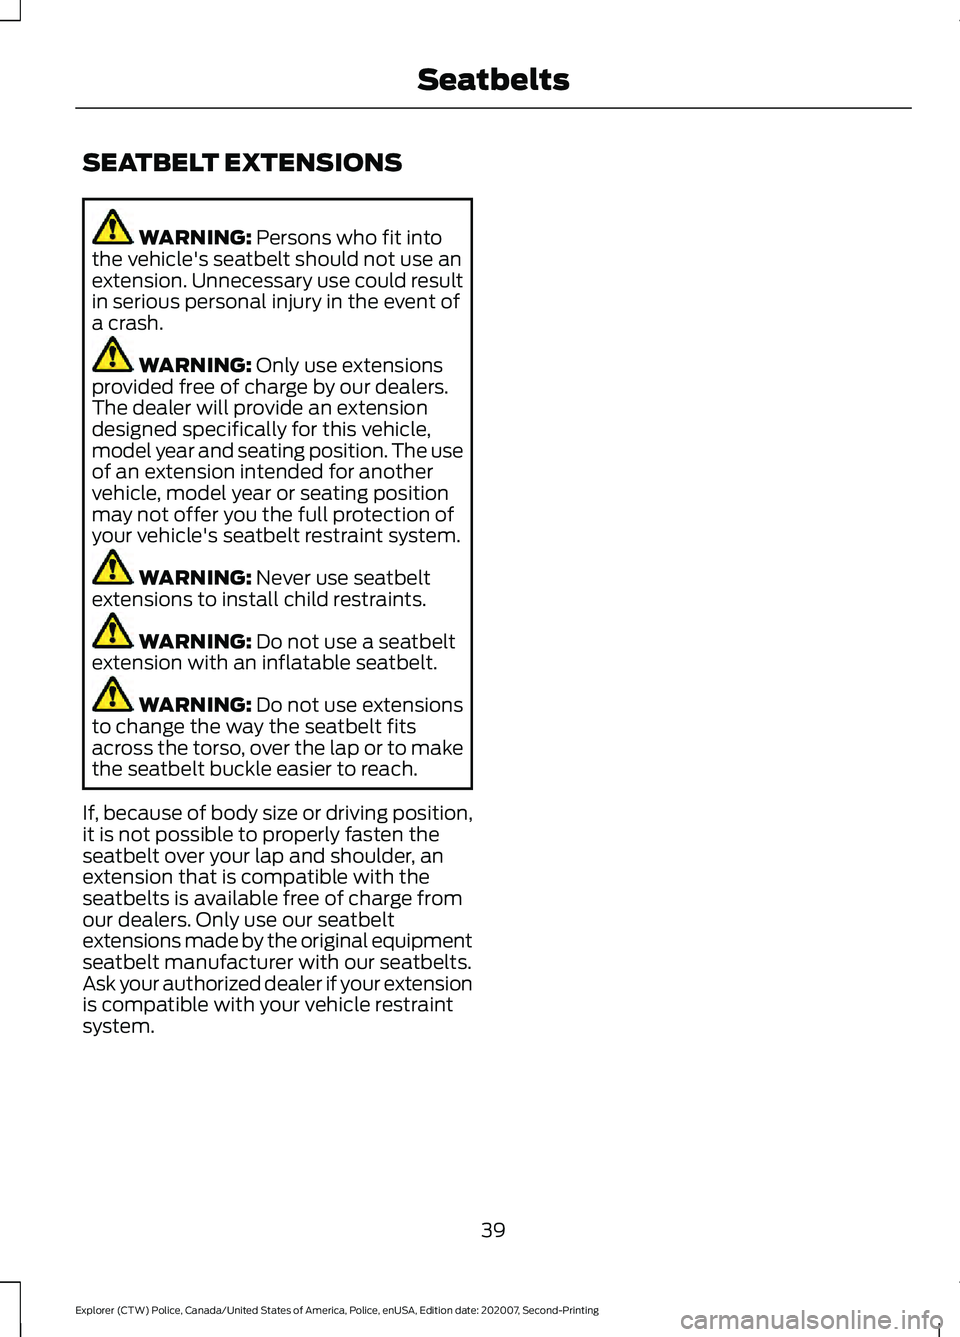
Window Lock
Press the control to lock or unlock the rear
window controls. It illuminates when you
lock the rear window controls.
Accessory Delay
You can use the window switches for
several minutes after you switch the
ignition off or until you open either front
door.
EXTERIOR MIRRORS
Power Exterior Mirrors
WARNING: Do not adjust the
mirrors when your vehicle is moving. This
could result in the loss of control of your
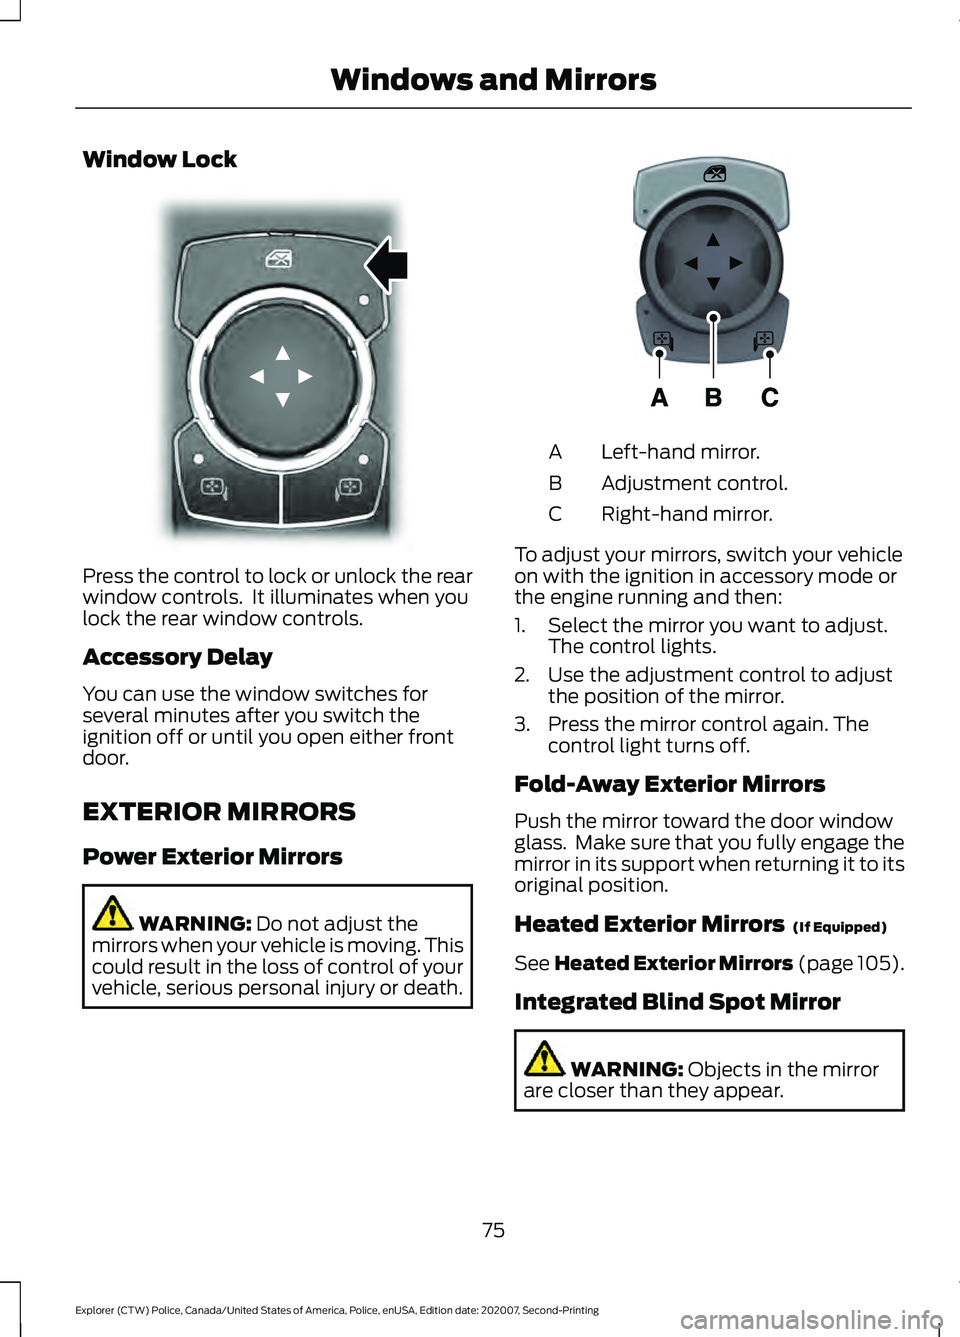
vehicle, serious personal injury or death. Left-hand mirror.
A
Adjustment control.
B
Right-hand mirror.
C
To adjust your mirrors, switch your vehicle
on with the ignition in accessory mode or
the engine running and then:
1. Select the mirror you want to adjust. The control lights.
2. Use the adjustment control to adjust the position of the mirror.
3. Press the mirror control again. The control light turns off.
Fold-Away Exterior Mirrors
Push the mirror toward the door window
glass. Make sure that you fully engage the
mirror in its support when returning it to its
original position.
Heated Exterior Mirrors (If Equipped)
See
Heated Exterior Mirrors (page 105).
Integrated Blind Spot Mirror WARNING:
Objects in the mirror
are closer than they appear.
75
Explorer (CTW) Police, Canada/United States of America, Police, enUSA, Edition date: 202007, Second-Printing Windows and MirrorsE304222 E297114