2021 FORD F650/750 oil capacities
[x] Cancel search: oil capacitiesPage 7 of 390

Fuses
Fuse Specification Chart
..........................193
Changing a Fuse ..........................................
201
Vehicle Inspection Guide
Vehicle Inspection Information .............
203
Maintenance
General Information ....................................
212
Opening and Closing the Hood ..............
213
Under Hood Overview - 6.7L Diesel ......
215
Under Hood Overview - 7.3L ....................
216
Engine Oil Dipstick - 7.3L ...........................
217
Engine Oil Dipstick - 6.7L Diesel .............
217
Engine Oil Check - 7.3L ...............................
217
Engine Oil Check - 6.7L Diesel ................
218
Changing the Engine Oil and Oil Filter ........................................................................\
.
219
Oil Change Indicator Reset .....................
220
Changing the Engine Air Filter - 6.7L Diesel ............................................................
221
Changing the Engine Air Filter - 7.3L .....
223
Draining the Fuel Filter Water Trap - 6.7L Diesel ...........................................................
225
Engine Coolant Check - 7.3L ...................
226
Engine Coolant Check - 6.7L Diesel ......
231
Automatic Transmission Fluid Check ........................................................................\
236
Brake Fluid Check ........................................
237
Power Steering Fluid Check ....................
238
Changing the 12V Battery ........................
239
Adjusting the Headlamps .......................
240
Washer Fluid Check ...................................
242
Fuel Filter - 7.3L ............................................
242
Checking the Wiper Blades .....................
242
Changing the Wiper Blades ....................
242
Removing a Headlamp .............................
243
Changing a Bulb ..........................................
243Changing the Engine-Mounted and
Diesel Fuel Conditioner Module Fuel
Filters - 6.7L Diesel .................................
244
Electrical System Inspection ..................
247
Air Induction System Inspection ...........
247
Exhaust System Inspection ....................
248
Brake System Inspection .........................
248
Axle Inspection .............................................
251
Steering System Inspection ....................
252
Suspension System Inspection .............
252
Frame and Tow Hook Inspection ..........
253
Rear Axle Fluid Check ................................
253
Spring U-Bolt Check ..................................
253
Vehicle Care
General Information ..................................
255
Cleaning Products ......................................
255
Cleaning the Exterior .................................
256
Waxing .............................................................
257
Cleaning the Engine ...................................
257
Cleaning the Windows and Wiper Blades ........................................................................\
257
Cleaning the Interior ..................................
258
Cleaning the Instrument Panel and Instrument Cluster Lens ......................
258
Repairing Minor Paint Damage .............
259
Cleaning the Wheels .................................
259
Vehicle Storage ...........................................
260
Wheels and Tires
Tire Care .........................................................
262
Using Snow Chains .....................................
277
Changing a Road Wheel ...........................
277
Technical Specifications ..........................
279
Capacities and Specifications
Engine Specifications - 6.7L Diesel .......
281
Engine Specifications - 7.3L ....................
282
Motorcraft Parts - 6.7L Diesel ................
283
4
F650750 (TBC) , enUSA, Edition date: 202010, Second-Printing Table of Contents
Page 105 of 390
To help achieve acceptable engine
performance and durability when using
biodiesel in your vehicle:
•
Confirm the biodiesel content of the
fuel to be 20% biodiesel or less, also
known as B20.
• Only use biodiesel fuel of good quality
that complies with industry standards.
• Follow the recommended service
maintenance intervals. See
Scheduled Maintenance (page 319).
• Do not store biodiesel fuel in the fuel
tank for more than 1 month.
• Consider changing brands or reducing
biodiesel content if you have cold
temperature fuel gelling issues or a
frequent LOW FUEL PRESSURE
message appearing.
Note: Do not use home heating oil,
agricultural fuel, raw fats and oils, waste
cooking greases, biodiesel fuels greater than
20% or any diesel fuel not intended for
highway use. Red dye is used to identify
fuels intended for agricultural and
non-highway use. Damage to the fuel
injection system, engine and exhaust
catalyst can occur if an improper fuel is
used.
Use of biodiesel in concentrations greater
than 20% could cause damage to your
vehicle, including engine and/or exhaust
catalyst and particulate filter failures.
Concentrations greater than 20% can also
cause fuel filter restrictions that could
result in a lack of power or damage to fuel
system components, including fuel pump
and fuel injector failures.
SAE 5W-40 or SAE 15W-40 oil is
recommended for fuels with greater than
5% biodiesel, also known as B5. Follow
the recommended oil change intervals and
other maintenance when operating on
biodiesel. See
Special Operating
Conditions Scheduled Maintenance
(page
329). Look for a label on the fuel pump to
confirm the amount of biodiesel contained
in a diesel fuel. Biodiesel content is often
indicated with the letter B followed by the
percent of biodiesel in the fuel. For
example, B20 indicates a fuel containing
20% biodiesel. Ask the service station
attendant to confirm the biodiesel content
of a diesel fuel if you do not see a label on
the fuel pump.
Note:
Biodiesel fuels degrade more easily
than diesel fuels not containing biodiesel.
Degraded or oxidized biodiesel can damage
fuel system seals and plastics and corrode
steel parts. If you plan to park or store your
vehicle for more than 1 month, empty your
vehicle fuel tank of biodiesel fuel. Fill the
tank with a pure petroleum-based diesel
fuel and run your vehicle for a minimum of
30 minutes.
During cold weather, if you have problems
operating on biodiesel, you may need to
use a diesel fuel with lower biodiesel
content, try another brand, or discontinue
the use of biodiesel.
Diesel Fuel Additives
It should not be necessary to add any
aftermarket additives to your fuel if you
use a high quality diesel fuel that conforms
to ASTM industry specifications.
Aftermarket additives can damage the fuel
injector system or engine.
Use Motorcraft® cetane booster or an
equivalent cetane booster additive if you
suspect fuel has low cetane. Use
Motorcraft® anti-gel & performance
improver or an equivalent additive if there
is fuel gelling.
Do not use alcohol-based additives to
improve cetane quality, to prevent fuel
gelling or any other use. The use of alcohol
additives may result in damage to the fuel
injectors and system. See Capacities and
Specifications (page 288).
102
F650750 (TBC) , enUSA, Edition date: 202010, Second-Printing Fuel and Refueling
Page 180 of 390
ECONOMICAL DRIVING
Your fuel economy is affected by several
things, such as how you drive, the
conditions you drive under, and how you
maintain your vehicle.
You may improve your fuel economy by
keeping these things in mind:
•
Accelerate and slow down in a smooth,
moderate fashion.
• Drive at steady speeds without
stopping.
• Anticipate stops; slowing down may
eliminate the need to stop.
• Close the windows for high-speed
driving.
• Drive at reasonable speeds. Traveling
at 55 mph (90 km/h) uses 15% less
fuel than traveling at 65 mph
(105 km/h).
• Keep the tires properly inflated and use
only the recommended size.
• Use the recommended engine oil.
• Perform all regularly scheduled
maintenance.
Avoid these actions; they reduce your fuel
economy:
• Sudden accelerations or hard
accelerations.
• Warm up your vehicle on cold
mornings.
• Use the air conditioner.
• Use the speed control in hilly terrain.
• Rest your foot on the brake pedal while
driving.
• Carry unnecessary weight.
Approximately 1 mpg [0.4 km/L] is lost
for every
400 lb (180 kg) of weight
carried.
• Driving with the wheels out of
alignment. Conditions
•
Adding certain accessories to your
vehicle may reduce fuel economy. For
example bug deflectors, rollbars, light
bars, running boards, ski racks or
luggage racks.
• Using fuel blended with alcohol may
lower fuel economy.
• Fuel economy may decrease with lower
temperatures during the first
5–10 mi
(12 –16 km) of driving.
• Driving on flat terrain offers improved
fuel economy as compared to driving
on hilly terrain.
• Transmissions give their best fuel
economy when operated in the top
cruise gear and with steady pressure
on the gas pedal.
COLD WEATHER
PRECAUTIONS
Note: Idling in cold weather does not heat
the engine to its normal operating
temperature. Long periods of idling,
especially in cold weather, can cause a
buildup of deposits which can cause engine
damage.
Changing to a lighter grade engine oil also
makes starting easier under these
conditions. Refer to Engine oil
specifications. See
Capacities and
Specifications (page 288).
Diesel fuel is adjusted seasonally for cold
temperatures. Diesel fuel which has not
been properly formulated for the ambient
conditions may gel which can clog the fuel
filters. One indication that the fuel filter(s)
may be clogged is if the engine starts, stalls
after a short time, and then does not
restart. If you have been using biodiesel,
you may need to use a fuel with lower
biodiesel content, try another brand, or
discontinue using biodiesel. Do not use
177
F650750 (TBC) , enUSA, Edition date: 202010, Second-Printing Driving Hints
Page 181 of 390

alcohol based additives to correct fuel
gelling. This may result in damage to the
fuel injectors and system. Use the proper
anti-gel and performance improvement
product. See Capacities and
Specifications (page 288).
Your vehicle is equipped with a fuel and
water separator that recirculates fuel from
the engine to help prevent fuel filter
clogging. To avoid engine fuel starvation
during cold weather operation of
32°F
(0°C) or below, we recommended that
the fuel level in your tank should not drop
below 1⁄4 full. This helps prevent air from
entering the fuel system and stalling the
engine.
Your vehicle is equipped with a selective
catalyst reduction system that uses Diesel
Exhaust Fluid (DEF) to operate properly.
You need to replenish your vehicle ’s DEF
at certain intervals. When filling your
vehicle ’s DEF tank in cold weather, you
must take special care to prevent damage
to the tank. See
Selective Catalytic
Reductant System (page 112).
In cold weather below
32°F (0°C), the
engine may slowly increase to a higher idle
speed if left idling in park (P) or neutral
(N).
If you operate your vehicle in a heavy
snowstorm or blowing snow conditions,
snow and ice can clog the engine air
induction. If this occurs, the engine may
experience a significant reduction in power
output. At the earliest opportunity, clear
all the snow or ice away from inside the air
filter assembly. Remove the air cleaner
cover and the pleated paper filter, leaving
the foam filter in and remove any snow or
ice. Make sure you install the foam filter
correctly in place. Remove any debris,
snow or ice on the foam filter by brushing
the surface with soft brush. Once you have
cleared all of the debris, reinstall the air
filter and assembly. Do not use water, solvents, or a hard brush
for cleaning the foam filter. WARNING:
To reduce the risk of
vehicle damage and/or personal burn
injuries do not start your engine with the
air filter removed and do not remove it
while the engine is running.
In order to operate the engine in
temperatures of 32°F (0°C) or lower, read
the following instructions:
• Make sure that the batteries are of
sufficient size and are fully charged.
Check other electrical components to
make sure they are in optimum
condition
• Use the proper coolant solution at the
concentration recommended
protecting the engine against damage
from freezing
• Try to keep the fuel tank full as much
as possible at the end of operation to
prevent condensation in the fuel
system
• Make sure you use proper cold weather
engine oil and that it is at its proper
level. Also, if necessary, make sure to
follow the engine oil and filter change
schedule found under the Special
operating conditions section listed in
the scheduled maintenance
information
• At temperatures of
-9°F (-23°C) or
below, it is recommended that you use
an engine block heater to improve cold
engine starting
• If operating in arctic temperatures of
-20°F (-29°C)
or lower, consult your
truck dealer for information about
special cold weather equipment and
precautions
178
F650750 (TBC) , enUSA, Edition date: 202010, Second-Printing Driving Hints
Page 183 of 390

Drive your new vehicle at least 1,000 mi
(1,600 km) before towing a trailer. Make
sure you use the specified engine oil. See
Capacities and Specifications
(page
288).
Do not add friction modifier compounds
or special break-in oils during the first few
thousand miles (kilometers) of operation.
These additives may prevent piston ring
seating.
DRIVING THROUGH WATER WARNING:
Do not drive through
flowing or deep water as you may lose
control of your vehicle.
Note: Driving through standing water can
cause vehicle damage.
Note: Engine damage can occur if water
enters the air filter.
Before driving through standing water,
check the depth. Never drive through water
that is higher than the bottom of the wheel
hubs. When driving through standing water, drive
very slowly and do not stop your vehicle.
Your brake performance and traction may
be limited. After driving through water and
as soon as it is safe to do so: •
Lightly press the brake pedal to dry the
brakes and to check that they work.
• Check that the horn works.
• Check that the exterior lights work.
• Turn the steering wheel to check that
the steering power assist works.
Operation in Standing Water
Ingestion of water into the diesel engine
can result in immediate and severe
damage to the engine. If driving through
water, slow down to avoid splashing water
into the intake. If the engine stalls, and you
suspect ingestion of water into the engine,
do not try to restart the engine. Consult
your dealer for service immediately.
Your fuel tank vents to the atmosphere by
valves on top of the tank and through the
fuel cap. If water reaches the top of the
tank, the valves may pull water into the
fuel tank. Water in the fuel can cause
performance issues and damage the fuel
injection system.
180
F650750 (TBC) , enUSA, Edition date: 202010, Second-Printing Driving HintsE176913
Page 220 of 390
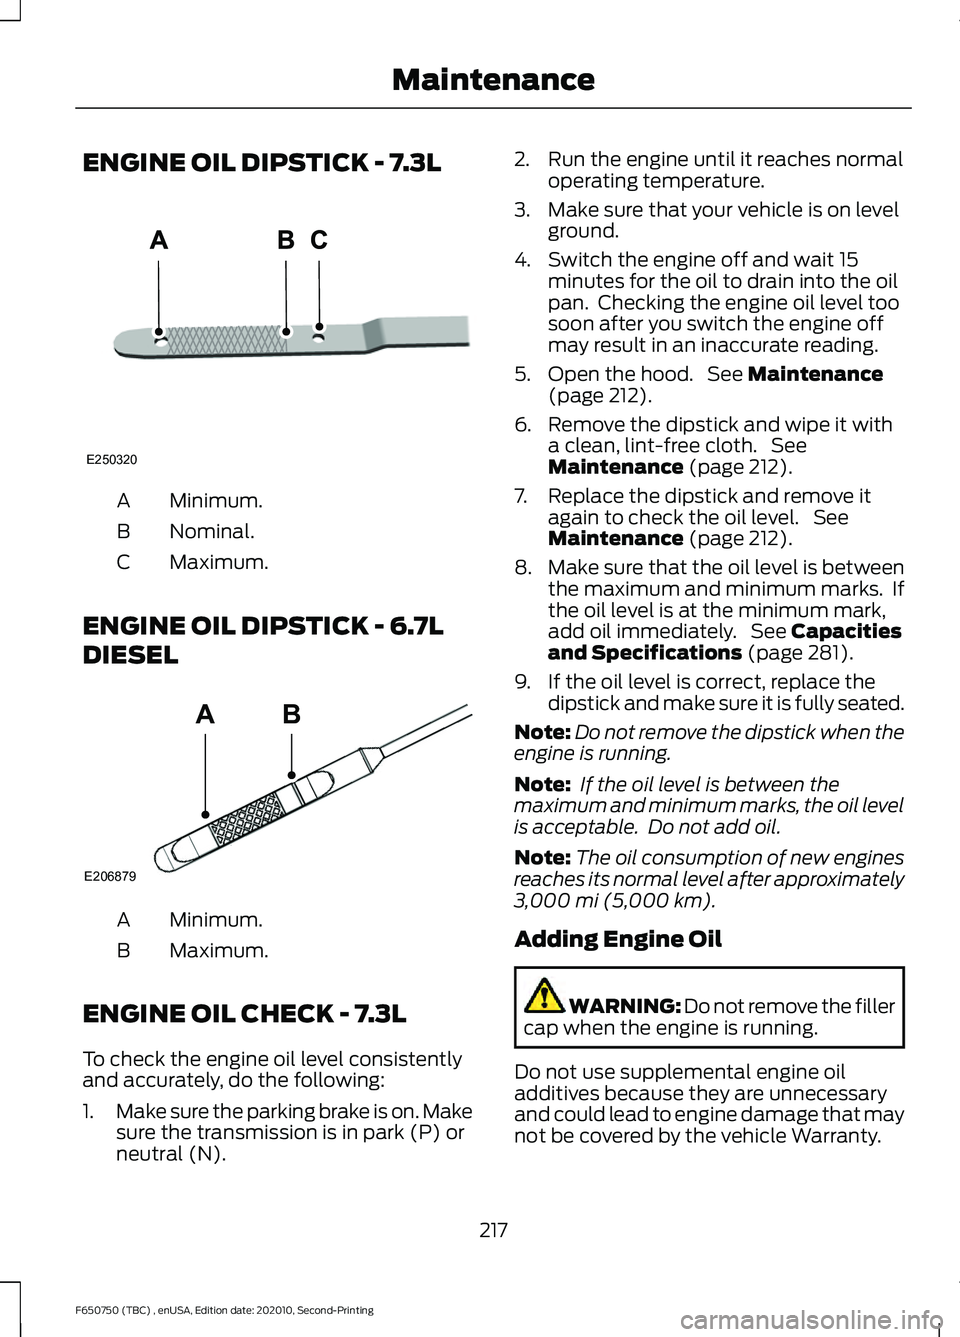
ENGINE OIL DIPSTICK - 7.3L
Minimum.
A
Nominal.
B
Maximum.
C
ENGINE OIL DIPSTICK - 6.7L
DIESEL Minimum.
A
Maximum.
B
ENGINE OIL CHECK - 7.3L
To check the engine oil level consistently
and accurately, do the following:
1. Make sure the parking brake is on. Make
sure the transmission is in park (P) or
neutral (N). 2. Run the engine until it reaches normal
operating temperature.
3. Make sure that your vehicle is on level ground.
4. Switch the engine off and wait 15 minutes for the oil to drain into the oil
pan. Checking the engine oil level too
soon after you switch the engine off
may result in an inaccurate reading.
5. Open the hood. See Maintenance
(page 212).
6. Remove the dipstick and wipe it with a clean, lint-free cloth. See
Maintenance
(page 212).
7. Replace the dipstick and remove it again to check the oil level. See
Maintenance
(page 212).
8. Make sure that the oil level is between
the maximum and minimum marks. If
the oil level is at the minimum mark,
add oil immediately. See
Capacities
and Specifications (page 281).
9. If the oil level is correct, replace the dipstick and make sure it is fully seated.
Note: Do not remove the dipstick when the
engine is running.
Note: If the oil level is between the
maximum and minimum marks, the oil level
is acceptable. Do not add oil.
Note: The oil consumption of new engines
reaches its normal level after approximately
3,000 mi (5,000 km)
.
Adding Engine Oil WARNING: Do not remove the filler
cap when the engine is running.
Do not use supplemental engine oil
additives because they are unnecessary
and could lead to engine damage that may
not be covered by the vehicle Warranty.
217
F650750 (TBC) , enUSA, Edition date: 202010, Second-Printing MaintenanceE250320 E206879
AB
Page 221 of 390
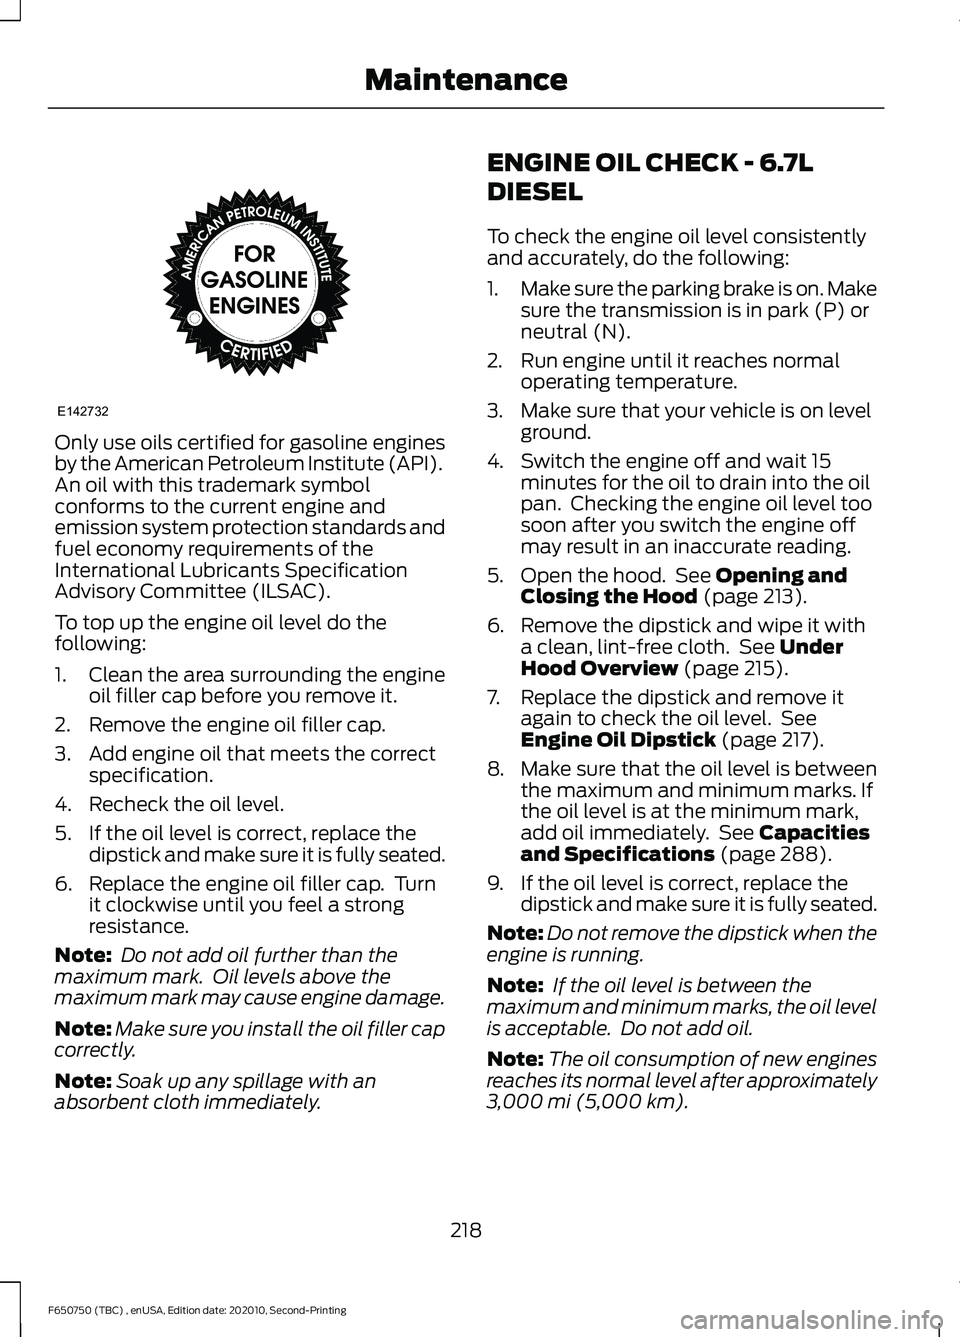
Only use oils certified for gasoline engines
by the American Petroleum Institute (API).
An oil with this trademark symbol
conforms to the current engine and
emission system protection standards and
fuel economy requirements of the
International Lubricants Specification
Advisory Committee (ILSAC).
To top up the engine oil level do the
following:
1. Clean the area surrounding the engine
oil filler cap before you remove it.
2. Remove the engine oil filler cap.
3. Add engine oil that meets the correct specification.
4. Recheck the oil level.
5. If the oil level is correct, replace the dipstick and make sure it is fully seated.
6. Replace the engine oil filler cap. Turn it clockwise until you feel a strong
resistance.
Note: Do not add oil further than the
maximum mark. Oil levels above the
maximum mark may cause engine damage.
Note: Make sure you install the oil filler cap
correctly.
Note: Soak up any spillage with an
absorbent cloth immediately. ENGINE OIL CHECK - 6.7L
DIESEL
To check the engine oil level consistently
and accurately, do the following:
1.
Make sure the parking brake is on. Make
sure the transmission is in park (P) or
neutral (N).
2. Run engine until it reaches normal operating temperature.
3. Make sure that your vehicle is on level ground.
4. Switch the engine off and wait 15 minutes for the oil to drain into the oil
pan. Checking the engine oil level too
soon after you switch the engine off
may result in an inaccurate reading.
5. Open the hood. See Opening and
Closing the Hood (page 213).
6. Remove the dipstick and wipe it with a clean, lint-free cloth. See
Under
Hood Overview (page 215).
7. Replace the dipstick and remove it again to check the oil level. See
Engine Oil Dipstick
(page 217).
8. Make sure that the oil level is between
the maximum and minimum marks. If
the oil level is at the minimum mark,
add oil immediately. See
Capacities
and Specifications (page 288).
9. If the oil level is correct, replace the dipstick and make sure it is fully seated.
Note: Do not remove the dipstick when the
engine is running.
Note: If the oil level is between the
maximum and minimum marks, the oil level
is acceptable. Do not add oil.
Note: The oil consumption of new engines
reaches its normal level after approximately
3,000 mi (5,000 km)
.
218
F650750 (TBC) , enUSA, Edition date: 202010, Second-Printing MaintenanceE142732
Page 222 of 390
Adding Engine Oil
WARNING: Do not remove the filler
cap when the engine is running.
Do not use supplemental engine oil
additives because they are unnecessary
and could lead to engine damage that may
not be covered by the vehicle Warranty.
To top up the engine oil level do the
following:
1. Clean the area surrounding the engine oil filler cap before you remove it.
2. Remove the engine oil filler cap. See Under Hood Overview (page 215).
Turn it counterclockwise and remove
it.
3. Add engine oil of the proper viscosity and grade that meets Ford
specifications. See
Capacities and
Specifications (page 288). You may
have to use a funnel to pour the engine
oil into the opening.
4. Recheck the oil level.
5. If the oil level is correct, replace the dipstick and make sure it is fully seated.
6. Replace the engine oil filler cap. Turn it clockwise until you feel a strong
resistance.
Note: Do not add oil further than the
maximum mark. Oil levels above the
maximum mark may cause engine damage.
Note: Make sure you install the oil filler cap
correctly.
Note: Soak up any spillage with an
absorbent cloth immediately. Engine lubrication for severe
service operation
The following conditions define severe
operation for which engine operation with
SAE 5W-40 oil which meets Ford
specification, WSS-M2C171-F1, is
recommended. Oil and oil filter change
intervals will be determined by the
Intelligent Oil Life Monitor™ as noted
previously.
CHANGING THE ENGINE OIL
AND OIL FILTER
WARNING: Do not handle a hot oil
filter with bare hands. WARNING:
Continuous contact
with used motor oil has caused cancer
in laboratory mice. Protect your skin by
washing with soap and water.
If your vehicle is equipped with a diesel
engine, an Intelligent Oil Life Monitor™
calculates the proper oil change service
interval. When the information display
indicates: OIL CHANGE REQUIRED, change
the engine oil and oil filter. See
Information Displays
(page 70).
The engine oil filter protects your engine
by filtering harmful, abrasive or sludge
particles and particles significantly smaller
than most available will-fit filters. See
Motorcraft Parts
(page 283).
1. Unscrew the oil filter and oil pan drain plug and wait for the oil to drain.
2. Replace the filter.
3. Reinstall the oil pan drain plug.
4. Refill the engine with new oil. See Capacities and Specifications (page
288
).
219
F650750 (TBC) , enUSA, Edition date: 202010, Second-Printing Maintenance