Page 161 of 666

3. Within ten seconds, press the lock
button on the remote control you are
linking. The instrument panel indicates
a successful link.
To unlink a remote control, follow the
same procedure – except in step 3, press
the unlock button on the remote control.
Note: If more than one linked remote
control or intelligent access key is in range,
the memory function moves to the settings
of the first key to initiate a memory recall.
Easy Entry and Exit Feature (If
Equipped)
If you enable the easy entry and exit
feature, it moves the driver seat rearward
up to
2 in (5 cm) when you put the
transmission in park (P) and remove the
key from the ignition.
The driver seat returns to the previous
position when you put the key in the
ignition.
You can enable or disable this feature
through the information display. See
Information Displays
(page 110).
REAR SEATS
(IF EQUIPPED)
Folding Up the Rear Seat Cushion
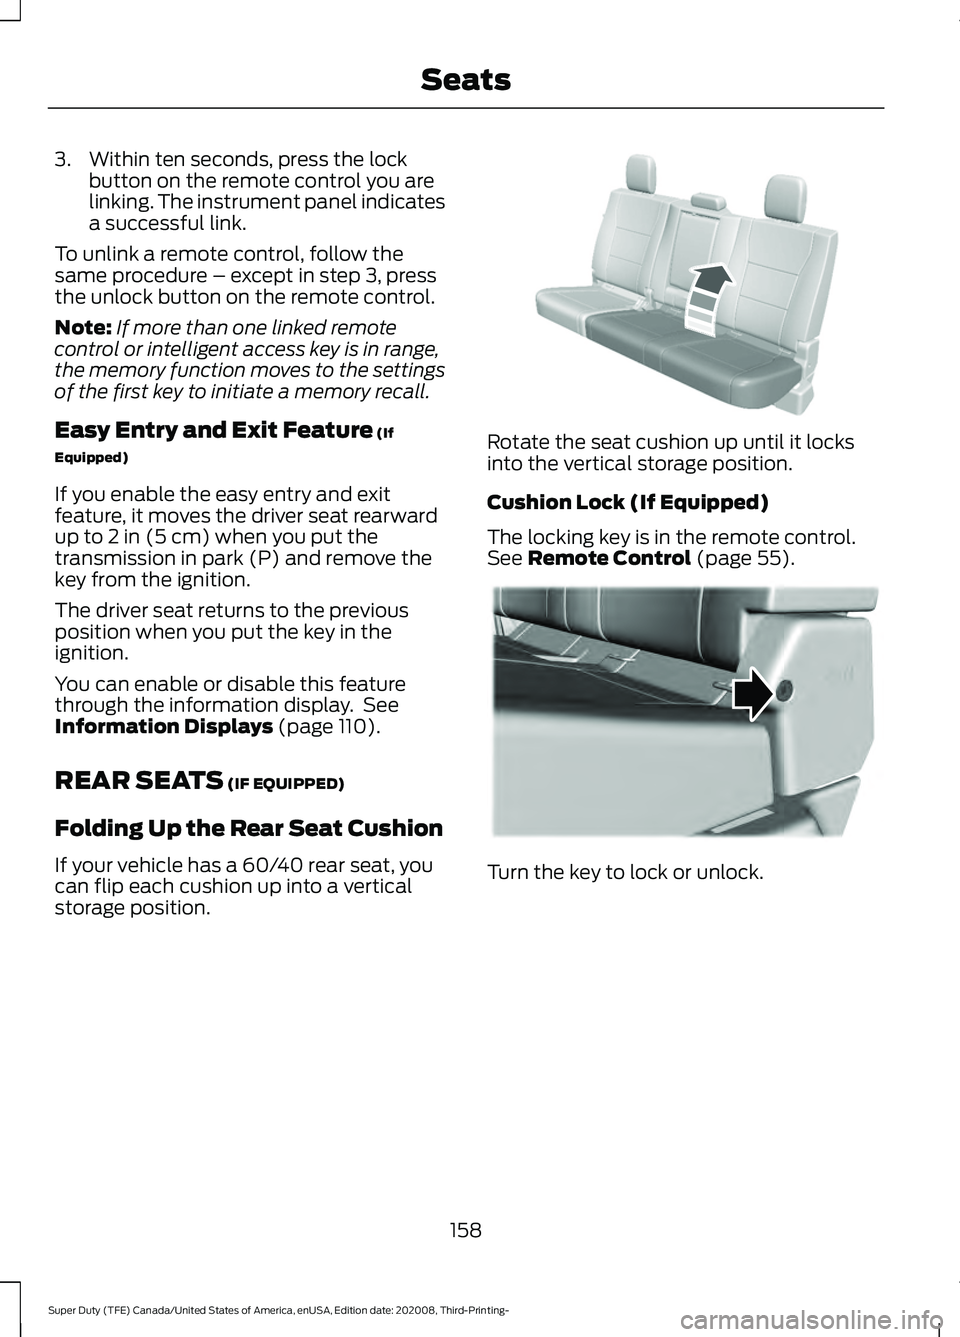
If your vehicle has a 60/40 rear seat, you
can flip each cushion up into a vertical
storage position. Rotate the seat cushion up until it locks
into the vertical storage position.
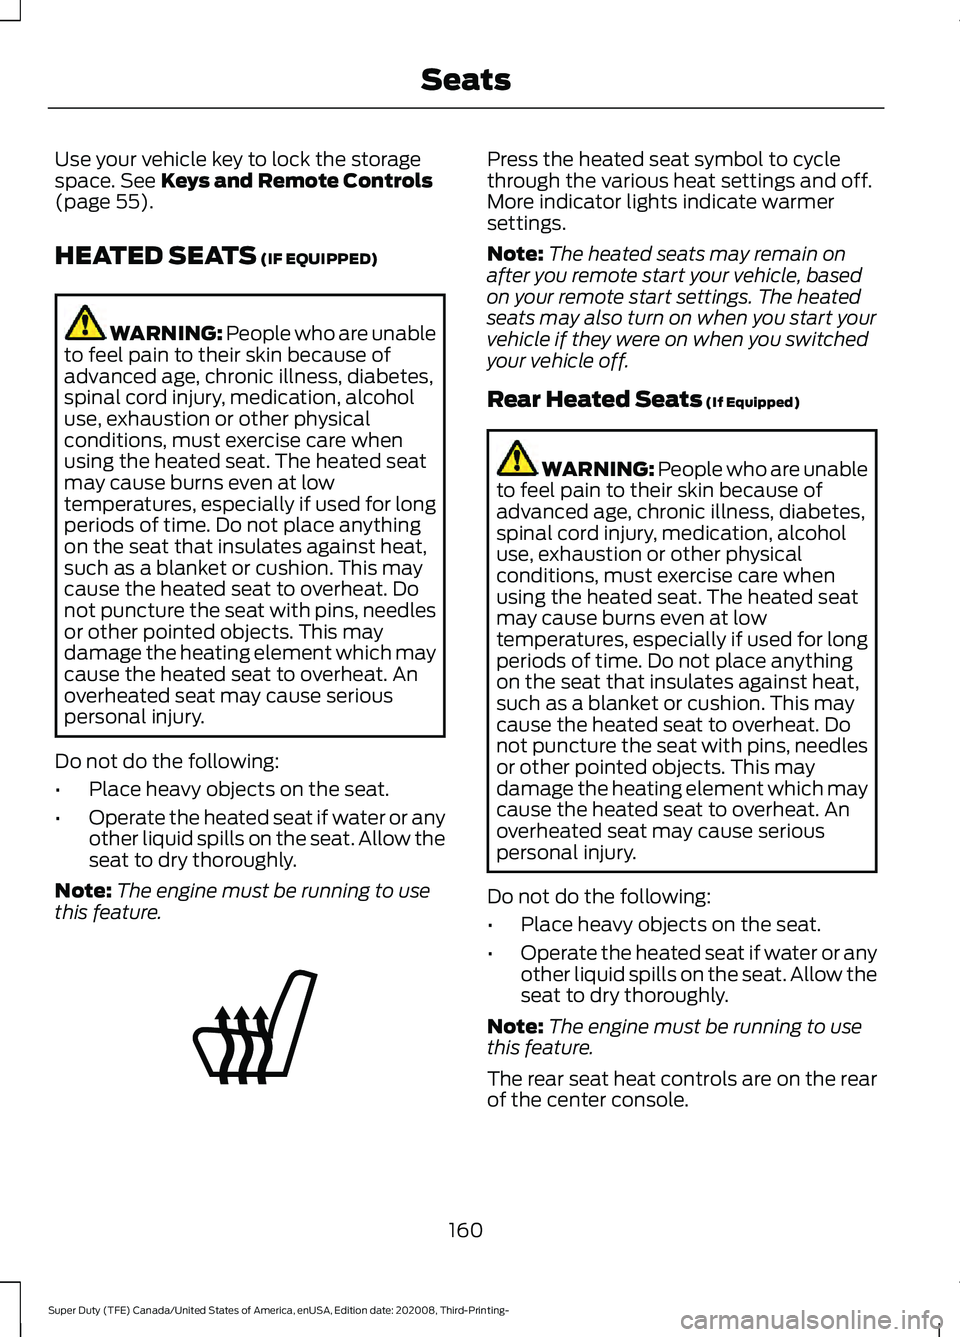
Cushion Lock (If Equipped)
The locking key is in the remote control.
See
Remote Control (page 55).
Turn the key to lock or unlock.
158
Super Duty (TFE) Canada/United States of America, enUSA, Edition date: 202008, Third-Printing- SeatsE310192 E310192 E224956
Page 162 of 666
Returning the Seat to the Seating
Position
WARNING: Check under the seat
cushion to make sure no cargo or objects
are under the seat cushion before
returning the seat cushion to its original
position, and that the seat cushion locks
into place. Failure to do so may prevent
the seat from operating properly in the
event of a crash, which could increase
the risk of serious injury. Pull the strap to release the seat cushion
from the storage position.
Rear Under Seat Storage
(If Equipped)
The rear seat has storage space under the
seat cushion. Lift the lever and flip up the seat cushion
to access the storage space and the power
point (A).
To remove the storage space divider,
squeeze the sides and lift it from the
storage tub.
159
Super Duty (TFE) Canada/United States of America, enUSA, Edition date: 202008, Third-Printing- SeatsE308139 AE162739 E162740 E162741
Page 163 of 666

Use your vehicle key to lock the storage
space. See Keys and Remote Controls
(page 55).
HEATED SEATS
(IF EQUIPPED) WARNING: People who are unable
to feel pain to their skin because of
advanced age, chronic illness, diabetes,
spinal cord injury, medication, alcohol
use, exhaustion or other physical
conditions, must exercise care when
using the heated seat. The heated seat
may cause burns even at low
temperatures, especially if used for long
periods of time. Do not place anything
on the seat that insulates against heat,
such as a blanket or cushion. This may
cause the heated seat to overheat. Do
not puncture the seat with pins, needles
or other pointed objects. This may
damage the heating element which may
cause the heated seat to overheat. An
overheated seat may cause serious
personal injury.
Do not do the following:
• Place heavy objects on the seat.
• Operate the heated seat if water or any
other liquid spills on the seat. Allow the
seat to dry thoroughly.
Note: The engine must be running to use
this feature. Press the heated seat symbol to cycle
through the various heat settings and off.
More indicator lights indicate warmer
settings.
Note:
The heated seats may remain on
after you remote start your vehicle, based
on your remote start settings. The heated
seats may also turn on when you start your
vehicle if they were on when you switched
your vehicle off.
Rear Heated Seats
(If Equipped) WARNING: People who are unable
to feel pain to their skin because of
advanced age, chronic illness, diabetes,
spinal cord injury, medication, alcohol
use, exhaustion or other physical
conditions, must exercise care when
using the heated seat. The heated seat
may cause burns even at low
temperatures, especially if used for long
periods of time. Do not place anything
on the seat that insulates against heat,
such as a blanket or cushion. This may
cause the heated seat to overheat. Do
not puncture the seat with pins, needles
or other pointed objects. This may
damage the heating element which may
cause the heated seat to overheat. An
overheated seat may cause serious
personal injury.
Do not do the following:
• Place heavy objects on the seat.
• Operate the heated seat if water or any
other liquid spills on the seat. Allow the
seat to dry thoroughly.
Note: The engine must be running to use
this feature.
The rear seat heat controls are on the rear
of the center console.
160
Super Duty (TFE) Canada/United States of America, enUSA, Edition date: 202008, Third-Printing- SeatsE146322
Page 164 of 666

Press the heated seat symbol to cycle
through the various heat settings and off.
More indicator lights indicate warmer
settings.
The heated seat module resets at every
ignition run cycle. While the ignition is in
the on position, press the heated seat
switch to enable heating mode. When
activated, they turn off automatically when
you switch off the engine.
VENTILATED SEATS (IF EQUIPPED)
Note: The ventilated seats may remain on
after you remote start your vehicle, based
on your remote start settings. The ventilated
seats may also turn on when you start your
vehicle if they were on when you switched
your vehicle off.
Do not do the following:
• Spill liquid on the front seats. This may
cause the air vent holes to become
blocked and not work properly.
• Place cargo or objects under the seats.
They may block the air intake causing
the air vents to not work properly.
The engine must be running to use this
feature. Press this symbol to cycle through the
various ventilation settings and off. More
indicator lights indicate higher fan speeds.
If the engine falls below 350 RPM while
the ventilated seats are on, the feature
turns itself off. You need to reactivate it.
Note:
To improve comfort, use the
ventilated seats along with the vehicle ’s air
conditioning system.
161
Super Duty (TFE) Canada/United States of America, enUSA, Edition date: 202008, Third-Printing- SeatsE146322 E224689
Page 167 of 666

UNIVERSAL GARAGE DOOR
OPENER
HomeLink Wireless Control
System
WARNING: Do not use the system
with any garage door opener that does
not have the safety stop and reverse
feature as required by U.S. Federal
Safety Standards (this includes any
garage door opener manufactured
before April 1, 1982). A garage door
opener which cannot detect an object,
signaling the door to stop and reverse,
does not meet current federal safety
standards. Using a garage door opener
without these features increases the risk
of serious injury or death.
Note: Make sure that the garage door and
security device are free from obstruction
when you are programming. Do not program
the system with the vehicle in the garage.
Note: Make sure you keep the original
remote control transmitter for use in other
vehicles as well as for future system
programming.
Note: We recommend that upon the sale
or lease termination of your vehicle, you
erase the programmed function buttons for
security reasons. See Erasing the Function
Button Codes
later in this section.
Note: You can program a maximum of
three devices. To change or replace any of
the three devices after it has been initially
programmed, you must first erase the
current settings. See Erasing the Function
Button Codes
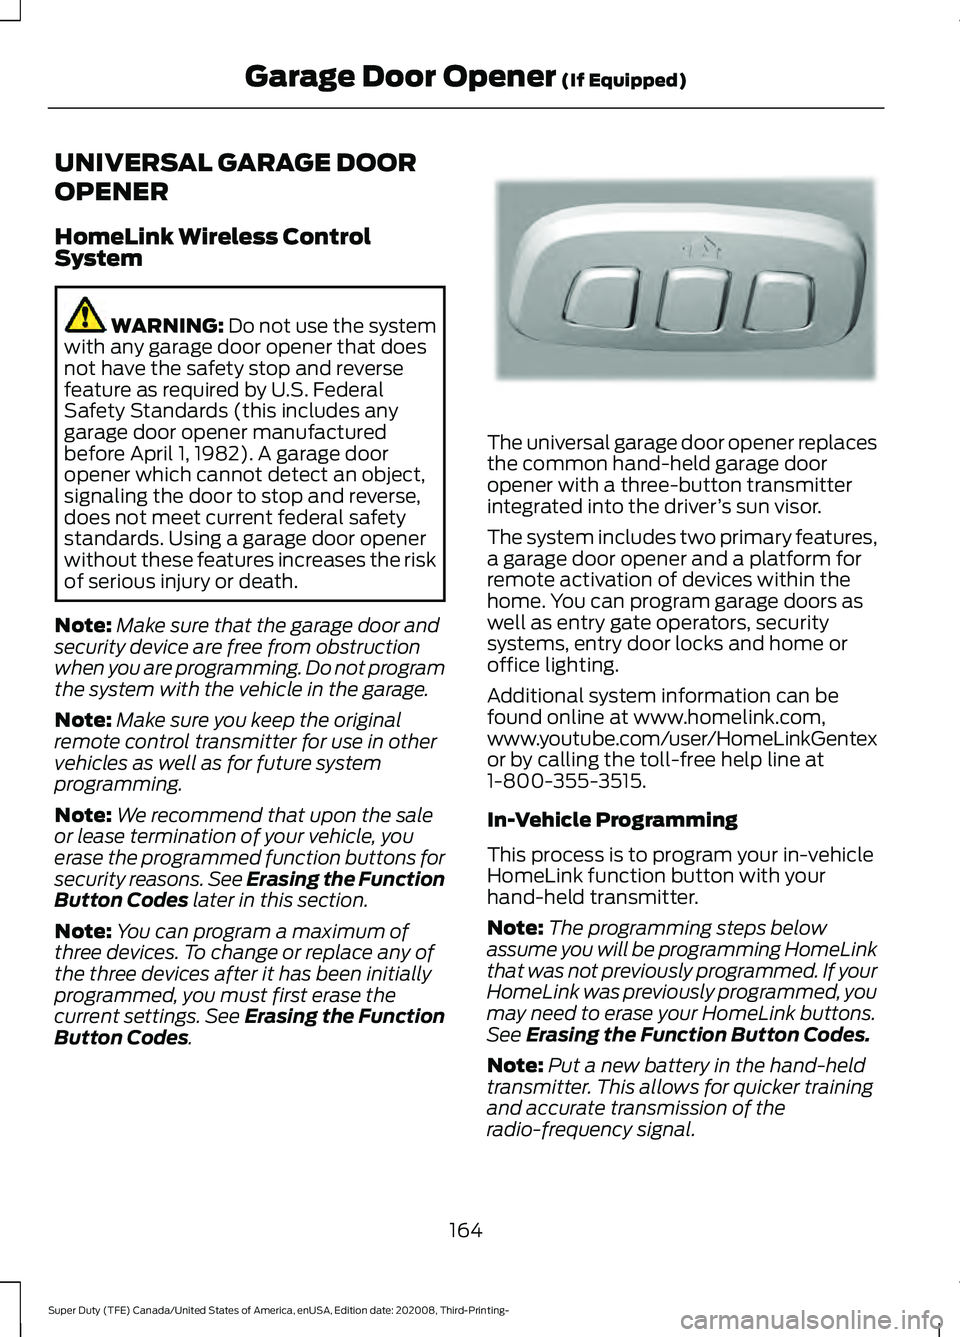
. The universal garage door opener replaces
the common hand-held garage door
opener with a three-button transmitter
integrated into the driver
’s sun visor.
The system includes two primary features,
a garage door opener and a platform for
remote activation of devices within the
home. You can program garage doors as
well as entry gate operators, security
systems, entry door locks and home or
office lighting.
Additional system information can be
found online at www.homelink.com,
www.youtube.com/user/HomeLinkGentex
or by calling the toll-free help line at
1-800-355-3515.
In-Vehicle Programming
This process is to program your in-vehicle
HomeLink function button with your
hand-held transmitter.
Note: The programming steps below
assume you will be programming HomeLink
that was not previously programmed. If your
HomeLink was previously programmed, you
may need to erase your HomeLink buttons.
See Erasing the Function Button Codes.
Note: Put a new battery in the hand-held
transmitter. This allows for quicker training
and accurate transmission of the
radio-frequency signal.
164
Super Duty (TFE) Canada/United States of America, enUSA, Edition date: 202008, Third-Printing- Garage Door Opener
(If Equipped)E188211
Page 174 of 666
CENTER CONSOLE (IF EQUIPPED)
Stow items in the cup holder carefully as
items may become loose during hard
braking, acceleration or crashes, including
hot drinks which may spill.
Available console features include: Storage compartment.
A
Front storage compartment with
USB ports.
B
Sliding cup holder.
C
Center storage compartment
with auxiliary power point.
D
Rear cup holders.
E
Auxiliary power point.
F
Heated rear seats.
G
AC power point.
H
USB charging ports.
I OVERHEAD CONSOLE (IF
EQUIPPED) Press near the rear edge of the door to
open it.
UNDER SEAT STORAGE
(IF
EQUIPPED)
Front Under Seat Storage
Compartment - Vehicles Without
Locking Storage Lift the latch to open the lid and access to
the storage compartment under the center
seat cushion.
171
Super Duty (TFE) Canada/United States of America, enUSA, Edition date: 202008, Third-Printing- Storage CompartmentsE250516 E224959 E306120
Page 175 of 666
Front Under Seat Storage
Compartment - Vehicles With
Locking Storage
1. Use the key in the remote control to
unlock. See Remote Control (page
55). 2. Press the latch to release the cushion.
3. Lift the cushion to access the storage
compartment. Rear Under Seat Storage
(If Equipped)
1. Lift the rear seat to access the under
seat storage bin. 172
Super Duty (TFE) Canada/United States of America, enUSA, Edition date: 202008, Third-Printing- Storage CompartmentsE224738 E223578 E229819 E235007
Page 176 of 666
2.
Lift the front and side panels to expand
and lock them in place. 3. Lock the panels in an open position. 4. To collapse, release the lever, push
down to the stowed position and fold
in the side and front panels.
Note: Make sure the storage divider is not
locked into place when collapsing. Push the
button to release the divider door and swing
it to the stowed position on the front wall.
173
Super Duty (TFE) Canada/United States of America, enUSA, Edition date: 202008, Third-Printing- Storage CompartmentsE235008 E235009