Page 57 of 244
 55
Lighting and visibility
4Lighting control
Never look too closely at the luminous
beam of LED lamps: risk of serious eye
injury!
In some weather conditions (e.g. low
temperature or humidity), mis")
55
Lighting and visibility
4Lighting control
Never look too closely at the luminous
beam of LED lamps: risk of serious eye
injury!
In some weather conditions (e.g. low
temperature or humidity), misting on the
internal surface of the glass of the headlamps
and rear lamps is normal, and will disappear
after the lamps have been on for a few
minutes.
Travelling abroad
Vehicles equipped with halogen
headlamps:
If planning to use your vehicle in a country
that drives on the other side of the road, the
headlamp dipped beams must be adjusted to
avoid dazzling oncoming drivers. Contact a
CITROËN dealer or a qualified workshop.
If one or more lamps fails, a message
asks you to check the lamp or lamps
concerned.
Main lighting
Automatic illumination of lamps/daytime running lampsSidelamps only
Dipped or main beam headlamps
Headlamp dipping
► Pull the stalk to switch between dipped and
main beam headlamps.
In “AUTO” and sidelamps modes, the driver can
switch on the main beam headlamps temporarily
(“headlamp flash”) by pulling the stalk.
Display
Illumination of the corresponding indicator lamp
in the instrument panel confirms that the lighting
selected is on.
Foglamps
Rear foglamp
It only works if the sidelamps or dipped beam headlamps are on.
► Rotate the ring forwards to switch it on and backwards to switch it off.
When the lamps are switched off automatically
("AUTO" position), the foglamp and the dipped
beam headlamps will remain on.
Front foglamps and rear
foglamp
Page 58 of 244
 56
Lighting and visibility
the left, moving the lighting control stalk upwards turns on the right-hand sidelamps).
This is confirmed by an audible signal and the
lighting of the corresponding directi")
56
Lighting and visibility
the left, moving the lighting control stalk upwards turns on the right-hand sidelamps).
This is confirmed by an audible signal and the
lighting of the corresponding direction indicator
lamp on the instrument panel.
► To switch off the parking lamps, return the lighting control stalk to the central position.
Automatic illumination of
headlamps
When the ring is at the "AUTO" position and
a low level of ambient light is detected by a
sunshine sensor, the number plate lamps, side lamps and dipped beam headlamps are switched
on automatically, without any action on the
part of the driver. They can also come on if
rain is detected, at the same time as automatic
operation of the windscreen wipers.
As soon as the light returns to a sufficient level
or after the windscreen wipers are switched off,
the lamps are switched off automatically.
Operating fault
In the event of a malfunction of the sunshine sensor, the lighting comes on,
this warning lamp is displayed in the instrument
panel accompanied by an audible signal and/or a
message.
Contact a CITROËN dealer or a qualified
workshop.
They operate with the sidelamps or dipped beam headlamps on, in manual or
auto mode.
► Press and rotate the ring:– forwards a 1st time to switch on the front
foglamps.
– forwards a 2nd time to switch on the rear
foglamp.
– backwards a 1st time to switch off the rear
foglamp.
– backwards a 2nd time to switch off the front
foglamps.
When the lamps are switched off automatically
(with AUTO model) or when the dipped beam
headlamps are switched off manually, the
foglamps and sidelamps remain on.
► Rotate the ring backwards to switch the foglamps off; the sidelamps will then switch off.
In good or rainy weather, by day and
night, using the front and rear foglamps
is prohibited. In these situations, the power of
their beams may dazzle other drivers. They
should only be used in fog or falling snow.
In these weather conditions, it is your
responsibility to switch on the foglamps and
dipped beam headlamps manually as the
sunshine sensor may detect sufficient light.
Do not forget to turn off the front and rear
foglamps as soon as they are no longer
necessary.
Switching off of the lamps when the
ignition is switched off
When the ignition is switched off, all of the
lamps turn off immediately, except for dipped
beam headlamps if automatic guide-me-home
lighting is activated.
Switching on the lamps after
switching off the ignition
To reactivate the lighting control, rotate the
ring to the "AUTO" position, then to the
desired position.
If the driver's door is opened, a temporary
audible signal warns the driver that the lamps
are on.
They will go off automatically after a period of
time that depends on the state of charge of
the battery (entering energy economy mode).
Direction indicators
(flashers)
► Left: lower the lighting control stalk passing the point of resistance.► Right: raise the lighting control stalk passing the point of resistance.
Three flashes
► Press briefly upwards or downwards, without going beyond the point of resistance; the
direction indicators will flash 3 times.
Parking lamps
Vehicle side marking by lighting the sidelamps
on the traffic side only.
► Depending on version, within one minute of switching off the ignition, move the lighting
control stalk up or down, depending which side
the traffic is on (for example, when parking on
Page 59 of 244
 57
Lighting and visibility
4the left, moving the lighting control stalk upwards
turns on the right-hand sidelamps).
This is confirmed by an audible signal and the
lighting of the corresponding direc")
57
Lighting and visibility
4the left, moving the lighting control stalk upwards
turns on the right-hand sidelamps).
This is confirmed by an audible signal and the
lighting of the corresponding direction indicator
lamp on the instrument panel.
► To switch off the parking lamps, return the lighting control stalk to the central position.
Automatic illumination of headlamps
When the ring is at the "AUTO" position and
a low level of ambient light is detected by a
sunshine sensor, the number plate lamps, side lamps and dipped beam headlamps are switched
on automatically, without any action on the
part of the driver. They can also come on if
rain is detected, at the same time as automatic
operation of the windscreen wipers.
As soon as the light returns to a sufficient level
or after the windscreen wipers are switched off,
the lamps are switched off automatically.
Operating fault
In the event of a malfunction of the sunshine sensor, the lighting comes on,
this warning lamp is displayed in the instrument
panel accompanied by an audible signal and/or a
message.
Contact a CITROËN dealer or a qualified
workshop.
Do not cover the sunshine sensor,
integrated with the rain sensor and
located at the top centre of the windscreen
behind the rear view mirror; the associated
functions would no longer be controlled.
In fog or snow, the sunshine sensor may
detect sufficient light. In this case, the
lighting will not come on automatically.
Daytime running lamps /
Sidelamps
The front and rear lamps light up automatically
when the engine starts.
They provide the following functions:
– Daytime running lamps (lighting control stalk
at position "AUTO" with adequate light level).
– Sidelamps (lighting control stalk in "AUTO"
position with low light level or "Sidelamps only”
or "Dipped/main beam headlamps").
In daytime running lamps mode, the
diodes are brighter.
Guide-me-home lighting
Automatic
With the "Automatic illumination of headlamps"
function activated (lighting control stalk at the
AUTO position), under low ambient light, the
dipped beam headlamps come on automatically
when the ignition is switched off.
Activation, deactivation and the duration of the
guide-me-home lighting are set in the vehicle
parameters menu.
Manual
Page 60 of 244
 58
Lighting and visibility
• If the \"AUTO\" and \"Main beam\" indicator lamps were on, the system changes to dipped beam.
To reactivate the system, flash the headlamps
again.
The syst")
58
Lighting and visibility
• If the "AUTO" and "Main beam" indicator lamps were on, the system changes to dipped beam.
To reactivate the system, flash the headlamps
again.
The system may be disrupted or not work correctly:
– When visibility conditions are poor (snowfall, heavy rain, etc.).– If the windscreen in front of the camera is dirty, misted or obscured (for example, by a
sticker).
– If the vehicle is facing highly reflective signs.
When the system detects thick fog, it
temporarily deactivates the function.
The system is not able to detect:
– Road users that do not have their own lighting, such as pedestrians.– Vehicles whose lighting is obscured (for example, vehicles driving behind a safety
barrier on a motorway).
– Vehicles at the top or bottom of a steep slope, on winding roads, on crossroads.
Clean the windscreen regularly,
particularly the area in front of the
camera.
The internal surface of the windscreen can
also become misted around the camera.
In humid and cold weather, demist the
windscreen regularly.
�7�K�H���W�H�P�S�R�U�D�U�\�\
��L�O�O�X�P�L�Q�D�W�L�R�Q��\
�R�I���W�K�H���G�L�S�S�H�G�\
��E�H�D�P���K�H�D�G�O�D�P�S�V���D�I�W�\
H�U���W�K�H���Y�H�K�L�F�O�H\
�
�V���L�J�Q�L�W�L�R�Q���K\
�D�V���E�H�H�Q��
�V�Z�L�W�F�K�H�G���R�
Page 61 of 244
 59
Lighting and visibility
4• If the \"AUTO\" and \"Main beam\" indicator lamps were on, the system changes to dipped beam.
To reactivate the system, flash the headlamps
again.
The sys")
59
Lighting and visibility
4• If the "AUTO" and "Main beam" indicator lamps were on, the system changes to dipped beam.
To reactivate the system, flash the headlamps
again.
The system may be disrupted or not work correctly:
– When visibility conditions are poor (snowfall, heavy rain, etc.).– If the windscreen in front of the camera is dirty, misted or obscured (for example, by a
sticker).
– If the vehicle is facing highly reflective signs.
When the system detects thick fog, it
temporarily deactivates the function.
The system is not able to detect:
– Road users that do not have their own lighting, such as pedestrians.– Vehicles whose lighting is obscured (for example, vehicles driving behind a safety
barrier on a motorway).
– Vehicles at the top or bottom of a steep slope, on winding roads, on crossroads.
Clean the windscreen regularly,
particularly the area in front of the
camera.
The internal surface of the windscreen can
also become misted around the camera.
In humid and cold weather, demist the
windscreen regularly.
Do not allow snow to accumulate on the
bonnet or roof of the vehicle as this could
obstruct the detection camera.
Headlamp beam height
adjustment
To avoid causing a nuisance to other road users,
the height of the headlamp beams should be
adjusted according to the load in the vehicle.
0. (Initial adjustment)
Driver only or driver + front passenger
1. Driver + front passenger + rear passengers +
maximum authorised load
2. Driver only + maximum authorised load
Cornering lighting
If your vehicle is so equipped, this system
makes use of the beam from a front foglamp to
illuminate the inside of a bend, when the main or
dipped beam headlamps are on and the vehicle
speed is below 25 mph (40 km/h) (urban driving,
winding road, intersections, parking manoeuvres,
etc.).
Without cornering lighting
Page 62 of 244
 60
Lighting and visibility
Automatic.
Refer to the corresponding section.
Front screenwash
► Pull the wiper control stalk towards you and hold.
The screenwash then the windscreen wipers
operate f")
60
Lighting and visibility
Automatic.
Refer to the corresponding section.
Front screenwash
► Pull the wiper control stalk towards you and hold.
The screenwash then the windscreen wipers
operate for a pre-determined time.
The height of the front screenwash jets
can be adjusted. To change the factory
setting, insert a needle into each of the jets,
then direct them.
To avoid damaging the wiper blades, do not operate the screenwash if the
screenwash reservoir is empty.
Only operate the screenwash if there is no
risk of the fluid freezing on the windscreen
and hindering visibility. During the winter
period, use "very cold climate" rated products.
Never top up with water.
Rear wiper
► Turn the ring to align the desired symbol with the marking.Off
Intermittent wipe
With cornering lighting
Switching on / off
This system starts:– when the corresponding direction indicator is switched on.
or
– from a certain angle of rotation of the steering wheel.
It becomes inactive:
– below a certain angle of rotation of the steering wheel.– above 25 mph (40 km/h).– when reverse gear is engaged.
Programming
The function is activated or deactivated via the
vehicle configuration menu.
This function is activated by default.
Without audio system
► In the "LIGHTING" menu on the instrument
panel display, activate/deactivate "DIR
HEADLAMPS" (directional headlamps).
With audio system
► In the "Personalisation-
configuration " menu, activate/deactivate
"Directional headlamps".
With touch screen
► In the Driving / Vehicle menu, select
the "Vehicle settings" tab, then
"Lighting " and activate/deactivate " Directional
headlamps".
Wiper control stalk
In wintry conditions, remove snow, ice or
frost present on the windscreen, around
the wiper arms and blades and on the
windscreen seal, before operating the wipers.
Do not operate the wipers on a dry
windscreen. Under extremely hot or cold
conditions, ensure that the wiper blades are
not stuck to the windscreen before operating
the wipers.
Without AUTO wiping
With AUTO wiping
Windscreen wipers
► To select the wiping speed: raise or lower the stalk to the desired position.Fast wiping (heavy rain)
Normal wiping (moderate rain)
Intermittent wiping (proportional to the vehicle’s speed)Off
Single wipe (press down and release).
or
Page 63 of 244
 61
Lighting and visibility
4Automatic.
Refer to the corresponding section.
Front screenwash
► Pull the wiper control stalk towards you and hold.
The screenwash then the windscreen wipers
operate f")
61
Lighting and visibility
4Automatic.
Refer to the corresponding section.
Front screenwash
► Pull the wiper control stalk towards you and hold.
The screenwash then the windscreen wipers
operate for a pre-determined time.
The height of the front screenwash jets can be adjusted. To change the factory
setting, insert a needle into each of the jets,
then direct them.
To avoid damaging the wiper blades, do not operate the screenwash if the
screenwash reservoir is empty.
Only operate the screenwash if there is no
risk of the fluid freezing on the windscreen
and hindering visibility. During the winter
period, use "very cold climate" rated products.
Never top up with water.
Rear wiper
► Turn the ring to align the desired symbol with the marking.Off
Intermittent wipe
Wash-wipe
Reverse gear
When reverse gear is engaged, the rear wiper
will come into operation automatically if the front
windscreen wipers are operating.
Activation / Deactivation
The system is activated or deactivated via the
vehicle configuration menu.
This system is activated by default.
Without audio system
► In the "COMFORT" menu on the instrument
panel display, activate/deactivate "REAR WIPE
REV". (automatic wiping in reverse).
With audio system
In the "Personalisation-configuration "
menu, activate/deactivate " Rear wipe in
reverse gear ".
With touch screen
► In the Driving / Vehicle menu, select
the "Vehicle settings" tab, then
"Comfort" and activate/deactivate " Rear wiper
in reverse ".
In the event of accumulation of snow or
hard frost or if a bicycle carrier is fitted to
a towing device, deactivate the automatic rear
wiper via the touch screen's Driving/ Vehicle
menu.
Rear screenwash
► Turn the ring all the way towards the dashboard and hold.
The screenwash and the wiper operate for as
long as the ring remains turned.
A final wiping cycle is performed when
screenwashing ends.
Special position of the
windscreen wipers
This maintenance position is used while cleaning
or replacing the wiper blades. It can also be
useful, in winter (ice, snow), to release the wiper
blades from the windscreen.
To maintain the effectiveness of the flat wiper blades, it is advisable to:
– handle them with care.– clean them regularly using soapy water .– avoid using them to hold cardboard on the windscreen.– replace them at the first signs of wear.
Page 64 of 244
 62
Lighting and visibility
Do not cover the rain/sunshine sensor.When using an automatic car wash,
switch off the automatic wipers and the
ignition.
In winter, wait until the windscreen is
complete")
62
Lighting and visibility
Do not cover the rain/sunshine sensor.When using an automatic car wash,
switch off the automatic wipers and the
ignition.
In winter, wait until the windscreen is
completely clear of ice before activating the
automatic wipers.
Switching on
► Give a short downwards push to the control stalk.
A wiping cycle confirms that the instruction has
been accepted.
Depending on version, this indicator lamp appears in the display or comes on in the
instrument panel, accompanied by a message.
Switching off
► Give the control stalk another brief push downwards or place the control stalk in another
position ( Int, 1 or 2).
Depending on version, this indicator lamp
disappears from the display or goes off in
the instrument panel, accompanied by a
message.
Before removing a windscreen wiper blade
► Operating the wiper control stalk within one minute after switching off the ignition will place
the wiper blades in a vertical position.
► Proceed with the desired operation or replace the wiper blades.
After refitting a windscreen wiper blade
► To return the wiper blades to their initial position, switch on the ignition and operate the
wiper control stalk.
Changing a wiper blade
Removing/refitting at the
front
► Carry out these wiper blade replacement operations from the driver's side.► Starting with the wiper blade farthest from you, hold each arm by the rigid section and raise
it as far as possible.
Take care not to hold the arms at the jet locations.
Do not touch the wiper blades. Risk of
irreparable deformation.
Do not release them while moving them. Risk
of damaging the windscreen!
► Clean the windscreen using screenwash
fluid.
Do not apply "Rain X" type water-
repellent products.
► Unclip the worn wiper blade closest to you and remove it.► Install the new wiper blade and clip it to the arm.► Repeat the procedure for the other wiper blade.► Starting with the wiper blade closest to you, once again hold each arm by the rigid section,
then guide it carefully onto the windscreen.
Removing/refitting at the
rear
► Hold the arm by the rigid section and raise it as far as possible.► Clean the rear screen using screenwash fluid.► Unclip the worn wiper blade and remove it.► Install the new wiper blade and clip it to the arm.► Once again hold the arm by the rigid section, then guide it carefully onto the rear screen.
Automatic windscreen wipers
In AUTO mode, the windscreen wipers operate
automatically, without any action on the part of
the driver. If rain is detected, the wiping adapts to
the intensity of the rainfall automatically.
Detection of rainfall is by means of a rain/
sunshine sensor at the top centre of the
windscreen, behind the rear view mirror.
 1
1 2
2 3
3 4
4 5
5 6
6 7
7 8
8 9
9 10
10 11
11 12
12 13
13 14
14 15
15 16
16 17
17 18
18 19
19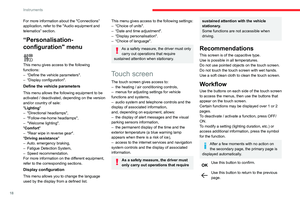 20
20 21
21 22
22 23
23 24
24 25
25 26
26 27
27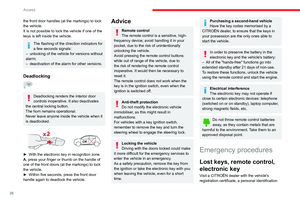 28
28 29
29 30
30 31
31 32
32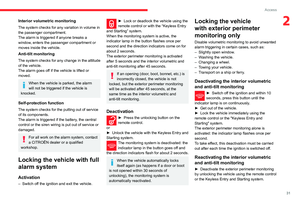 33
33 34
34 35
35 36
36 37
37 38
38 39
39 40
40 41
41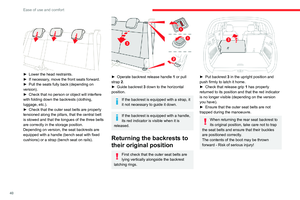 42
42 43
43 44
44 45
45 46
46 47
47 48
48 49
49 50
50 51
51 52
52 53
53 54
54 55
55 56
56 57
57 58
58 59
59 60
60 61
61 62
62 63
63 64
64 65
65 66
66 67
67 68
68 69
69 70
70 71
71 72
72 73
73 74
74 75
75 76
76 77
77 78
78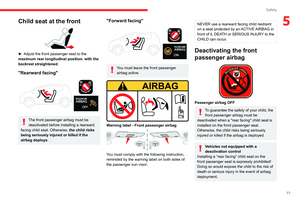 79
79 80
80 81
81 82
82 83
83 84
84 85
85 86
86 87
87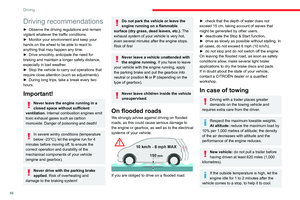 88
88 89
89 90
90 91
91 92
92 93
93 94
94 95
95 96
96 97
97 98
98 99
99 100
100 101
101 102
102 103
103 104
104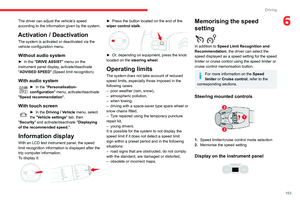 105
105 106
106 107
107 108
108 109
109 110
110 111
111 112
112 113
113 114
114 115
115 116
116 117
117 118
118 119
119 120
120 121
121 122
122 123
123 124
124 125
125 126
126 127
127 128
128 129
129 130
130 131
131 132
132 133
133 134
134 135
135 136
136 137
137 138
138 139
139 140
140 141
141 142
142 143
143 144
144 145
145 146
146 147
147 148
148 149
149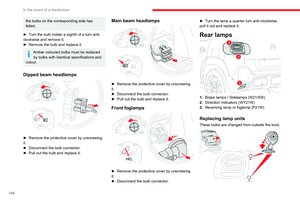 150
150 151
151 152
152 153
153 154
154 155
155 156
156 157
157 158
158 159
159 160
160 161
161 162
162 163
163 164
164 165
165 166
166 167
167 168
168 169
169 170
170 171
171 172
172 173
173 174
174 175
175 176
176 177
177 178
178 179
179 180
180 181
181 182
182 183
183 184
184 185
185 186
186 187
187 188
188 189
189 190
190 191
191 192
192 193
193 194
194 195
195 196
196 197
197 198
198 199
199 200
200 201
201 202
202 203
203 204
204 205
205 206
206 207
207 208
208 209
209 210
210 211
211 212
212 213
213 214
214 215
215 216
216 217
217 218
218 219
219 220
220 221
221 222
222 223
223 224
224 225
225 226
226 227
227 228
228 229
229 230
230 231
231 232
232 233
233 234
234 235
235 236
236 237
237 238
238 239
239 240
240 241
241 242
242 243
243