2021 CHEVROLET SILVERADO 2500HD warning light
[x] Cancel search: warning lightPage 258 of 433
Chevrolet Silverado 2500 HD/3500 HD Owner Manual (GMNA-Localizing-U.
S./Canada/Mexico-14632154) - 2021 - CRC - 11/20/20
Driving and Operating 257
<0.3 m (1 ft) in the vehicle front—a
continuous beep will sound from the rear or
front depending on object location, or both
sides of the Safety Alert Seat will pulse five
times. Beeps for FPA are higher pitched than
for RPA.
Rear Cross Traffic Alert (RCTA)
If equipped, when the vehicle is shifted into
R (Reverse), RCTA shows a red warning
triangle with a left or right pointing arrow
on the infotainment display to warn of
traffic coming from the left or right. This
system detects objects coming from up to
20 m (65 ft) from the left or right side of
the vehicle. When an object is detected,
either three beeps sound from the left or
right or three Safety Alert Seat pulses occur
on the left or right side, depending on the
direction of the detected vehicle.
Use caution while backing up when towing
a trailer, as the RCTA detection zones that
extend out from the back of the vehicle do
not move further back when a trailer is
towed.
RCTA is disabled when the trailer connection
status is displayed. RCTA can be turned off. See
“Collision/
Detection Systems” underVehicle
Personalization 0126.
Turning the Features On or Off
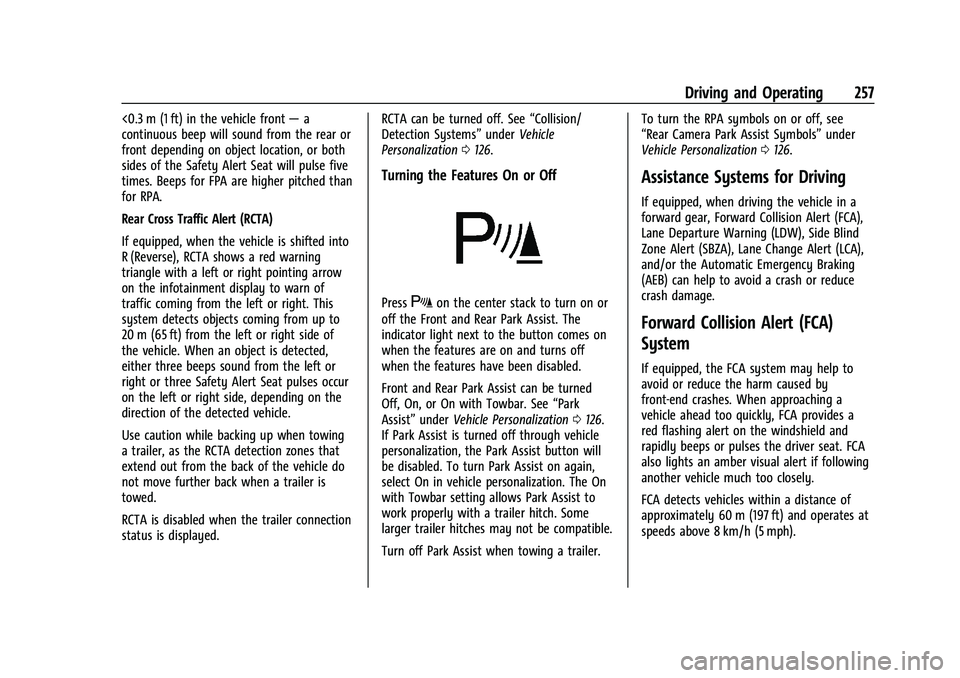
PressXon the center stack to turn on or
off the Front and Rear Park Assist. The
indicator light next to the button comes on
when the features are on and turns off
when the features have been disabled.
Front and Rear Park Assist can be turned
Off, On, or On with Towbar. See “Park
Assist” underVehicle Personalization 0126.
If Park Assist is turned off through vehicle
personalization, the Park Assist button will
be disabled. To turn Park Assist on again,
select On in vehicle personalization. The On
with Towbar setting allows Park Assist to
work properly with a trailer hitch. Some
larger trailer hitches may not be compatible.
Turn off Park Assist when towing a trailer. To turn the RPA symbols on or off, see
“Rear Camera Park Assist Symbols”
under
Vehicle Personalization 0126.
Assistance Systems for Driving
If equipped, when driving the vehicle in a
forward gear, Forward Collision Alert (FCA),
Lane Departure Warning (LDW), Side Blind
Zone Alert (SBZA), Lane Change Alert (LCA),
and/or the Automatic Emergency Braking
(AEB) can help to avoid a crash or reduce
crash damage.
Forward Collision Alert (FCA)
System
If equipped, the FCA system may help to
avoid or reduce the harm caused by
front-end crashes. When approaching a
vehicle ahead too quickly, FCA provides a
red flashing alert on the windshield and
rapidly beeps or pulses the driver seat. FCA
also lights an amber visual alert if following
another vehicle much too closely.
FCA detects vehicles within a distance of
approximately 60 m (197 ft) and operates at
speeds above 8 km/h (5 mph).
Page 261 of 433
Chevrolet Silverado 2500 HD/3500 HD Owner Manual (GMNA-Localizing-U.
S./Canada/Mexico-14632154) - 2021 - CRC - 11/20/20
260 Driving and Operating
Warning (Continued)
.Detect a vehicle ahead if it is partially
blocked by pedestrians or other
objects.
Complete attention is always required
while driving, and you should be ready to
take action and apply the brakes and/or
steer the vehicle to avoid crashes.
AEB may slow the vehicle to a complete
stop to try to avoid a potential crash. If this
happens, AEB may engage the Electric
Parking Brake (EPB) to hold the vehicle at a
stop. Release the EPB or firmly press the
accelerator pedal.
{Warning
AEB may automatically brake the vehicle
suddenly in situations where it is
unexpected and undesired. It could
respond to a turning vehicle ahead,
guardrails, signs, and other non-moving
objects. To override AEB, firmly press the
accelerator pedal, if it is safe to do so.
Intelligent Brake Assist (IBA)
IBA may activate when the brake pedal is
applied quickly by providing a boost to
braking based on the speed of approach and
distance to a vehicle ahead.
Minor brake pedal pulsations or pedal
movement during this time is normal and
the brake pedal should continue to be
applied as needed. IBA will automatically
disengage only when the brake pedal is
released.
{Warning
IBA may increase vehicle braking in
situations when it may not be necessary.
You could block the flow of traffic. If this
occurs, take your foot off the brake pedal
and then apply the brakes as needed.
AEB and IBA can be disabled. See “Collision/
Detection Systems” underVehicle
Personalization 0126.
{Warning
Using AEB or IBA while towing a trailer
could cause you to lose control of the
vehicle and crash. Turn the system to
Alert or Off when towing a trailer.
A system unavailable message may
display if:
.The front of the vehicle or windshield is
not clean.
.Heavy rain or snow is interfering with
object detection.
.There is a problem with the StabiliTrak/
Electronic Stability Control (ESC) system.
The AEB system does not need service.
Side Blind Zone Alert (SBZA)
If equipped, the SBZA system is a
lane-changing aid that assists drivers with
avoiding crashes that occur with moving
vehicles in the side blind zone, or blind spot
areas. When the vehicle is in a forward gear,
the left or right side mirror display will light
up if a moving vehicle is detected in that
blind zone. If the turn signal is activated and
a vehicle is also detected on the same side,
the display will flash as an extra warning
not to change lanes. Since this system is
Page 262 of 433

Chevrolet Silverado 2500 HD/3500 HD Owner Manual (GMNA-Localizing-U.
S./Canada/Mexico-14632154) - 2021 - CRC - 11/20/20
Driving and Operating 261
part of the Lane Change Alert (LCA) system,
read the entire LCA section before using this
feature.
Lane Change Alert (LCA)
If equipped, the LCA system is a
lane-changing aid that assists drivers with
avoiding lane change crashes that occur with
moving vehicles in the side blind zone (or
spot) areas or with vehicles rapidly
approaching these areas from behind. The
LCA warning display will light up in the
corresponding outside side mirror and will
flash if the turn signal is on.
{Warning
LCA does not alert the driver to vehicles
outside of the system detection zones,
pedestrians, bicyclists, or animals. It may
not provide alerts when changing lanes
under all driving conditions. Failure to use
proper care when changing lanes may
result in injury, death, or vehicle damage.
Before making a lane change, always
check mirrors, glance over your shoulder,
and use the turn signals.LCA Detection Zones
1. SBZA Detection Zone
2. LCA Detection Zone
The LCA sensor covers a zone of
approximately one lane over from both
sides of the vehicle, or 3.5 m (11 ft). The
height of the zone is approximately between
0.5 m (1.5 ft) and 2 m (6 ft) off the ground.
The Side Blind Zone Alert (SBZA) warning
area starts at approximately the middle of
the vehicle and goes back 5 m (16 ft). Drivers
are also warned of vehicles rapidly
approaching from up to 70 m (230 ft) behind
the vehicle.
How the System Works
The LCA symbol lights up in the side mirrors
when the system detects a moving vehicle
in the next lane over that is in the side blind zone or rapidly approaching that zone
from behind. A lit LCA symbol indicates it
may be unsafe to change lanes. Before
making a lane change, check the LCA
display, check mirrors, glance over your
shoulder, and use the turn signals.
Left Side Mirror
DisplayRight Side Mirror Display
When the vehicle is started, both outside
mirror LCA displays will briefly come on to
indicate the system is operating. When the
vehicle is in a forward gear, the left or right
side mirror display will light up if a moving
vehicle is detected in the next lane over in
that blind zone or rapidly approaching that
zone. If the turn signal is activated in the
same direction as a detected vehicle, this
display will flash as an extra warning not to
change lanes.
Page 263 of 433

Chevrolet Silverado 2500 HD/3500 HD Owner Manual (GMNA-Localizing-U.
S./Canada/Mexico-14632154) - 2021 - CRC - 11/20/20
262 Driving and Operating
LCA can be disabled through vehicle
personalization. When you disable LCA, SBZA
is also disabled. SeeVehicle Personalization
0 126. If LCA is disabled by the driver, the
LCA mirror displays will not light up.
When the System Does Not Seem to
Work Properly
The LCA system requires some driving for
the system to calibrate to maximum
performance. This calibration may occur
more quickly if the vehicle is driving on a
straight highway road with traffic and
roadside objects (e.g., guardrails, barriers).
LCA displays may not come on when
passing a vehicle quickly, for a stopped
vehicle, or when towing a trailer. The LCA
detection zones that extend back from the
side of the vehicle do not move further back
when a trailer is towed. Use caution while
changing lanes when towing a trailer. LCA
may alert to objects attached to the vehicle,
such as a trailer, bicycle, or object extending
out to either side of the vehicle. Attached
objects may also interfere with the
detection of vehicles. This is normal system
operation; the vehicle does not need service. LCA may not always alert the driver to
vehicles in the next lane over, especially in
wet conditions or when driving on sharp
curves. The system does not need to be
serviced. The system may light up due to
guardrails, signs, trees, shrubs, and other
non-moving objects. This is normal system
operation; the vehicle does not need service.
LCA may not operate when the LCA sensors
in the left or right corners of the rear
bumper are covered with mud, dirt, snow,
ice, or slush, or in heavy rainstorms. For
cleaning instructions, see "Washing the
Vehicle" under
Exterior Care0373. If the DIC
still displays the system unavailable
message after cleaning both sides of the
vehicle toward the rear corners of the
vehicle, see your dealer.
If the LCA displays do not light up when
moving vehicles are in the side blind zone or
are rapidly approaching this zone and the
system is clean, the system may need
service. Take the vehicle to your dealer.
Radio Frequency Information
See Radio Frequency Statement 0409.
Lane Departure Warning (LDW)
If equipped, LDW may help avoid crashes
due to unintentional lane departures. LDW
uses a camera sensor to detect the lane
markings at speeds of 56 km/h (35 mph) or
greater. It may provide an alert if the
vehicle is crossing a lane without using a
turn signal in that direction. LDW light will
not alert if the turn signal is active in the
direction of lane departure, or if LDW
detects that you are accelerating, braking or
actively steering.
{Warning
The LDW system does not steer the
vehicle. The LDW system may not:
.Provide enough time to avoid a crash.
.Detect lane markings under poor
weather or visibility conditions. This
can occur if the windshield or
headlamps are blocked by dirt, snow,
or ice; if they are not in proper
condition; or if the sun shines directly
into the camera.
.Detect road edges.
.Detect lanes on winding or hilly roads.
(Continued)
Page 264 of 433

Chevrolet Silverado 2500 HD/3500 HD Owner Manual (GMNA-Localizing-U.
S./Canada/Mexico-14632154) - 2021 - CRC - 11/20/20
Driving and Operating 263
Warning (Continued)
If LDW only detects lane markings on one
side of the road, it will only warn you
when departing the lane on the side
where it has detected a lane marking.
Always keep your attention on the road
and maintain proper vehicle position
within the lane, or vehicle damage,
injury, or death could occur. Always keep
the windshield, headlamps, and camera
sensors clean and in good repair. Do not
use LDW in bad weather conditions.
How the System Works
LDW utilizes a camera sensor installed on
the windshield ahead of the rearview mirror
to detect lane markings.
To turn LDW on and off, press
@on the
center stack. The control indicator will light
when LDW is on.
When LDW is on,@is green if LDW is
available to warn of a lane departure. If the
vehicle crosses a detected lane marking
without using the turn signal in that
direction,
@changes to amber and flashes.
Additionally, there will be three beeps, on
the right or left, depending on the lane
departure direction. LDW will not alert if the
turn signal is active in the direction of lane
departure or if LDA detects that you are
accelerating, braking or actively steering.
Fuel
Top Tier Fuel
GM recommends the use of TOP TIER
Detergent Gasoline to keep the engine clean,
reduce engine deposits, and maintain
optimal vehicle performance. Look for the
TOP TIER Logo or see www.toptiergas.com
for a list of TOP TIER Detergent Gasoline
marketers and applicable countries.
Recommended Fuel
For diesel engine vehicles, see “Fuel for
Diesel Engines” in the Duramax diesel
supplement.
If the vehicle has a yellow sticker on the
fuel door, E85 or FlexFuel can be used. If the
vehicle does not have a yellow sticker, do
not use gasoline with ethanol levels greater
than 15% by volume. See E85 or FlexFuel
0 264.
Page 268 of 433
Chevrolet Silverado 2500 HD/3500 HD Owner Manual (GMNA-Localizing-U.
S./Canada/Mexico-14632154) - 2021 - CRC - 11/20/20
Driving and Operating 267
Warning (Continued)
.Read and follow all the instructions on
the fuel pump island.
.Turn off the engine when refueling.
.Keep sparks, flames, and smoking
materials away from fuel.
.Do not leave the fuel pump
unattended.
.Avoid using electronic devices while
refueling.
.Do not re-enter the vehicle while
pumping fuel.
.Keep children away from the fuel
pump and never let children
pump fuel.
.Before touching the fill nozzle, touch a
metallic object to discharge static
electricity from your body.
.Fuel can spray out if the fuel cap is
opened too quickly. This spray can
happen if the tank is nearly full, and is
more likely in hot weather. Open the
fuel cap slowly and wait for any hiss
noise to stop, then unscrew the cap all
the way.Turn the fuel cap counterclockwise to
remove. Fully insert and latch the fill nozzle,
begin fueling. For models with dual fuel
tanks, the fuel gauge shows an average of
both tanks. When refueling, refuel the
primary front tank first, then add fuel to the
auxiliary rear tank.
{Warning
Overfilling the fuel tank by more than
three clicks of a standard fill nozzle may
cause:
.Vehicle performance issues, including
engine stalling and damage to the fuel
system.
.Fuel spills.
.Under certain conditions, fuel fires.
Be careful not to spill fuel. Wait five seconds
after you have finished pumping before
removing the fill nozzle. Clean fuel from
painted surfaces as soon as possible. See
Exterior Care 0373. Reinstall the cap by
turning it clockwise until it clicks.
{Warning
If a fire starts while you are refueling, do
not remove the fill nozzle. Shut off the
flow of fuel by shutting off the pump or
by notifying the station attendant. Leave
the area immediately.
Caution
If a new fuel cap is needed, get the right
type of cap from your dealer. The wrong
type of fuel cap may not fit properly,
may turn on the malfunction indicator
lamp, and could damage the fuel system
and emissions system. See Malfunction
Indicator Lamp (Check Engine Light) 0111.
Filling a Portable Fuel Container
{Warning
Never fill a portable fuel container while
it is in the vehicle. Static electricity
discharge from the container can ignite
the fuel vapor. You or others could be
(Continued)
Page 283 of 433
Chevrolet Silverado 2500 HD/3500 HD Owner Manual (GMNA-Localizing-U.
S./Canada/Mexico-14632154) - 2021 - CRC - 11/20/20
282 Driving and Operating
Tow/Haul Mode is most useful when towing
a heavy trailer or carrying a large or
heavy load:
.Through rolling terrain.
.In stop-and-go traffic.
.In busy parking lots.
Operating the vehicle in Tow/Haul Mode
when lightly loaded or not towing will not
cause damage; however, it is not
recommended and may result in unpleasant
engine and transmission driving
characteristics, heavy or light steering
efforts, and reduced fuel economy.
Integrated Trailer Brake Control System
The vehicle may have an Integrated Trailer
Brake Control (ITBC) system for use with
electric trailer brakes or most electric over
hydraulic trailer brake systems. These
instructions apply to both types of electric
trailer brakes.
This symbol is on the Trailer Brake Control
Panel on vehicles with an ITBC system. The
power output to the trailer brakes is
proportional to the amount of vehicle
braking. This available power output to the
trailer brakes can be adjusted to a wide
range of trailering situations.
The ITBC system is integrated with the
vehicle’s brake, antilock brake, and
StabiliTrak/Electronic Stability Control (ESC)
systems. In trailering conditions that cause
the vehicle’s antilock brake or StabiliTrak/
ESC systems to activate, power sent to the
trailer's brakes will be automatically
adjusted to minimize trailer wheel lock-up.
This does not imply that the trailer has
StabiliTrak/ESC.
If the vehicle’s brake, antilock brake,
or StabiliTrak/ESC systems are not
functioning properly, the ITBC system may
not function fully or at all. Make sure all of
these systems are fully operational to allow
the ITBC system to function properly.
The ITBC system is powered through the
vehicle's electrical system. Turning the
ignition off will also turn off the ITBC
system. The ITBC system is fully functional
only when the ignition is in on.{Warning
Connecting a trailer that has an air brake
system may result in reduced or
complete loss of trailer braking, including
increased stopping distance or trailer
instability which could result in serious
injury, death, or property damage. Only
use the ITBC system with electric or
electric over hydraulic trailer brake
systems.
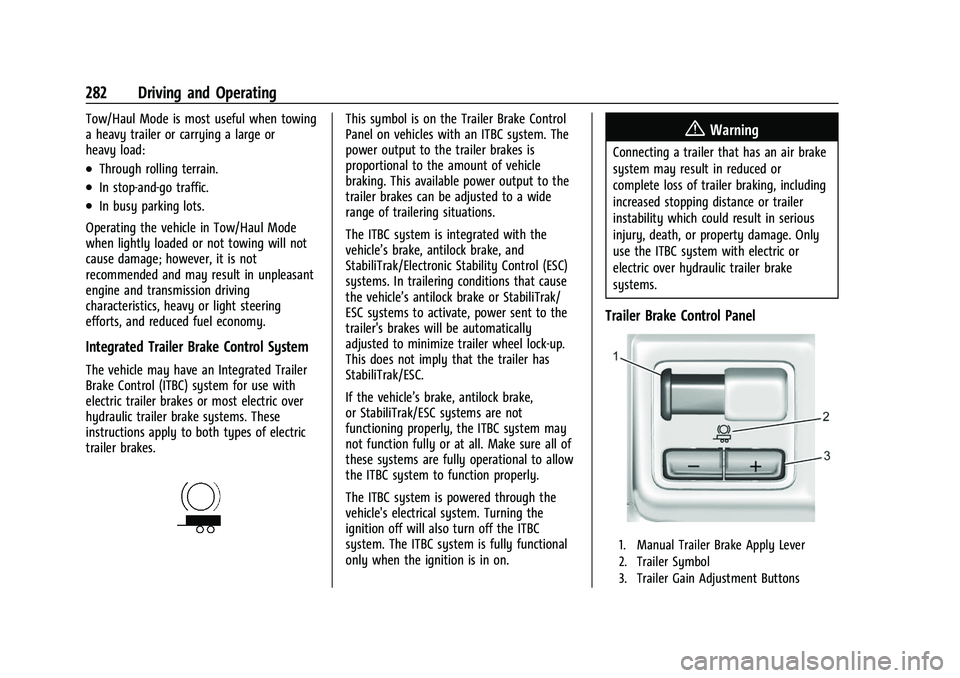
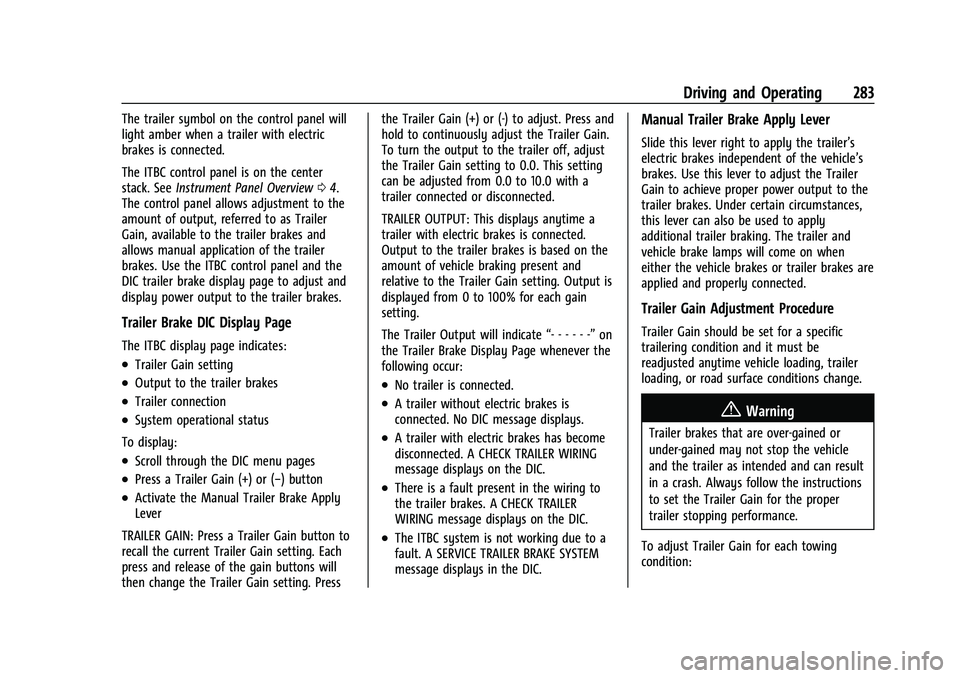
Trailer Brake Control Panel
1. Manual Trailer Brake Apply Lever
2. Trailer Symbol
3. Trailer Gain Adjustment Buttons
Page 284 of 433
Chevrolet Silverado 2500 HD/3500 HD Owner Manual (GMNA-Localizing-U.
S./Canada/Mexico-14632154) - 2021 - CRC - 11/20/20
Driving and Operating 283
The trailer symbol on the control panel will
light amber when a trailer with electric
brakes is connected.
The ITBC control panel is on the center
stack. SeeInstrument Panel Overview 04.
The control panel allows adjustment to the
amount of output, referred to as Trailer
Gain, available to the trailer brakes and
allows manual application of the trailer
brakes. Use the ITBC control panel and the
DIC trailer brake display page to adjust and
display power output to the trailer brakes.
Trailer Brake DIC Display Page
The ITBC display page indicates:
.Trailer Gain setting
.Output to the trailer brakes
.Trailer connection
.System operational status
To display:
.Scroll through the DIC menu pages
.Press a Trailer Gain (+) or (−) button
.Activate the Manual Trailer Brake Apply
Lever
TRAILER GAIN: Press a Trailer Gain button to
recall the current Trailer Gain setting. Each
press and release of the gain buttons will
then change the Trailer Gain setting. Press the Trailer Gain (+) or (-) to adjust. Press and
hold to continuously adjust the Trailer Gain.
To turn the output to the trailer off, adjust
the Trailer Gain setting to 0.0. This setting
can be adjusted from 0.0 to 10.0 with a
trailer connected or disconnected.
TRAILER OUTPUT: This displays anytime a
trailer with electric brakes is connected.
Output to the trailer brakes is based on the
amount of vehicle braking present and
relative to the Trailer Gain setting. Output is
displayed from 0 to 100% for each gain
setting.
The Trailer Output will indicate
“- - - - - -”on
the Trailer Brake Display Page whenever the
following occur:
.No trailer is connected.
.A trailer without electric brakes is
connected. No DIC message displays.
.A trailer with electric brakes has become
disconnected. A CHECK TRAILER WIRING
message displays on the DIC.
.There is a fault present in the wiring to
the trailer brakes. A CHECK TRAILER
WIRING message displays on the DIC.
.The ITBC system is not working due to a
fault. A SERVICE TRAILER BRAKE SYSTEM
message displays in the DIC.
Manual Trailer Brake Apply Lever
Slide this lever right to apply the trailer’s
electric brakes independent of the vehicle’s
brakes. Use this lever to adjust the Trailer
Gain to achieve proper power output to the
trailer brakes. Under certain circumstances,
this lever can also be used to apply
additional trailer braking. The trailer and
vehicle brake lamps will come on when
either the vehicle brakes or trailer brakes are
applied and properly connected.
Trailer Gain Adjustment Procedure
Trailer Gain should be set for a specific
trailering condition and it must be
readjusted anytime vehicle loading, trailer
loading, or road surface conditions change.
{Warning
Trailer brakes that are over-gained or
under-gained may not stop the vehicle
and the trailer as intended and can result
in a crash. Always follow the instructions
to set the Trailer Gain for the proper
trailer stopping performance.
To adjust Trailer Gain for each towing
condition: