2021 CHEVROLET SILVERADO 2500HD Four wheel
[x] Cancel search: Four wheelPage 357 of 433
Chevrolet Silverado 2500 HD/3500 HD Owner Manual (GMNA-Localizing-U.
S./Canada/Mexico-14632154) - 2021 - CRC - 11/20/20
356 Vehicle Care
{Warning
Changing a tire can be dangerous. The
vehicle can slip off the jack and roll over
or fall causing injury or death. Find a
level place to change the tire. To help
prevent the vehicle from moving:1. Set the parking brake firmly.
2. Shift the vehicle to P (Park).
3. For vehicles with four-wheel drive with an N (Neutral) transfer case
position, be sure the transfer case is
in a drive gear —not in N (Neutral).
4. Turn off the engine and do not restart while the vehicle is raised.
5. Do not allow passengers to remain in the vehicle.
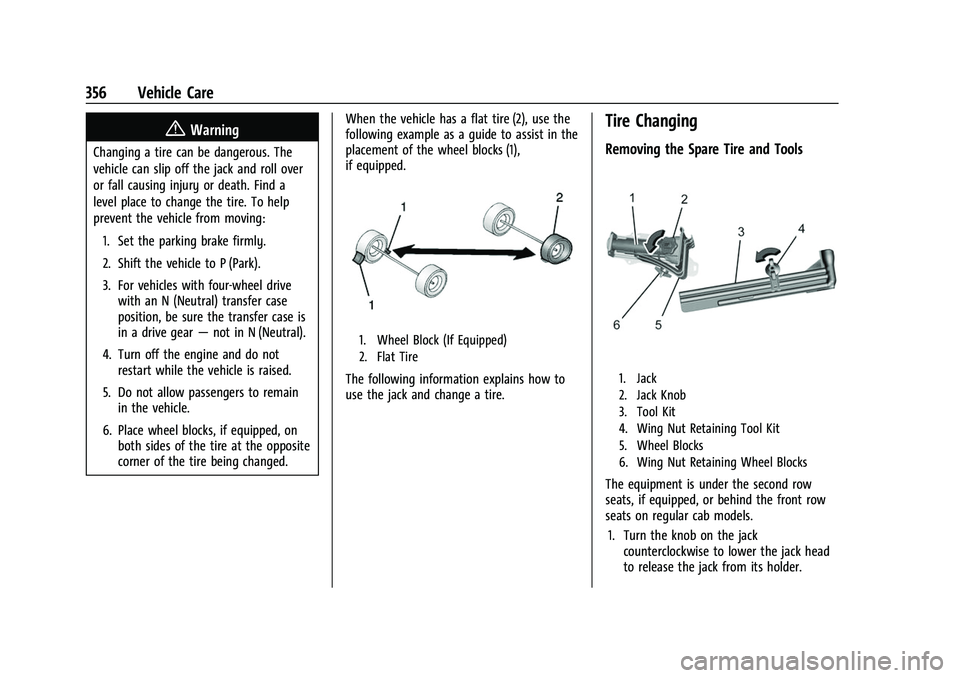
6. Place wheel blocks, if equipped, on both sides of the tire at the opposite
corner of the tire being changed. When the vehicle has a flat tire (2), use the
following example as a guide to assist in the
placement of the wheel blocks (1),
if equipped.
1. Wheel Block (If Equipped)
2. Flat Tire
The following information explains how to
use the jack and change a tire.
Tire Changing
Removing the Spare Tire and Tools
1. Jack
2. Jack Knob
3. Tool Kit
4. Wing Nut Retaining Tool Kit
5. Wheel Blocks
6. Wing Nut Retaining Wheel Blocks
The equipment is under the second row
seats, if equipped, or behind the front row
seats on regular cab models.
1. Turn the knob on the jack counterclockwise to lower the jack head
to release the jack from its holder.
Page 367 of 433
Chevrolet Silverado 2500 HD/3500 HD Owner Manual (GMNA-Localizing-U.
S./Canada/Mexico-14632154) - 2021 - CRC - 11/20/20
366 Vehicle Care
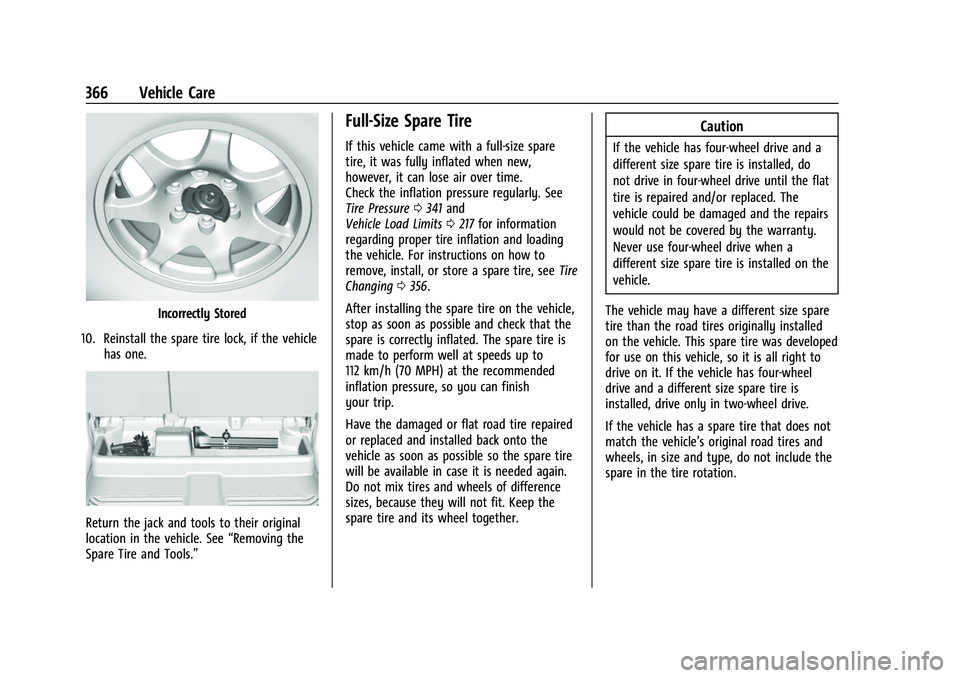
Incorrectly Stored
10. Reinstall the spare tire lock, if the vehicle has one.
Return the jack and tools to their original
location in the vehicle. See “Removing the
Spare Tire and Tools.”
Full-Size Spare Tire
If this vehicle came with a full-size spare
tire, it was fully inflated when new,
however, it can lose air over time.
Check the inflation pressure regularly. See
Tire Pressure 0341 and
Vehicle Load Limits 0217 for information
regarding proper tire inflation and loading
the vehicle. For instructions on how to
remove, install, or store a spare tire, see Tire
Changing 0356.
After installing the spare tire on the vehicle,
stop as soon as possible and check that the
spare is correctly inflated. The spare tire is
made to perform well at speeds up to
112 km/h (70 MPH) at the recommended
inflation pressure, so you can finish
your trip.
Have the damaged or flat road tire repaired
or replaced and installed back onto the
vehicle as soon as possible so the spare tire
will be available in case it is needed again.
Do not mix tires and wheels of difference
sizes, because they will not fit. Keep the
spare tire and its wheel together.
Caution
If the vehicle has four-wheel drive and a
different size spare tire is installed, do
not drive in four-wheel drive until the flat
tire is repaired and/or replaced. The
vehicle could be damaged and the repairs
would not be covered by the warranty.
Never use four-wheel drive when a
different size spare tire is installed on the
vehicle.
The vehicle may have a different size spare
tire than the road tires originally installed
on the vehicle. This spare tire was developed
for use on this vehicle, so it is all right to
drive on it. If the vehicle has four-wheel
drive and a different size spare tire is
installed, drive only in two-wheel drive.
If the vehicle has a spare tire that does not
match the vehicle’s original road tires and
wheels, in size and type, do not include the
spare in the tire rotation.
Page 369 of 433
Chevrolet Silverado 2500 HD/3500 HD Owner Manual (GMNA-Localizing-U.
S./Canada/Mexico-14632154) - 2021 - CRC - 11/20/20
368 Vehicle Care
1. Check the other vehicle. It must have a12-volt battery with a negative ground
system.
Caution
If the other vehicle does not have a
12-volt system with a negative ground,
both vehicles can be damaged. Only use
a vehicle that has a 12-volt system with a
negative ground for jump starting.
2. If you have a vehicle with a diesel engine with two batteries, you should
know before you begin that, especially in
cold weather, you may not be able to
get enough power from a single battery
in another vehicle to start your diesel
engine. If your vehicle has more than
one battery, using the battery that is
closer to the starter will reduce electrical
resistance. This is located on the
passenger side, in the rear of the engine
compartment.
3. Get the vehicles close enough so the jumper cables can reach, but be sure the
vehicles are not touching each other.
If they are, it could cause an unwanted
ground connection. You would not be able to start your vehicle, and the bad
grounding could damage the electrical
systems.
To avoid the possibility of the vehicles
rolling, set the parking brake firmly on
both vehicles involved in the jump start
procedure. Put the automatic
transmission in P (Park) before setting
the parking brake. If you have a
four-wheel-drive vehicle, be sure the
transfer case is in a drive gear, not in
N (Neutral).
Caution
If any accessories are left on or plugged
in during the jump starting procedure,
they could be damaged. The repairs
would not be covered by the vehicle
warranty. Whenever possible, turn off or
unplug all accessories on either vehicle
when jump starting.
4. Turn the ignition off on both vehicles. Unplug unnecessary accessories plugged
into the accessory power outlets. Turn
off the radio and all the lamps that are
not needed. This will avoid sparks and
help save both batteries. And it could
save the radio! 5. Open the hood on the other vehicle and
locate the positive (+) and negative (−)
terminal locations on that vehicle.
The positive (+) terminal is under a red
plastic cover at the positive battery post.
To uncover the positive (+) terminal,
open the red plastic cover.
For more information on the location of
the remote positive (+) and remote
negative (−) terminals, see Engine
Compartment Overview 0304.
{Warning
An electric fan can start up even when
the engine is not running and can injure
you. Keep hands, clothing, and tools
away from any underhood electric fan.
{Warning
Using a match near a battery can cause
battery gas to explode. People have been
hurt doing this, and some have been
blinded. Use a flashlight if you need
more light.
(Continued)
Page 371 of 433
Chevrolet Silverado 2500 HD/3500 HD Owner Manual (GMNA-Localizing-U.
S./Canada/Mexico-14632154) - 2021 - CRC - 11/20/20
370 Vehicle Care
Caution (Continued)
lash or hook to suspension components.
Use the proper straps around the tires to
secure the vehicle. Do not drag a locked
wheel/tire. Use tire skates or dollies
under any locked wheel/tire while
loading the vehicle. Do not use a sling
type lift to tow the vehicle. This could
damage the vehicle.
Caution
Improper use of the tow eye can damage
the vehicle. If equipped, use the tow eye
to load a disabled vehicle onto a flatbed
tow truck from a flat road surface, or to
move the vehicle a short distance. Use
caution and low speeds. The transmission
must be in (N) Neutral when moving the
vehicle.
GM recommends a flatbed tow truck to
transport a disabled vehicle. Use ramps to
help reduce approach angles, if necessary.
A towed vehicle should have its drive wheels
off the ground. Contact Roadside Assistance
or a professional towing service if the
disabled vehicle must be towed.
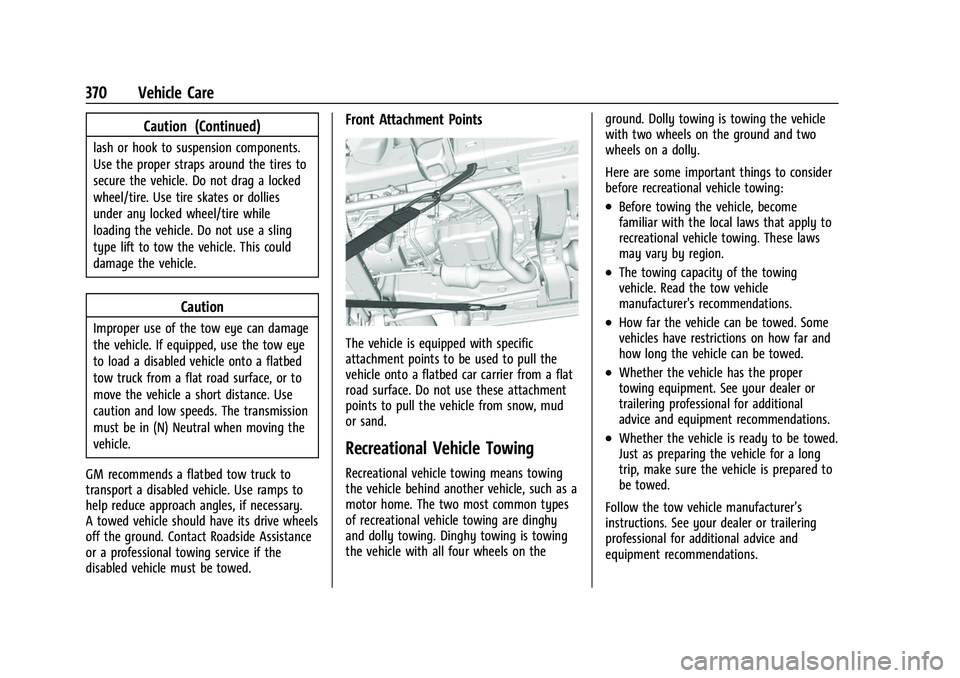
Front Attachment Points
The vehicle is equipped with specific
attachment points to be used to pull the
vehicle onto a flatbed car carrier from a flat
road surface. Do not use these attachment
points to pull the vehicle from snow, mud
or sand.
Recreational Vehicle Towing
Recreational vehicle towing means towing
the vehicle behind another vehicle, such as a
motor home. The two most common types
of recreational vehicle towing are dinghy
and dolly towing. Dinghy towing is towing
the vehicle with all four wheels on the ground. Dolly towing is towing the vehicle
with two wheels on the ground and two
wheels on a dolly.
Here are some important things to consider
before recreational vehicle towing:
.Before towing the vehicle, become
familiar with the local laws that apply to
recreational vehicle towing. These laws
may vary by region.
.The towing capacity of the towing
vehicle. Read the tow vehicle
manufacturer's recommendations.
.How far the vehicle can be towed. Some
vehicles have restrictions on how far and
how long the vehicle can be towed.
.Whether the vehicle has the proper
towing equipment. See your dealer or
trailering professional for additional
advice and equipment recommendations.
.Whether the vehicle is ready to be towed.
Just as preparing the vehicle for a long
trip, make sure the vehicle is prepared to
be towed.
Follow the tow vehicle manufacturer’s
instructions. See your dealer or trailering
professional for additional advice and
equipment recommendations.
Page 372 of 433
Chevrolet Silverado 2500 HD/3500 HD Owner Manual (GMNA-Localizing-U.
S./Canada/Mexico-14632154) - 2021 - CRC - 11/20/20
Vehicle Care 371
Caution
Use of a shield mounted in front of the
vehicle grille could restrict airflow and
cause damage to the transmission. The
repairs would not be covered by the
vehicle warranty. If using a shield, only
use one that attaches to the towing
vehicle.
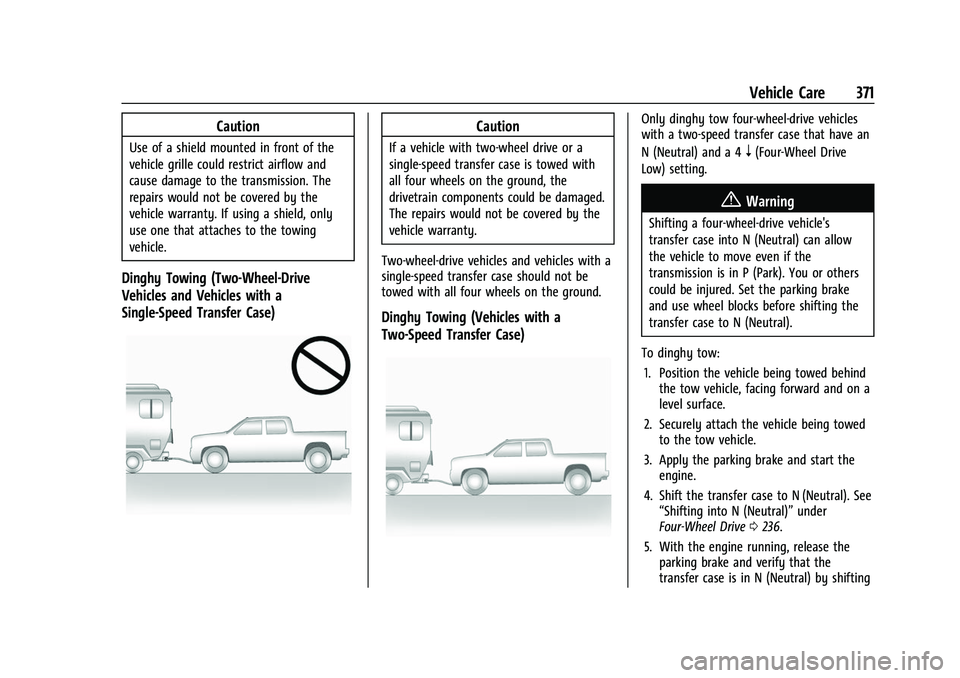
Dinghy Towing (Two-Wheel-Drive
Vehicles and Vehicles with a
Single-Speed Transfer Case)
Caution
If a vehicle with two-wheel drive or a
single-speed transfer case is towed with
all four wheels on the ground, the
drivetrain components could be damaged.
The repairs would not be covered by the
vehicle warranty.
Two-wheel-drive vehicles and vehicles with a
single-speed transfer case should not be
towed with all four wheels on the ground.
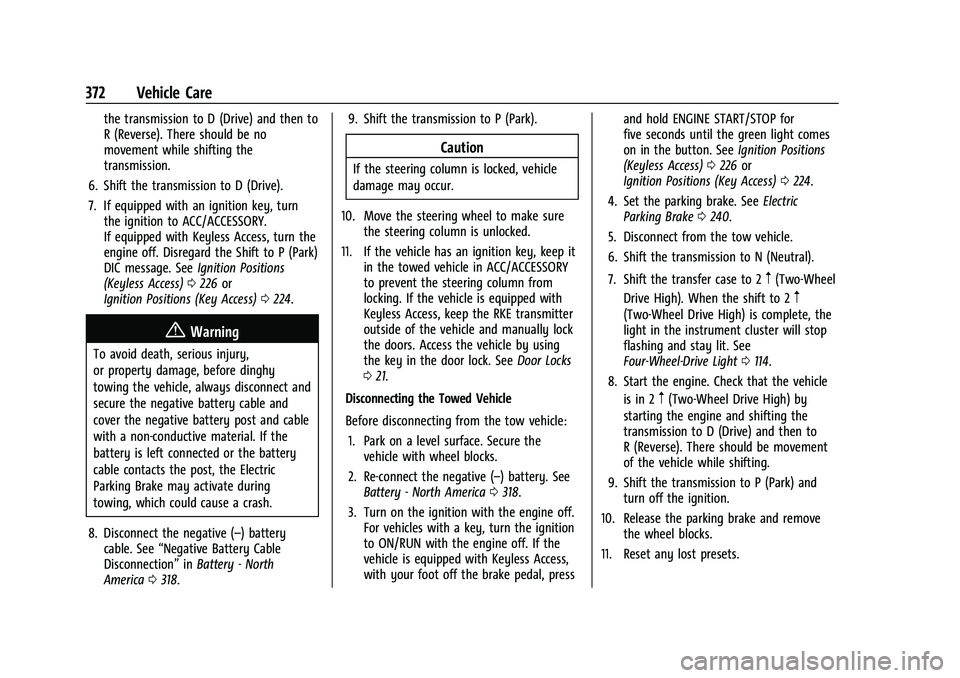
Dinghy Towing (Vehicles with a
Two-Speed Transfer Case)
Only dinghy tow four-wheel-drive vehicles
with a two-speed transfer case that have an
N (Neutral) and a 4
n(Four-Wheel Drive
Low) setting.
{Warning
Shifting a four-wheel-drive vehicle's
transfer case into N (Neutral) can allow
the vehicle to move even if the
transmission is in P (Park). You or others
could be injured. Set the parking brake
and use wheel blocks before shifting the
transfer case to N (Neutral).
To dinghy tow: 1. Position the vehicle being towed behind the tow vehicle, facing forward and on a
level surface.
2. Securely attach the vehicle being towed to the tow vehicle.
3. Apply the parking brake and start the engine.
4. Shift the transfer case to N (Neutral). See “Shifting into N (Neutral)” under
Four-Wheel Drive 0236.
5. With the engine running, release the parking brake and verify that the
transfer case is in N (Neutral) by shifting
Page 373 of 433
Chevrolet Silverado 2500 HD/3500 HD Owner Manual (GMNA-Localizing-U.
S./Canada/Mexico-14632154) - 2021 - CRC - 11/20/20
372 Vehicle Care
the transmission to D (Drive) and then to
R (Reverse). There should be no
movement while shifting the
transmission.
6. Shift the transmission to D (Drive).
7. If equipped with an ignition key, turn the ignition to ACC/ACCESSORY.
If equipped with Keyless Access, turn the
engine off. Disregard the Shift to P (Park)
DIC message. See Ignition Positions
(Keyless Access) 0226 or
Ignition Positions (Key Access) 0224.
{Warning
To avoid death, serious injury,
or property damage, before dinghy
towing the vehicle, always disconnect and
secure the negative battery cable and
cover the negative battery post and cable
with a non-conductive material. If the
battery is left connected or the battery
cable contacts the post, the Electric
Parking Brake may activate during
towing, which could cause a crash.
8. Disconnect the negative (–) battery cable. See “Negative Battery Cable
Disconnection” inBattery - North
America 0318. 9. Shift the transmission to P (Park).
Caution
If the steering column is locked, vehicle
damage may occur.
10. Move the steering wheel to make sure the steering column is unlocked.
11. If the vehicle has an ignition key, keep it in the towed vehicle in ACC/ACCESSORY
to prevent the steering column from
locking. If the vehicle is equipped with
Keyless Access, keep the RKE transmitter
outside of the vehicle and manually lock
the doors. Access the vehicle by using
the key in the door lock. See Door Locks
0 21.
Disconnecting the Towed Vehicle
Before disconnecting from the tow vehicle: 1. Park on a level surface. Secure the vehicle with wheel blocks.
2. Re-connect the negative (–) battery. See Battery - North America 0318.
3. Turn on the ignition with the engine off. For vehicles with a key, turn the ignition
to ON/RUN with the engine off. If the
vehicle is equipped with Keyless Access,
with your foot off the brake pedal, press and hold ENGINE START/STOP for
five seconds until the green light comes
on in the button. See
Ignition Positions
(Keyless Access) 0226 or
Ignition Positions (Key Access) 0224.
4. Set the parking brake. See Electric
Parking Brake 0240.
5. Disconnect from the tow vehicle.
6. Shift the transmission to N (Neutral).
7. Shift the transfer case to 2
m(Two-Wheel
Drive High). When the shift to 2
m
(Two-Wheel Drive High) is complete, the
light in the instrument cluster will stop
flashing and stay lit. See
Four-Wheel-Drive Light 0114.
8. Start the engine. Check that the vehicle is in 2
m(Two-Wheel Drive High) by
starting the engine and shifting the
transmission to D (Drive) and then to
R (Reverse). There should be movement
of the vehicle while shifting.
9. Shift the transmission to P (Park) and turn off the ignition.
10. Release the parking brake and remove the wheel blocks.
11. Reset any lost presets.
Page 374 of 433
Chevrolet Silverado 2500 HD/3500 HD Owner Manual (GMNA-Localizing-U.
S./Canada/Mexico-14632154) - 2021 - CRC - 11/20/20
Vehicle Care 373
The outside temperature display will
default to 0 °C (32 °F) but will reset with
normal usage.
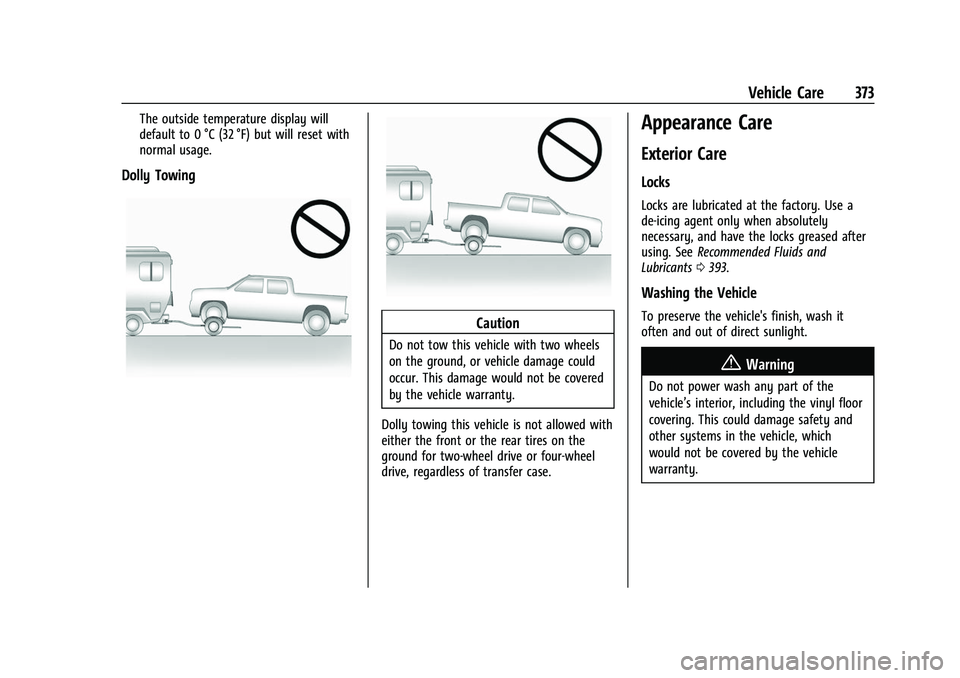
Dolly Towing
Caution
Do not tow this vehicle with two wheels
on the ground, or vehicle damage could
occur. This damage would not be covered
by the vehicle warranty.
Dolly towing this vehicle is not allowed with
either the front or the rear tires on the
ground for two-wheel drive or four-wheel
drive, regardless of transfer case.
Appearance Care
Exterior Care
Locks
Locks are lubricated at the factory. Use a
de-icing agent only when absolutely
necessary, and have the locks greased after
using. See Recommended Fluids and
Lubricants 0393.
Washing the Vehicle
To preserve the vehicle's finish, wash it
often and out of direct sunlight.
{Warning
Do not power wash any part of the
vehicle’s interior, including the vinyl floor
covering. This could damage safety and
other systems in the vehicle, which
would not be covered by the vehicle
warranty.
Page 391 of 433
Chevrolet Silverado 2500 HD/3500 HD Owner Manual (GMNA-Localizing-U.
S./Canada/Mexico-14632154) - 2021 - CRC - 11/20/20
390 Service and Maintenance
Footnotes—Maintenance Schedule
Additional Required Services - Severe
(1) Or every four years, whichever comes
first. If driving in dusty conditions, inspect
the filter at each oil change or more often
as needed. See Engine Air Cleaner/Filter
0 309.
(2) Or every two years, whichever comes
first. More frequent replacement may be
needed if the vehicle is driven in areas with
heavy traffic, poor air quality, areas with
high dust levels or are sensitive to
environmental allergens. Filter replacement
may also be needed if you notice reduced
airflow, windows fogging up, or odors. Your
local GM Service location can help you
determine when it is the right time to
replace your filter.
(3) Visually check all fuel and vapor lines
and hoses for proper attachment,
connection, routing, and condition.
(4) Do not directly power wash the transfer
case and/or front/rear axle output seals.
High pressure water can overcome the seals
and contaminate the fluid. Contaminated
fluid will decrease the life of the transfer
case and/or drive axles and should be
replaced. (5)
Or every five years, whichever comes
first. See Cooling System 0310.
(6) Or every 10 years, whichever comes first.
Inspect for fraying, excessive cracking,
or damage; replace, if needed.
(7) Replace brake fluid every five years. See
Brake Fluid 0317.
(8) Or every 12 months, whichever comes
first. See Wiper Blade Replacement 0322.
(9) Or every 10 years, whichever comes first.
See Gas Strut(s) 0323.
(10) Replace air conditioning desiccant every
seven years.
Special Application Services
.Vehicles with Dual Wheels: Check dual
wheel nut torque at 160, 1 600, and
10 000 km (100, 1,000, and 6,000 mi) of
driving. Repeat this service whenever a
tire/wheel is serviced or removed.
.Severe Commercial Use Vehicles Only:
Lubricate chassis components every oil
change.
.Have underbody flushing service
performed. See “Underbody Maintenance”
in Exterior Care 0373.
Additional Maintenance
and Care
Your vehicle is an important investment and
caring for it properly may help to avoid
future costly repairs. To maintain vehicle
performance, additional maintenance
services may be required.
It is recommended that your dealer perform
these services —their trained dealer
technicians know your vehicle best. Your
dealer can also perform a thorough
assessment with a multi-point inspection to
recommend when your vehicle may need
attention.
The following list is intended to explain the
services and conditions to look for that may
indicate services are required.
Battery
The 12-volt battery supplies power to start
the engine and operate any additional
electrical accessories.
.To avoid break-down or failure to start
the vehicle, maintain a battery with full
cranking power.