2021 CHEVROLET SILVERADO 2500HD stop start
[x] Cancel search: stop startPage 229 of 433
Chevrolet Silverado 2500 HD/3500 HD Owner Manual (GMNA-Localizing-U.
S./Canada/Mexico-14632154) - 2021 - CRC - 11/20/20
228 Driving and Operating
Starting Procedure
1. For Key Access vehicles, turn the ignitionkey to Start. When the engine starts, let
go of the key. For Keyless Access
vehicles, the RKE transmitter must be in
the vehicle. Press ENGINE START/STOP
with the brake pedal applied. When the
engine begins cranking, let go of the
button.
The driver may observe a minor, and
temporary, brake pedal kickback when
starting the vehicle. This is normal.
The idle speed will go down as the
engine gets warm. Do not race the
engine immediately after starting it.
Operate the engine and transmission
gently to allow the oil to warm up and
lubricate all moving parts.
When the low fuel warning light is on
and the FUEL LEVEL LOW message is
displayed in the Driver Information
Center (DIC), hold the ignition switch in
the START position to continue engine
cranking.Caution
Cranking the engine for long periods of
time, by returning the ignition to the
START position immediately after
cranking has ended, can overheat and
damage the cranking motor, and drain
the battery. Wait at least 15 seconds
between each try, to let the cranking
motor cool down.
2. If the engine does not start after five to 10 seconds, especially in very cold
weather (below −18 °C or 0 °F), it could
be flooded with too much gasoline. Try
pushing the accelerator pedal all the way
to the floor and holding it there while
holding the key in START or ENGINE
START/STOP for up to a maximum of
15 seconds. Wait at least 15 seconds
between each try, to allow the cranking
motor to cool down. When the engine
starts, let go of the key or button and
accelerator. If the vehicle starts briefly
but then stops again, do the same thing.
This clears the extra gasoline from the
engine. Do not race the engine
immediately after starting it. Operate the engine and transmission gently until
the oil warms up and lubricates all
moving parts.
Engine Heater
If equipped, the engine heater can provide
easier starting and better fuel economy
during engine warm-up in cold weather
conditions at or below
−18 °C (0 °F). Vehicles
with an engine heater should be plugged in
at least four hours before starting. An
internal thermostat in the plug-end of the
cord may exist, which will prevent engine
heater operation at temperatures above
−18 °C (0 °F).
{Warning
Do not plug in the engine block heater
while the vehicle is parked in a garage or
under a carport. Property damage or
personal injury may result. Always park
the vehicle in a clear open area away
from buildings or structures.
Page 234 of 433
Chevrolet Silverado 2500 HD/3500 HD Owner Manual (GMNA-Localizing-U.
S./Canada/Mexico-14632154) - 2021 - CRC - 11/20/20
Driving and Operating 233
{Warning
It is dangerous to get out of the vehicle
if the shift lever is not fully in P (Park)
with the parking brake firmly set. The
vehicle can roll.
Do not leave the vehicle when the engine
is running. If you have left the engine
running, the vehicle can move suddenly.
You or others could be injured. To be
sure the vehicle will not move, even
when you are on fairly level ground,
always set the parking brake and move
the shift lever to P (Park). SeeShifting
Into Park 0230 and
Driving Characteristics and Towing Tips
0 268.
{Warning
If equipped with four-wheel drive, the
vehicle will be free to roll if the transfer
case is in N (Neutral), even when the shift
lever is in P (Park). You or someone else
could be seriously injured. Be sure the
transfer case is in a drive gear —2
m, 4m,
(Continued)
Warning (Continued)
or 4n— or set the parking brake before
placing the transfer case in N (Neutral).
See Four-Wheel Drive 0236.
R : Use this gear to back up.
Caution
Shifting to R (Reverse) while the vehicle is
moving forward could damage the
transmission. The repairs would not be
covered by the vehicle warranty. Shift to
R (Reverse) only after the vehicle is
stopped.
To rock the vehicle back and forth to get
out of snow, ice, or sand without damaging
the transmission, see If the Vehicle Is Stuck
0 216.
N : In this position, the engine does not
connect with the wheels. To restart the
engine when the vehicle is already moving,
use N (Neutral) only.
Also, use N (Neutral) when the vehicle is
being towed.
{Warning
Shifting into a drive gear while the
engine is running at high speed is
dangerous. Unless your foot is firmly on
the brake pedal, the vehicle could move
very rapidly. You could lose control and
hit people or objects. Do not shift into a
drive gear while the engine is running at
high speed.
Caution
Shifting out of P (Park) or N (Neutral) with
the engine running at high speed may
damage the transmission. The repairs
would not be covered by the vehicle
warranty. Be sure the engine is not
running at high speed when shifting the
vehicle.
Caution
A transmission hot message may display
if the automatic transmission fluid is too
hot. Driving under this condition can
damage the vehicle. Stop and idle the
engine to cool the automatic
(Continued)
Page 239 of 433
Chevrolet Silverado 2500 HD/3500 HD Owner Manual (GMNA-Localizing-U.
S./Canada/Mexico-14632154) - 2021 - CRC - 11/20/20
238 Driving and Operating
Once the 4x4 shift has completed, the
DIC message disappears, the 4x4 graphic
stops flashing and the current setting is
indicated.
If vehicle speed is higher when shift request
occurs, a DIC message displays. Reduce
vehicle speed.
If the transmission is not in N (Neutral)
when shift request occurs, a DIC message
displays. The vehicle will allow 20 seconds
for the shift to occur. After this time, a
graphic in the instrument cluster will
indicate that the transfer case is in 4
n.
Caution
Shifting the transmission into gear before
the requested mode indicator light has
stopped flashing could damage the
transfer case.
If the transmission is not shifted into
N (Neutral) or the vehicle has not slowed to
5 km/h (3 mph) within 20 seconds, the
transfer case will remain in its original state.
This will be indicated in the instrument
cluster. With the vehicle moving less than
5 km/h (3 mph) and the transmission in
N (Neutral), attempt the shift again.
Shifting Out of 4
n
1. The vehicle must be stopped or moving
less than 5 km/h (3 mph) with the
transmission in N (Neutral) and the
ignition on. It is best for the vehicle to
be moving 1.6 to 3.2 km/h (1 to 2 mph).
2. Press 4
m, AUTO, or 2m. The actual 4x4
shift request is only made after the
button is released. The 4x4 graphic will
remain flashing until the shift request
has completed. A DIC message displays
to indicate the state of the request.
Once the 4x4 shift has completed, the
DIC message disappears, the 4x4 graphic
stops flashing, and the current setting is
indicated.
If vehicle speed is higher when shift
request occurs, a DIC message displays.
Reduce vehicle speed.
If the transmission is not in N (Neutral)
when shift request occurs, DIC messages will
display. The vehicle will allow 20 seconds for
this shift to occur. After this time, a graphic
in the instrument cluster will indicate that
the transfer case is in 4
n.
Caution
Shifting the transmission into gear before
the requested mode indicator light has
stopped flashing could damage the
transfer case.
If the transmission is not shifted into
N (Neutral) or the vehicle has not slowed to
5 km/h (3 mph) within 20 seconds, the
transfer case will remain in its original state.
This will be indicated in the instrument
cluster.
With the vehicle moving less than 5 km/h
(3 mph), and the transmission in N (Neutral),
attempt the shift again.
Shifting Into N (Neutral)
To shift into N (Neutral): 1. Start the vehicle.
2. Shift the transmission to N (Neutral).
3. Shift the transfer case to 2
m.
4. Apply the parking brake and/or brake pedal.
5. Press 2
mfive times in 10 seconds until
the N (Neutral) graphic starts flashing in
the instrument cluster. When the shift is
complete, the graphic stops flashing.
Page 243 of 433
Chevrolet Silverado 2500 HD/3500 HD Owner Manual (GMNA-Localizing-U.
S./Canada/Mexico-14632154) - 2021 - CRC - 11/20/20
242 Driving and Operating
apply the brake pedal as the driving
situation dictates. Brake Assist disengages
when the brake pedal is released.
Hill Start Assist (HSA)
{Warning
Do not rely on the HSA feature. HSA does
not replace the need to pay attention
and drive safely. You may not hear or
feel alerts or warnings provided by this
system. Failure to use proper care when
driving may result in injury, death,
or vehicle damage. SeeDefensive Driving
0 208.
When the vehicle is stopped on a grade, Hill
Start Assist (HSA) prevents the vehicle from
rolling in an unintended direction during the
transition from brake pedal release to
accelerator pedal apply. The brakes release
when the accelerator pedal is applied. If the
accelerator pedal is not applied within a few
minutes, the Electric Parking Brake will
apply. The brakes may also release under
other conditions. Do not rely on HSA to hold
the vehicle. HSA is available when the vehicle is facing
uphill in a forward gear, or when facing
downhill in R (Reverse). The vehicle must
come to a complete stop on a grade for HSA
to activate.
Ride Control Systems
Traction Control/Electronic
Stability Control
System Operation
The vehicle has a Traction Control System
(TCS) and StabiliTrak/Electronic Stability
Control (ESC) system. These systems help
limit wheel spin and assist the driver in
maintaining control, especially on slippery
road conditions.
TCS activates if it senses any of the drive
wheels are spinning or beginning to lose
traction. When this happens, TCS applies the
brakes to the spinning wheels and reduces
engine power to limit wheel spin.
StabiliTrak/ESC activates when the vehicle
senses a difference between the intended
path and the direction the vehicle is actually
traveling. StabiliTrak/ESC selectively applies
braking pressure to any one of the vehicle
wheel brakes to assist the driver in keepingthe vehicle on the intended path. Trailer
Sway Control (TSC) is also on automatically
when the vehicle is started. See
Trailer Sway
Control (TSC) 0285.
If cruise control is being used and traction
control or StabiliTrak/ESC begins to limit
wheel spin, cruise control will disengage.
Cruise control may be turned back on when
road conditions allow.
Both systems come on automatically when
the vehicle is started and begins to move.
The systems may be heard or felt while
they are operating or while performing
diagnostic checks. This is normal and does
not mean there is a problem with the
vehicle.
It is recommended to leave both systems on
for normal driving conditions, but it may be
necessary to turn TCS off if the vehicle gets
stuck in sand, mud, ice, or snow. See If the
Vehicle Is Stuck 0216 and “Turning the
Systems Off and On” later in this section.
When the transfer case (if equipped) is in
Four-Wheel Drive Low, the stability system
is automatically disabled,
gcomes on, and
the appropriate message will appear on the
Page 244 of 433
Chevrolet Silverado 2500 HD/3500 HD Owner Manual (GMNA-Localizing-U.
S./Canada/Mexico-14632154) - 2021 - CRC - 11/20/20
Driving and Operating 243
Driver Information Center (DIC). Both
traction control and StabiliTrak/ESC are
automatically disabled in this condition.
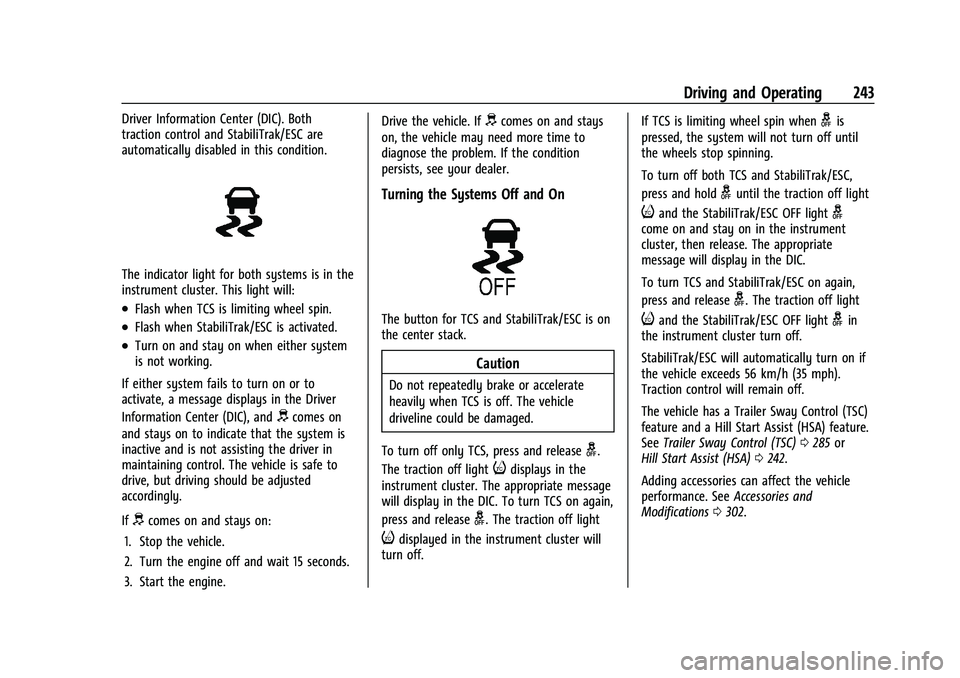
The indicator light for both systems is in the
instrument cluster. This light will:
.Flash when TCS is limiting wheel spin.
.Flash when StabiliTrak/ESC is activated.
.Turn on and stay on when either system
is not working.
If either system fails to turn on or to
activate, a message displays in the Driver
Information Center (DIC), and
dcomes on
and stays on to indicate that the system is
inactive and is not assisting the driver in
maintaining control. The vehicle is safe to
drive, but driving should be adjusted
accordingly.
If
dcomes on and stays on:
1. Stop the vehicle.
2. Turn the engine off and wait 15 seconds.
3. Start the engine. Drive the vehicle. If
dcomes on and stays
on, the vehicle may need more time to
diagnose the problem. If the condition
persists, see your dealer.
Turning the Systems Off and On
The button for TCS and StabiliTrak/ESC is on
the center stack.
Caution
Do not repeatedly brake or accelerate
heavily when TCS is off. The vehicle
driveline could be damaged.
To turn off only TCS, press and release
g.
The traction off light
idisplays in the
instrument cluster. The appropriate message
will display in the DIC. To turn TCS on again,
press and release
g. The traction off light
idisplayed in the instrument cluster will
turn off. If TCS is limiting wheel spin when
gis
pressed, the system will not turn off until
the wheels stop spinning.
To turn off both TCS and StabiliTrak/ESC,
press and hold
guntil the traction off light
iand the StabiliTrak/ESC OFF lightgcome on and stay on in the instrument
cluster, then release. The appropriate
message will display in the DIC.
To turn TCS and StabiliTrak/ESC on again,
press and release
g. The traction off light
iand the StabiliTrak/ESC OFF lightgin
the instrument cluster turn off.
StabiliTrak/ESC will automatically turn on if
the vehicle exceeds 56 km/h (35 mph).
Traction control will remain off.
The vehicle has a Trailer Sway Control (TSC)
feature and a Hill Start Assist (HSA) feature.
See Trailer Sway Control (TSC) 0285 or
Hill Start Assist (HSA) 0242.
Adding accessories can affect the vehicle
performance. See Accessories and
Modifications 0302.
Page 266 of 433
Chevrolet Silverado 2500 HD/3500 HD Owner Manual (GMNA-Localizing-U.
S./Canada/Mexico-14632154) - 2021 - CRC - 11/20/20
Driving and Operating 265
The starting characteristics of E85 or FlexFuel
make it unsuitable for use when
temperatures fall below−18 °C (0 °F). Use
gasoline or add gasoline to the E85 or
FlexFuel.
Because E85 or FlexFuel has less energy per
liter (gallon) than gasoline, the vehicle will
need to be refilled more often. See Filling
the Tank (Pickup Model) 0265 or
Filling the Tank (Chassis Cab and Box Delete
Models) 0266.
The only GM approved aftermarket additive
is ACDelco Fuel System Treatment
Plus-FlexFuel. Follow the instructions on the
bottle for proper use. This product is
available at your GM dealer.
Caution
Some additives are not compatible with
E85 or FlexFuel and can harm the
vehicle's fuel system. Use only additives
approved by GM for E85 or FlexFuel
vehicles. Damage caused by unapproved
additives would not be covered by the
vehicle warranty.
Caution
Do not use fuel containing methanol.
It can corrode metal parts in the fuel
system and also damage plastic and
rubber parts. That damage would not be
covered under the vehicle warranty.
To help keep the engine running efficiently,
fill the tank with gasoline, up to E15, after
filling the tank with E85 one or two times.
Filling the Tank (Pickup Model)
If the vehicle has a diesel engine, see the
Duramax diesel supplement.
An arrow on the fuel gauge indicates which
side of the vehicle the fuel door is on. See
Fuel Gauge 0106.
{Warning
Fuel vapors and fuel fires burn violently
and can cause injury or death.
Follow these guidelines to help avoid
injuries to you and others:
.Read and follow all the instructions on
the fuel pump island.
.Turn off the engine when refueling.
(Continued)
Warning (Continued)
.Keep sparks, flames, and smoking
materials away from fuel.
.Do not leave the fuel pump
unattended.
.Avoid using electronic devices while
refueling.
.Do not re-enter the vehicle while
pumping fuel.
.Keep children away from the fuel
pump and never let children
pump fuel.
.Before touching the fill nozzle, touch a
metallic object to discharge static
electricity from your body.
.Fuel can spray out if the fill nozzle is
inserted too quickly. This spray can
happen if the tank is nearly full, and is
more likely in hot weather. Insert the
fill nozzle slowly and wait for any hiss
noise to stop before beginning to
flow fuel.
Page 268 of 433
Chevrolet Silverado 2500 HD/3500 HD Owner Manual (GMNA-Localizing-U.
S./Canada/Mexico-14632154) - 2021 - CRC - 11/20/20
Driving and Operating 267
Warning (Continued)
.Read and follow all the instructions on
the fuel pump island.
.Turn off the engine when refueling.
.Keep sparks, flames, and smoking
materials away from fuel.
.Do not leave the fuel pump
unattended.
.Avoid using electronic devices while
refueling.
.Do not re-enter the vehicle while
pumping fuel.
.Keep children away from the fuel
pump and never let children
pump fuel.
.Before touching the fill nozzle, touch a
metallic object to discharge static
electricity from your body.
.Fuel can spray out if the fuel cap is
opened too quickly. This spray can
happen if the tank is nearly full, and is
more likely in hot weather. Open the
fuel cap slowly and wait for any hiss
noise to stop, then unscrew the cap all
the way.Turn the fuel cap counterclockwise to
remove. Fully insert and latch the fill nozzle,
begin fueling. For models with dual fuel
tanks, the fuel gauge shows an average of
both tanks. When refueling, refuel the
primary front tank first, then add fuel to the
auxiliary rear tank.
{Warning
Overfilling the fuel tank by more than
three clicks of a standard fill nozzle may
cause:
.Vehicle performance issues, including
engine stalling and damage to the fuel
system.
.Fuel spills.
.Under certain conditions, fuel fires.
Be careful not to spill fuel. Wait five seconds
after you have finished pumping before
removing the fill nozzle. Clean fuel from
painted surfaces as soon as possible. See
Exterior Care 0373. Reinstall the cap by
turning it clockwise until it clicks.
{Warning
If a fire starts while you are refueling, do
not remove the fill nozzle. Shut off the
flow of fuel by shutting off the pump or
by notifying the station attendant. Leave
the area immediately.
Caution
If a new fuel cap is needed, get the right
type of cap from your dealer. The wrong
type of fuel cap may not fit properly,
may turn on the malfunction indicator
lamp, and could damage the fuel system
and emissions system. See Malfunction
Indicator Lamp (Check Engine Light) 0111.
Filling a Portable Fuel Container
{Warning
Never fill a portable fuel container while
it is in the vehicle. Static electricity
discharge from the container can ignite
the fuel vapor. You or others could be
(Continued)
Page 272 of 433
Chevrolet Silverado 2500 HD/3500 HD Owner Manual (GMNA-Localizing-U.
S./Canada/Mexico-14632154) - 2021 - CRC - 11/20/20
Driving and Operating 271
When parking your vehicle and your trailer
on a hill:1. Press the brake pedal, but do not shift into P (Park) yet. Turn the wheels into
the curb if facing downhill or into traffic
if facing uphill.
2. Have someone place chocks under the trailer wheels.
3. Gradually release the brake pedal to allow the chocks to absorb the load of
the trailer.
4. Reapply the brake pedal. Then apply the parking brake and shift into P (Park).
5. Release the brake pedal.
Leaving After Parking on a Hill
1. Apply and hold the brake pedal.
.Start the engine.
.Shift into a gear.
.Release the parking brake.
2. Let up on the brake pedal.
3. Drive slowly until the trailer is clear of the chocks.
4. Stop and have someone pick up and store the chocks.
Launching and Retrieving a Boat
Backing the Trailer into the Water
{Warning
.Have all passengers get out of the
vehicle before backing onto the sloped
part of the ramp. Lower the driver and
passenger side windows before
backing onto the ramp. This will
provide a means of escape in the
unlikely event the vehicle slides into
the water.
.If the boat launch surface is slippery,
have the driver remain in the vehicle
with the brake pedal applied while the
boat is being launched. The boat
launch can be especially slippery at
low tide when part of the ramp was
previously submerged at high tide. Do
not back onto the ramp to launch the
boat if you are not sure the vehicle
can maintain traction.
.Do not move the vehicle if someone is
in the path of the trailer. Some parts
of the trailer might be underwater and
not visible to people who are assisting
in launching the boat. Disconnect the wiring to the trailer before
backing the trailer into the water to prevent
damage to the electrical circuits on the
trailer. Reconnect the wiring to the trailer
after removing the trailer from the water.
If the trailer has electric brakes that can
function when the trailer is submerged, it
might help to leave the electrical trailer
connector attached to maintain trailer brake
functionality while on the boat ramp.
To back the trailer into the water:
1. If equipped, place the vehicle in four-wheel-drive high.
2. Slowly back down the boat ramp until the boat is floating, but no further than
necessary.
3. Press and hold the brake pedal, but do not shift into P (Park) yet.
4. Have someone place chocks under the front wheels of the vehicle.
5. Gradually release the brake pedal to allow the chocks to absorb the load of
the trailer.
6. Reapply the brake pedal. Then apply the parking brake and shift into P (Park).
7. Release the brake pedal.