2021 CHEVROLET MALIBU ECO
[x] Cancel search: ECOPage 176 of 351
Chevrolet Malibu Owner Manual (GMNA-Localizing-U.S./Canada-
14584249) - 2021 - CRC - 11/9/20
Driving and Operating 175
Variable Effort Steering
The vehicle has a steering system that
varies the amount of effort required to steer
the vehicle in relation to the speed of the
vehicle.
The amount of steering effort required is
less at slower speeds to make the vehicle
more maneuverable and easier to park. At
faster speeds, the steering effort increases
to provide a sport-like feel to the steering.
This provides maximum control and stability.
Electric Power Steering
The vehicle has electric power steering.
It does not have power steering fluid.
Regular maintenance is not required.
If power steering assist is lost due to a
system malfunction, the vehicle can be
steered, but may require increased effort.
If the steering wheel is turned until it
reaches the end of its travel and is held
against that position for an extended period
of time, power steering assist may be
reduced.
If the steering assist is used for an extended
period of time while the vehicle is not
moving, power assist may be reduced.Normal use of the power steering assist
should return when the system cools down.
See your dealer if there is a problem.
Curve Tips
.Take curves at a reasonable speed.
.Reduce speed before entering a curve.
.Maintain a reasonable steady speed
through the curve.
.Wait until the vehicle is out of the curve
before accelerating gently into the
straightaway.
Steering in Emergencies
.There are some situations when steering
around a problem may be more effective
than braking.
.Holding both sides of the steering wheel
allows you to turn 180 degrees without
removing a hand.
.Antilock Brake System (ABS) allows
steering while braking.
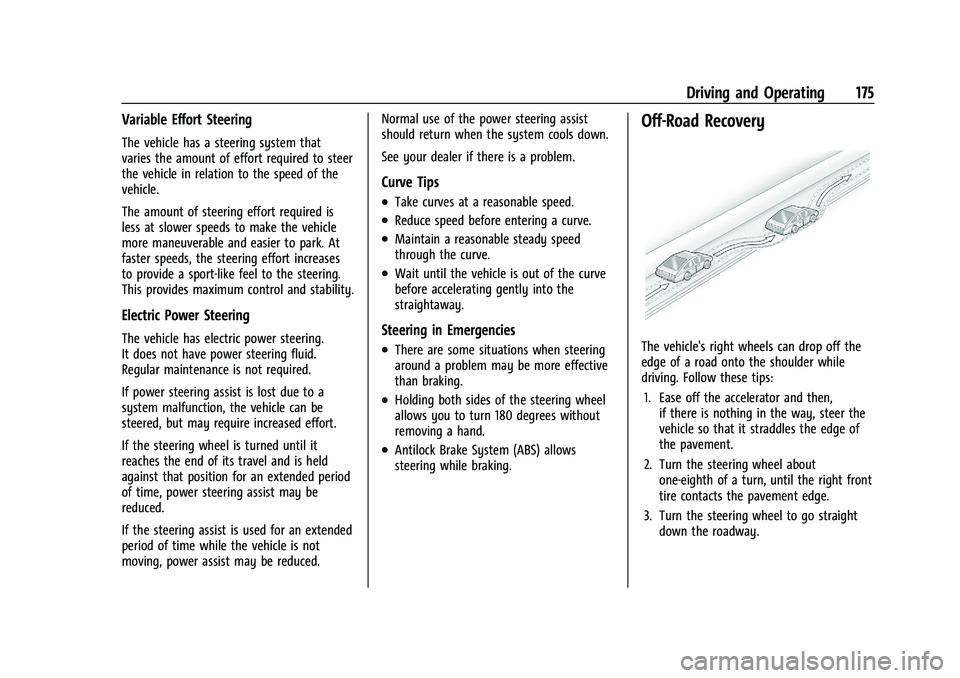
Off-Road Recovery
The vehicle's right wheels can drop off the
edge of a road onto the shoulder while
driving. Follow these tips:
1. Ease off the accelerator and then, if there is nothing in the way, steer the
vehicle so that it straddles the edge of
the pavement.
2. Turn the steering wheel about one-eighth of a turn, until the right front
tire contacts the pavement edge.
3. Turn the steering wheel to go straight down the roadway.
Page 177 of 351
Chevrolet Malibu Owner Manual (GMNA-Localizing-U.S./Canada-
14584249) - 2021 - CRC - 11/9/20
176 Driving and Operating
Loss of Control
Skidding
There are three types of skids that
correspond to the vehicle's three control
systems:
.Braking Skid—wheels are not rolling.
.Steering or Cornering Skid —too much
speed or steering in a curve causes tires
to slip and lose cornering force.
.Acceleration Skid —too much throttle
causes the driving wheels to spin.
Defensive drivers avoid most skids by taking
reasonable care suited to existing conditions,
and by not overdriving those conditions. But
skids are always possible.
If the vehicle starts to slide, follow these
suggestions:
.Ease your foot off the accelerator pedal
and steer the way you want the vehicle
to go. The vehicle may straighten out. Be
ready for a second skid if it occurs.
.Slow down and adjust your driving
according to weather conditions. Stopping
distance can be longer and vehicle control
can be affected when traction is reduced
by water, snow, ice, gravel, or other
material on the road. Learn to recognize warning clues
—such as enough water,
ice, or packed snow on the road to make
a mirrored surface —and slow down
when you have any doubt.
.Try to avoid sudden steering, acceleration,
or braking, including reducing vehicle
speed by shifting to a lower gear. Any
sudden changes could cause the tires to
slide.
Remember: Antilock brakes help avoid only
the braking skid.
Driving on Wet Roads
Rain and wet roads can reduce vehicle
traction and affect your ability to stop and
accelerate. Always drive slower in these
types of driving conditions and avoid driving
through large puddles and deep-standing or
flowing water.
{Warning
Wet brakes can cause crashes. They
might not work as well in a quick stop
and could cause pulling to one side. You
could lose control of the vehicle. (Continued)
Warning (Continued)
After driving through a large puddle of
water or a car/vehicle wash, lightly apply
the brake pedal until the brakes work
normally.
Flowing or rushing water creates strong
forces. Driving through flowing water
could cause the vehicle to be carried
away. If this happens, you and other
vehicle occupants could drown. Do not
ignore police warnings and be very
cautious about trying to drive through
flowing water.
Hydroplaning
Hydroplaning is dangerous. Water can build
up under the vehicle's tires so they actually
ride on the water. This can happen if the
road is wet enough and you are going fast
enough. When the vehicle is hydroplaning, it
has little or no contact with the road.
There is no hard and fast rule about
hydroplaning. The best advice is to slow
down when the road is wet.
Page 180 of 351
Chevrolet Malibu Owner Manual (GMNA-Localizing-U.S./Canada-
14584249) - 2021 - CRC - 11/9/20
Driving and Operating 179
get the vehicle out after a few tries, it
might need to be towed out. If the vehicle
does need to be towed out, seeTowing the
Vehicle 0292.
Vehicle Load Limits
It is very important to know how much
weight the vehicle can carry. This
weight is called the vehicle capacity
weight and includes the weight of all
occupants, cargo, and all
nonfactory-installed options. Two labels
on the vehicle may show how much
weight it may properly carry: the Tire
and Loading Information label and the
Certification label.
{Warning
Do not load the vehicle any heavier
than the Gross Vehicle Weight Rating
(GVWR), or either the maximum
front or rear Gross Axle Weight
Rating (GAWR). This can cause
systems to break and change the
way the vehicle handles. This could
cause loss of control and a crash.
(Continued)
Warning (Continued)
Overloading can also reduce stopping
performance, damage the tires, and
shorten the life of the vehicle.
Tire and Loading Information Label
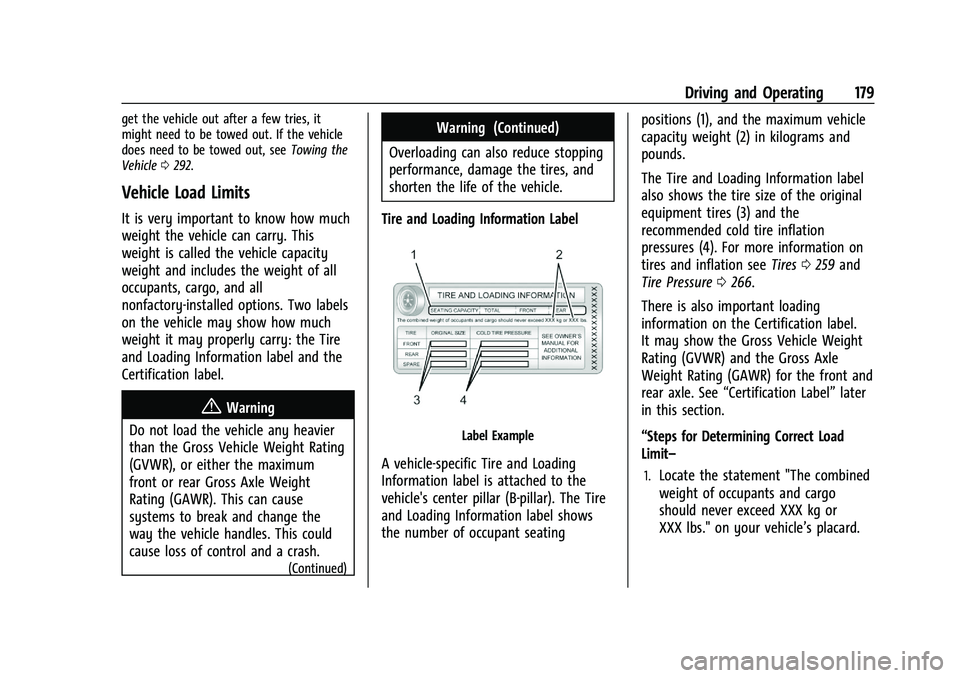
Label Example
A vehicle-specific Tire and Loading
Information label is attached to the
vehicle's center pillar (B-pillar). The Tire
and Loading Information label shows
the number of occupant seating positions (1), and the maximum vehicle
capacity weight (2) in kilograms and
pounds.
The Tire and Loading Information label
also shows the tire size of the original
equipment tires (3) and the
recommended cold tire inflation
pressures (4). For more information on
tires and inflation see
Tires0259 and
Tire Pressure 0266.
There is also important loading
information on the Certification label.
It may show the Gross Vehicle Weight
Rating (GVWR) and the Gross Axle
Weight Rating (GAWR) for the front and
rear axle. See “Certification Label” later
in this section.
“Steps for Determining Correct Load
Limit–1.Locate the statement "The combined
weight of occupants and cargo
should never exceed XXX kg or
XXX lbs." on your vehicle’s placard.
Page 184 of 351
Chevrolet Malibu Owner Manual (GMNA-Localizing-U.S./Canada-
14584249) - 2021 - CRC - 11/9/20
Driving and Operating 183
2. Shift the vehicle to N (Neutral). This canbe done while the vehicle is moving.
After shifting to N (Neutral), firmly apply
the brakes and steer the vehicle to a
safe location.
3. Come to a complete stop, shift to P (Park), and turn the ignition off. The
shift lever must be in P (Park) to turn the
ignition off.
4. Set the parking brake. See Electric
Parking Brake 0192.
{Warning
Turning off the vehicle while moving may
cause loss of power assist in the brake
and steering systems and disable the
airbags. While driving, only shut the
vehicle off in an emergency.
If the vehicle cannot be pulled over and
must be shut off while driving, press and
hold ENGINE START/STOP for longer than
two seconds, or press twice in five seconds.
ACC/ACCESSORY (Amber Indicator Light) :
This mode allows you to use some electrical
accessories when the engine is off. With the ignition off, pressing the button
one time without the brake pedal applied
will place the ignition system in ACC/
ACCESSORY.
The ignition will switch from ACC/
ACCESSORY to off after five minutes to
prevent battery run down.
ON/RUN/START (Green Indicator Light) :
This
mode is for driving and starting. With the
ignition off, and the brake pedal applied,
pressing the button once will turn the
ignition on. Once engine cranking begins,
release the button. Engine cranking will
continue until the engine starts. See Starting
the Engine 0183. The ignition will then
remain on.
Service Mode
This power mode is available for service and
diagnostics, and to verify the proper
operation of the malfunction indicator lamp
as may be required for emission inspection
purposes. With the vehicle off, and the
brake pedal not applied, pressing and
holding the button for more than
five seconds will place the vehicle in Service
Mode. The instruments and audio systems
will operate as they do with the ignition on,
but the vehicle will not be able to be driven. The engine will not start in Service Mode.
Press the button again to turn the
vehicle off.
Starting the Engine
Move the shift lever to P (Park) or
N (Neutral). The engine will not start in any
other position. To restart the engine when
the vehicle is already moving, use
N (Neutral) only.
Caution
Do not try to shift to P (Park) if the
vehicle is moving. If you do, you could
damage the transmission. Shift to P (Park)
only when the vehicle is stopped.
Caution
If you add electrical parts or accessories,
you could change the way the engine
operates. Any resulting damage would
not be covered by the vehicle warranty.
See
Add-On Electrical Equipment 0226.
Page 185 of 351
Chevrolet Malibu Owner Manual (GMNA-Localizing-U.S./Canada-
14584249) - 2021 - CRC - 11/9/20
184 Driving and Operating
Starting Procedure1. With the Keyless Access system, the RKE transmitter must be in the vehicle. Press
ENGINE START/STOP with the brake pedal
applied. When the engine begins
cranking, let go of the button.
The idle speed will go down as the
engine gets warm. Do not race the
engine immediately after starting it.
If the RKE transmitter is not in the
vehicle, if there is interference, or if the
RKE transmitter battery is low, the Driver
Information Center (DIC) will display a
message. See Driver Information Center
(DIC) (Base Level) 094 or
Driver Information Center (DIC) (Uplevel)
0 96 and
Remote Keyless Entry (RKE) System
Operation 07.
Caution
Cranking the engine for long periods of
time, by trying to start the engine
immediately after cranking has ended,
can overheat and damage the cranking
motor, and drain the battery. Wait at
least 15 seconds between each try, to let
the cranking motor cool down. 2. If the engine does not start after five to
10 seconds, especially in very cold
weather (below −18 °C or 0 °F), it could
be flooded with too much gasoline. Try
pushing the accelerator pedal all the way
to the floor and holding it there as you
hold ENGINE START/STOP, for up to a
maximum of 15 seconds. Wait at least
15 seconds between each try, to allow
the cranking motor to cool down. When
the engine starts, let go of the button
and the accelerator. If the vehicle starts
briefly but then stops again, do the
same thing. This clears the extra gasoline
from the engine. Do not race the engine
immediately after starting it. Operate
the engine and transmission gently until
the oil warms up and lubricates all
moving parts.
Stop/Start System
If equipped, the Stop/Start system will shut
off the engine to help conserve fuel. It has
components designed for the increased
number of starts.
{Warning
The automatic engine Stop/Start feature
causes the engine to shut off while the
vehicle is still on. Do not exit the vehicle
before shifting to P (Park). The vehicle
may restart and move unexpectedly.
Always shift to P (Park), and then turn
the ignition off before exiting the vehicle.
Auto Engine Stop/Start
When the brakes are applied and the vehicle
is at a complete stop, the engine may turn
off. When stopped, the tachometer displays
AUTO STOP. See Tachometer083. When the
brake pedal is released or the accelerator
pedal is pressed, the engine will restart.
To maintain vehicle performance, other
conditions may cause the engine to
automatically restart before the brake pedal
is released.
Auto Stops may not occur and/or auto
restarts may occur because:
.The climate control settings require the
engine to be running to cool or heat the
vehicle interior.
.The vehicle battery charge is low.
Page 186 of 351
Chevrolet Malibu Owner Manual (GMNA-Localizing-U.S./Canada-
14584249) - 2021 - CRC - 11/9/20
Driving and Operating 185
.The vehicle battery has recently been
disconnected.
.Minimum vehicle speed has not been
reached since the last Auto Stop.
.The accelerator pedal is pressed.
.The engine or transmission is not at the
required operating temperature.
.The outside temperature is not in the
required operating range.
.The vehicle transmission is shifted out of
D (Drive) to any gear other than P (Park).
.Tow/Haul Mode or other driver modes
have been selected.
.The vehicle is on a steep hill or grade.
.The driver door has been opened or driver
seat belt has been unbuckled.
.The hood has been opened.
.The Auto Stop has reached the maximum
allowed time.Auto Stop Disable Switch
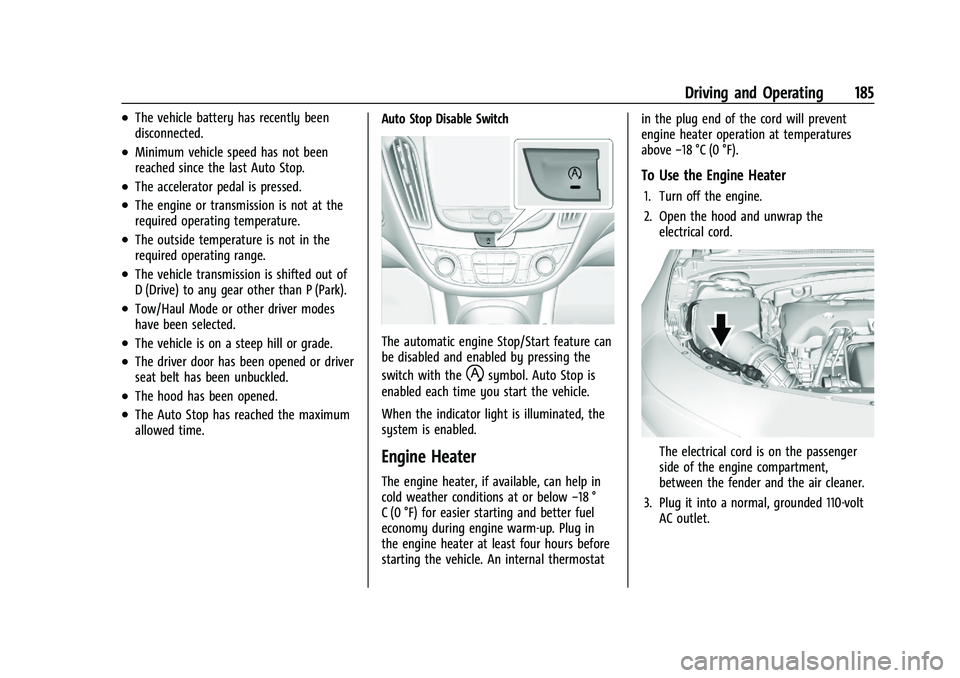
The automatic engine Stop/Start feature can
be disabled and enabled by pressing the
switch with the
hsymbol. Auto Stop is
enabled each time you start the vehicle.
When the indicator light is illuminated, the
system is enabled.
Engine Heater
The engine heater, if available, can help in
cold weather conditions at or below −18 °
C (0 °F) for easier starting and better fuel
economy during engine warm-up. Plug in
the engine heater at least four hours before
starting the vehicle. An internal thermostat in the plug end of the cord will prevent
engine heater operation at temperatures
above
−18 °C (0 °F).
To Use the Engine Heater
1. Turn off the engine.
2. Open the hood and unwrap the
electrical cord.
The electrical cord is on the passenger
side of the engine compartment,
between the fender and the air cleaner.
3. Plug it into a normal, grounded 110-volt AC outlet.
Page 191 of 351
Chevrolet Malibu Owner Manual (GMNA-Localizing-U.S./Canada-
14584249) - 2021 - CRC - 11/9/20
190 Driving and Operating
If the vehicle is stopped on a hill, with your
foot off the brake pedal, the vehicle may
roll. This is normal and is due to the torque
converter designed to improve fuel economy
and performance. Use the brake to hold the
vehicle on a hill. Do not use the accelerator
pedal.
L :This position gives you access to gear
ranges. This provides more engine braking
but lower fuel economy than D (Drive). You
can use it on very steep hills, or in deep
snow or mud. See Manual Mode0190.
Operating Modes : The transmission may
operate in a lower gear than normal to
improve vehicle performance. The engine
speed may be higher and there may be an
increase in noise during the following
conditions:
.When climbing a grade
.When driving downhill
.When driving in hot temperatures, or at
high altitude
Manual Mode
Electronic Range Select (ERS) Mode
ERS mode allows you to choose the top-gear
limit of the transmission and the vehicle's
speed while driving downhill or towing a trailer. The vehicle has an electronic shift
position indicator within the instrument
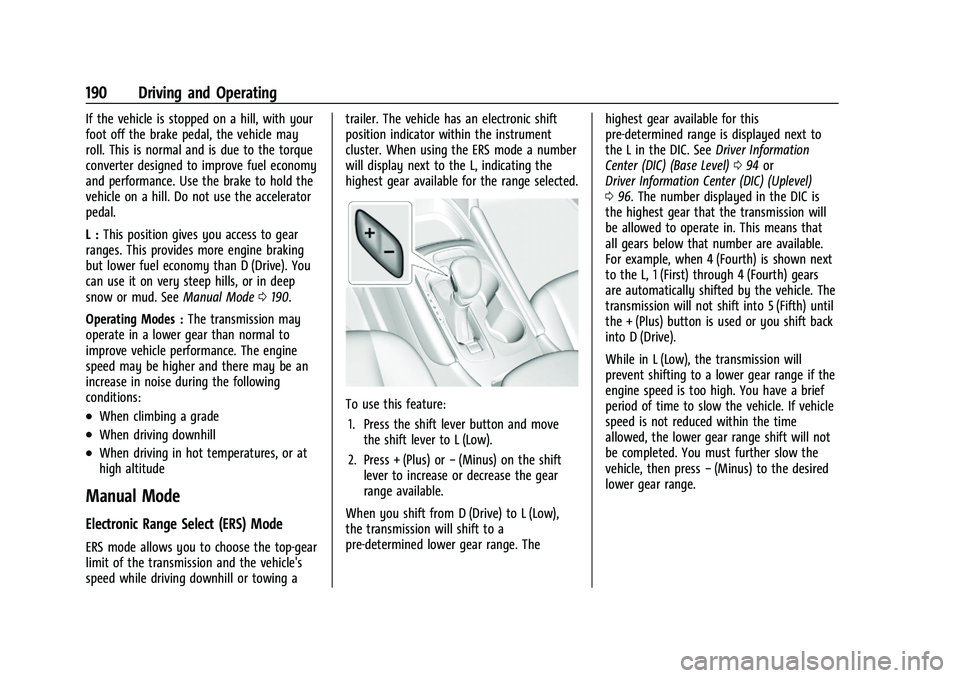
cluster. When using the ERS mode a number
will display next to the L, indicating the
highest gear available for the range selected.
To use this feature:
1. Press the shift lever button and move the shift lever to L (Low).
2. Press + (Plus) or −(Minus) on the shift
lever to increase or decrease the gear
range available.
When you shift from D (Drive) to L (Low),
the transmission will shift to a
pre-determined lower gear range. The highest gear available for this
pre-determined range is displayed next to
the L in the DIC. See
Driver Information
Center (DIC) (Base Level) 094 or
Driver Information Center (DIC) (Uplevel)
0 96. The number displayed in the DIC is
the highest gear that the transmission will
be allowed to operate in. This means that
all gears below that number are available.
For example, when 4 (Fourth) is shown next
to the L, 1 (First) through 4 (Fourth) gears
are automatically shifted by the vehicle. The
transmission will not shift into 5 (Fifth) until
the + (Plus) button is used or you shift back
into D (Drive).
While in L (Low), the transmission will
prevent shifting to a lower gear range if the
engine speed is too high. You have a brief
period of time to slow the vehicle. If vehicle
speed is not reduced within the time
allowed, the lower gear range shift will not
be completed. You must further slow the
vehicle, then press −(Minus) to the desired
lower gear range.
Page 195 of 351
Chevrolet Malibu Owner Manual (GMNA-Localizing-U.S./Canada-
14584249) - 2021 - CRC - 11/9/20
194 Driving and Operating
braking pressure to any one of the vehicle
wheel brakes to assist the driver in keeping
the vehicle on the intended path.
If cruise control is being used and traction
control or StabiliTrak/ESC begins to limit
wheel spin, cruise control will disengage.
Cruise control may be turned back on when
road conditions allow.
Both systems come on automatically when
the vehicle is started and begins to move.
The systems may be heard or felt while
they are operating or while performing
diagnostic checks. This is normal and does
not mean there is a problem with the
vehicle.
It is recommended to leave both systems on
for normal driving conditions, but it may be
necessary to turn TCS off if the vehicle gets
stuck in sand, mud, ice, or snow. SeeIf the
Vehicle Is Stuck 0178 and “Turning the
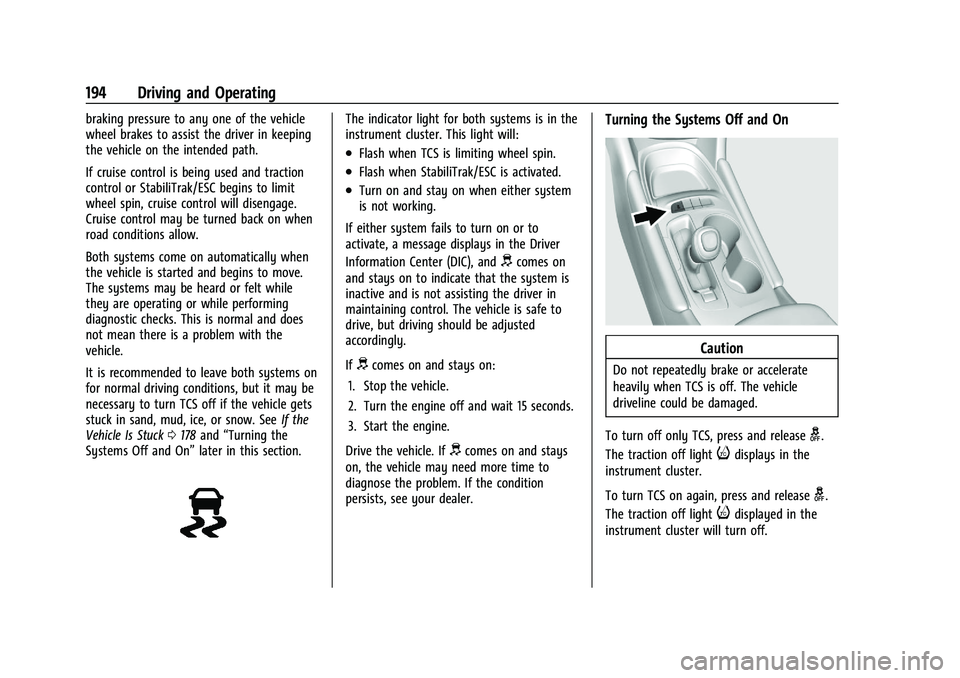
Systems Off and On” later in this section.The indicator light for both systems is in the
instrument cluster. This light will:
.Flash when TCS is limiting wheel spin.
.Flash when StabiliTrak/ESC is activated.
.Turn on and stay on when either system
is not working.
If either system fails to turn on or to
activate, a message displays in the Driver
Information Center (DIC), and
dcomes on
and stays on to indicate that the system is
inactive and is not assisting the driver in
maintaining control. The vehicle is safe to
drive, but driving should be adjusted
accordingly.
If
dcomes on and stays on:
1. Stop the vehicle.
2. Turn the engine off and wait 15 seconds.
3. Start the engine.
Drive the vehicle. If
dcomes on and stays
on, the vehicle may need more time to
diagnose the problem. If the condition
persists, see your dealer.
Turning the Systems Off and On
Caution
Do not repeatedly brake or accelerate
heavily when TCS is off. The vehicle
driveline could be damaged.
To turn off only TCS, press and release
g.
The traction off light
idisplays in the
instrument cluster.
To turn TCS on again, press and release
g.
The traction off light
idisplayed in the
instrument cluster will turn off.