2021 CHEVROLET CAMARO center console
[x] Cancel search: center consolePage 9 of 16

9
APPSF
In-vehicle apps — connecting to music, news, weather, travel informat\
ion, sports,
entertainment and more — are available for download to the infotainment system through the Apps icon on the Home page. Downloading and using the apps requires \
internet connectivity and may require a data plan, accessed through the vehicle’\
s 4G LTE Wi-Fi hotspot, if active, or a mobile device hotspot.
PORTABLE AUDIO DEVICES
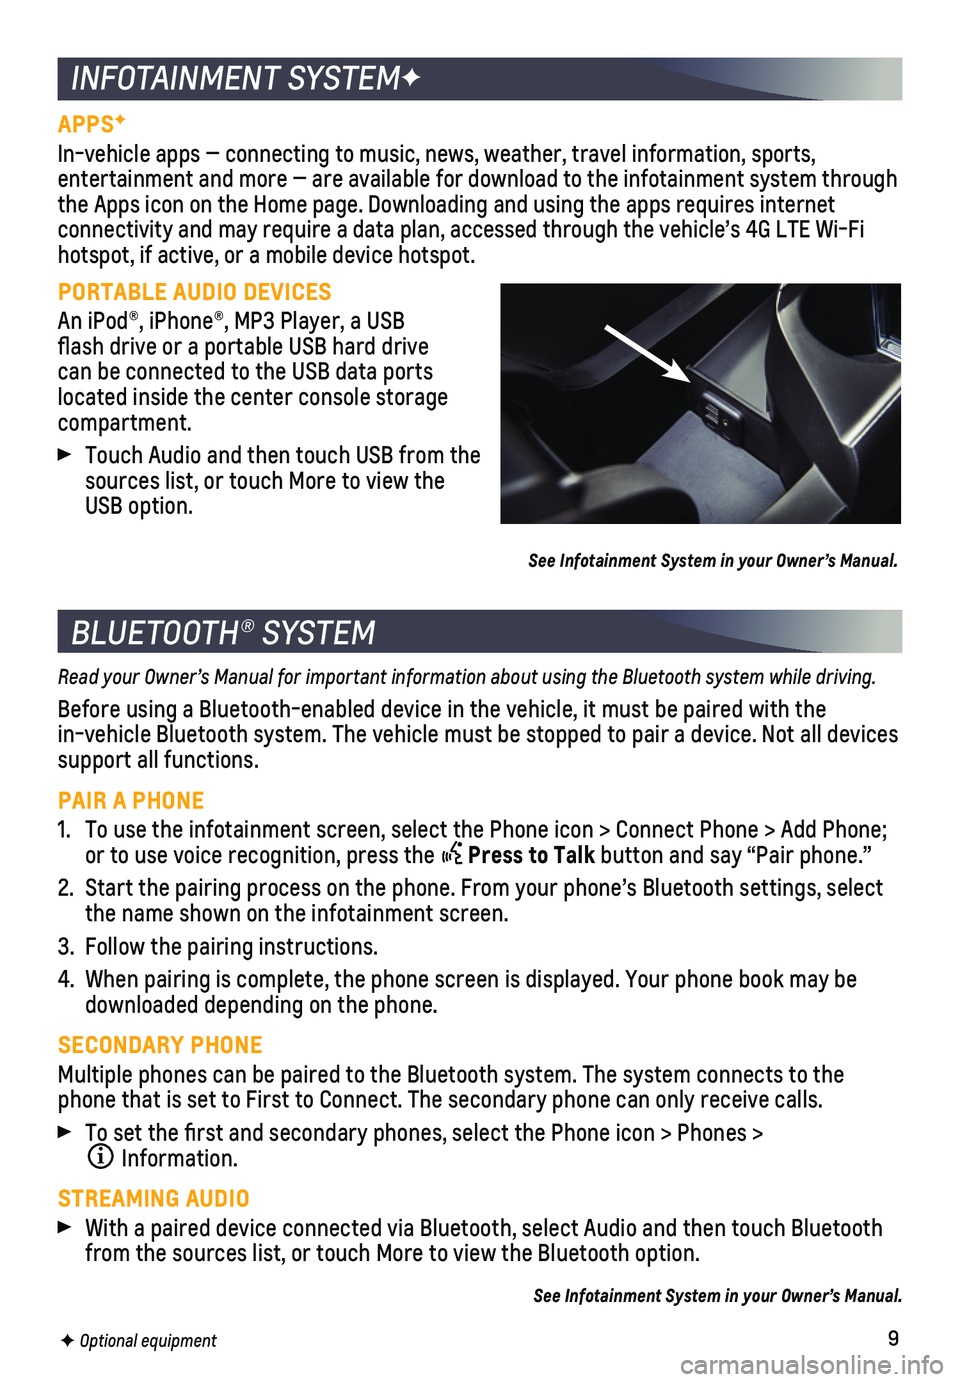
An iPod®, iPhone®, MP3 Player, a USB flash drive or a portable USB hard drive can be connected to the USB data ports located inside the center console storage compartment.
Touch Audio and then touch USB from the sources list, or touch More to view the USB option.
See Infotainment System in your Owner’s Manual.
INFOTAINMENT SYSTEMF
BLUETOOTH® SYSTEM
Read your Owner’s Manual for important information about using the Bluetooth system while driving.
Before using a Bluetooth-enabled device in the vehicle, it must be paire\
d with the
in-vehicle Bluetooth system. The vehicle must be stopped to pair a devic\
e. Not all devices support all functions.
PAIR A PHONE
1. To use the infotainment screen, select the Phone icon > Connect Phone > \
Add Phone; or to use voice recognition, press the Press to Talk button and say “Pair phone.”
2. Start the pairing process on the phone. From your phone’s Bluetooth s\
ettings, select the name shown on the infotainment screen.
3. Follow the pairing instructions.
4. When pairing is complete, the phone screen is displayed. Your phone book\
may be downloaded depending on the phone.
SECONDARY PHONE
Multiple phones can be paired to the Bluetooth system. The system connec\
ts to the phone that is set to First to Connect. The secondary phone can only rece\
ive calls.
To set the first and secondary phones, select the Phone icon > Phones \
>
Information.
STREAMING AUDIO
With a paired device connected via Bluetooth, select Audio and then touc\
h Bluetooth from the sources list, or touch More to view the Bluetooth option.
See Infotainment System in your Owner’s Manual.
F Optional equipment
Page 10 of 16

10
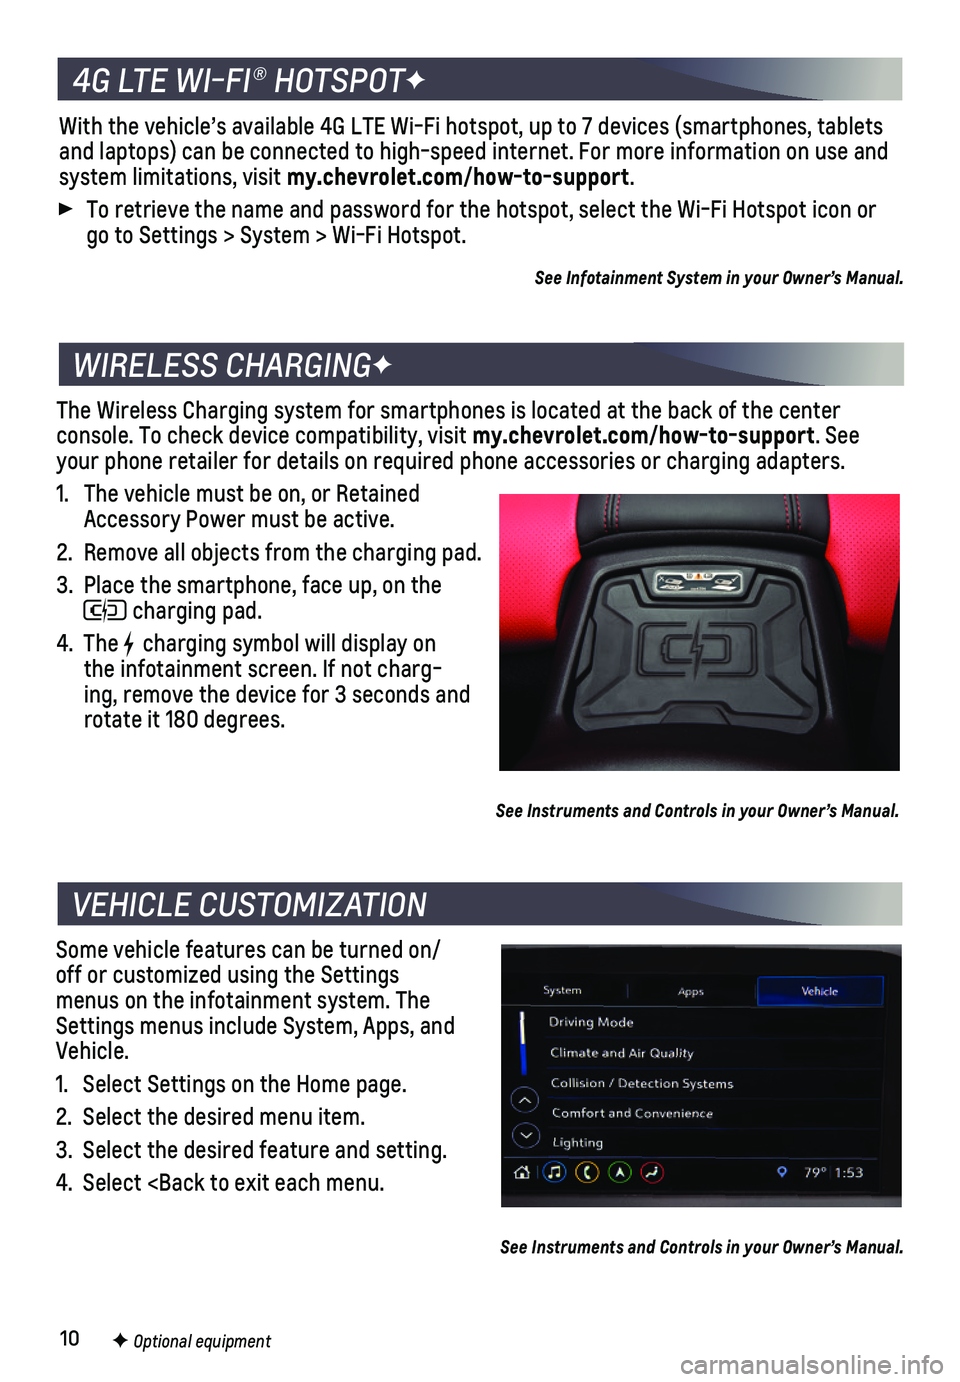
The Wireless Charging system for smartphones is located at the back of t\
he center
console. To check device compatibility, visit my.chevrolet.com/how-to-support. See your phone retailer for details on required phone accessories or chargin\
g adapters.
1. The vehicle must be on, or Retained Accessory Power must be active.
2. Remove all objects from the charging pad.
3. Place the smartphone, face up, on the
charging pad.
4. The charging symbol will display on the infotainment screen. If not charg-ing, remove the device for 3 seconds and rotate it 180 degrees.
See Instruments and Controls in your Owner’s Manual.
Some vehicle features can be turned on/off or customized using the Settings menus on the infotainment system. The Settings menus include System, Apps, and Vehicle.
1. Select Settings on the Home page.
2. Select the desired menu item.
3. Select the desired feature and setting.
4. Select
VEHICLE CUSTOMIZATION
F Optional equipment
See Instruments and Controls in your Owner’s Manual.
4G LTE WI-FI® HOTSPOTF
With the vehicle’s available 4G LTE Wi-Fi hotspot, up to 7 devices (\
smartphones, tablets and laptops) can be connected to high-speed internet. For more informat\
ion on use and system limitations, visit my.chevrolet.com/how-to-support.
To retrieve the name and password for the hotspot, select the Wi-Fi Hots\
pot icon or go to Settings > System > Wi-Fi Hotspot.
See Infotainment System in your Owner’s Manual.
Page 12 of 16

12
TRACTION CONTROL AND STABILITY CONTROL SYSTEMS
The traction control system limits wheelspin and the StabiliTrak® sta\
bility control system assists with directional control of the vehicle in difficult driving c\
onditions. Both systems turn on automatically every time the vehicle is started.
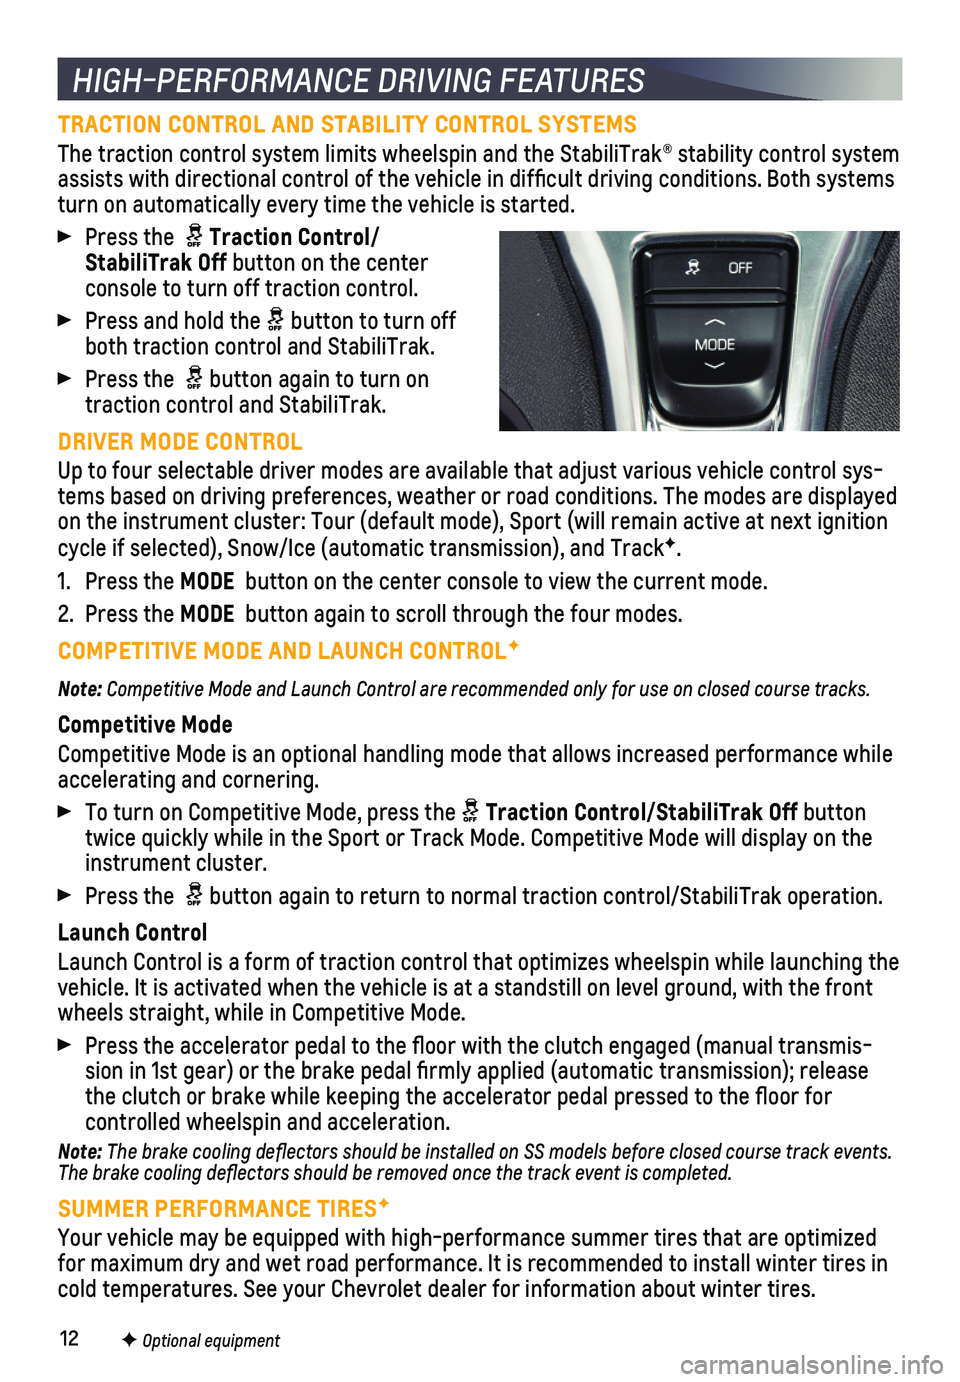
Press the Traction Control/StabiliTrak Off button on the center console to turn off traction control.
Press and hold the button to turn off both traction control and StabiliTrak.
Press the button again to turn on traction control and StabiliTrak.
DRIVER MODE CONTROL
Up to four selectable driver modes are available that adjust various veh\
icle control sys-tems based on driving preferences, weather or road conditions. The modes\
are displayed on the instrument cluster: Tour (default mode), Sport (will remain ac\
tive at next ignition cycle if selected), Snow/Ice (automatic transmission), and TrackF.
1. Press the MODE button on the center console to view the current mode.
2. Press the MODE button again to scroll through the four modes.
COMPETITIVE MODE AND LAUNCH CONTROLF
Note: Competitive Mode and Launch Control are recommended only for use on closed course tracks.
Competitive Mode
Competitive Mode is an optional handling mode that allows increased perf\
ormance while
accelerating and cornering.
To turn on Competitive Mode, press the Traction Control/StabiliTrak Off button twice quickly while in the Sport or Track Mode. Competitive Mode will di\
splay on the instrument cluster.
Press the button again to return to normal traction control/StabiliTrak operation\
.
Launch Control
Launch Control is a form of traction control that optimizes wheelspin wh\
ile launching the vehicle. It is activated when the vehicle is at a standstill on level gr\
ound, with the front wheels straight, while in Competitive Mode.
Press the accelerator pedal to the floor with the clutch engaged (man\
ual transmis-sion in 1st gear) or the brake pedal firmly applied (automatic trans\
mission); release the clutch or brake while keeping the accelerator pedal pressed to the fl\
oor for
controlled wheelspin and acceleration.
Note: The brake cooling deflectors should be installed on SS models before closed course track events. The brake cooling deflectors should be removed once the track event is\
completed.
SUMMER PERFORMANCE TIRESF
Your vehicle may be equipped with high-performance summer tires that are\
optimized for maximum dry and wet road performance. It is recommended to install w\
inter tires in cold temperatures. See your Chevrolet dealer for information about winte\
r tires.
HIGH-PERFORMANCE DRIVING FEATURES
F Optional equipment
Page 15 of 16

15
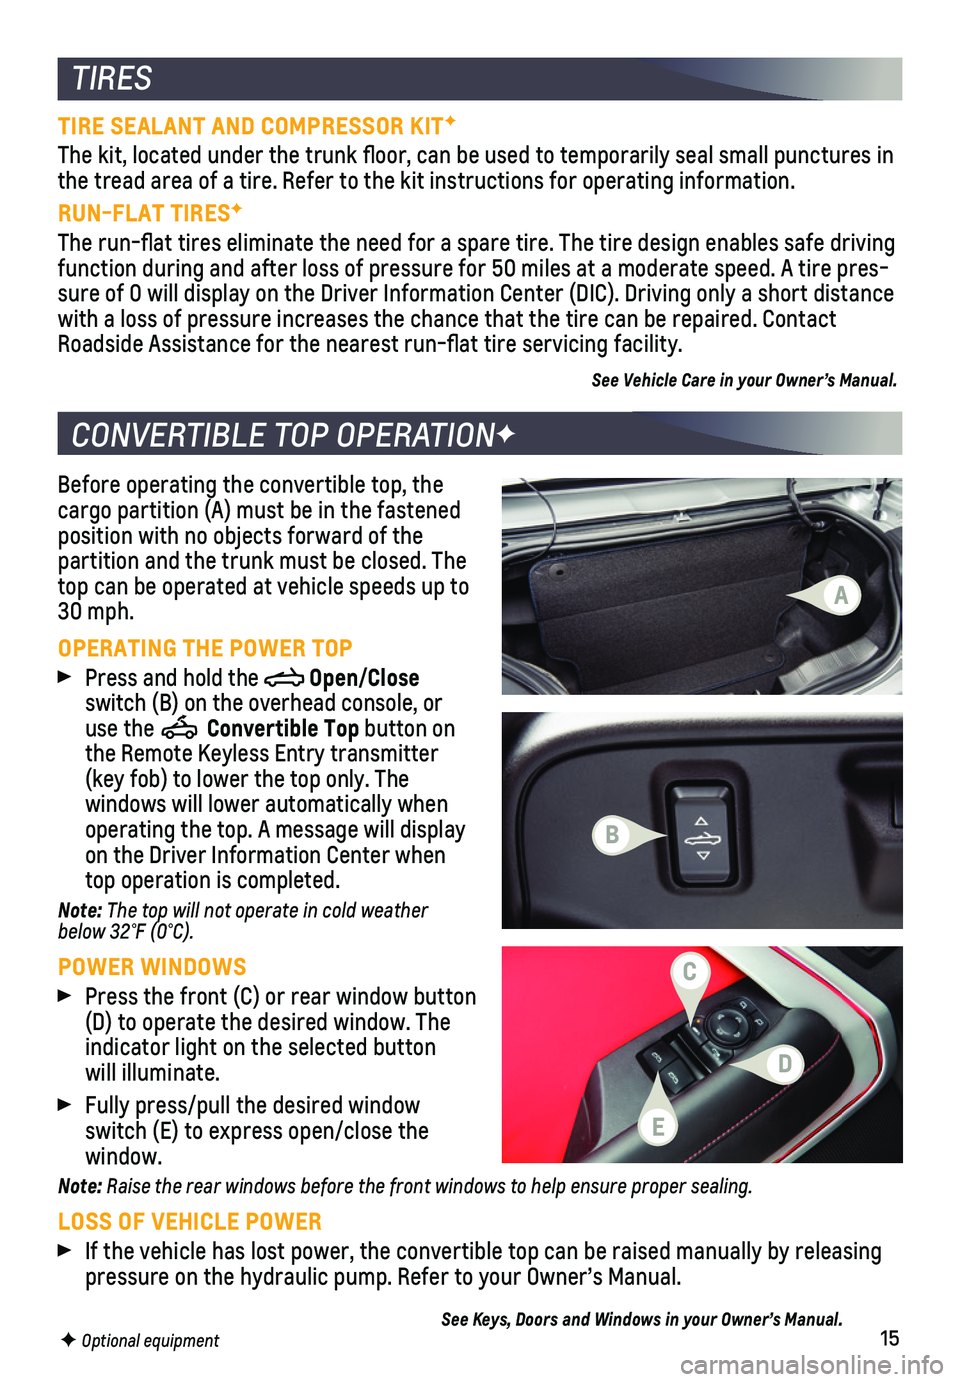
Before operating the convertible top, the cargo partition (A) must be in the fastened position with no objects forward of the partition and the trunk must be closed. The top can be operated at vehicle speeds up to 30 mph.
OPERATING THE POWER TOP
Press and hold the Open/Close switch (B) on the overhead console, or use the Convertible Top button on the Remote Keyless Entry transmitter (key fob) to lower the top only. The
windows will lower automatically when
operating the top. A message will display on the Driver Information Center when top operation is completed.
Note: The top will not operate in cold weather below 32°F (0°C).
POWER WINDOWS
Press the front (C) or rear window button (D) to operate the desired window. The
indicator light on the selected button will illuminate.
Fully press/pull the desired window switch (E) to express open/close the window.
Note: Raise the rear windows before the front windows to help ensure proper sealing.
LOSS OF VEHICLE POWER
If the vehicle has lost power, the convertible top can be raised manuall\
y by releasing pressure on the hydraulic pump. Refer to your Owner’s Manual.
See Keys, Doors and Windows in your Owner’s Manual.
CONVERTIBLE TOP OPERATIONF
TIRES
F Optional equipment
TIRE SEALANT AND COMPRESSOR KITF
The kit, located under the trunk floor, can be used to temporarily sea\
l small punctures in the tread area of a tire. Refer to the kit instructions for operating in\
formation.
RUN-FLAT TIRESF
The run-flat tires eliminate the need for a spare tire. The tire desig\
n enables safe driving function during and after loss of pressure for 50 miles at a moderate sp\
eed. A tire pres-sure of 0 will display on the Driver Information Center (DIC). Driving\
only a short distance with a loss of pressure increases the chance that the tire can be repair\
ed. Contact Roadside Assistance for the nearest run-flat tire servicing facility.
See Vehicle Care in your Owner’s Manual.
B
D
C
A
E