2021 CHEVROLET CAMARO tires
[x] Cancel search: tiresPage 12 of 16

12
TRACTION CONTROL AND STABILITY CONTROL SYSTEMS
The traction control system limits wheelspin and the StabiliTrak® sta\
bility control system assists with directional control of the vehicle in difficult driving c\
onditions. Both systems turn on automatically every time the vehicle is started.
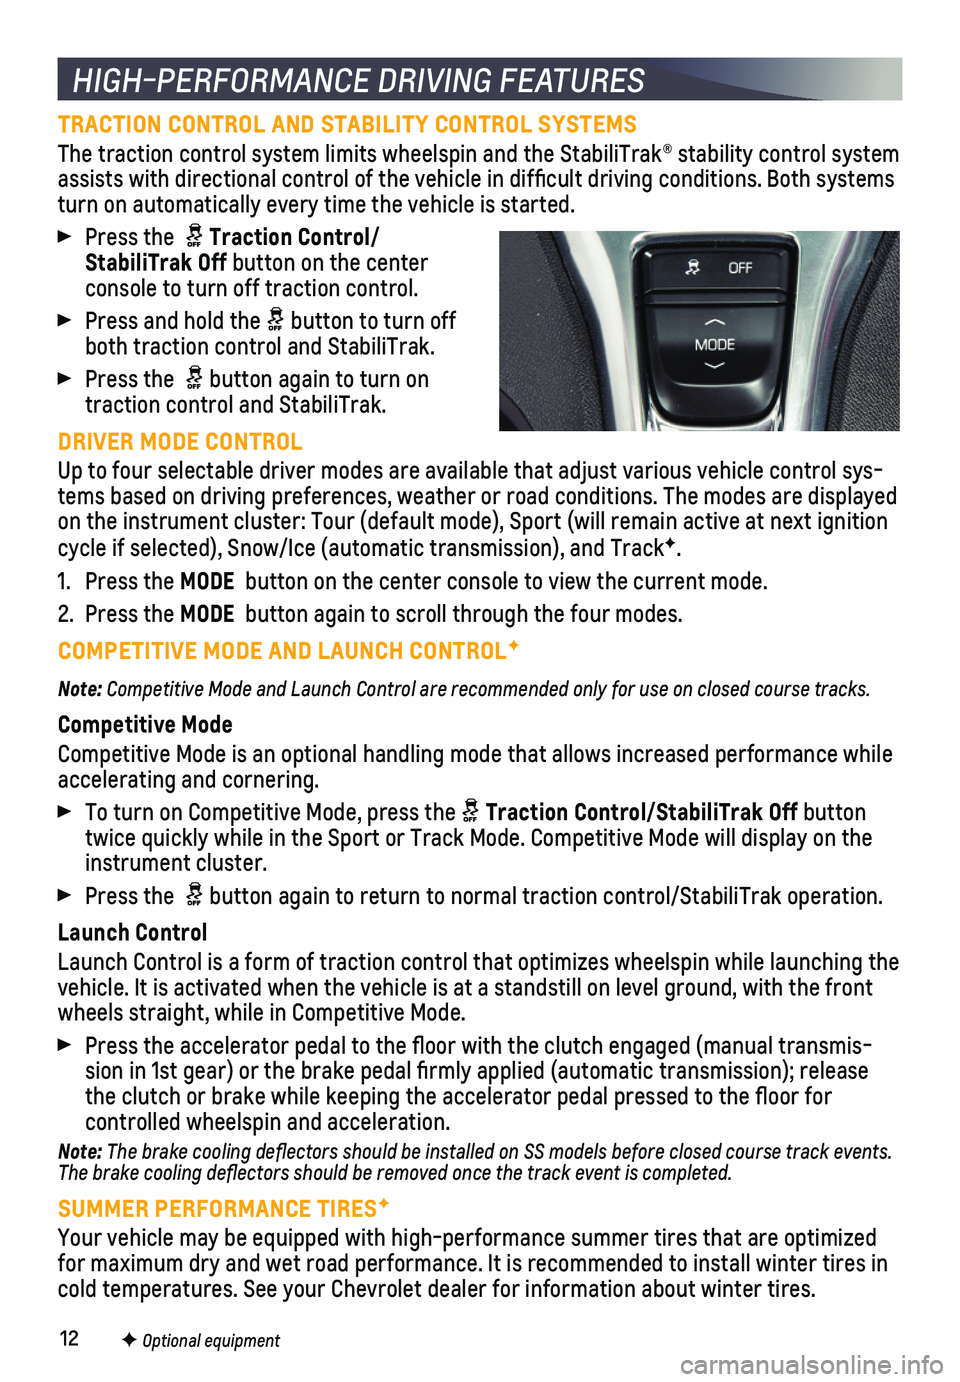
Press the Traction Control/StabiliTrak Off button on the center console to turn off traction control.
Press and hold the button to turn off both traction control and StabiliTrak.
Press the button again to turn on traction control and StabiliTrak.
DRIVER MODE CONTROL
Up to four selectable driver modes are available that adjust various veh\
icle control sys-tems based on driving preferences, weather or road conditions. The modes\
are displayed on the instrument cluster: Tour (default mode), Sport (will remain ac\
tive at next ignition cycle if selected), Snow/Ice (automatic transmission), and TrackF.
1. Press the MODE button on the center console to view the current mode.
2. Press the MODE button again to scroll through the four modes.
COMPETITIVE MODE AND LAUNCH CONTROLF
Note: Competitive Mode and Launch Control are recommended only for use on closed course tracks.
Competitive Mode
Competitive Mode is an optional handling mode that allows increased perf\
ormance while
accelerating and cornering.
To turn on Competitive Mode, press the Traction Control/StabiliTrak Off button twice quickly while in the Sport or Track Mode. Competitive Mode will di\
splay on the instrument cluster.
Press the button again to return to normal traction control/StabiliTrak operation\
.
Launch Control
Launch Control is a form of traction control that optimizes wheelspin wh\
ile launching the vehicle. It is activated when the vehicle is at a standstill on level gr\
ound, with the front wheels straight, while in Competitive Mode.
Press the accelerator pedal to the floor with the clutch engaged (man\
ual transmis-sion in 1st gear) or the brake pedal firmly applied (automatic trans\
mission); release the clutch or brake while keeping the accelerator pedal pressed to the fl\
oor for
controlled wheelspin and acceleration.
Note: The brake cooling deflectors should be installed on SS models before closed course track events. The brake cooling deflectors should be removed once the track event is\
completed.
SUMMER PERFORMANCE TIRESF
Your vehicle may be equipped with high-performance summer tires that are\
optimized for maximum dry and wet road performance. It is recommended to install w\
inter tires in cold temperatures. See your Chevrolet dealer for information about winte\
r tires.
HIGH-PERFORMANCE DRIVING FEATURES
F Optional equipment
Page 14 of 16

14
REAR CAMERA MIRRORF
DRIVER ASSISTANCE SYSTEMS
TIRE PRESSURE MONITOR
The Low Tire Pressure warning light on the instrument cluster illuminates when one or more of the vehicle’s tires is significantly underinflated. Fi\
ll the tires to the proper tire pressures listed on the Tire and Loading Information label, located belo\
w the driver’s door latch. Current tire pressures can be viewed on the Driver Informati\
on Center (DIC).
F Optional equipment
Safety or driver assistance features are no substitute for the driver’\
s responsibility to operate the vehicle in a safe manner. The driver should remain attentive to traffic, surroundings and road conditions at all times. Read your Owner’s Manual for important feature limitations and information.
To turn the following driver assistance systems on/off or to change the \
system settings, go to Settings > Vehicle > Collision/Detection Systems on the infotainme\
nt screen.
LANE CHANGE ALERT WITH SIDE BLIND ZONE ALERTF – While driving, the system dis plays a warning symbol on the left or right side mirror when a moving vehicle i\
s detected rapidly approaching or is in a side blind zone. The warning sym\
bol flashes if a turn signal is activated when a vehicle has been detected on the same si\
de.
REAR PARK ASSISTF – During low-speed parking maneuvers when in Reverse, the system provides “distance to closest object” information on the instrument cluster and sounds a beep. Five beeps sound when an object is very close.
REAR CROSS TRAFFIC ALERTF – During low-speed maneuvers when in Reverse, the system warns of cross-traffic approaching in either direction by displ\
aying a red alert on the infotainment screen and sounding several beeps.
FORWARD COLLISION ALERTF – The Vehicle Ahead Indicator is green on the instru-ment cluster when a vehicle is detected and is amber when following a ve\
hicle ahead much too closely. When approaching a detected vehicle directly ahead too\
rapidly, a red alert flashes on the windshield and rapid beeps sound.
Press the Forward Collision Alert button on the steering wheel to set the alert timing to Far, Medium, or Near.See Driving and Operating in your Owner’s Manual.
The rear camera mirror provides a wider, less obstructed field of view\
to assist when driving, changing lanes and checking traffic conditions.
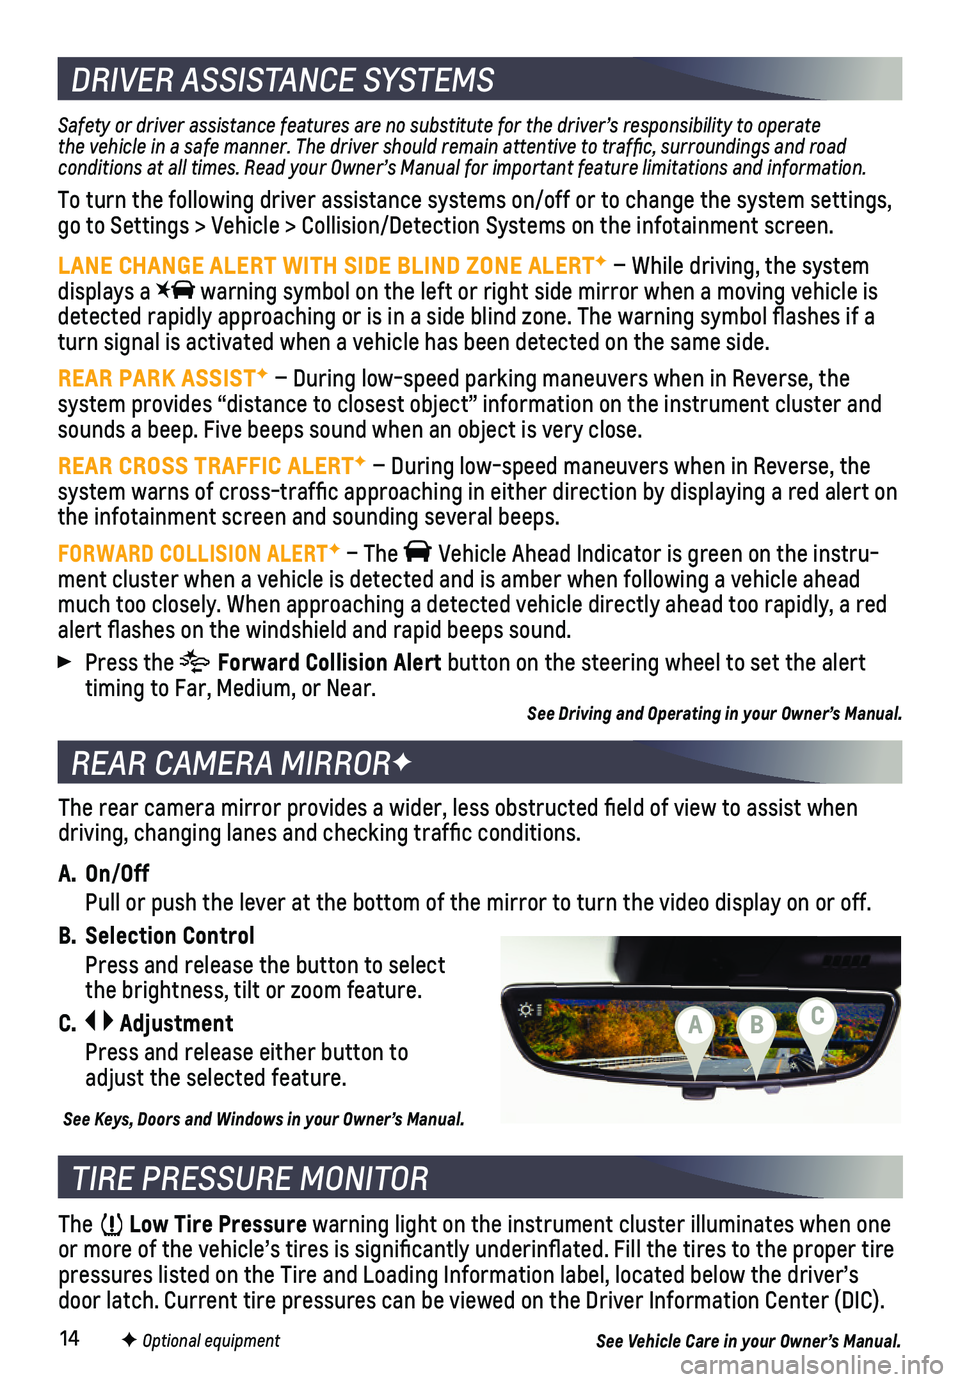
A. On/Off
Pull or push the lever at the bottom of the mirror to turn the video dis\
play on or off.
B. Selection Control
Press and release the button to select the brightness, tilt or zoom feature.
C. Adjustment
Press and release either button to adjust the selected feature.
See Keys, Doors and Windows in your Owner’s Manual.
See Vehicle Care in your Owner’s Manual.
CBA
Page 15 of 16

15
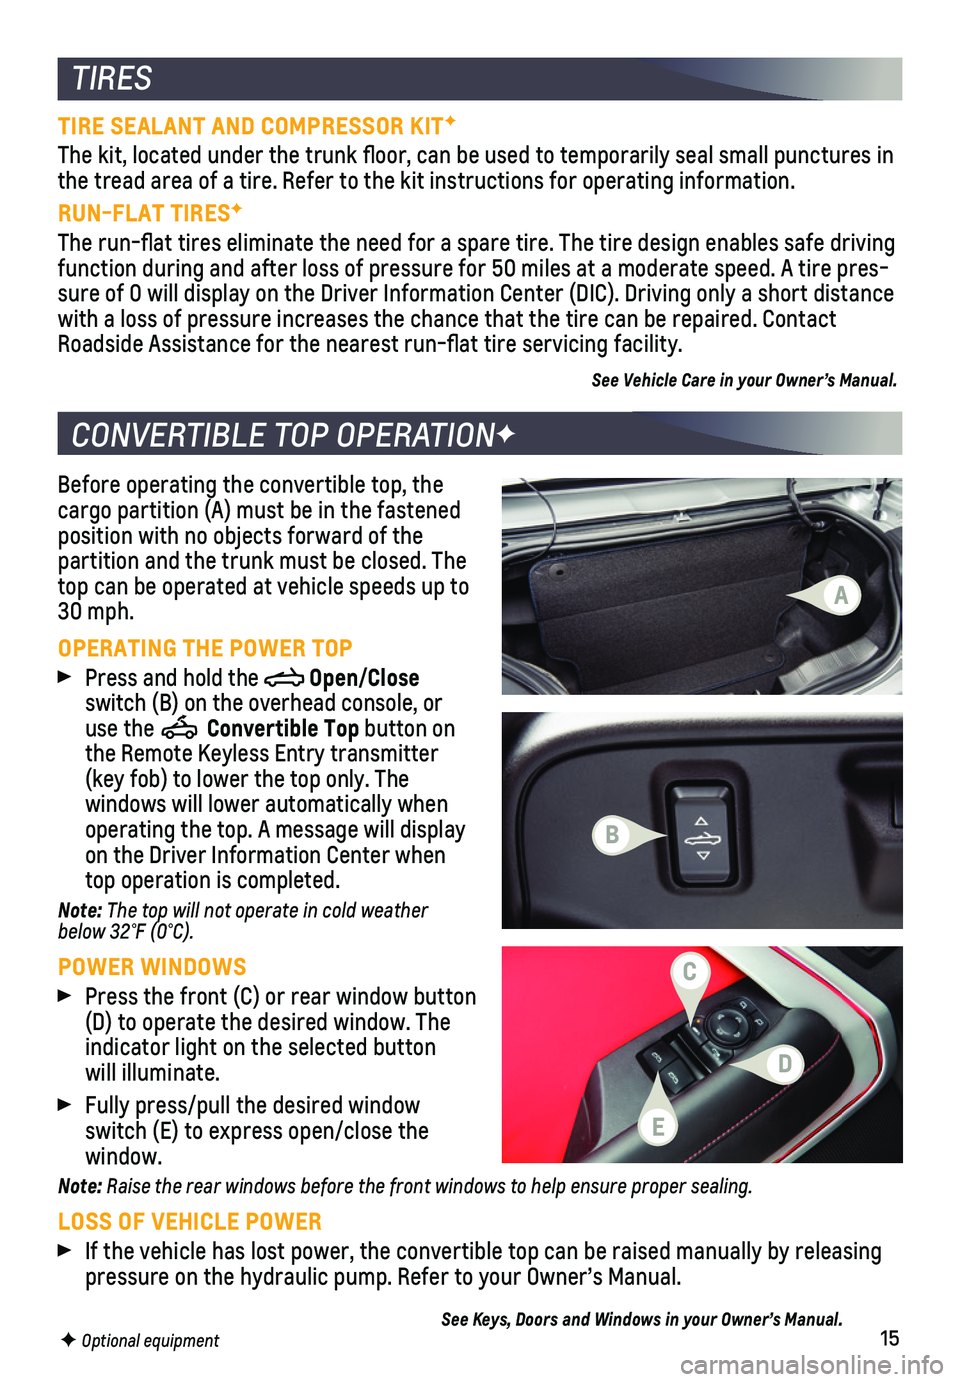
Before operating the convertible top, the cargo partition (A) must be in the fastened position with no objects forward of the partition and the trunk must be closed. The top can be operated at vehicle speeds up to 30 mph.
OPERATING THE POWER TOP
Press and hold the Open/Close switch (B) on the overhead console, or use the Convertible Top button on the Remote Keyless Entry transmitter (key fob) to lower the top only. The
windows will lower automatically when
operating the top. A message will display on the Driver Information Center when top operation is completed.
Note: The top will not operate in cold weather below 32°F (0°C).
POWER WINDOWS
Press the front (C) or rear window button (D) to operate the desired window. The
indicator light on the selected button will illuminate.
Fully press/pull the desired window switch (E) to express open/close the window.
Note: Raise the rear windows before the front windows to help ensure proper sealing.
LOSS OF VEHICLE POWER
If the vehicle has lost power, the convertible top can be raised manuall\
y by releasing pressure on the hydraulic pump. Refer to your Owner’s Manual.
See Keys, Doors and Windows in your Owner’s Manual.
CONVERTIBLE TOP OPERATIONF
TIRES
F Optional equipment
TIRE SEALANT AND COMPRESSOR KITF
The kit, located under the trunk floor, can be used to temporarily sea\
l small punctures in the tread area of a tire. Refer to the kit instructions for operating in\
formation.
RUN-FLAT TIRESF
The run-flat tires eliminate the need for a spare tire. The tire desig\
n enables safe driving function during and after loss of pressure for 50 miles at a moderate sp\
eed. A tire pres-sure of 0 will display on the Driver Information Center (DIC). Driving\
only a short distance with a loss of pressure increases the chance that the tire can be repair\
ed. Contact Roadside Assistance for the nearest run-flat tire servicing facility.
See Vehicle Care in your Owner’s Manual.
B
D
C
A
E